
by Todd Walker
Dirt Road Girl wanted something substantial to cage her tomatoes in our front yard. She hates those flimsy wire cages. Our backyard is full shade. We followed the sun and started food-scaping the font yard. There’s sunshine 8 hours a day out front.
She wanted something functional, sturdy, and of course, homemade. I made rolled wire cages last year from fencing. One problem with these cages was that they blew over during summer storms – even after staking them down in the container. We needed something anchored into the ground.
We had an old wooden ladder by my shop. I suggested we use it as a ‘cage.’
“That’ll work!”
Here’s what she came up with… for me to do!
Todd’s Tomato Ladder is not your typical tomato cage.
After a quick search online, she drew inspiration from Mother Earth News – Woody’s Folding Tomato Cages.
Keep in mind that these tomato ladders are going in our front yard. I printed Woody’s plans, gather lumber, and set to building. He calls for using 8 foot 1×3 lumber for the legs. I go to work.

8 foot tomato ladders are 2 feet shy of a regulation basketball goal.
It never occurs to me that erecting two “twin tower” tomato ladders in our front yard might draw neighbor’s ire. We try to fly under the radar as much as possible in our front yard food-scaping. These 8 footers would work in the country or a backyard.
I quickly build two of these bad boys, set them over the containers, and think, “wow, those sure are high.”

Painting your house, Walker?
They lasted about a week after we noticed neighbors walking by with thought bubbles over their heads…
“What are they up to this year!?!”
Back to the drawing board.
I needed to shrink Woody’s plans.
Here’s the plan if you want to build our 6 foot model.
Bill of Material
Use non-pressure treated lumber to keep chemicals from leaching into your plants.
Four 1 x 3 boards 8 feet long
Two 1 x 2 boards 8 feet long
10 1/2 inch piece of 2 x 4 lumber
About 40-50 1 5/8 inch screws (I use star drive decking screws. It’s my personal mission to convert everyone to superior star drive screws)
Four 3 inch decking screws (2 will be used to attach the 2 x 4 to the legs – 2 will be used to attach the base of the legs to ground stakes)
Tools List
Circular Saw – If you’ve got a miter saw, it makes quick work of the cutting chores. But a circular saw will do the job.
Drill/Impact Driver
Hammer (for driving anchor stakes in the ground)
1/8 inch drill bit
Tape measure
Pencil
Skill Level
Beginner
Time Needed
30 minutes per ladder (that’s a generous estimate)
Cut List
1. Cut four 1 x 3’s six-foot long.
2. Cut one piece of 2 x 4 scrap 10 1/2 inches long.
3. Cut the 1 x 2’s for the rungs of the inside legs – working from the bottom of the ladder to the top: 19 1/2 inches, 17 1//4 inches, 15 1/2 inches, 13 3/4 inches, and 12 1/4 inches.
4. Cut the 1 x 2’s for the rungs of the outside legs – working from the bottom to the top: 21 inches, 19 inches, 17 inches, 15 1/4, and 13 3/4.
5. Cut two 1 x 3’s twenty inches long (use the extra two feet cut from the leg pieces). These will be the cross braces on the legs.
Putting it all together
If you don’t want to cut all your material ahead of time, that’s perfectly fine. Pre-cutting will streamline your build and save time.
Step 1: Stack two of the 6 foot 1 x 3 inch legs with the ends flush. Drill a pilot hole through one end of the boards with the 1/8th inch drill bit in the center of the 1 x 3 about 3/4 of an inch from the end of the board. This is where you will insert a 3 inch screw into the piece of the 2 x 4 in a moment. Repeat the process with the two remaining 6 foot 1 x 3 legs.
Step 2: With two of the legs stacked flush, screw a three-inch screw through the pilot hole into the end of the 10 1/2 inch piece 2 x 4 stock. The ends of the 1 x 3’s need to be flush and centered (meaning about 1/4 inch of 2 x 4 exposed on either side of the 1 x 3) on the end of the 2 x 4. Don’t over sink the screws or you’ll spit the wood. Then attach the other two legs to the other end of the 2 x 4. This will serve as the top of the ladder and pivot point for the legs.
Step 3: Go ahead and drill pilot holes in each end of the rungs. Attach the bottom rung (19 1/2 inches) with one 1 5/8 in. screw per side – one foot from the bottom on the inside legs. Continue attaching rungs – longest to shortest – up the ladder with one foot spacing. Now, flip the ladder over and repeat the process for the outside legs starting with the 21 inch rung.
Step 4: With the rungs attached evenly, open the ladder and stand it up. Connect the 20 inch braces to the sides of the ladder. I attached mine at the second rung from the bottom. You can adjust the width of the ladder by moving the braces up for a wider base or down to make the ladder more narrow.
Step 5: Place the tomato ladder over your tomato plant. Drive a pointed wooden stake in the ground beside two legs catty-corner style. Screw the legs into the stakes to anchor them securely.
After the growing season, simply take one screw out of each brace, unscrew the legs from the ground stakes, and fold the tomato ladders up for storage. Or move them into your greenhouse for the winter growing season.
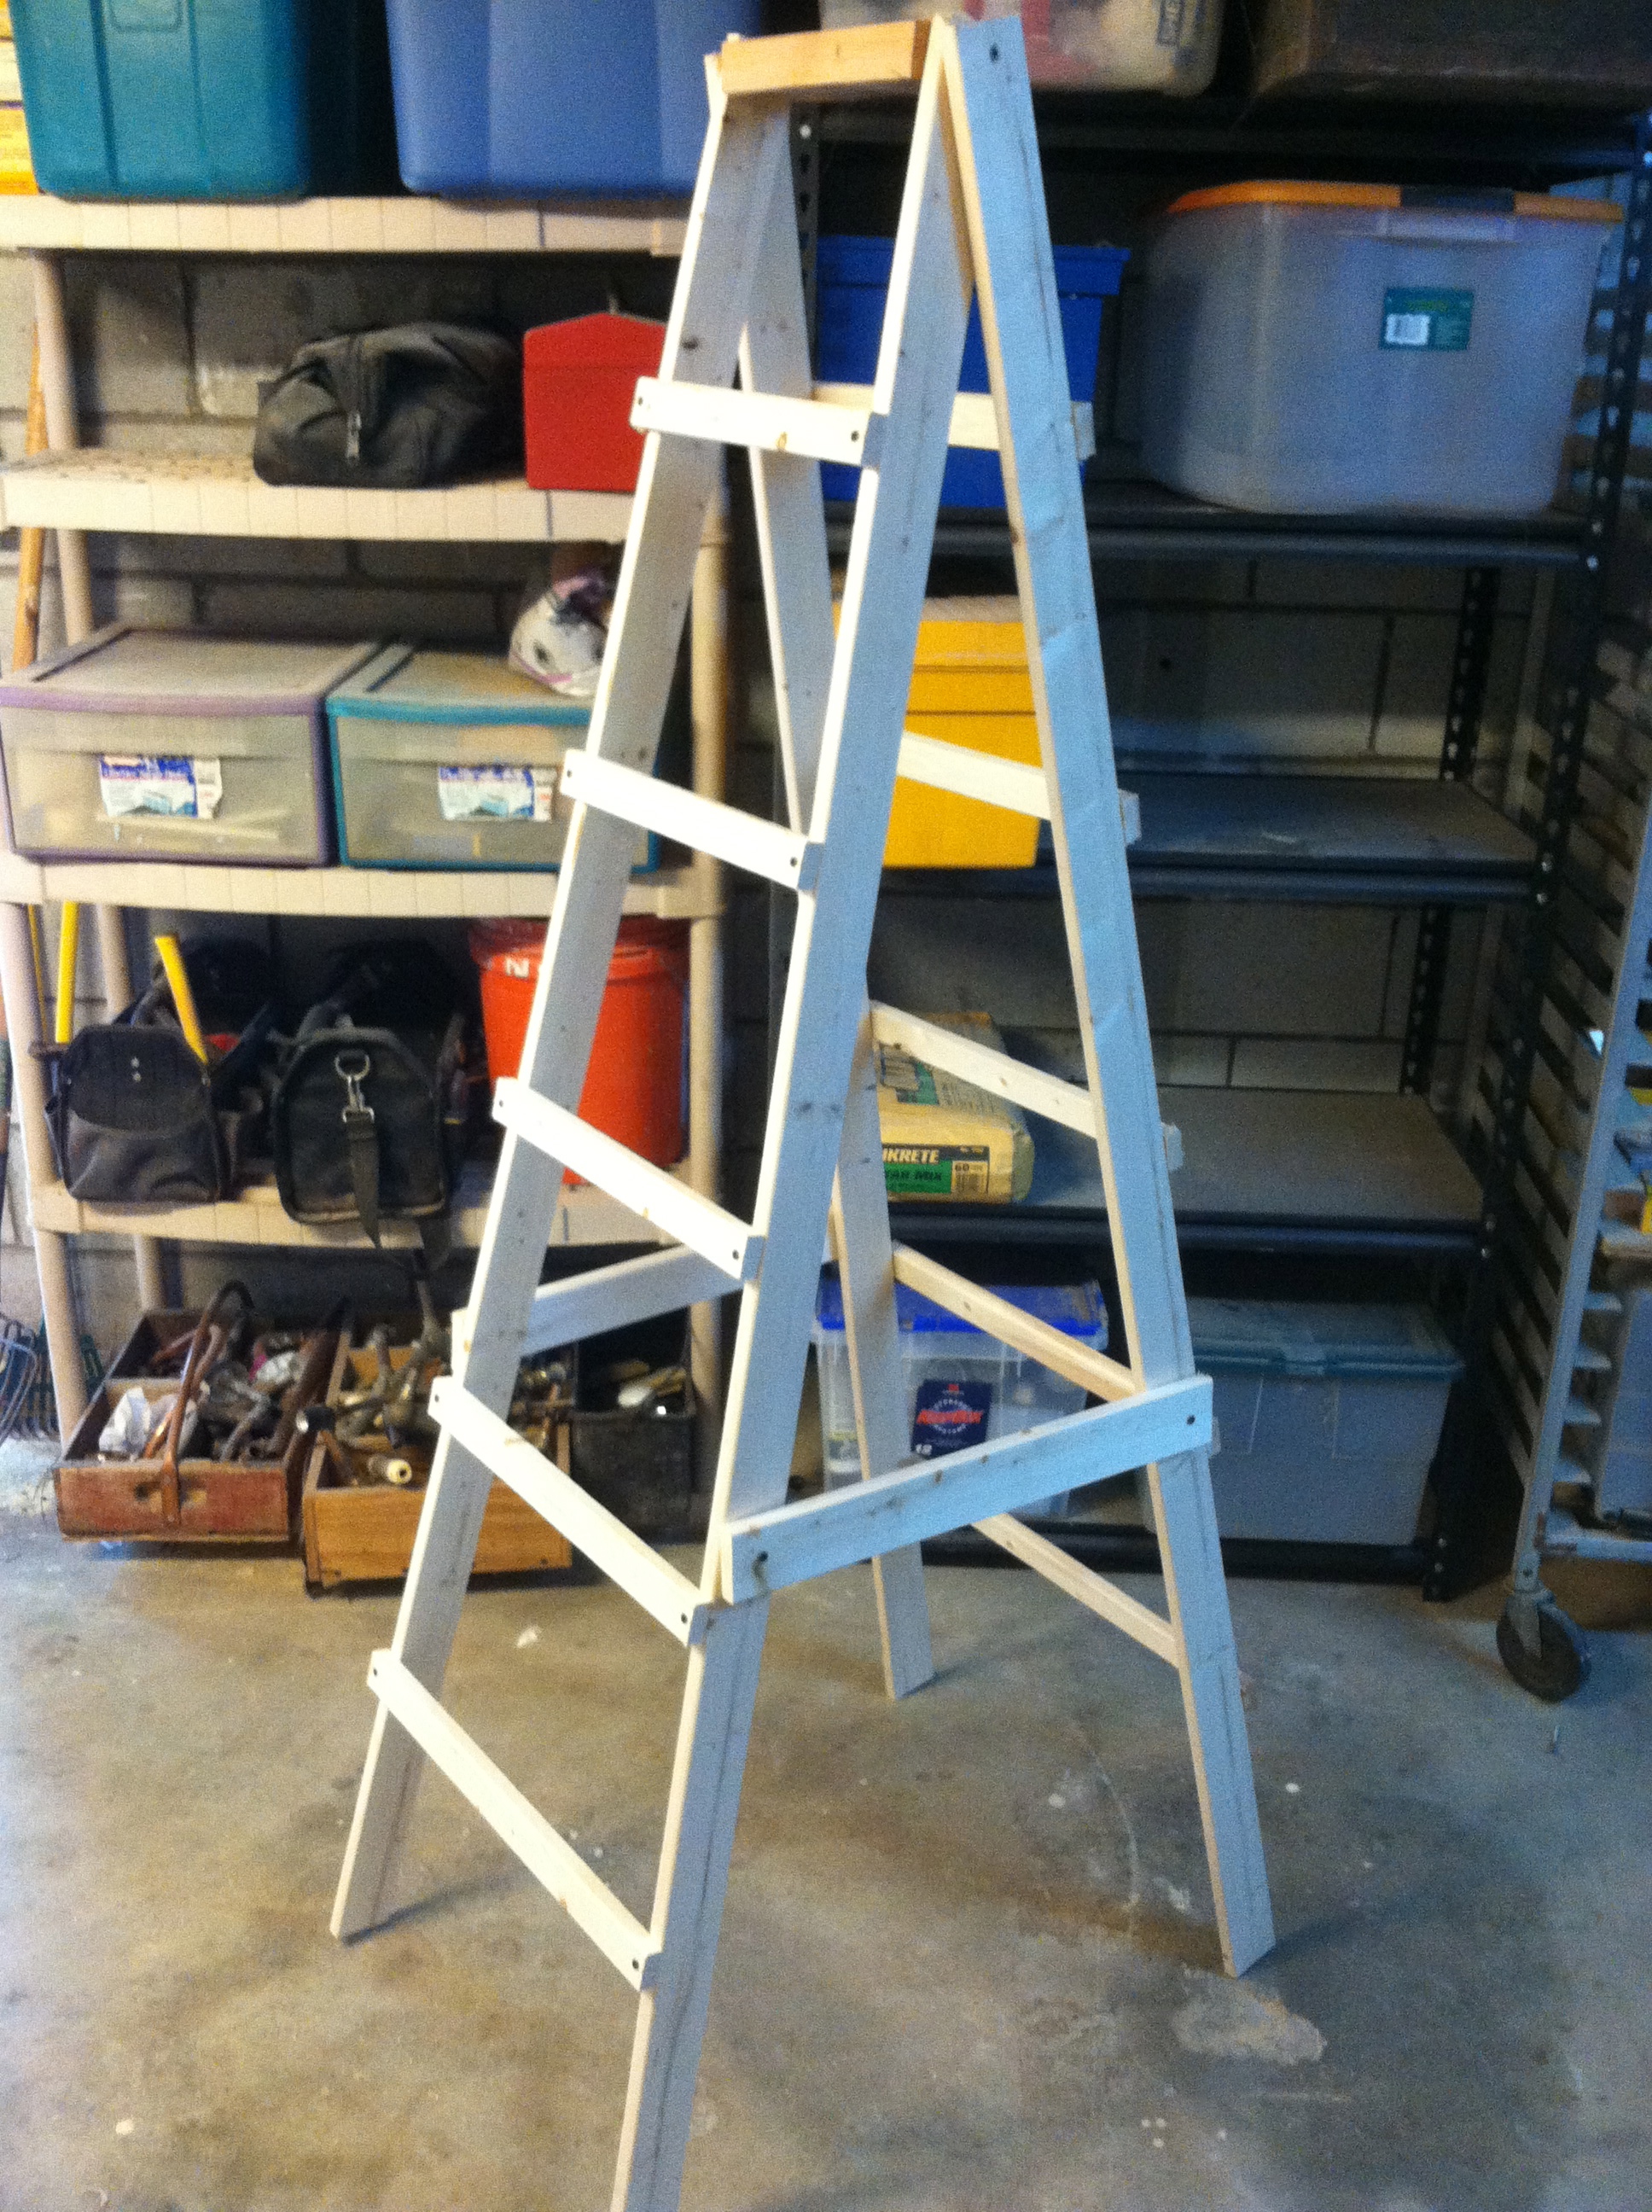
Note: I cut two feet off the top of our original “twin tower” tomato ladders to keep neighborly busy-bodying to a minimum. Here’s the finished product.
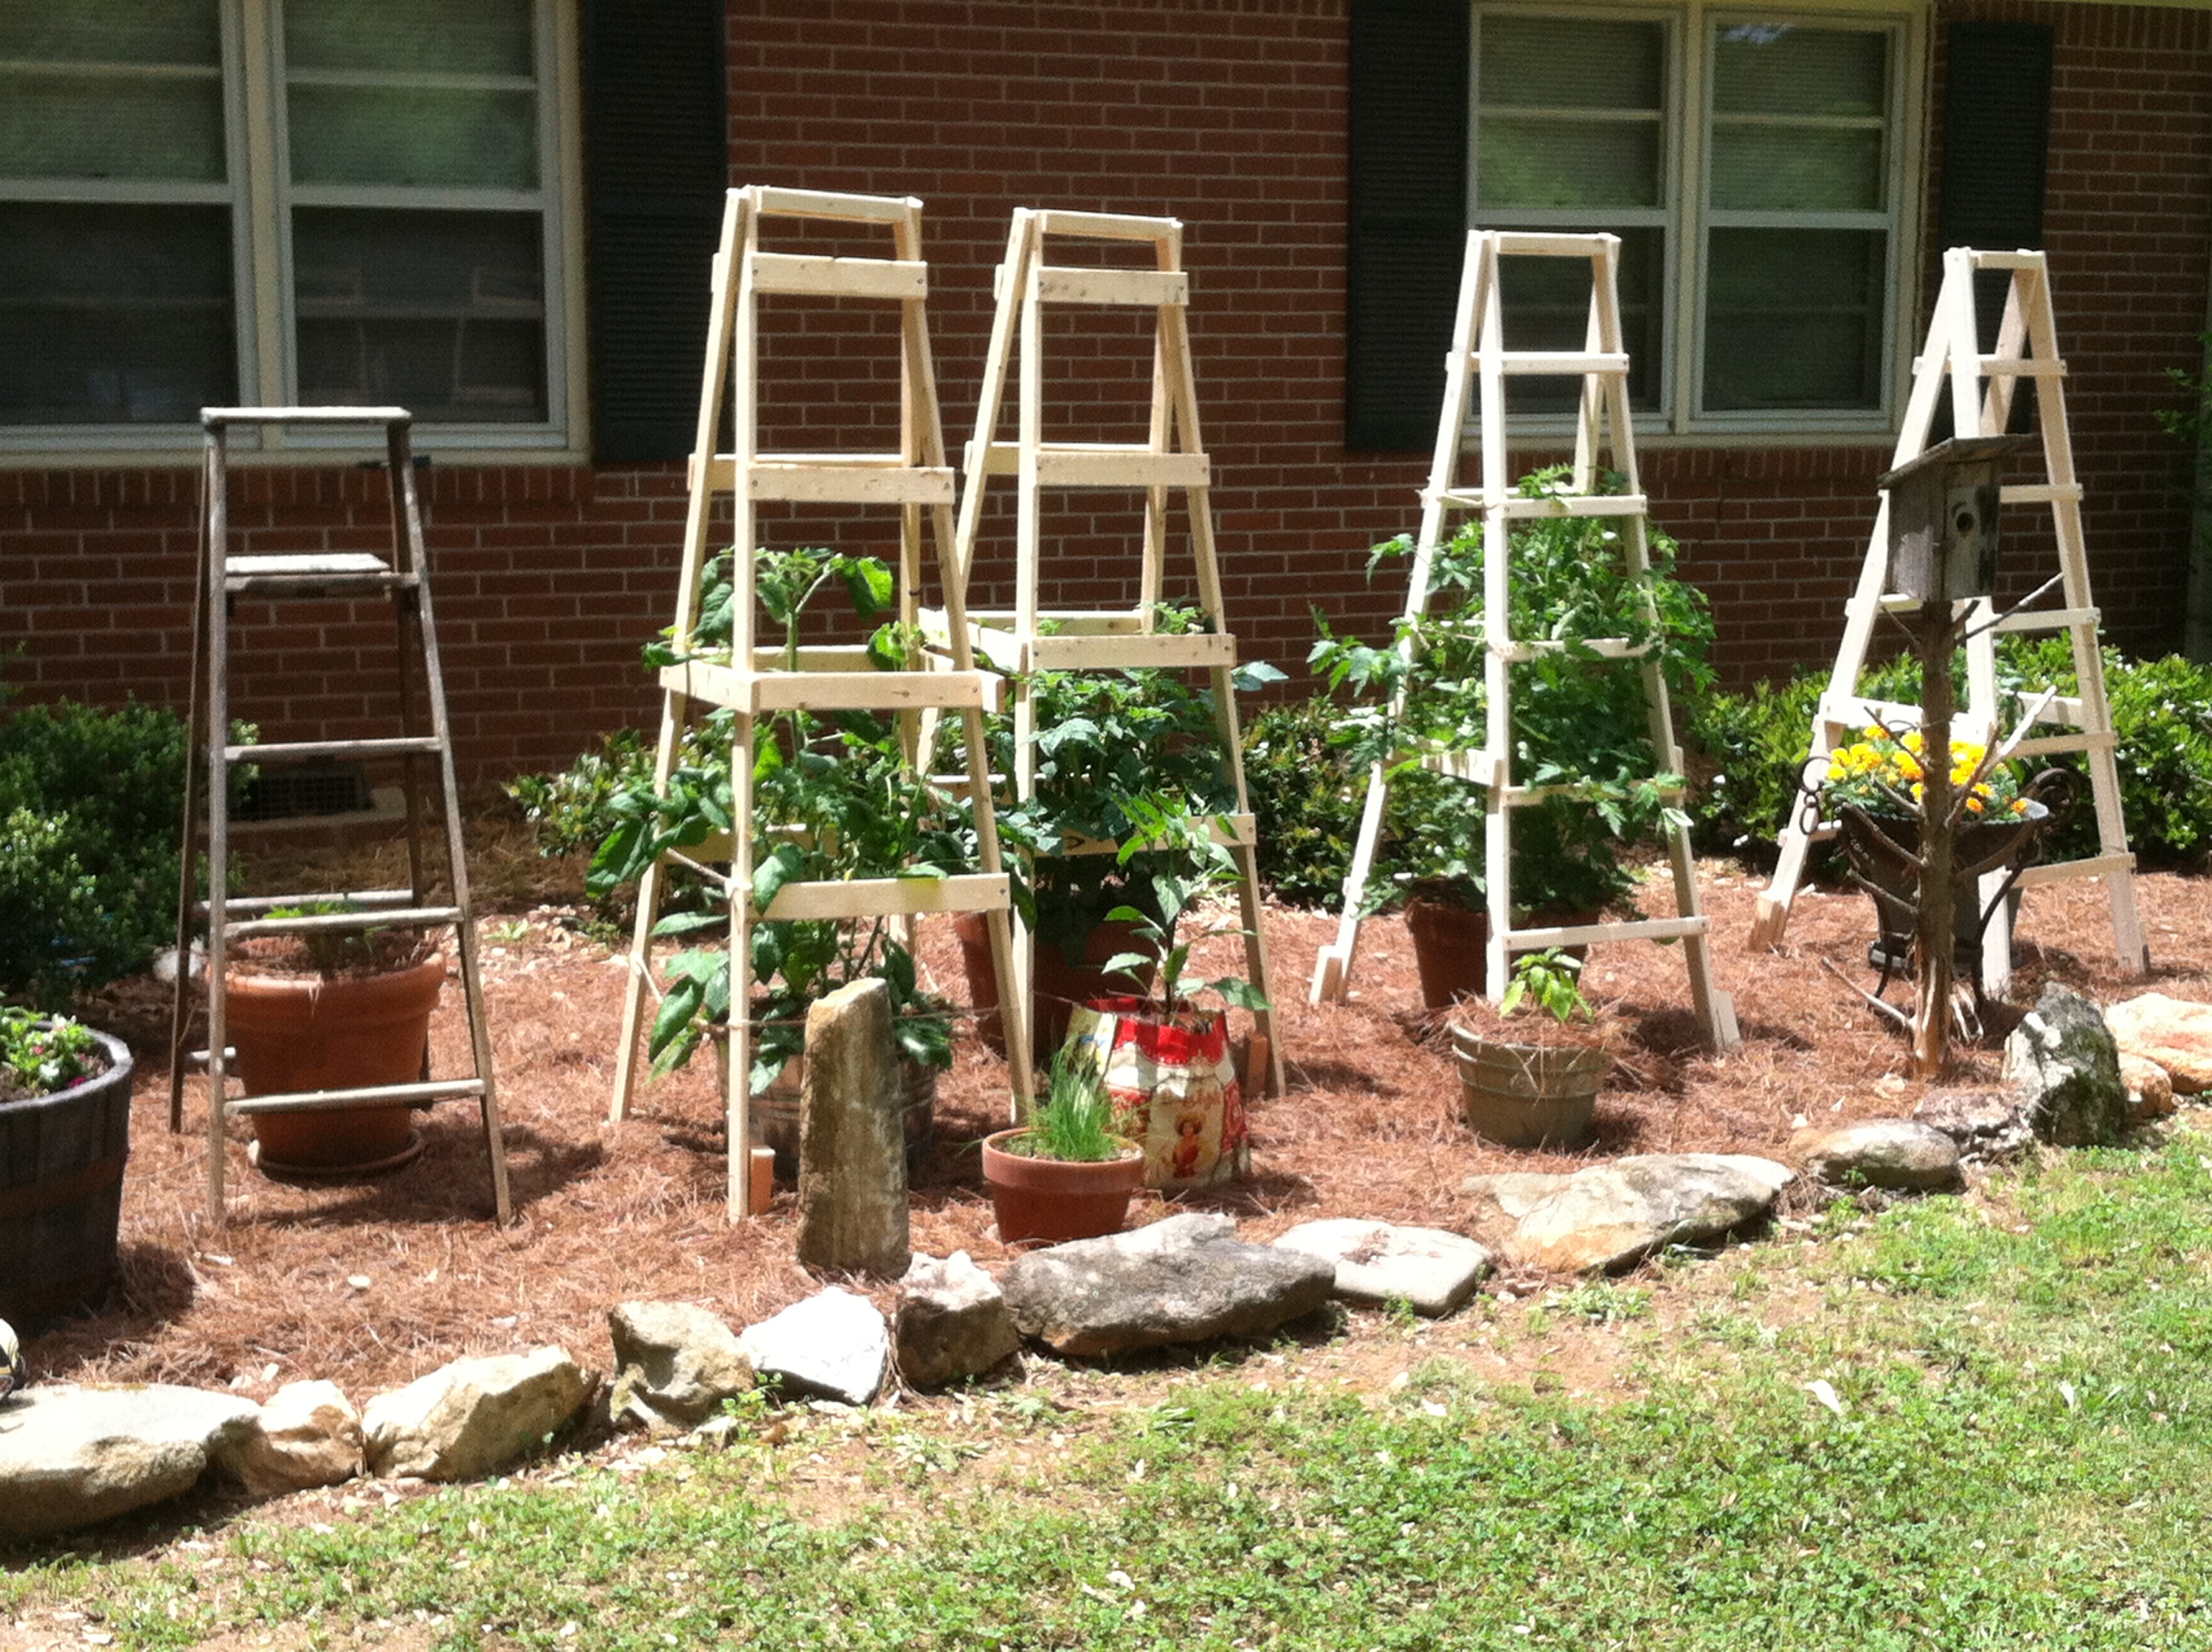
Four of Todd’s Tomato Ladders anchored and ready with an old wooden ladder on the far left.
Friends don’t let friends use lame tomato cages! What’s your best method of caging tomatoes?
Here’s a non-related byproduct of building these tomato ladders…

My fly rod and this largemouth bass ended my Saturday on a great note!
Keep Doing the Stuff,
Todd
P.S. – You can also keep up with the Stuff we’re Doing on Twitter, Pinterest, Google +, YouTube and our Facebook page… and over at the Doing the Stuff Network on Pinterest, Google +, and Facebook.
P.P.S – If you find value in our blog, Dirt Road Girl and I would appreciate your vote on Top Prepper Sites! You can vote daily by clicking here or on the image below. Check out all the other value-adding sites while you’re there…

Thanks for Sharing the Stuff!
Copyright © by Survival Sherpa: In light of the recent theft of all my content by a pirate site, my sharing policy has changed. I do not permit the re-posting of entire articles from my site without express written consent by me. My content on this site may be shared in digital form (200 words or less) for non-commercial use with a link back (without no-follow attribute) to the original article crediting the author. All photos, drawings, and articles are copyrighted by and the property of Survival Sherpa. You are more than welcome to share our photos and articles on social media for educational purposes as long as you link back to the original article/photo with credit to the author.


Reblogged this on thesurvivalplaceblog.
LikeLike
Pingback: DIY Tomato Ladders: No More Lame Cages - SHTF Preparedness
Pingback: Todd’s Tomato Ladders: No More Lame Cages | Sensible Survival and just good information
Pingback: Email Re: Todd’s Tomato Ladders | Survival Sherpa
I have two ladders that are not usable anymore. So, that takes care of two tomato ladders. I can put tomatoes at each end of my metal swing and use those for ladders. Now, I don’t have to build anything or use short cages anymore.
LikeLike
Something for your wife to do: paint the ladders and then add painted vines and/or flowers so they look more “front garden attractive” to your neighbors : )
LikeLike
We’re very natural looking outside. I think paint would take away from what we’re doing. No complaints yet. But then again, not too worried about my neighbors.
Thanks for the comment.
LikeLike
Another tip, cut the cross braces in 2 pieces, attach the 2 with screws in the center so the ladder will fold up for storage during the winter.
LikeLike
I designed mine to fold up for storage. Remove the brace screws and fold. But I’m liking your suggestion. Thanks, Tina!
LikeLike
Pingback: It Takes a Village: 33 Awesome Projects for Preppers | Patriot Powered News
I’m definitely putting this idea to use, thanks! Seems so obvious after seeing it, but I’ve long struggled with keeping my tomatoes properly controlled to keep them off the ground, and had never yet come up with a good workable idea on how to do it. This works. Sturdy and reusable. I just wonder how I might keep the feet of the ladders off the soil to make them last even longer and not rot, since my will sitting on unpaved surfaces in the garden.
LikeLike
You could prime and paint them, Jack. One of our Doing the Stuff Network members did paint hers and added some color to her garden. 🙂
Thanks for the comment!
LikeLike
Pingback: Todd’s Tomato Ladders: No More Lame Cages | American Conservative Daily News
Pingback: Made by Hands: Make it or Buy it? | Survival Sherpa
Pingback: 12 Woodworking Projects for Preppers and Homesteaders | Ask a Prepper
Hi Todd. I just found your site and have really enjoyed it, especially your no nonsense approach.
I’m curious about the cost of these tomato ladders, do you have an estimate?
I had considered making something like this in the past but I grow about 100 tomato plants each year, so I had been conscious about the cost and time as well.
I really like what you have done here, these things are fantastic. Due to sheer volume, I decided to go with simplicity, rebar. I buy a 12 foot section, cut it in half and done. One 12 foot section makes 2 stakes and cost under $5, $2.50 a piece when cut in half.
It seems to deviate from the “use what you have” philosophy, but sometimes you just need to do what you need to do. I spend a little money each year to buy a few of these and in no time I have enough for all my needs. They store in a small footprint and will last forever.
Just another way of looking at things. Thanks again, I’m really enjoying your postings.
Dave
LikeLike
Rebar is a great way to go. Buying it as you go stretches the expense over time as you said. And it never rots.
Man, you’re growing some serious amounts of ‘maters, bud. The number of ladders you’d need would be expensive if you didn’t have access to really cheap or free wood I’m afraid. Our last crop of tomatoes, I build a bamboo A-frame and simply lashed it together with bank line. It worked well but did take some time to build. But the bamboo was free 😉
LikeLike
Your bamboo idea is awesome. My neighbor started a small bamboo plot, literally a 1 foot high bunch from a flower arrangement. A few years later it is easily over 20 feet high and spread about 50 feet across. Yeah this stuff is invasive, but there are so many uses for it. Tomato cages, tripods for beans, peas, etc.
Yeah I grow a lot of tomatos, but save most of it for sauces and dried tomato powder. If you have never had an omlet with dehydrated tomato powder….you don’t know what you are missing!
LikeLike
I never have had tomato powder in an omelet but I bet is amazing. Do you just dehydrate and turn to powder?
LikeLike
Pingback: 27 DIY Tomato Cage, Trellis & Stake Ideas you can use! - Agricultural Family
Pingback: 7 DIY Tomato Cage, Trellis & Stake Ideas – Nelle's journey
Pingback: 6 Ways to Stake Tomatoes Cheap