by Todd Walker
Southern Ice Storm Cooking Check List
- Propane cooker and fuel: √
- Camp stove and Coleman fuel: √
- Lump charcoal for the Green Egg: √
- EmberLit stove: √
- Firewood: √
We stock up on all these items in case of emergency events like the latest ice storm. Fortunately, we were without power for only three hours. Other Georgians didn’t fare as well.
Our Plan-B cooking methods were in place but were never called into action.
Today, cabin fever struck. I needed some back yard dirt time. What to do???
I know… make a tripod for our fire pit!
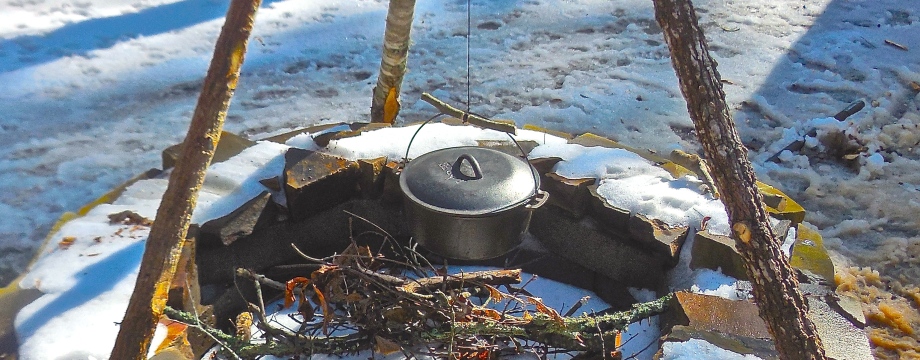
Roast me!
The first two emergency cooking fuels on my list are non-renewable. I’m sure I could make lump charcoal but not something I’ve done before. I don’t count on a method until I’ve practiced it. Always trading theory for ACTION!
Firewood is plentiful and gives us one more cooking option. Now I needed to build cooking equipment for our primitive outdoor kitchen.
Materials and Tools
Here’s what you’ll need to build your own sturdy cooking tripod…
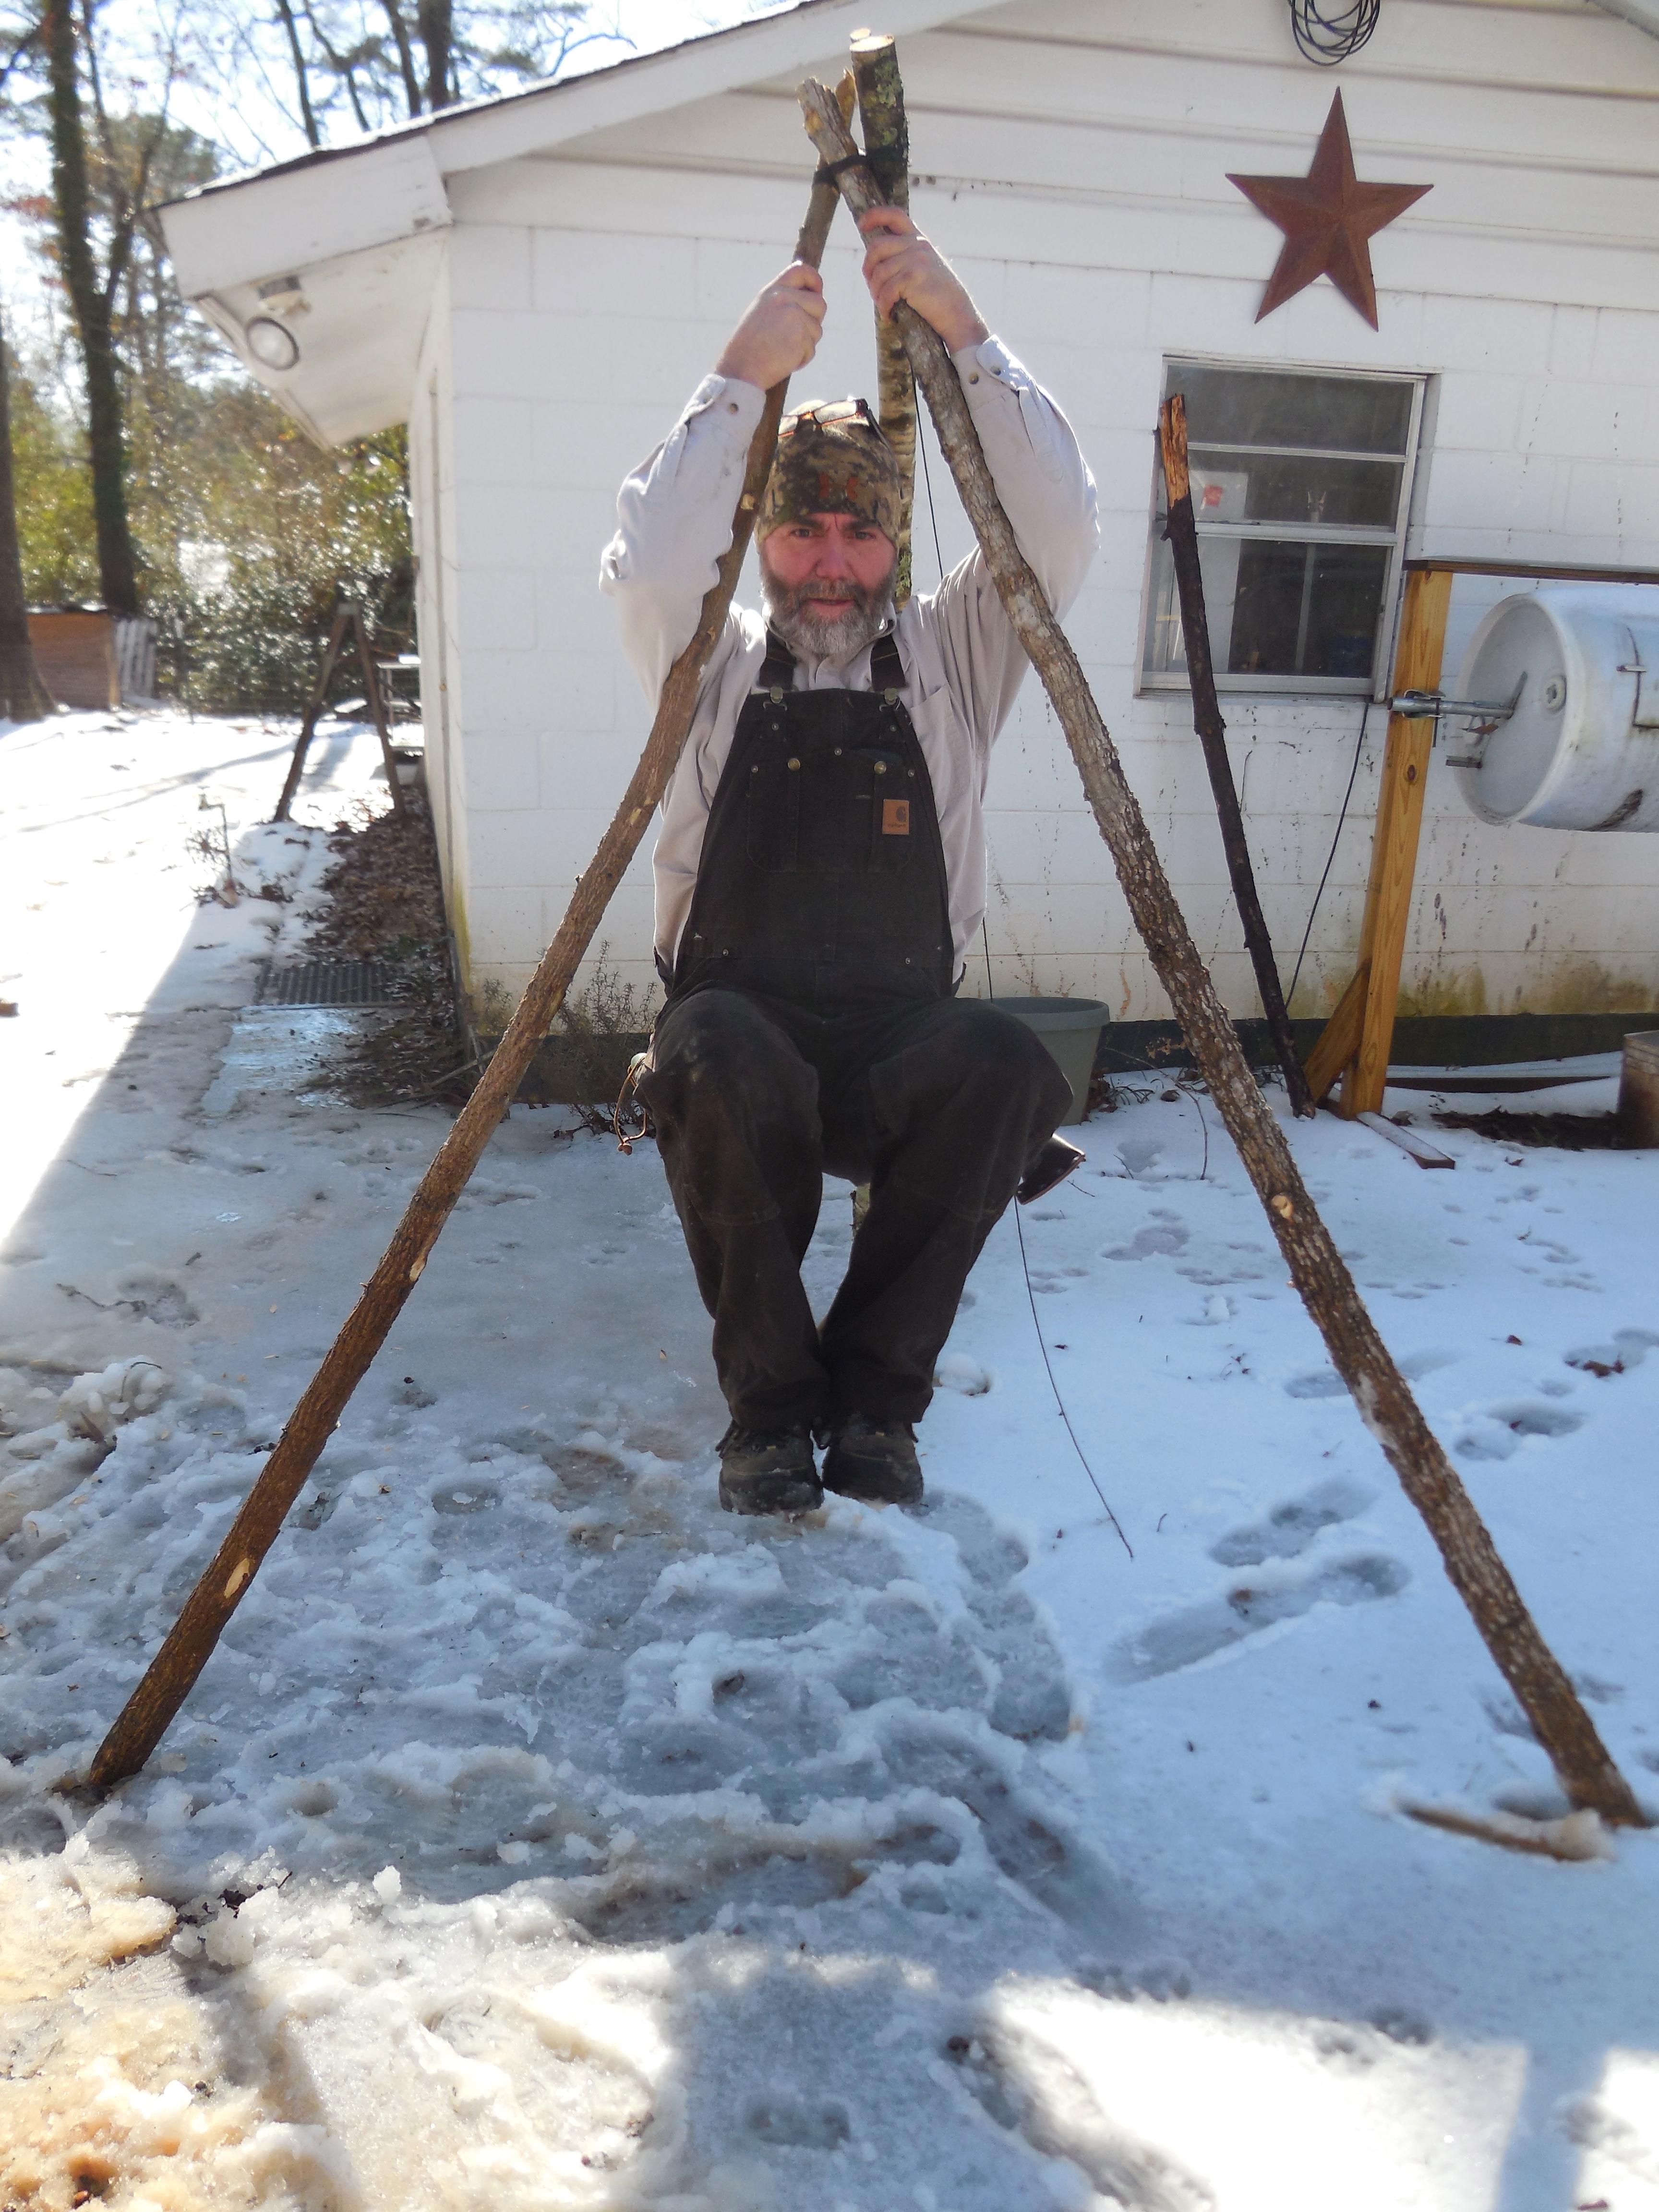
- Three green wrist-size saplings about 7 feet tall
- 20 feet of thin, strong cordage – tarred bank line works great (find it in Hunting and Fishing departments of box stores)
- Cutting tool to harvest saplings
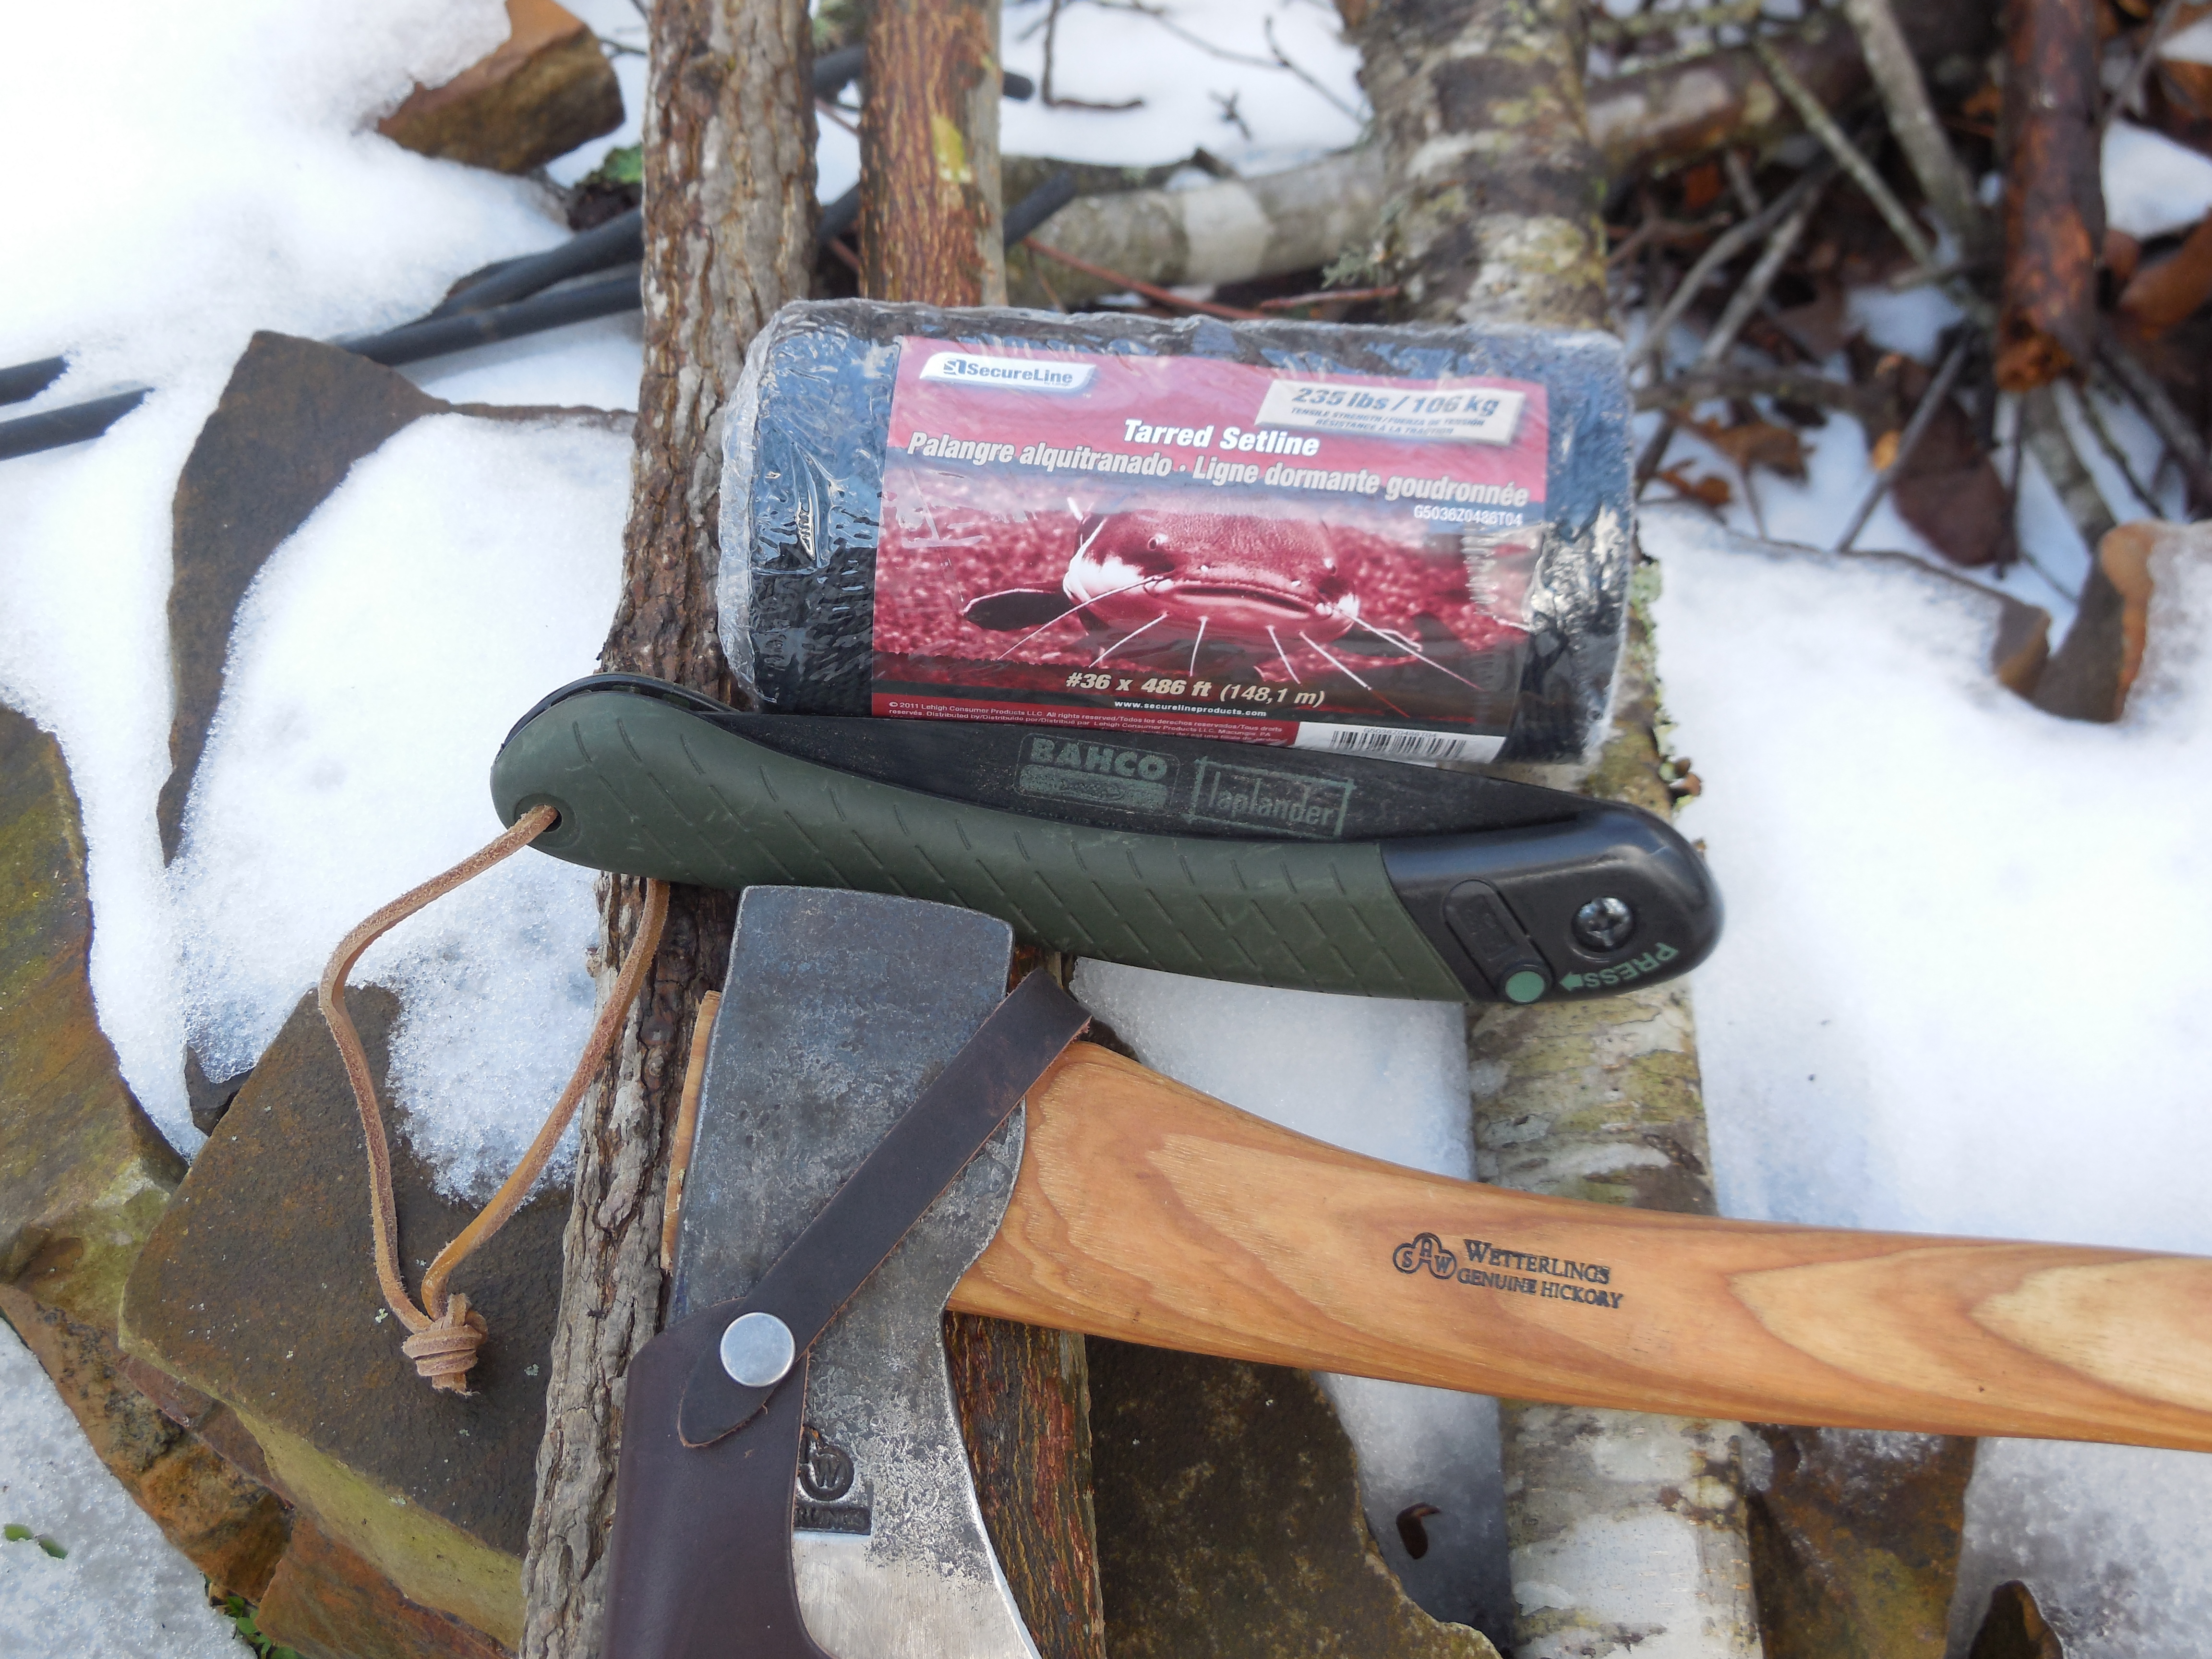
All you need is wood, cordage, and cutting tools
Cut the three saplings and trim branches. The base of my trees were about forearm-size with the tops about wrist size. Don’t discard the branches. You’ll use these resources later in your build.
Lay the saplings side by side. Tie a Timber Hitch with bank line onto the end of one of your poles. Here’s an animation for a tying a Timber Hitch.

Simple Timber Hitch
For this application, skip the half hitches if you’re using tarred bank line. Fold over a 4 inch tag and twist the loop several times. Then pull the long tag line through the loop and cinch it tight about 5 or 6 inches from the top of one of your poles.
With poles laid flat, wrap three revolutions of cordage securing two saplings. Use a stick, screw driver, or attachment on your Swiss Army Knife to pull the loops tight. Now make three more passes and pull tight again. Keep the cord as tight as possible while keeping the poles side by side – don’t allow them to bunch together.

The packaging hook is a jewel for pulling cordage tight
Next, thread the cordage between the first and second pole below the previous six wraps. These wraps are called frapping. Pull the cord up and over the top of the six cord warps. Repeat this until you have three revolutions around the six strands running perpendicular to your poles.
Here’s our video tutorial below on tripod lashing:
Tighten your cord every third wrap. You now have six wraps running horizontally with the poles. Tie off the tag on the sixth wrap with a half hitch.

Lashing between two poles
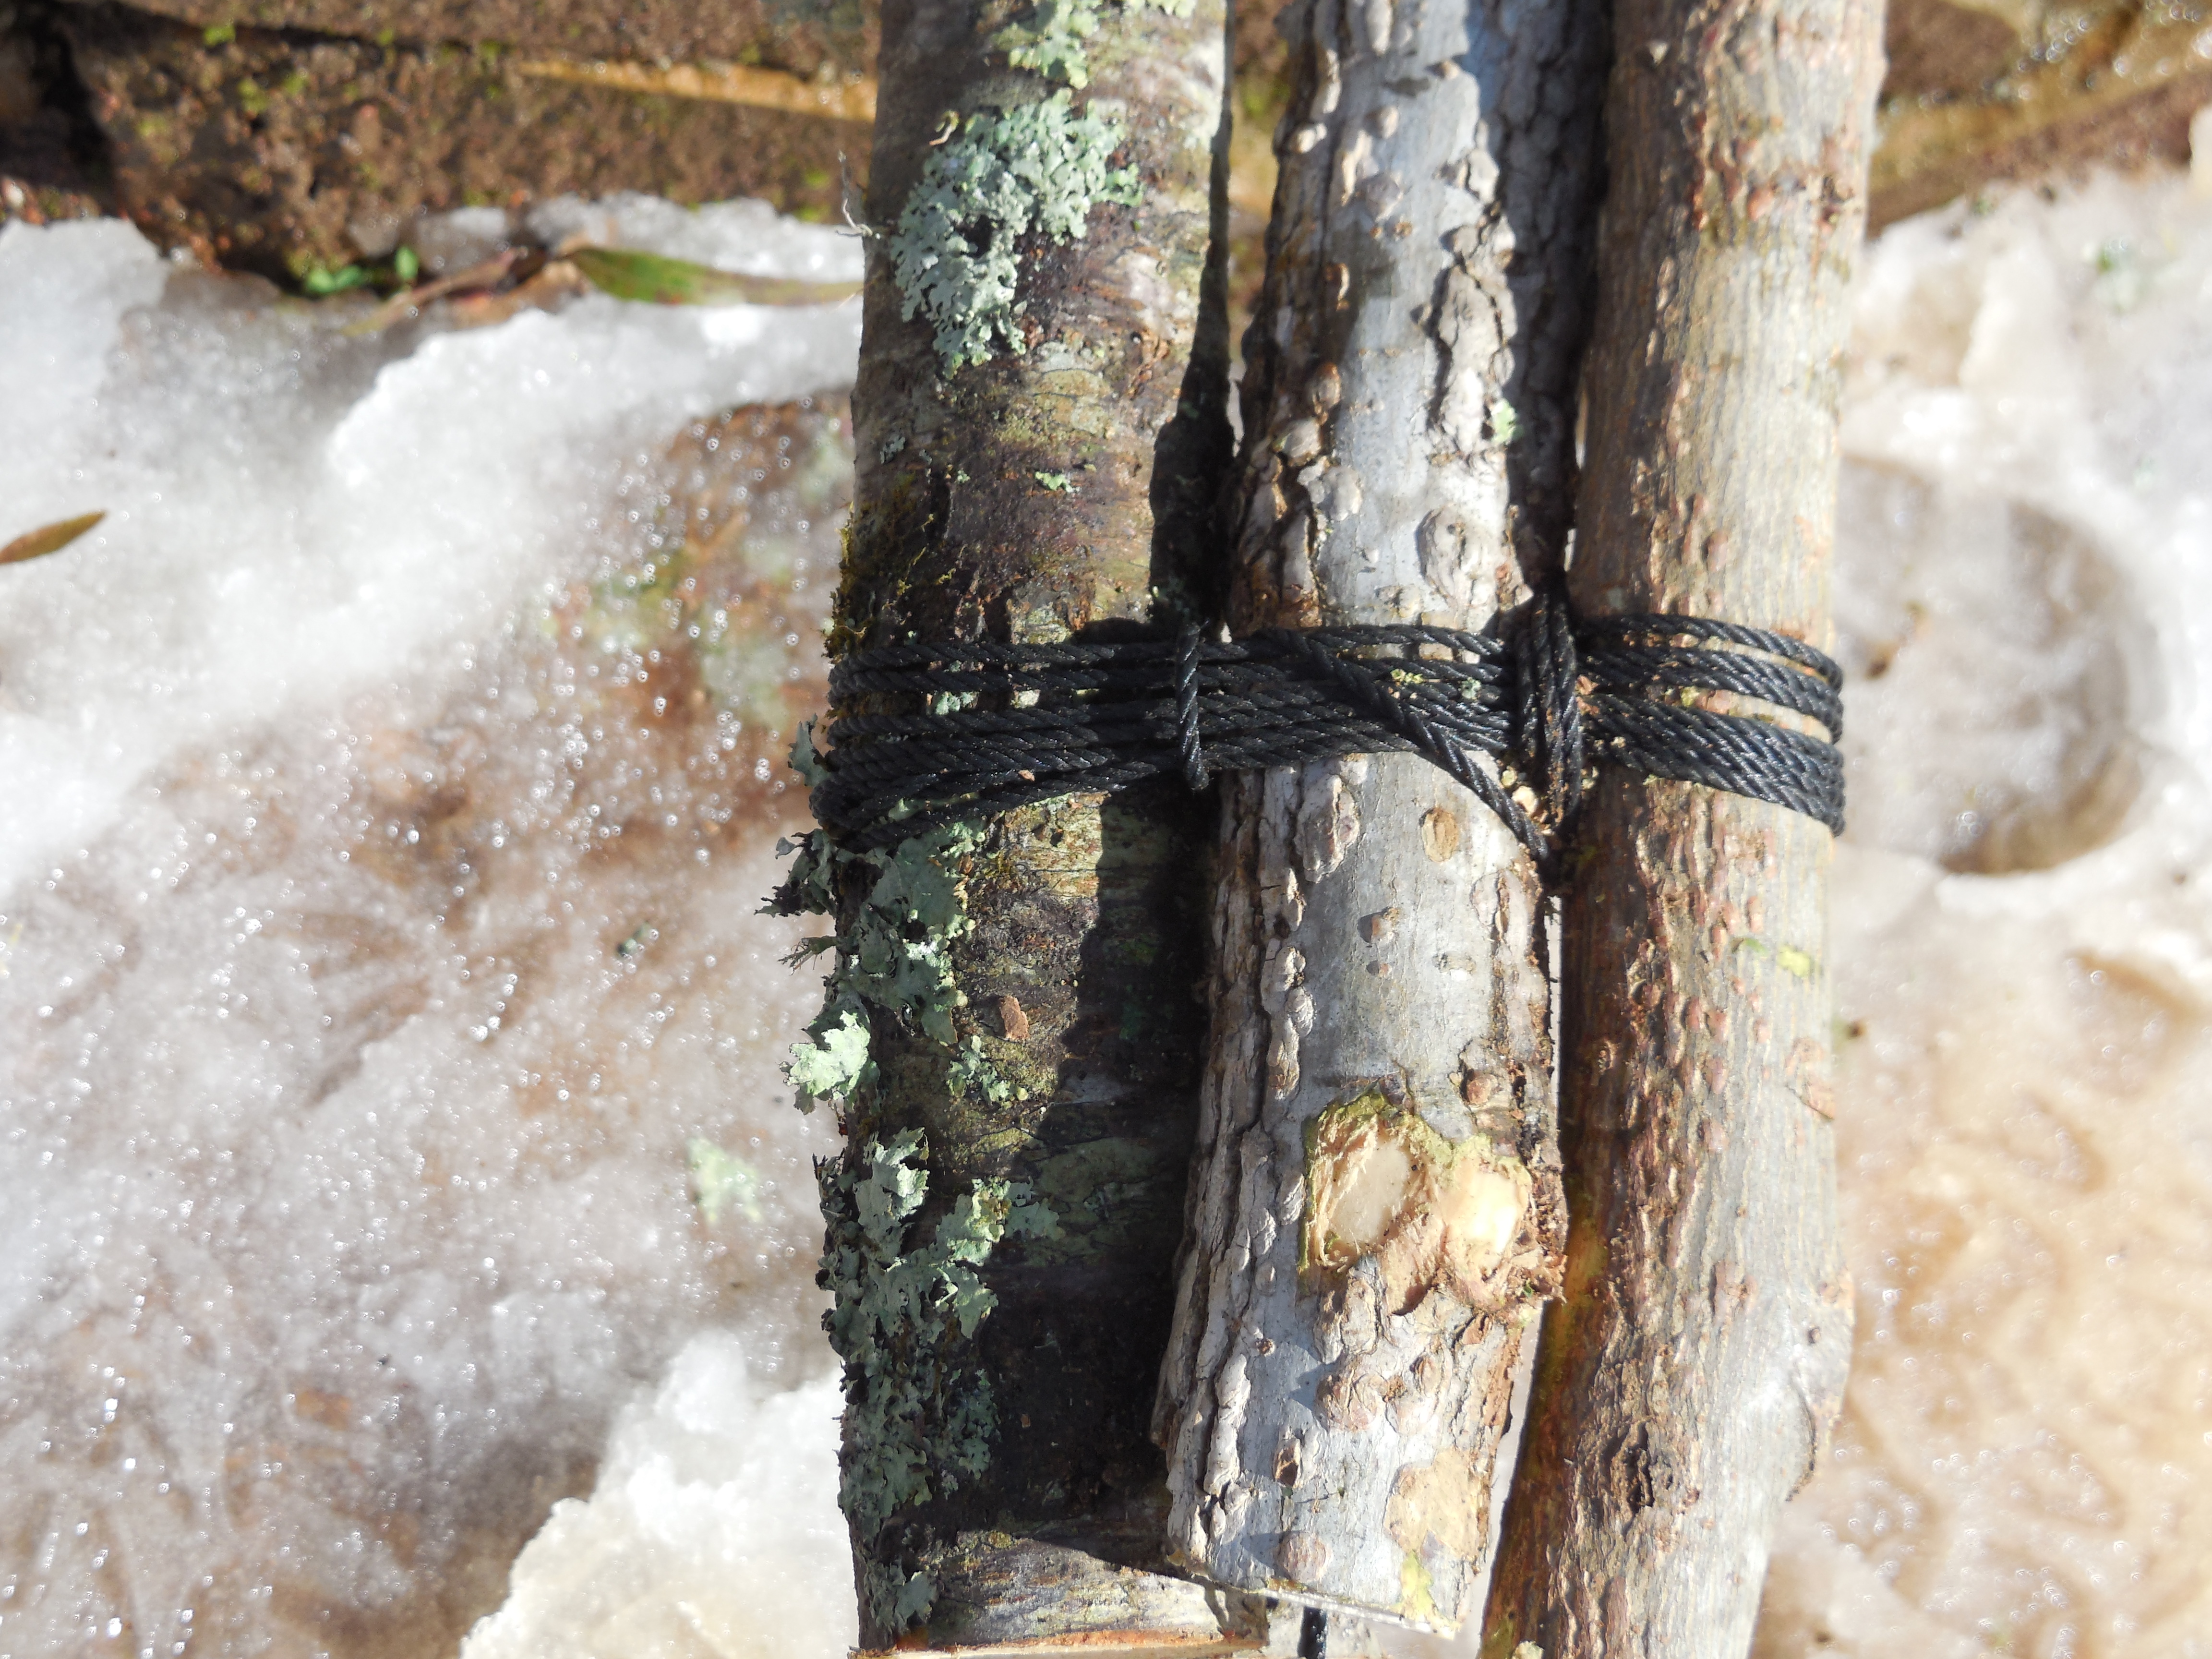
Joint on left needs two more wraps
Spread the poles out and set up over your fire pit. Mark where the ends meet the ground and fold your tripod back up. Place the poles on a wood anvil and trim the ends to a point for a better bite.
Re-install the tripod around your fire pit.
You should have a long tag of cordage dangling down the center of the tripod. Use this to hang cooking pots over the fire. If you don’t feel #36 bank line is sufficient, you could use a metal cable or small chain.

Prefect!
Toggle
Make a toggle out of one of the limbs from your sapling. I made mine about 8 inches long. Cut a notch in the middle and secure the bank line in the notch.
Slip the toggle through the wire handle to suspend the pot. You can adjust the pot height by looping the cordage over a pole stub at the top of the tripod.

Toggle holding cast iron squirrel pot
Pot Hook and Toggle
I also made a hook for the toggle system. Notch the top of the hook safely with a knife and tie a 12 inch piece of line around the notch. Tie a loop in the long tag end for your toggle stick to go through. This hook will allow you lower the pot close to the fire keeping the bank line farther away from the heat.
Check out other pot hook options in one of our other articles.

Squirrel stew pot ready!
This set up is simple, sturdy, and functional. If the power goes out for a while, wrap your tripod in a tarp or canvas drop cloth to smoke the thawing meat in your freezer. Just a thought.
Only thing missing is a few squirrels.
Keep Doing the Stuff of Self-Reliance,
Todd
P.S. – You can also keep up with the Stuff we’re Doing on Twitter, Pinterest, Google +, YouTube, Instagram, and Facebook… and over at our Doing the Stuff Network.
P.P.S – If you find value in our blog, Dirt Road Girl and I would appreciate your vote on Top Prepper Sites! You can vote daily by clicking here or on the image below. Check out all the other value-adding sites while you’re there…

Thanks for Sharing the Stuff!
Copyright © by Survival Sherpa: In light of the recent theft of all my content by a pirate site, my sharing policy has changed. I do not permit the re-posting of entire articles from my site without express written consent by me. My content on this site may be shared in digital form (200 words or less) for non-commercial use with a link back (without no-follow attribute) to the original article crediting the author. All photos, drawings, and articles are copyrighted by and the property of Survival Sherpa. You are more than welcome to share our photos and articles on social media for educational purposes as long as you link back to the original article/photo with credit to the author.


Reblogged this on sondasmcschatter.
LikeLike
Pingback: Julie's Weekly Roundup 2.15.14 - Home Ready Home
Pingback: Here’s Your Sign: Turning Trash Into Survival Treasure | Survival Sherpa
Pingback: Here’s Your Sign: Turning Trash Into Survival Treasure | Patriot Rising
Great tutorial, brother! Nice stuff you got here.
LikeLike
Thank you, Dom! Just subbed to your YT channel. Been thinking of starting a channel myself. I think a lot of the tutorials would be best taught via video.
BTW, enjoyed your flint and steel vid! Very nicely done and informative.
LikeLike
Pingback: 14 DiY Projects for Wilderness Self-Reliance | Survival Sherpa
Thanks for the excellent tutorial! I’ll be building one of these shortly to put over the fire pit. It’ll be great fun cooking outdoors, and not heating up the kitchen 😉
LikeLike
Thanks, Sarah! Glad you found it useful! Let us know how it works for you.
LikeLike
Pingback: 14 DiY Projects for Wilderness Self-Reliance | The Daily Sheeple
Pingback: Backyard Bushcraft Skills: No Wilderness Required | Survival Sherpa
Pingback: How I Preserve Food: Modern Mountain Man MRE’s | Survival Sherpa
Pingback: Backyard Bushcraft Skills: No Wilderness Required | Ready Nutrition
Pingback: How to Make a Plumber’s Stove on Steroids for Cooking and Warmth | Survival Sherpa
Pingback: How to Make a Plumber's Stove on Steroids for Cooking and Warmth | Ready Nutrition
Pingback: How to Make a Plumber’s Stove on Steroids for Cooking and Warmth » Survival Gear & Food Storage
Pingback: How to Make a Plumber’s Stove on Steroids for Cooking and Warmth - The Daily Coin
Pingback: Camp Craft: How to Tie Square Lashing | Survival Sherpa
Pingback: 49 Outdoor Skills and Projects to Try When Camping | Survival Sherpa
Pingback: Made by Hands: Make it or Buy it? | Survival Sherpa
Pingback: Made by Hands: Make it or Buy it? | OffGrid Survival Website
Pingback: 27 Basecamp Projects Guaranteed to Elevate Skills and Fun in the Woods | Survival Sherpa
Pingback: How to Carve 7 Pot Hooks for Classic Camp Cooking | Survival Sherpa
Pingback: My Top 4 Most Useful Basecamp Builds | Survival Sherpa
Pingback: How to Make Perfect Hobo Coffee without Modern Gadgetry | Survival Sherpa
Pingback: Campfire Cookery: How to Cook Tasty Meals Over an Open Fire | Survival Sherpa