
by Todd Walker
I love my Pathfinder 32 oz. Bottle Cooking Kit… except for one thing… the bag.
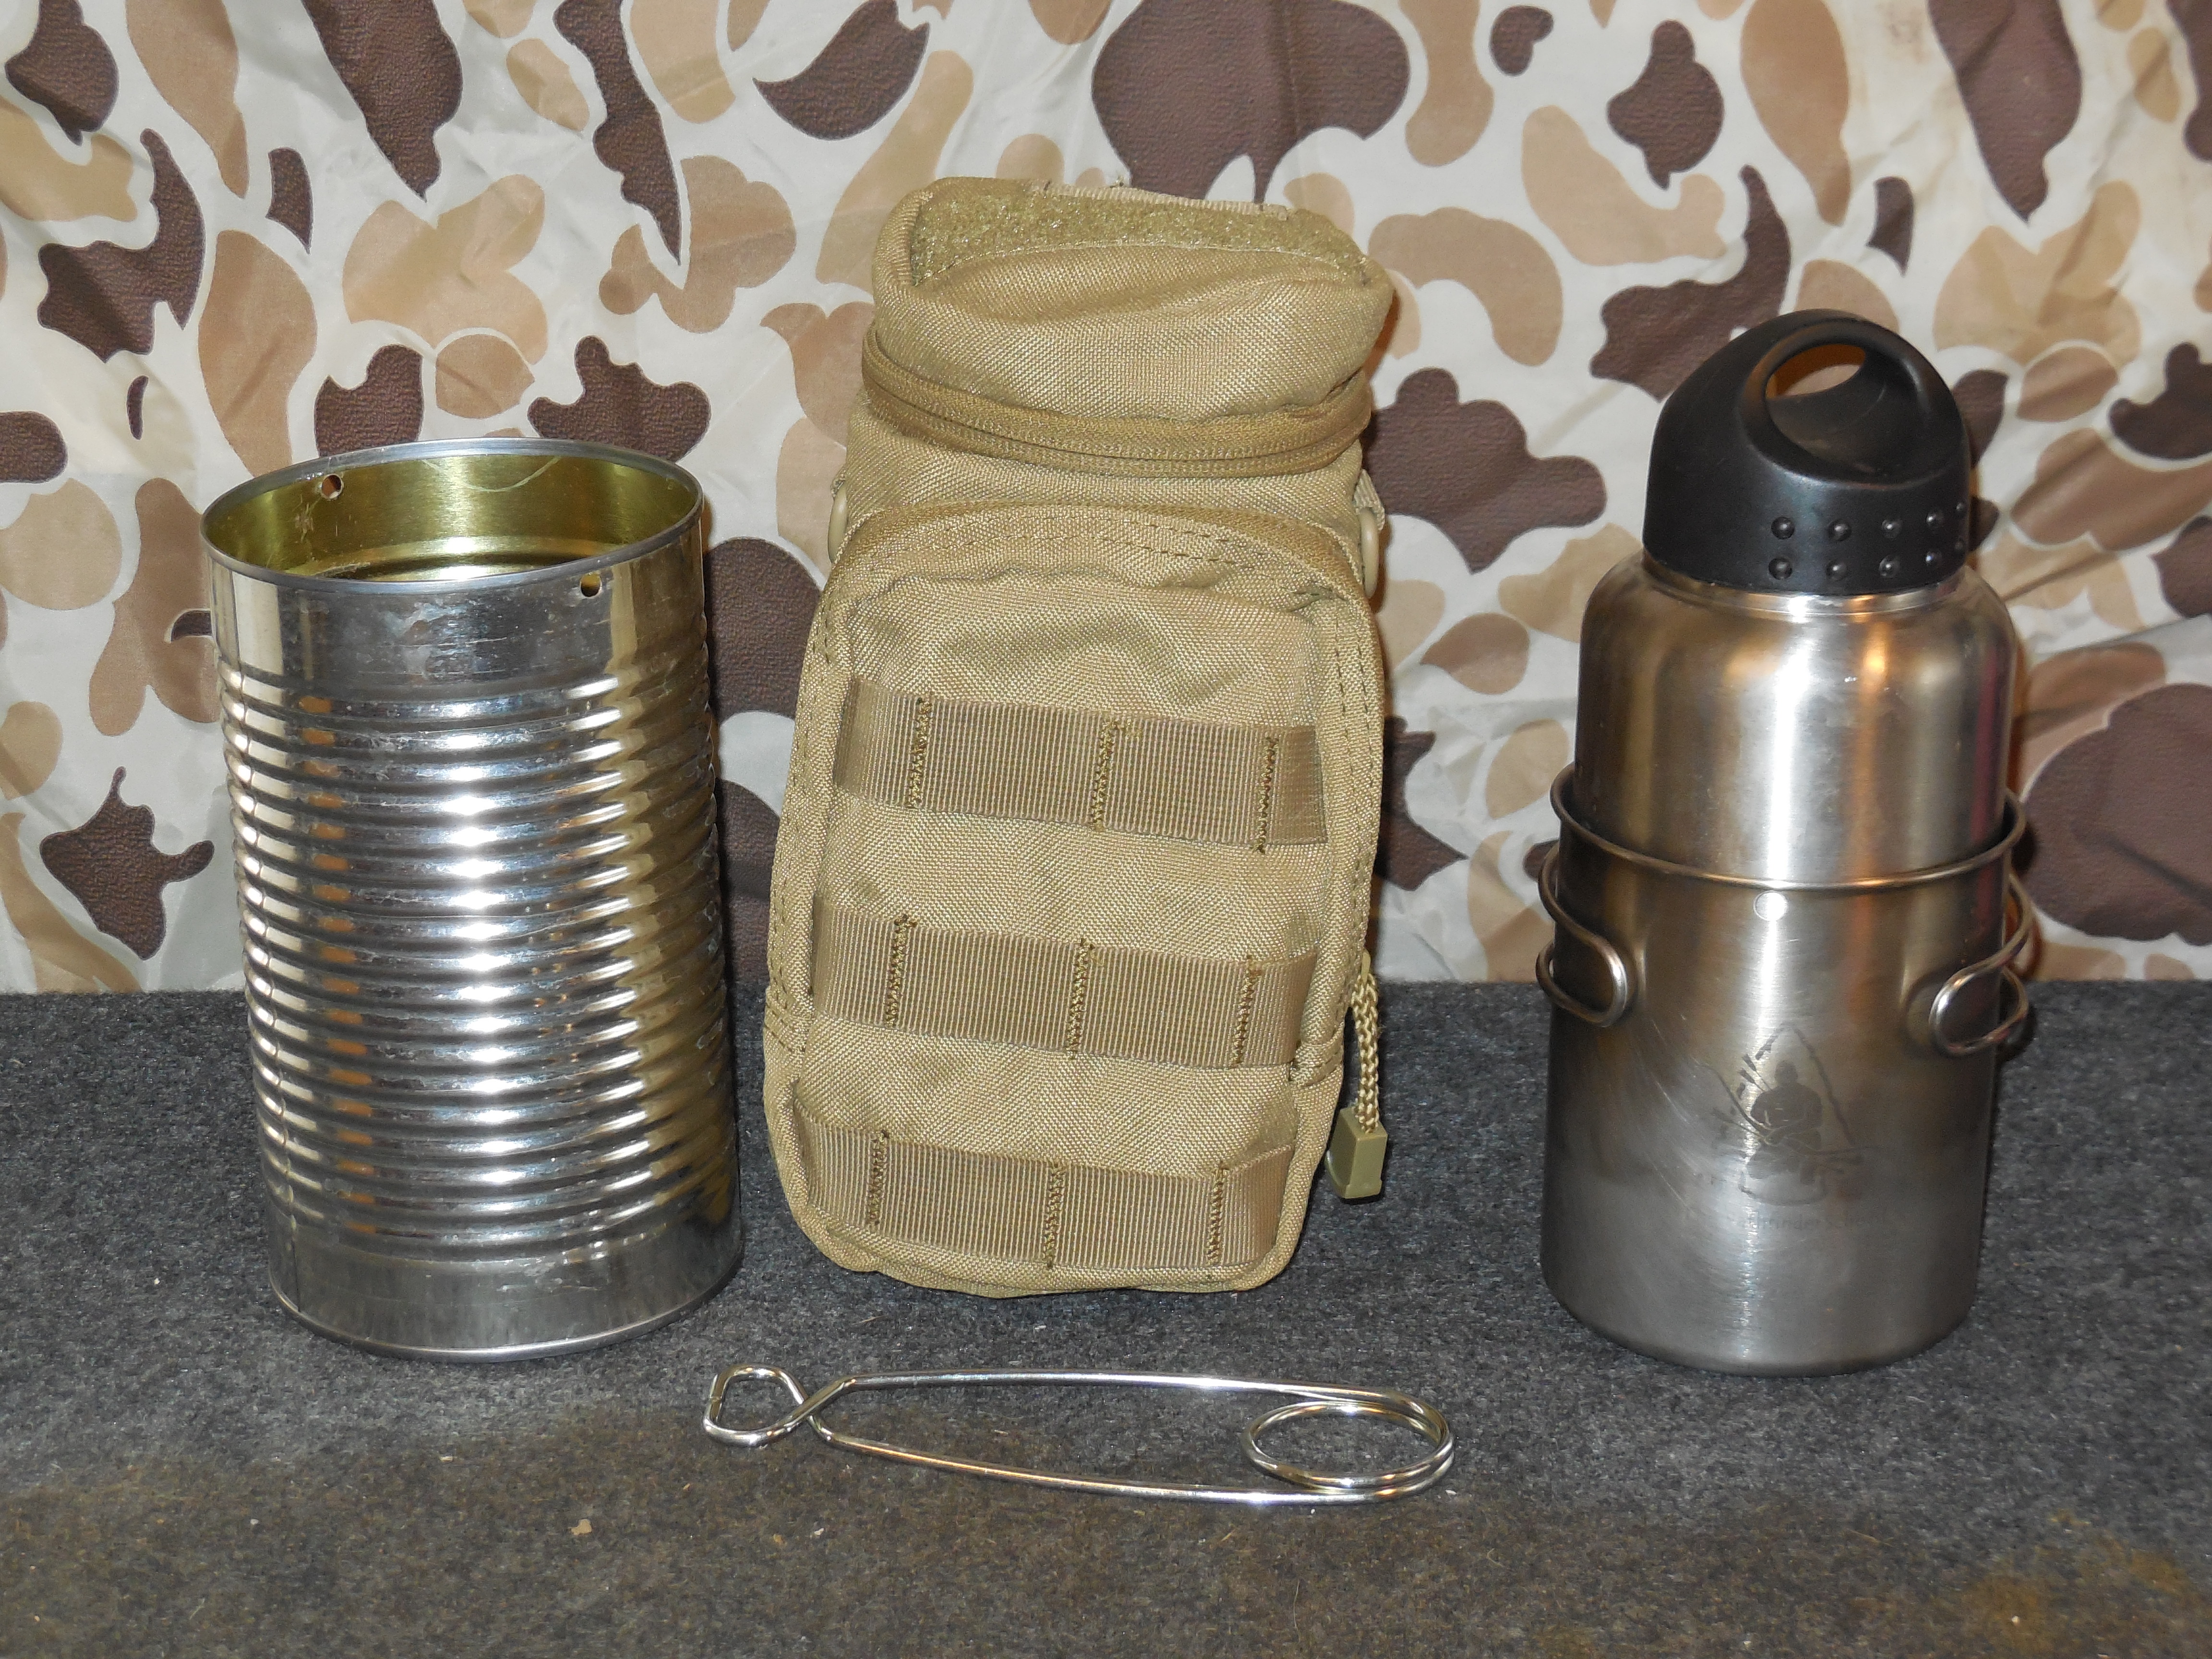
The bag is such a useful piece of kit and I hated its one glitch.
The nesting cup caught on the interior of the nylon bag when storing or removing the set. I filed the bat-wing handle attachment but the cup still snagged the bag liner. Oh well, I thought I’d have to live with it.
Christian C rescued my bag by making a simple, yet brilliant, modification on his YouTube channel which saved me the gnawing frustration each time I used my cup in the field. You can check his video out at the bottom of this post.
As many of you know, I’m a container freak! And this mod not only fixes the bag snag but also adds yet another metal container to my cook kit. I’m a redundancy freak too.
All you need is a #3 Tall can from the grocery store. I stopped by our mom and pop grocery store on my way back from some quality dirt time yesterday and bought the cheapest can of tomato juice on the shelf. I walked in with my tape measure to make sure the can would fit my PF bag.
The can’s dimensions are 4 1/4 inches in diameter by 7 inches tall and holds about 45 oz. I paid $1.55.
Remove the lid with a can opener and discard the juice… or drink it if you’re into cheap, watered down fruit juice. Check the rim for any sharp edges. File them smooth if you have any. Mine had none.
Wash and dry the can. Drill two holes on opposite sides of the top rim of the can. File the holes smooth. Make the holes large enough to accept the fish mouth spreader (bottle hanger) that comes with your PF Complete Bottle Cooking Kit.
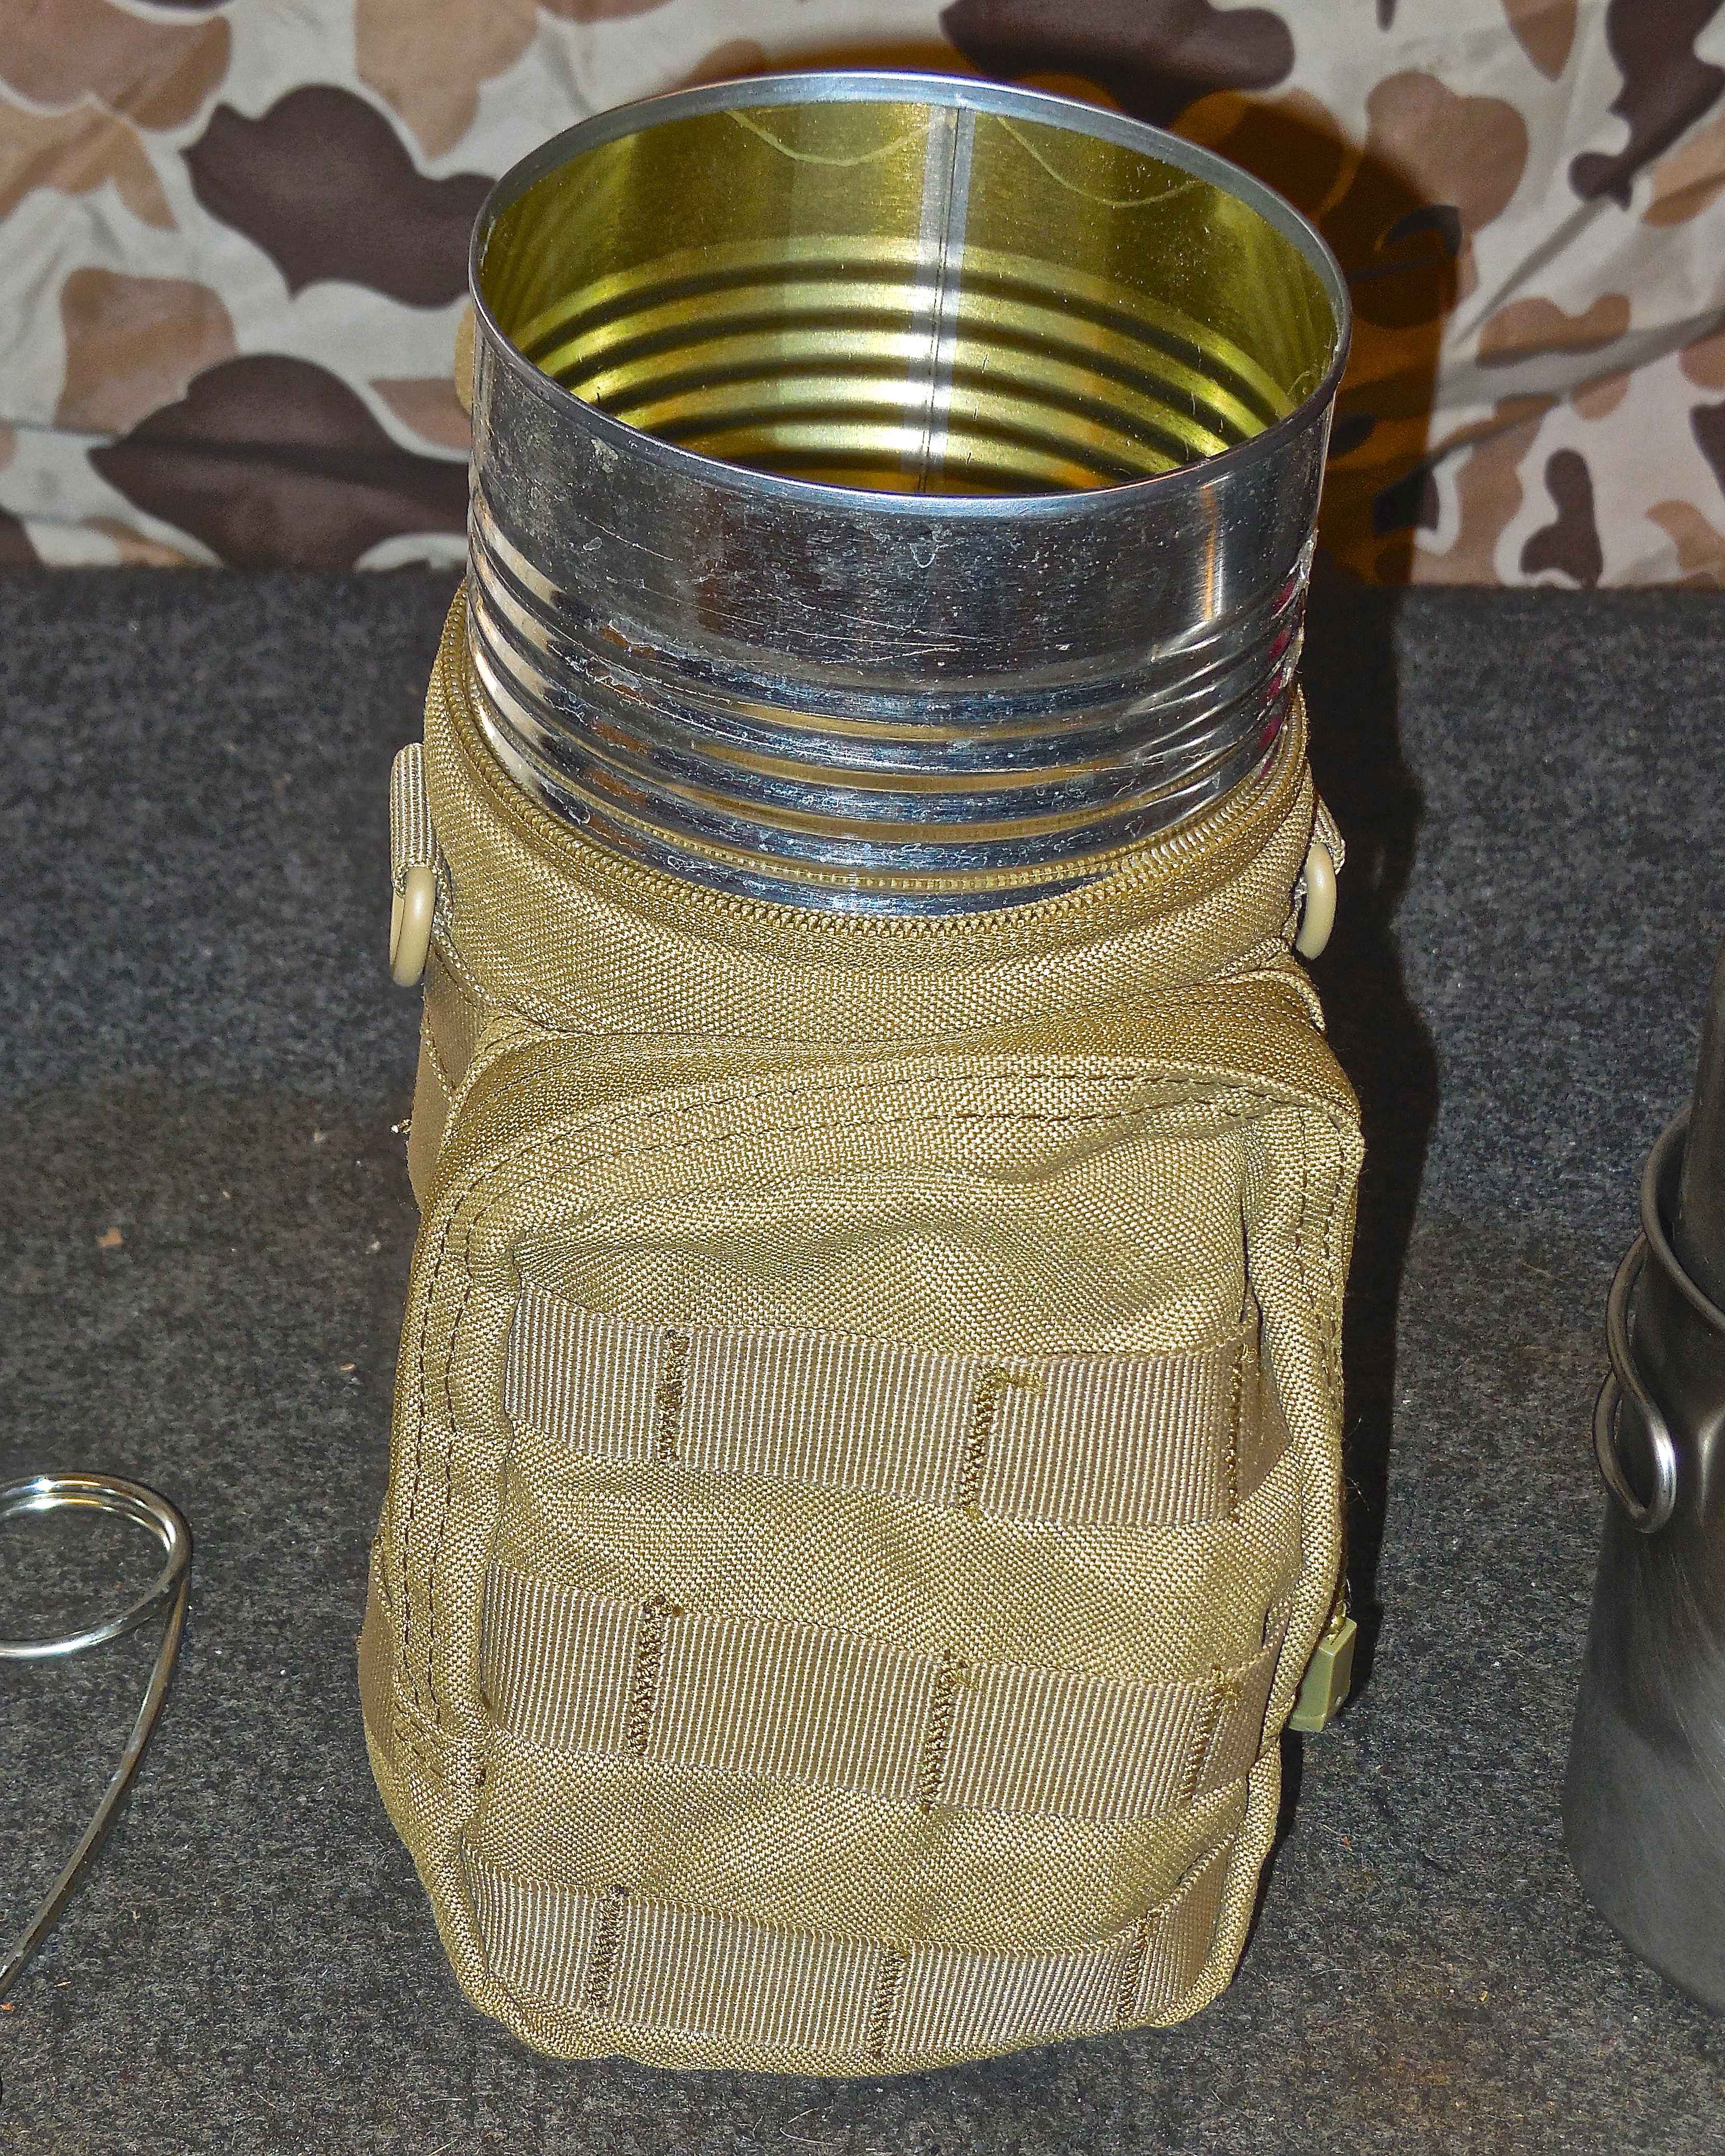
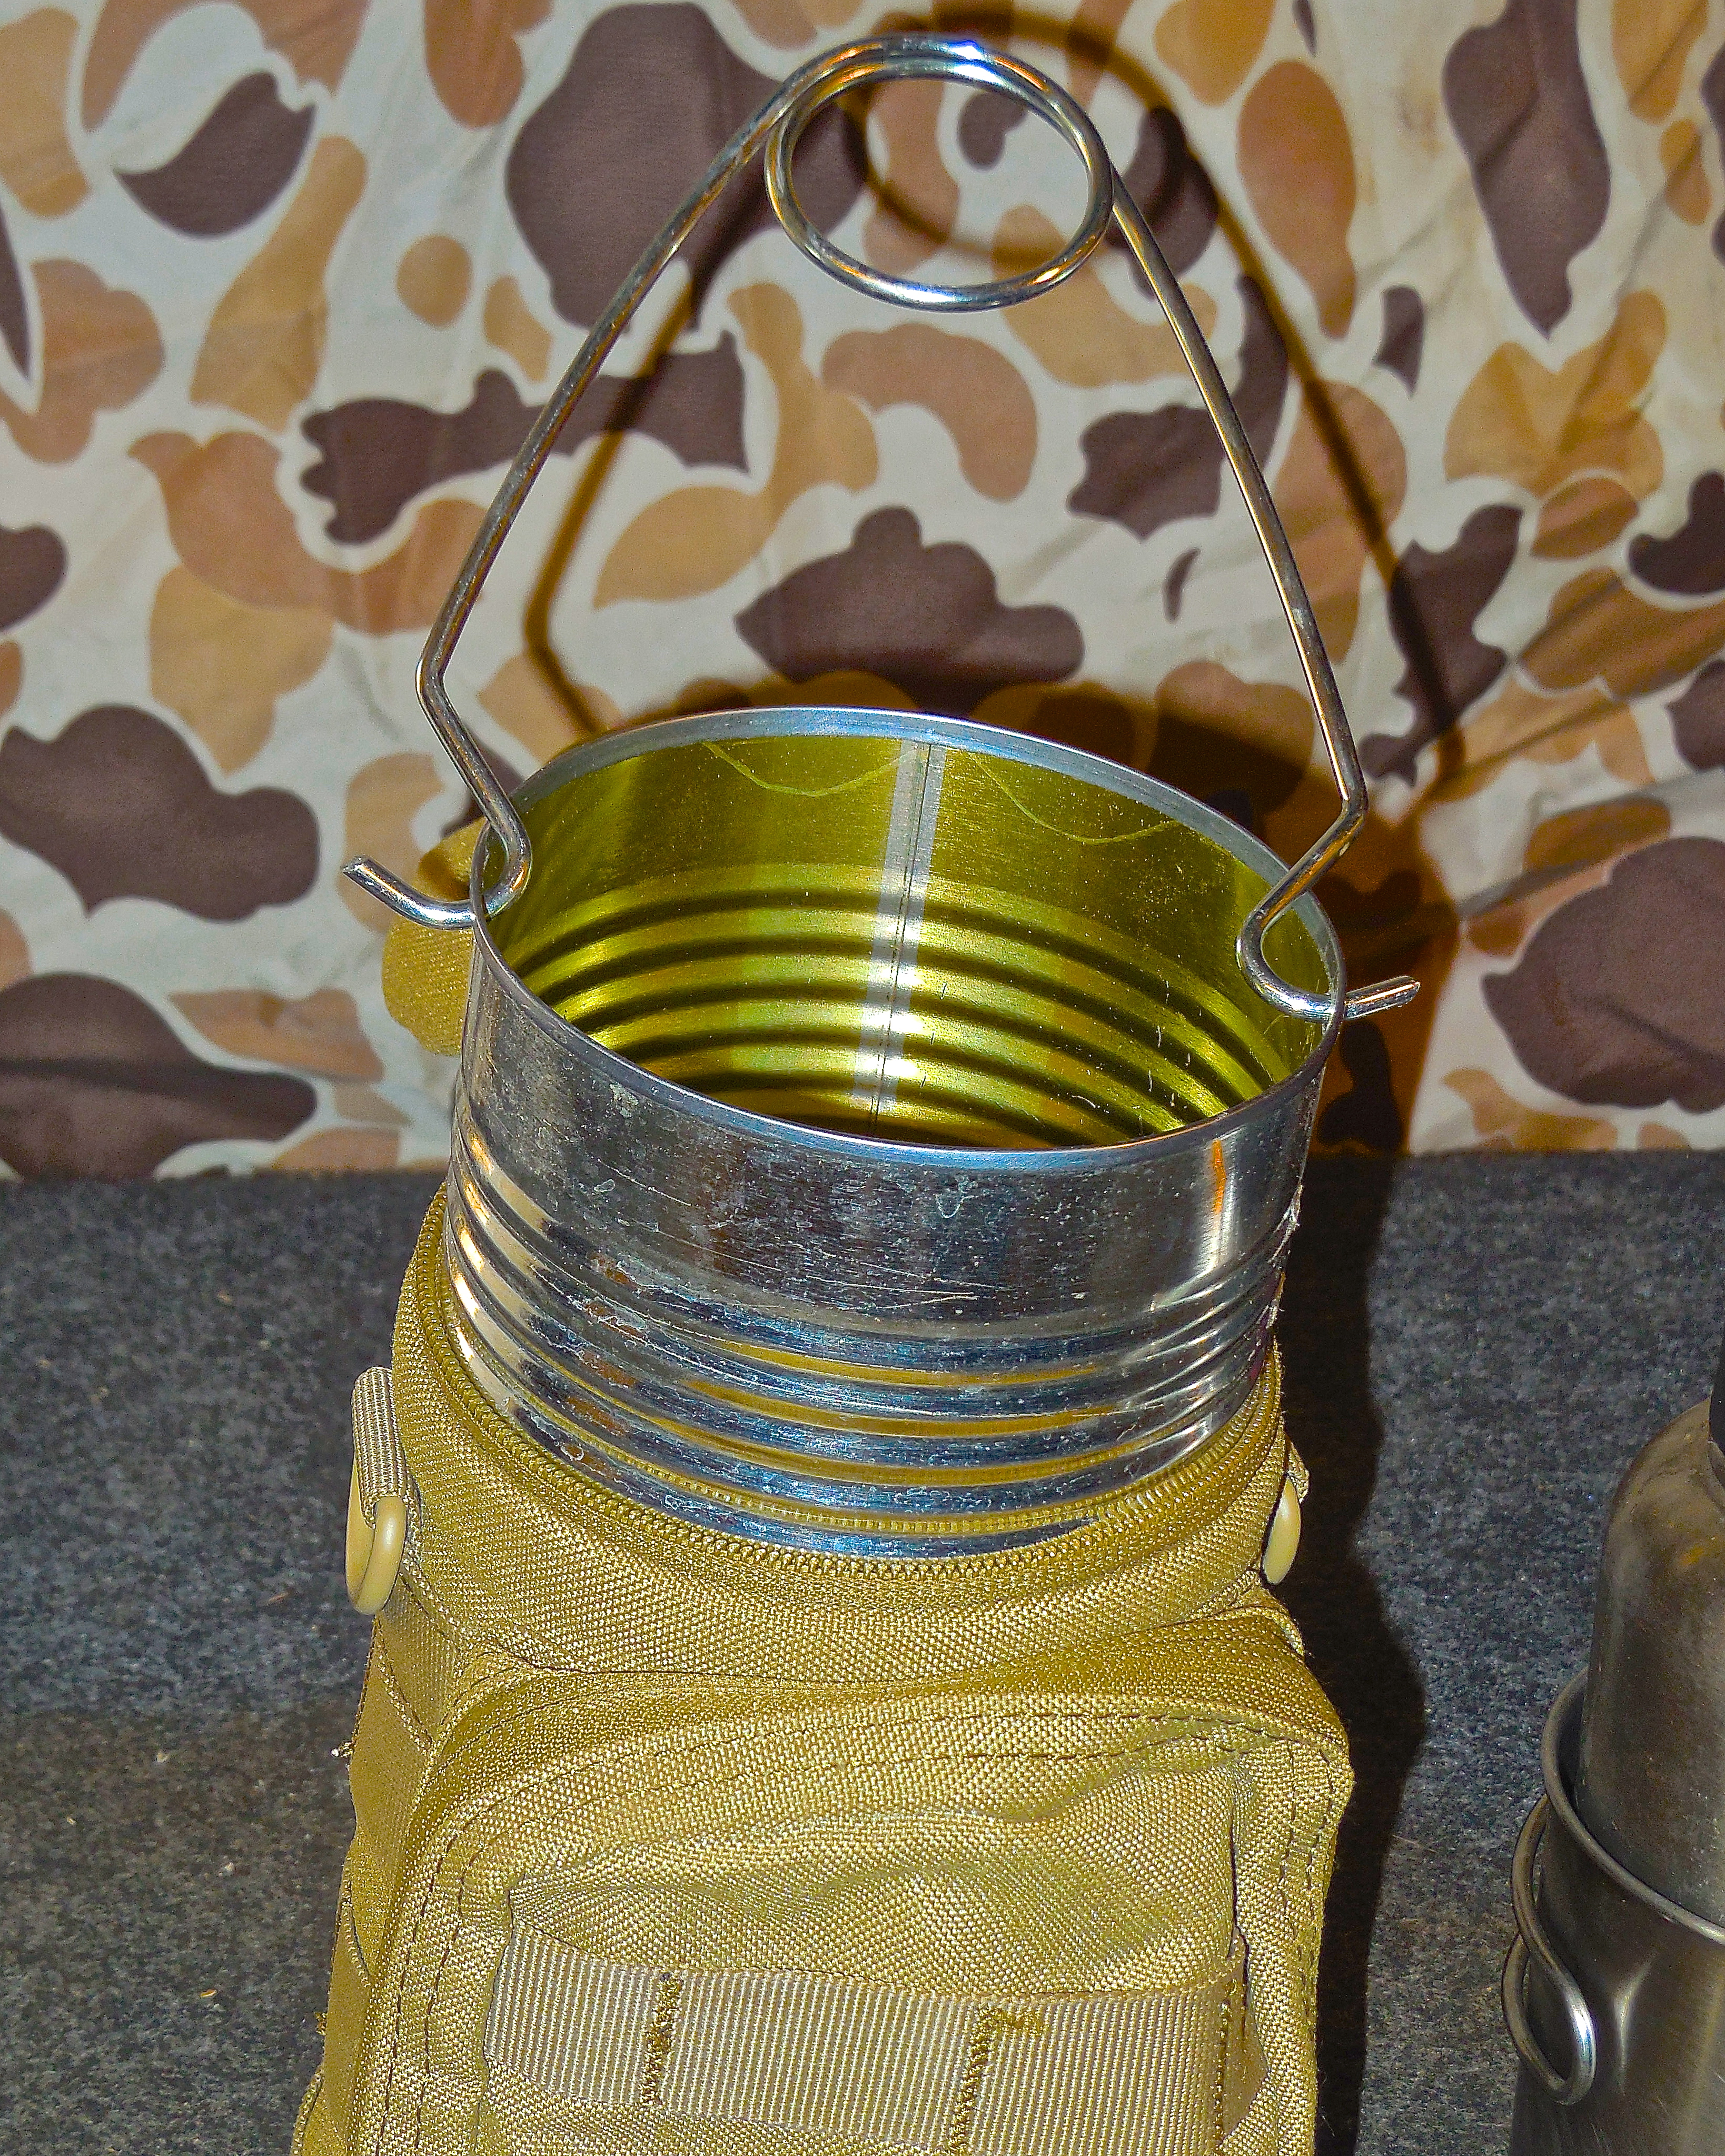
Bottle hanger attached to my new container
Insert the can into the bag. It’s a tight fit but will slide in creating a nesting sleeve for the cup, 32 oz. bottle, and pack stove ring.
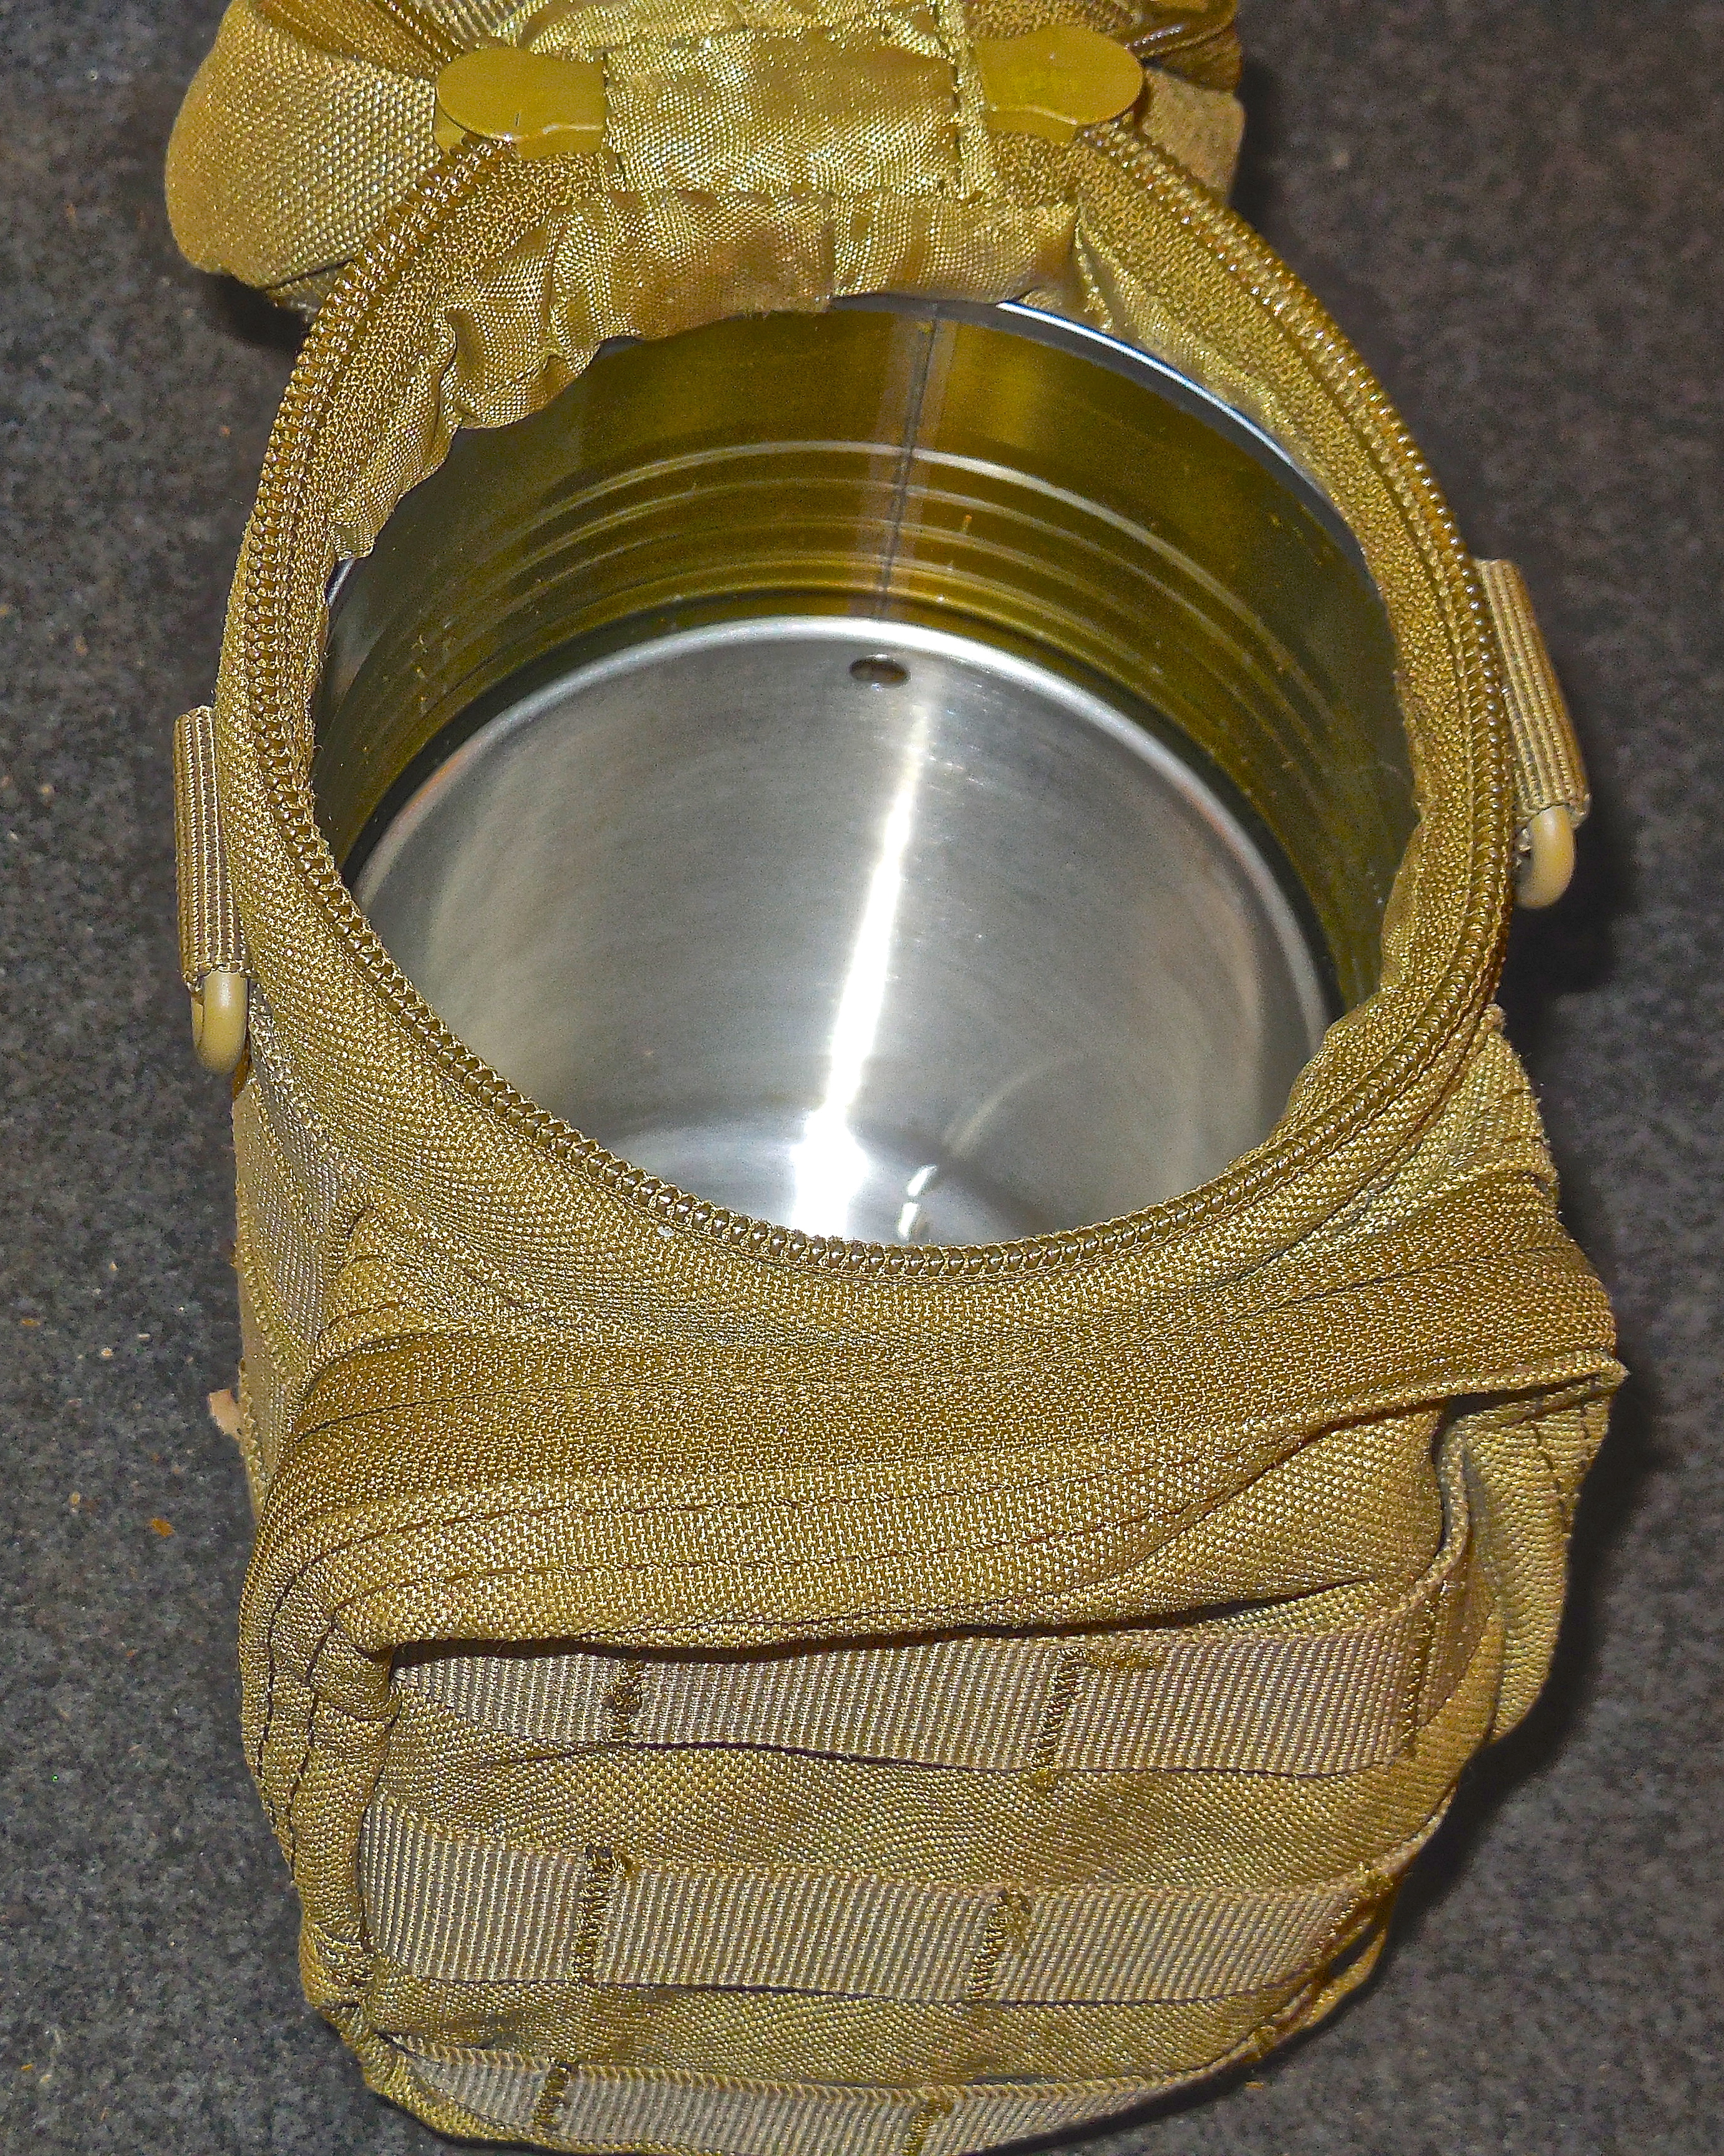
27 oz cup nesting inside the 45 oz can


Perfect fit!
Disclaimer: As you know, I don’t advertise on our site. I receive no compensation for any of the stuff I promote on our blog unless it passes the Doing the Stuff test. If you’re interested in ordering this kit, you can do so by clicking here: PF Complete Bottle Cooking Kit. The newer model comes with a strainer lid for the cup, an item I’m ordering soon.
You never want to be caught without a way to stay hydrated or make fire to regulate your core temperature. That’s why I carry this bomb proof kit with me on all my adventures in the wild – day hikes, camping, dirt time, hunting, and fishing.
I can’t thank Christian C enough for his brilliant idea! Watch his video below…
<iframe width=”640″ height=”390″ src=”//www.youtube.com/embed/rC0zJcKWpbg” frameborder=”0″ allowfullscreen>
Keep Doing the Stuff!
Todd
P.S. – You can also keep up with the Stuff we’re Doing on Twitter, Pinterest, Google +, and our Facebook page. Ready to trade theory for action? Join us in the Doing the Stuff Network on these social media sites: Pinterest, Google +, and Facebook. Use the hashtag #DoingTheStuff when sharing your stuff on Twitter.
P.P.S – If you find value in our blog, DRG and I would appreciate your vote on the Top Prepper Sites! You can vote daily by clicking here or on the image below. Check out all the other value-adding Prepper sites while you’re there…

Thanks for sharing the stuff!
Copyright Information: Content on this site (unless the work of a third-party) may be shared freely in digital form, in part or whole, for non-commercial use with a link back to this site crediting the author. All links in articles must remain intact as originally posted in order to be republished. If you are interested a third-party article, please contact the author directly for republishing information.


I was frustrated by this. I slid my kit into a small stuff sack, then slid it in the holder. Very easy to retrieve. Slides right out with no problems!
LikeLike
Thought about lining my bag with roof flashing but the can provided an extra container so I went with that option. Thanks for the tip, Rob!
LikeLike
After measuring the #3 can I figured my stainless steel cup would not fit in because of the collapsible handles. So after looking around in my kitchen I found a 4″ X 8″ container of instant oatmeal, it’s made of thin but strong cardboard; cut it along one side all the way to the bottom, and slid the cup into it, then pressed the whole assembly into the pouch. Voila! fits perfect and slides out with no snags. And of course my 32 Oz. Nalgene fits perfectly into the cup.
LikeLike
Possum mentality right there, Tony!
LikeLike
Pingback: Skills: A Gear Weight-Loss Program | Survival Sherpa
Pingback: 14 DiY Projects for Wilderness Self-Reliance | Survival Sherpa
Pingback: 14 DiY Projects for Wilderness Self-Reliance | The Daily Sheeple
is that a maxpedition bag you’re using or is it part of the kit you bought?
LikeLike
No, it’s part of the Pathfinder Bottle kit. I wasn’t crazy about it at first but now it’s an excellent piece in my kit with the mod. Thanks for the comment, Tom!
LikeLike
I tried clicking on your link for the kit but it is broken, outdated, etc. Do you have another link for this item.
LikeLike
Sorry about that, Carol. Here’s the link that works: http://www.selfrelianceoutfitters.com/stainless-steel-bottle-cooking-kit/
This is the 3rd generation of the cook kit. I own the first gen.
Thanks for the heads up!
LikeLike
Pingback: 5 Must-Have Survival Kit Items That Won’t Require a Mule for Conveyance | Survival Sherpa
Pingback: 5 must-have survival kit items that won’t require a mule for conveyance
Pingback: 5 Must-Have Survival Kit Items That Won’t Require a Mule for Conveyance | TheSurvivalPlaceBlog
Pingback: 5 Must-Have Survival Kit Items That Won’t Require a Mule for Conveyance | ROWAN OATH KEEPERS
Hey I stumbled across this post while looking for some nesting options for my 24oz bottle. I didn’t know you did a write up about my little idea on the mod. I need to spend more time on your blog! Have a Great day!
LikeLike
You did a genius mod on that bottle, sir! I’ve since modified the actual bottle bag and use the bean can to do water boil challenges. You’re welcome to hang out, Christian!
LikeLike