by Todd Walker
Fire don’t care about pretty. It eats ugly. In fact, fire loves chaos.

Imagine the first pre-history people to harness fire. They didn’t have a Boy Scout manual open on a rock referencing a proper fire lay or ignition sources. My guess is they watched in fear and awe, time after time, generation after generation, as wildfires destroyed all forest litter, tangles, and animals in its path. Fire’s appetite for chaos was observed, and, in return, unveiled its secret to changing useless stuff into useful stuff.
The need to shiver in the cold and huddle in darkness passed with one spark, dry wood, and a windy day. The idea of fire was now alight in the mind of primal man. An idea so powerful it would change the course of mankind and modern civilization.
Going back to our wild roots in the woods, none of us would opt to leave the warmth of a campfire for a wet, cold, dark existence. No. Fire is our companion. Our comfort. Our tool.
The usefulness of this tool in outdoor self-reliance and living should be more than a hobby in the preparedness community. Fire is life out there! So is the fire that mysteriously flows through copper wire to power your home. This technology of fire was fueled by observations, ideas, questions, and notions from the first harnessed spark many years ago.
Fire craft continues to be a top priority for survival and thriving in both short and long-term situations. The building blocks are the same. Fire needs fuel, oxygen, and heat to live… and a bit of chaos.
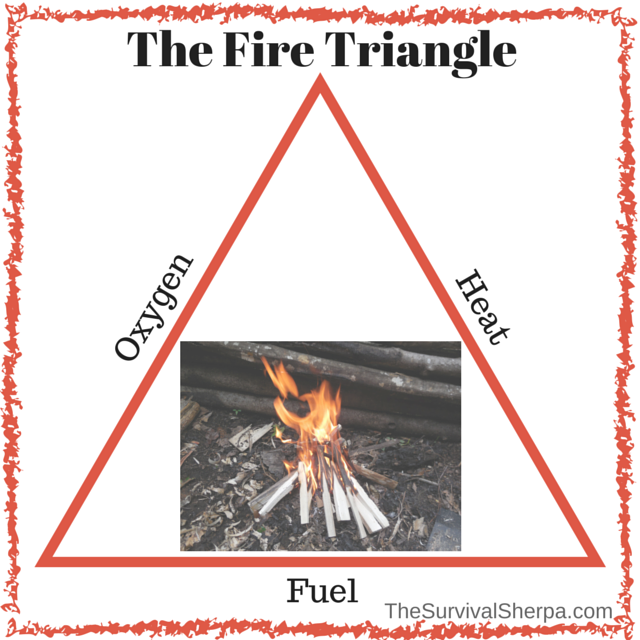
Every fire is built with these three sides
A breakdown of the science of combustion is in order…
Fire Triangle
We modern mortals think we’ve “evolved” past our simple ancestral fire-makers. Gas grills ignite with the push of a button. Convenience leads to forgetting fundamentals though.
Fire craft fundamentals, however, never change.
Heat (Ignition Sources)
- Open Flame Ignition – Bic lighter and matches
- Spark Ignition – Ferrocerium rod, flint and steel, rock on rock
- Solar Ignition – Magnifying lens and fresnel lens
- Friction – bow drill, hand drill, etc.
There is always air and sticks available in the woods I roam. But heat is the most difficult to come by, especially with primitive methods.
Here’s the science stuff – less the chemical equations…
To burn sticks, enough heat must be applied to drive moisture from the wood in the form of steam. Even ‘dry’ wood contains some moisture. Once the gas escapes, the white cellulose chars and turns to black charcoal. It’s the charcoal mixing with oxygen that produces the radiant, hypnotic flames. This heating process chars more cellulose on surrounding sticks to create a sustainable fire.
Here’s the practical stuff…
When teaching my grandson to build his first fire with one match, he asked why we had to collect all the tiny, pencil-lead size sticks for our fire. A quick demonstration trying to ignite a one inch diameter stick with the open flame from a match answered his question. The match stick, his heat source, was consumed before the large stick reached ignition temperature. Fuel size matters!
Once we had an established campfire, he watched that same fuel stick burn easily. Larger sticks take more heat to burn. Surface area was the key for him to start his one-match fire.
Surface area becomes even more important with spark ignition or coals from friction methods. Only the driest, finest tinder material should be used. Inner barks, leaves, grasses, seed heads, and other fluffy stuff should be used to build a tinder bundle with the coarser material on the perimeter and progressively finer (hair-thin) in the middle. This is where your sparks or coal will land to ignite the bundle.
Oxygen
As mentioned earlier, air is the easiest to come by. Burning sticks requires air. Take this side of the triangle away and you create charred material and lots of smoke. Which is good to know in making charred material for your next fire. But we want flames.
Fuel
The analogy of a fire’s meal plan can be found in the first post of our Bombproof Fire Craft series. We won’t rehash it here. But we need to cover how to arrange these three meals so flames can eat and grow into a sustainable fire.
My Top 4 Campfires
There are more ways to build a campfire than ways to use one. In colder, northern climates, you may need a long-fire the length of your shelter to sleep warm through the night. In my temperate Georgia climate, the following campfires work just fine.
No matter what style you build, do it safely. Clear a 4 to 5 foot area of all combustible material where you plan to build your campfire. Look up to make sure low hanging limbs aren’t directly over your spot. A fire pit, rock ring, or trench are handy for containing campfires. A container and nearby water is an added safety measure.
A fire’s meal plan consist of these three ingredients:
- Tinder: stuff that produces the initial flame – fine, dry, fluffy stuff
- Kindling: the next meal is smalls – tiny twigs to pinky finger size sticks
- Fuel: by now a coal bed of smalls will ignite thumb-size to larger sticks as a meal to satisfy your fire’s appetite
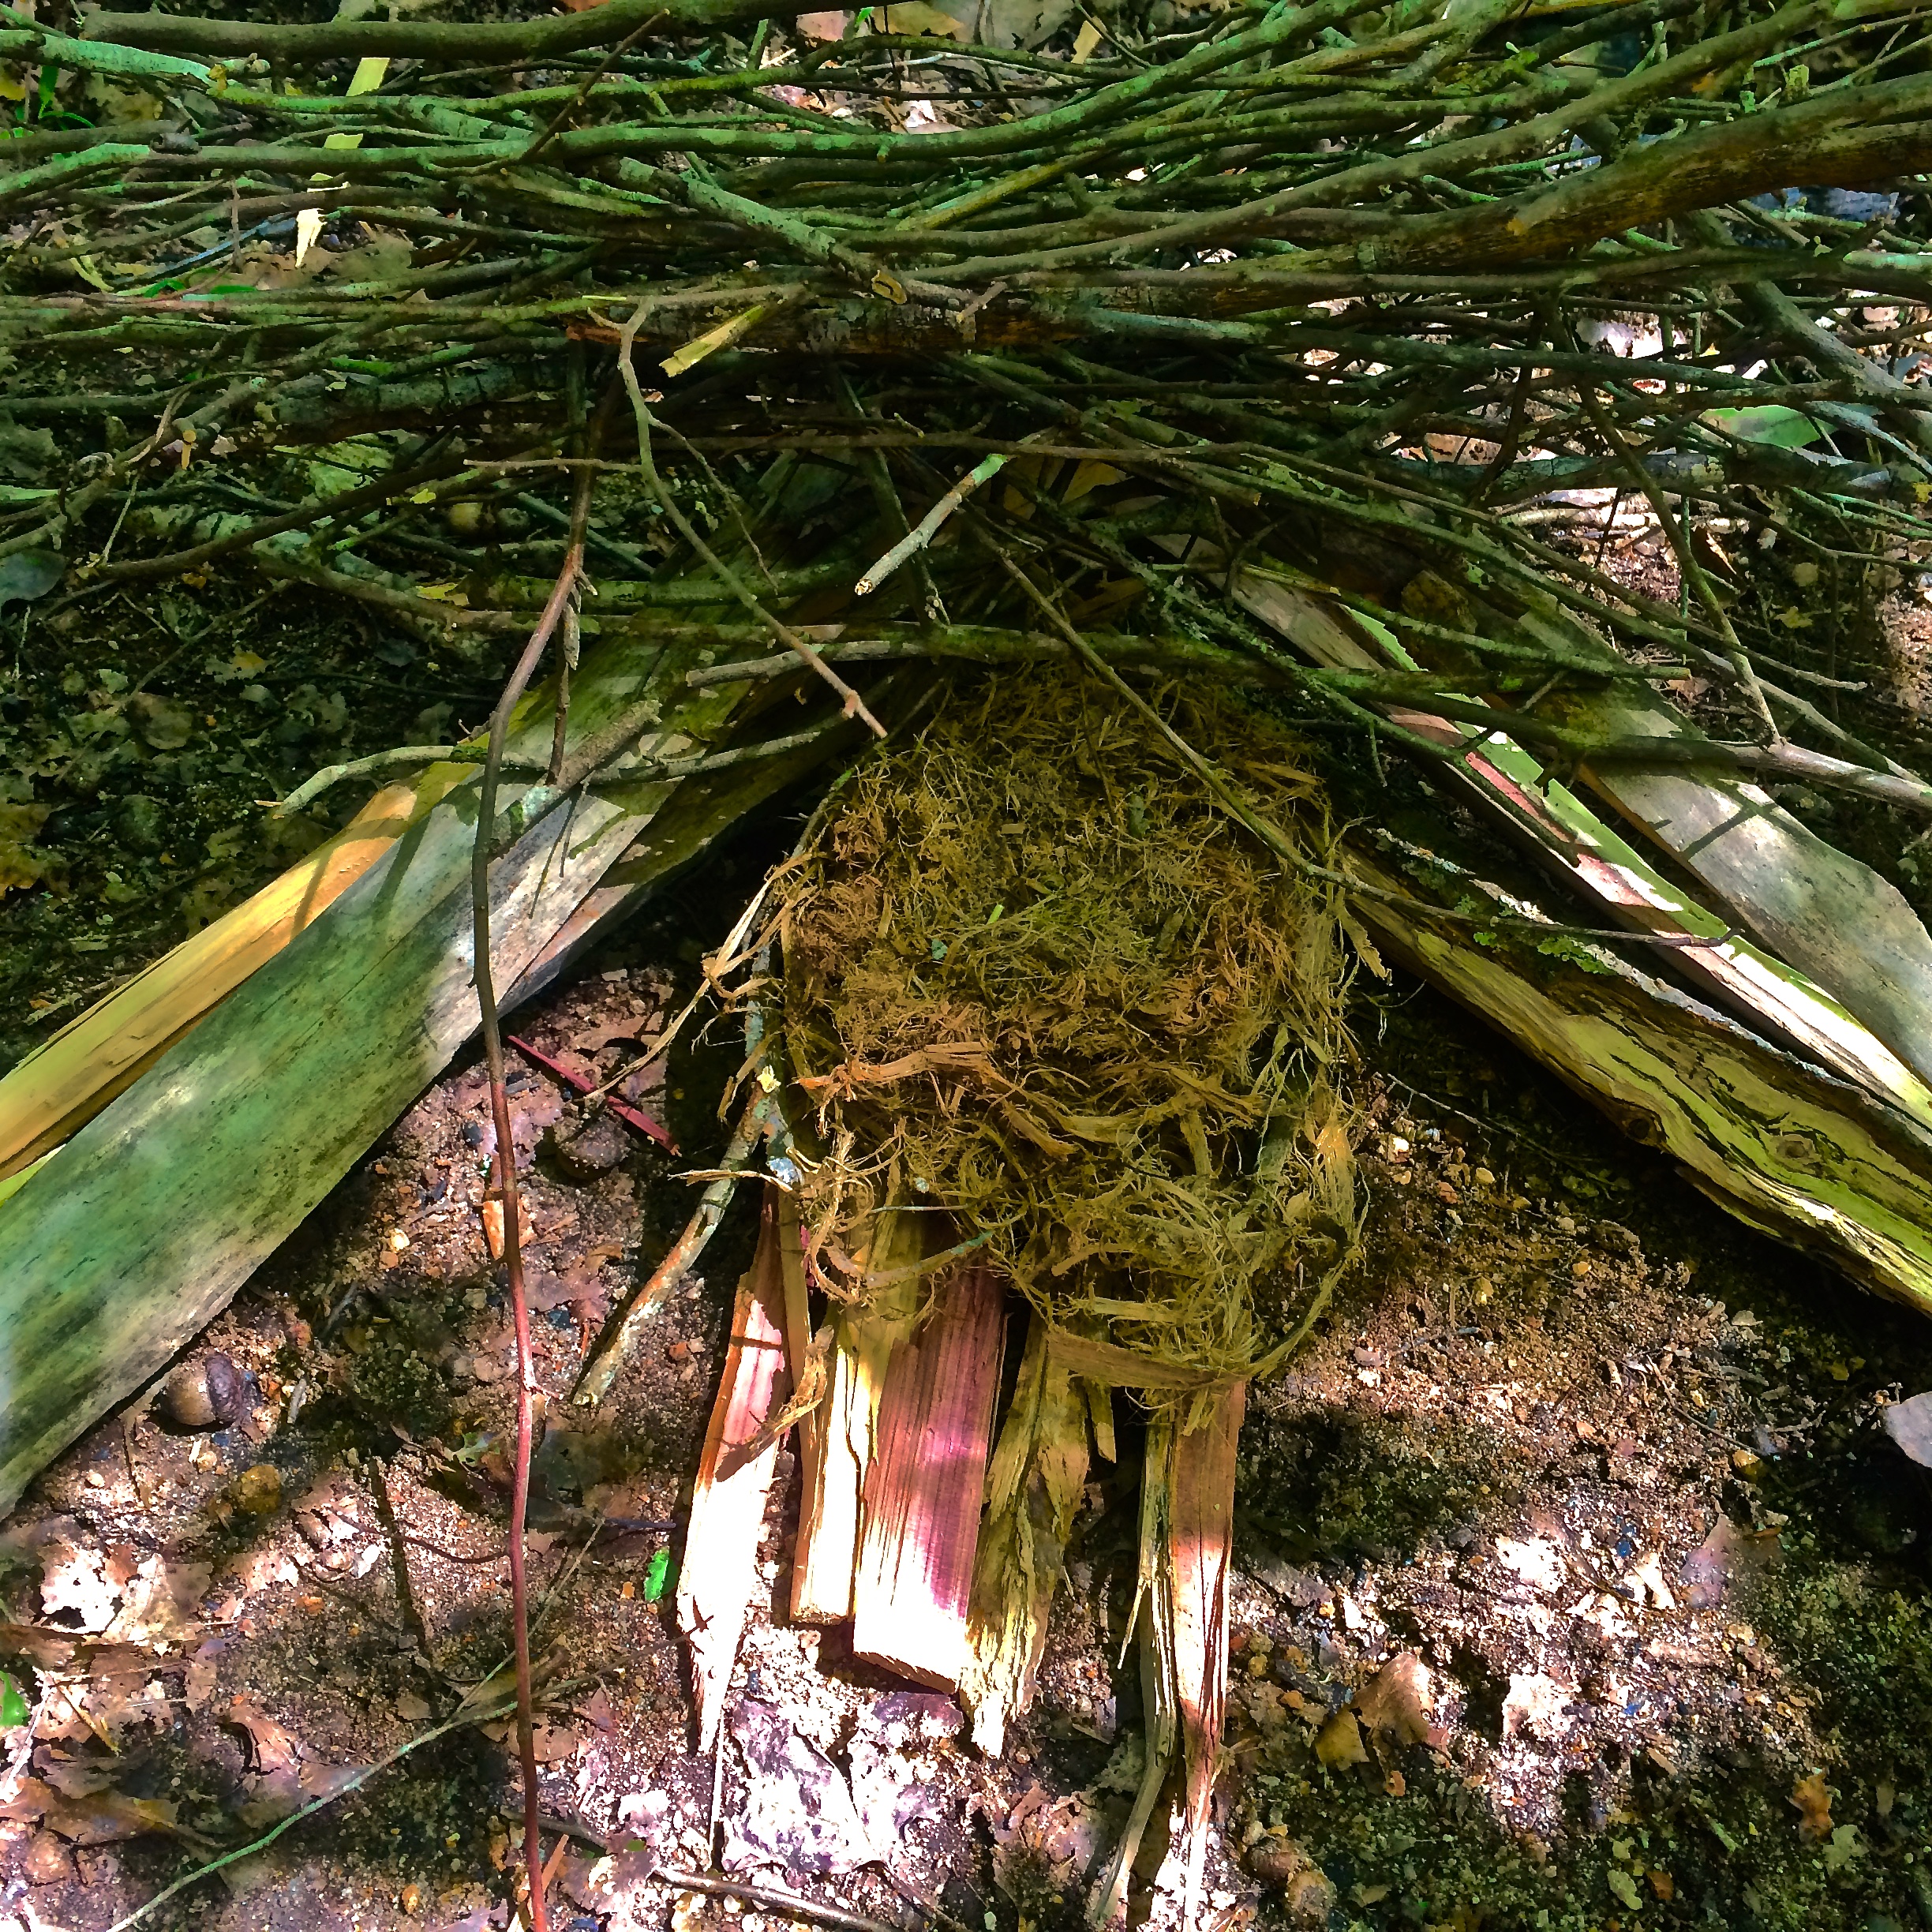
Ground conditions may require that you build a platform or bed to prevent your tinder from absorbing moisture and sucking heat from your initial flame. Use bark or a row of dry thumb-size sticks large enough for your tinder bundle to rest.
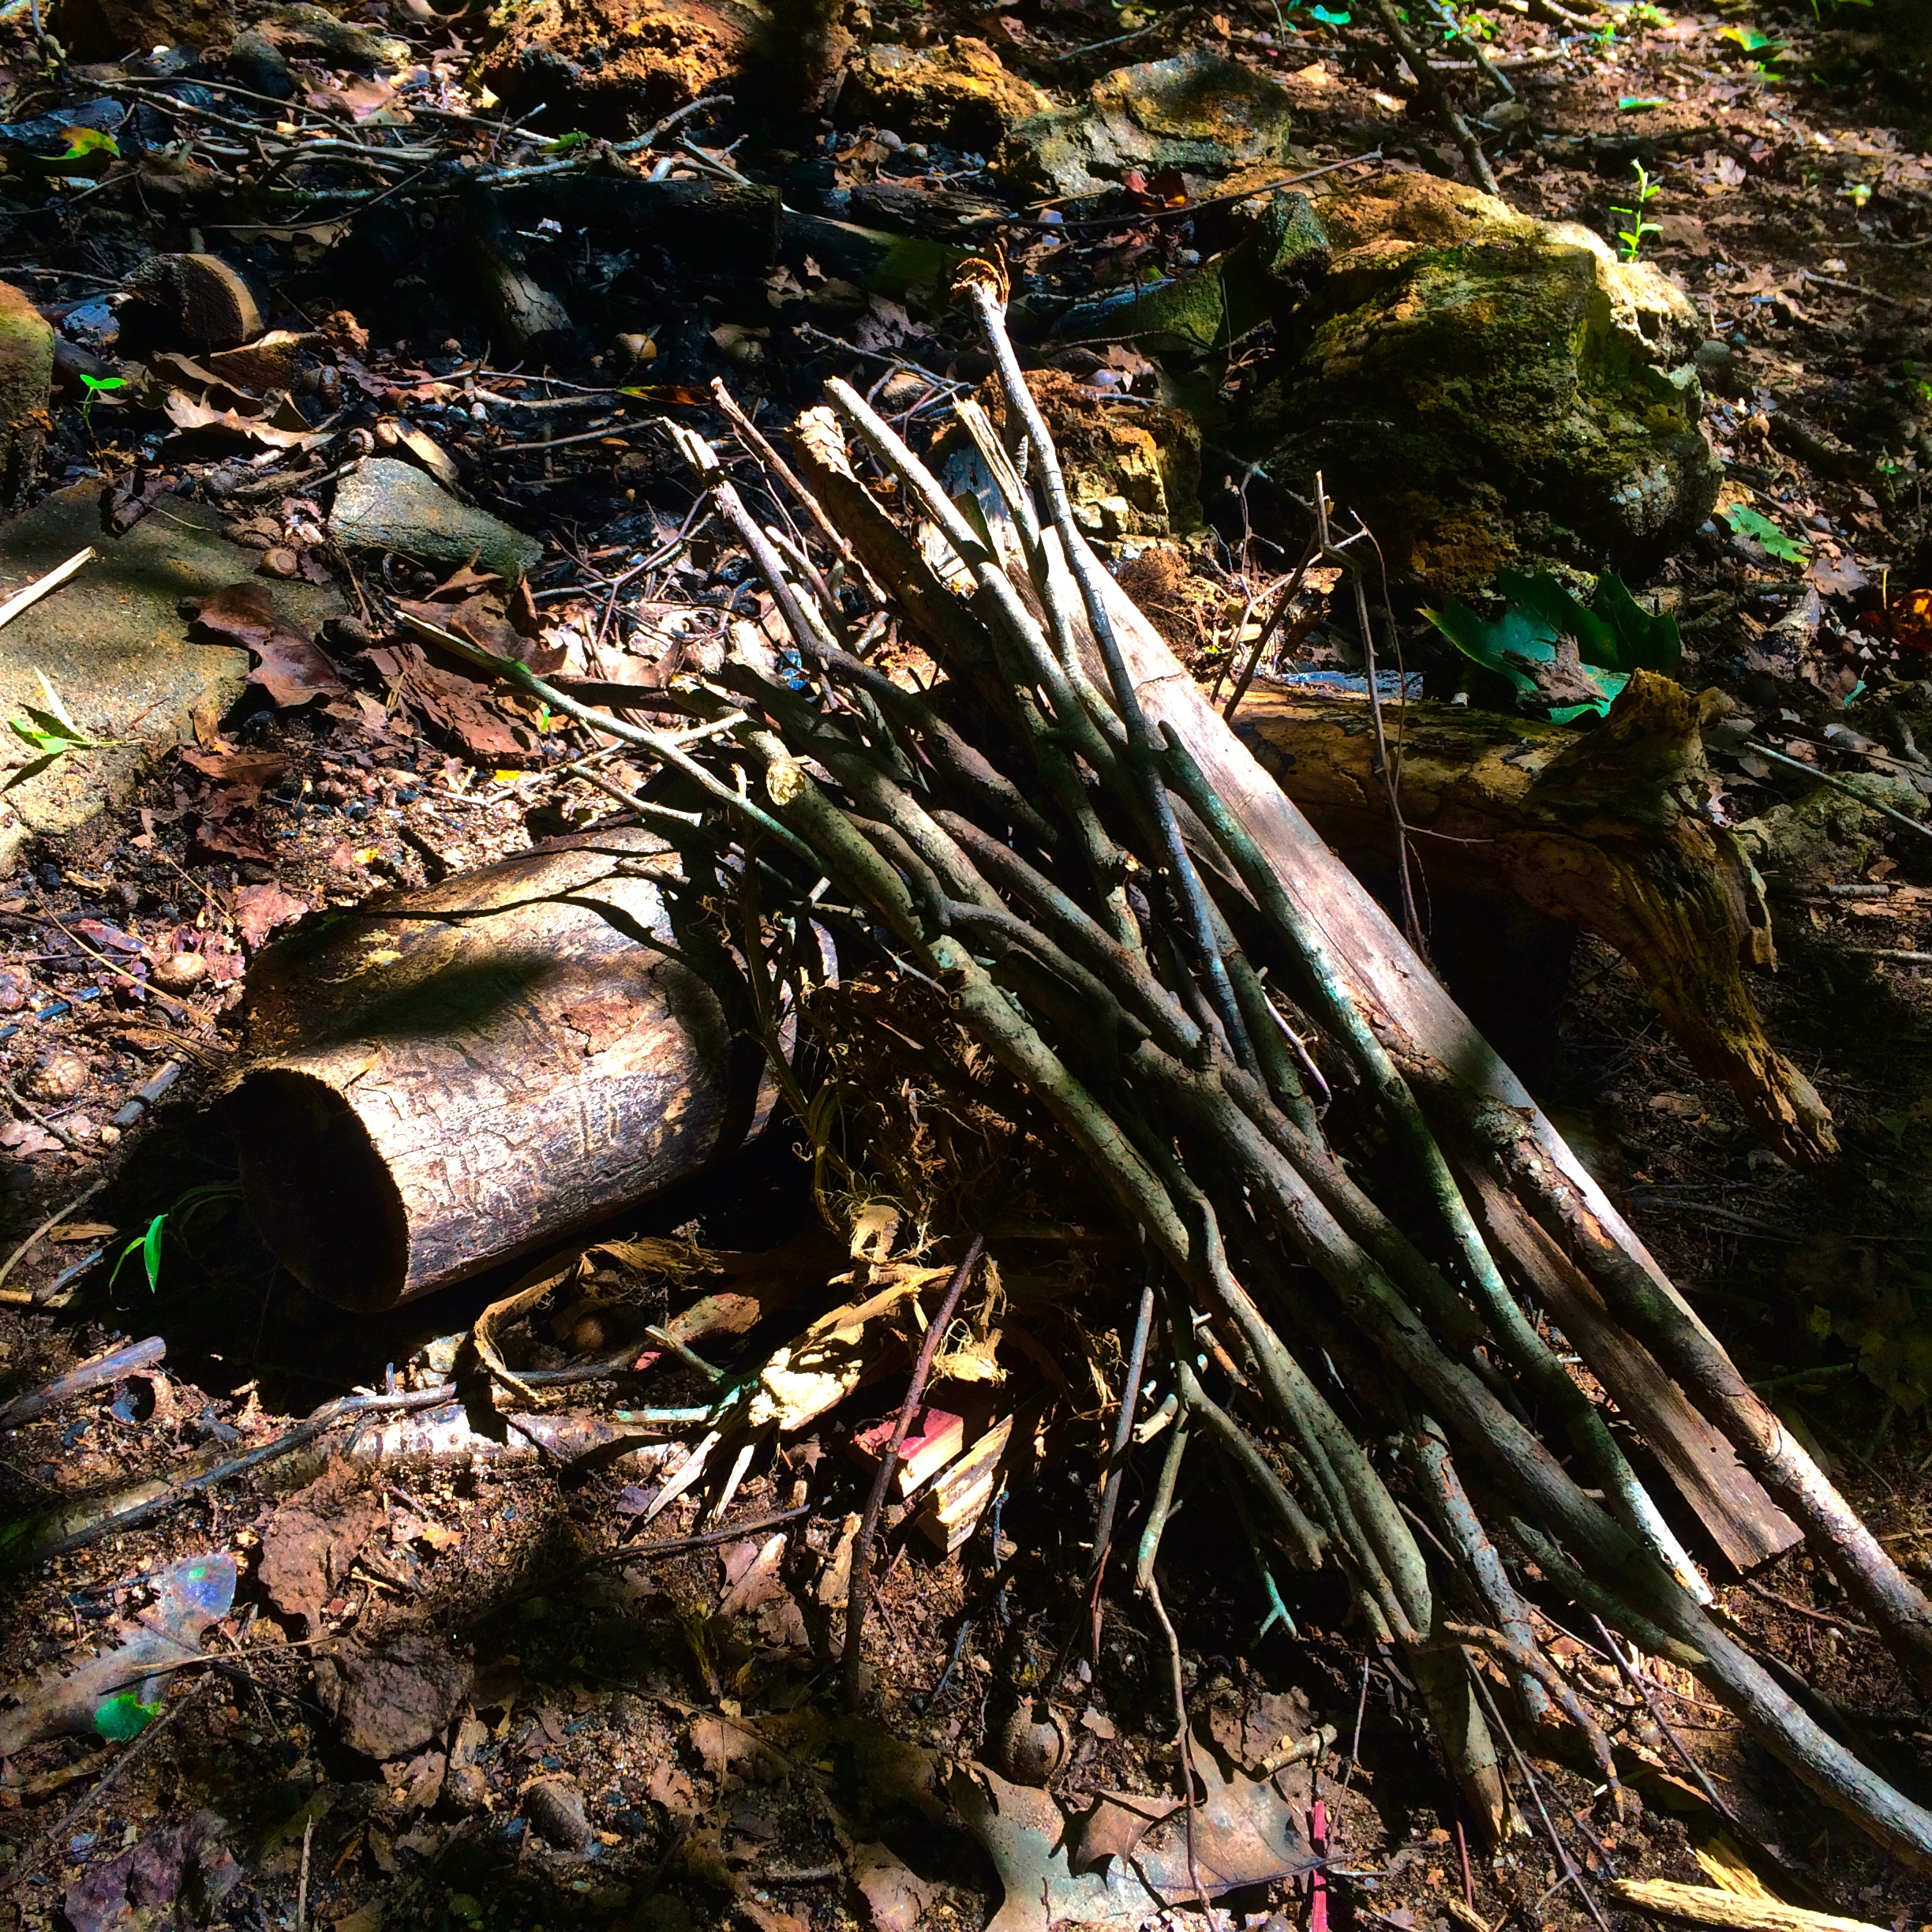
#1) Twig Fire Lay
When I need a fire that’s hot and fast, this is my favorite down n dirty fire lay. It’s ugly but remember… Fire don’t care about pretty!

Down n Dirty Twig fire will boil 32 ounces of water in under 5 minutes easily
Collect a double armful of dead-hanging smalls (pencil lead to pencil size). Bunch them together in a two foot bundle the diameter of a soccer ball. Break them over your knee in the middle forming an A-frame. Balance the bundle with the tip of the A-frame pointing up over your tinder source.
Light the tinder and let it eat. As it burns through the smalls, toss more kindling on top like Pick-Up Sticks. Fire loves chaos!
#2) Split Rail Fire Lay
This fire lay is basically half of a Log Cabin fire lay.

Split rail fence with a cedar platform to keep the tinder off the ground
Stack thumb to wrist size fuel alternately to form a corner about 5 to 6 inches tall. The gaps between the fuel should look like a stacked wood fence. This allows plenty of air flow. Lay a large bundle of pencil led size twigs on top of the stacked corner. Ignite your tinder material inside the corner and roll the twig bundle over the top of the flames and let it eat.
Ready for ignition
As the flames lick through the top of the twig bundle, lean progressively larger fuel in the corner split rail fence. You’ll end up with a Lean-To fire lay as you add the larger fuel.
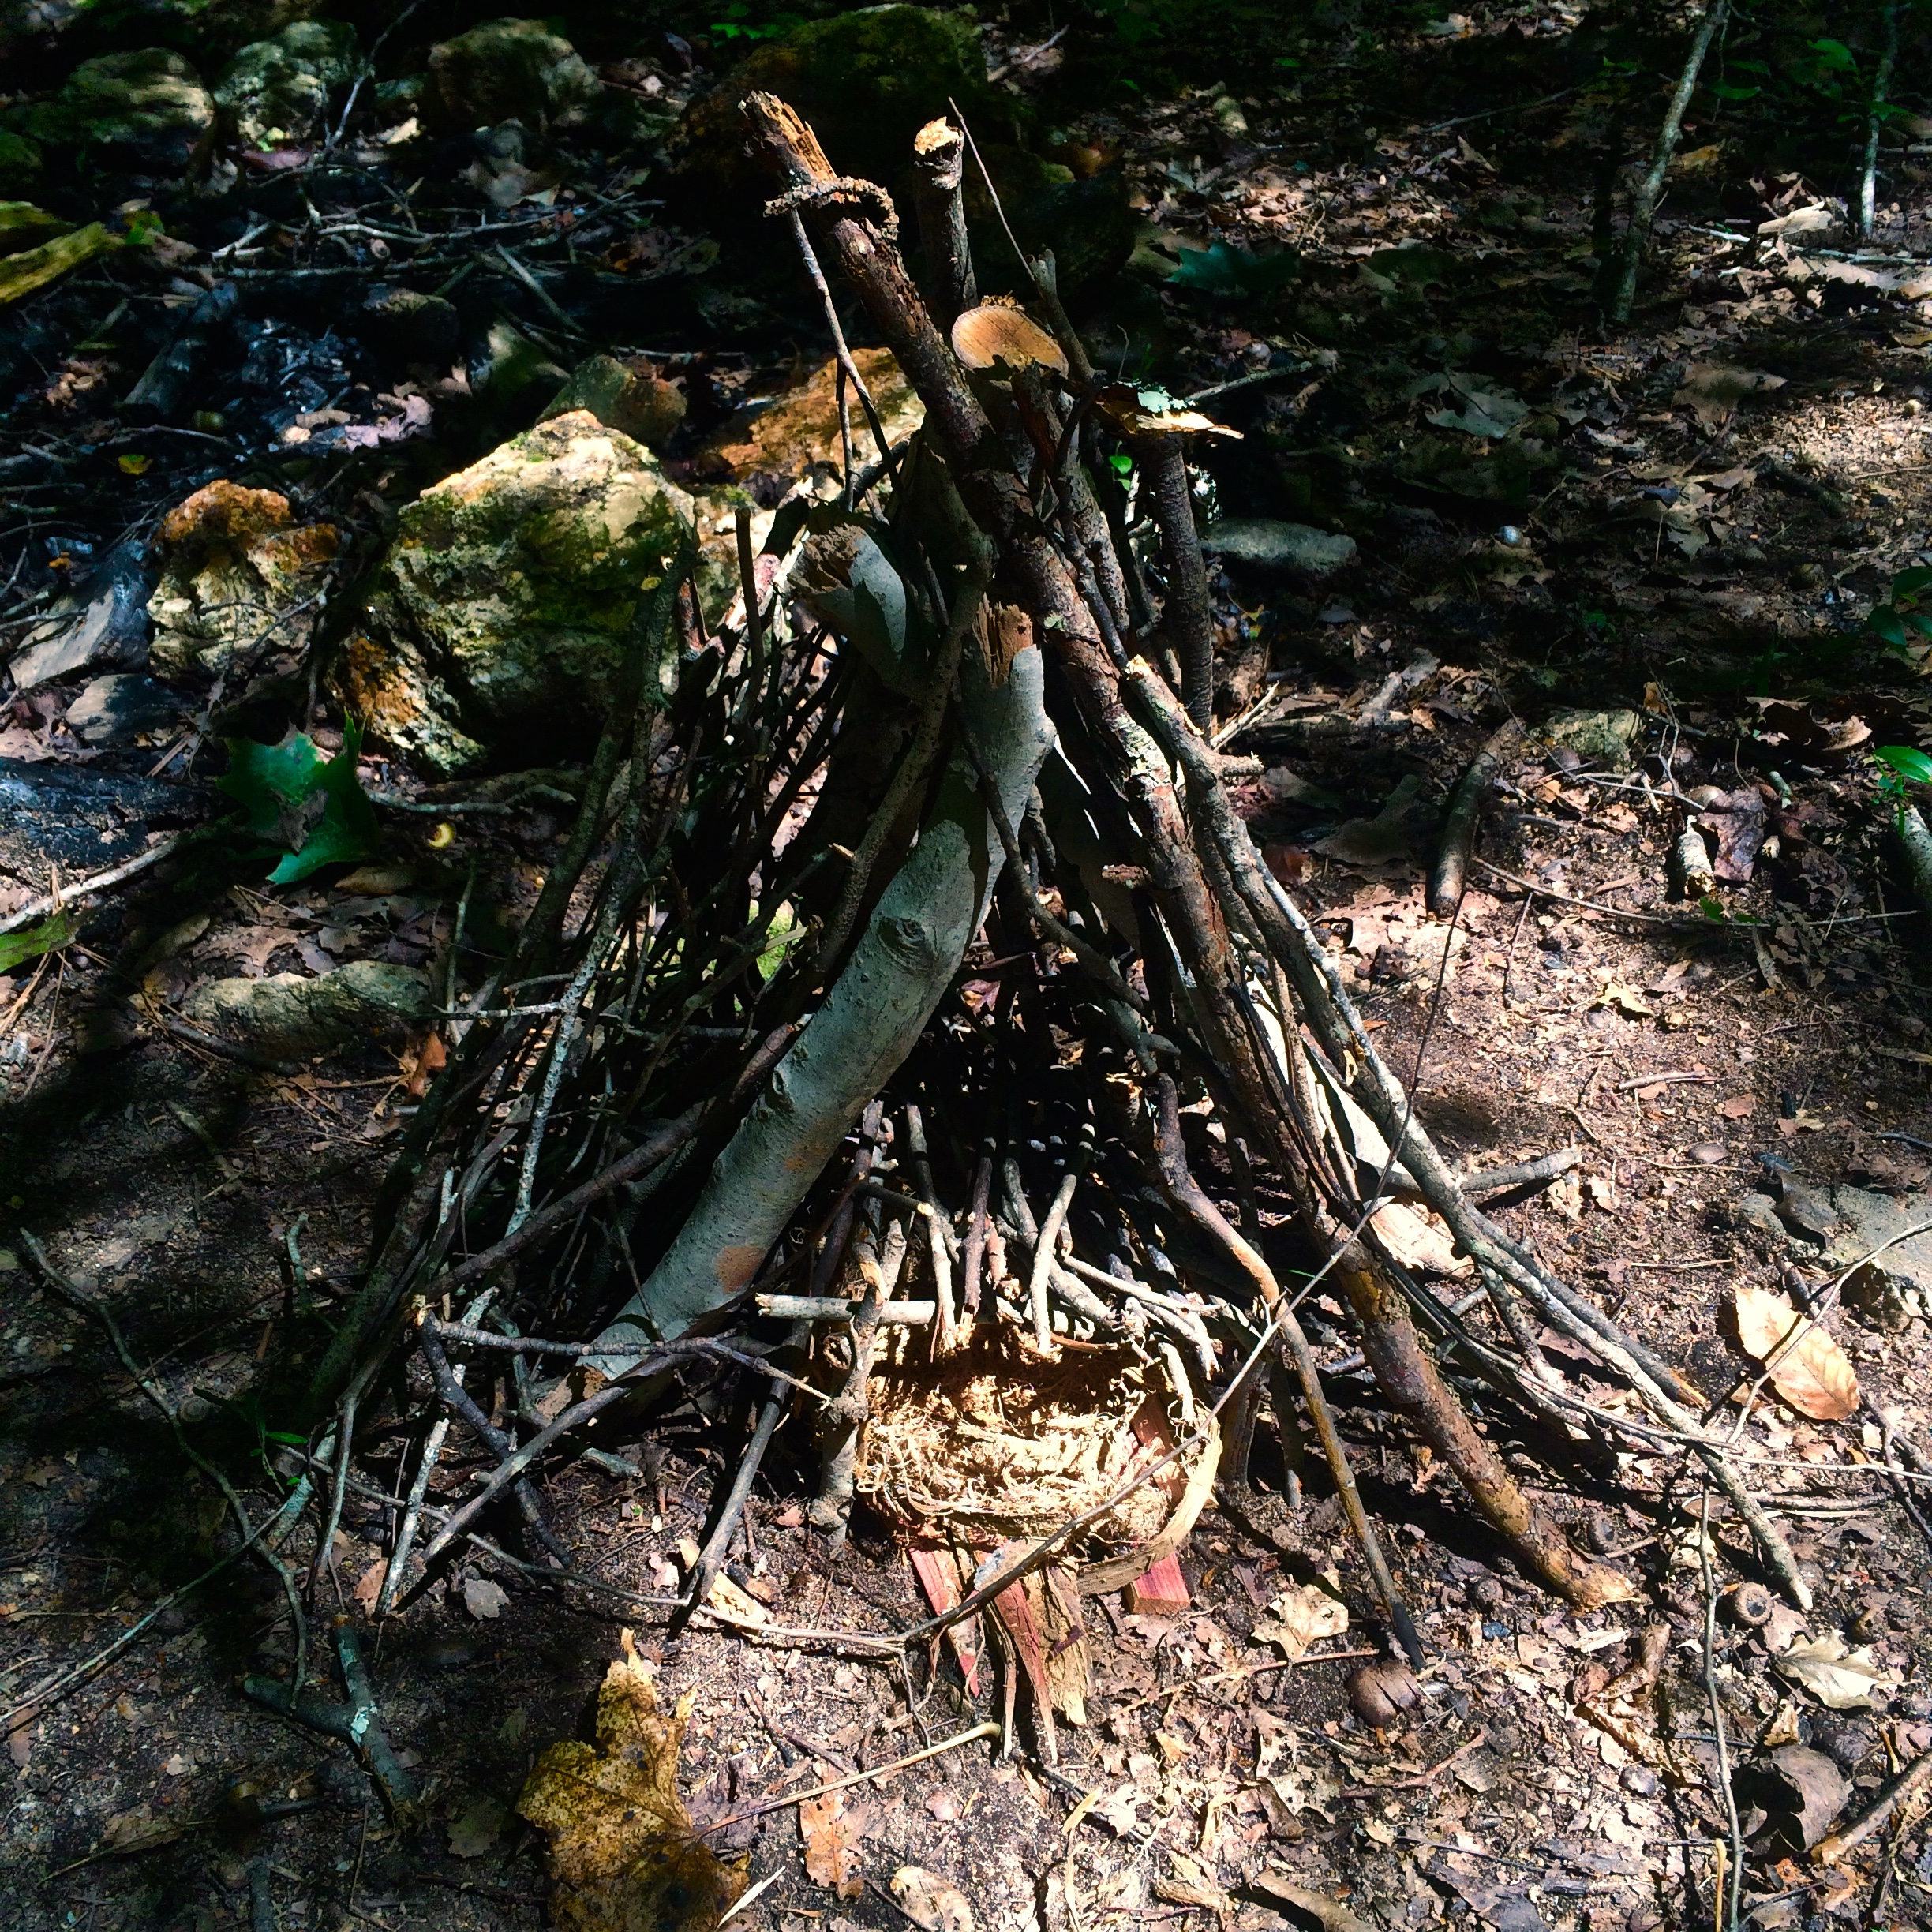
#3) Tipi Fire Lay
Tipis are ingenuous in design. The conical shape allows intense heat to rise up through a progression of kindling to ignite larger fuel. Tipi fires can burn even in rainy conditions. Tight placement of log-size fuel shelters the coal bed while allowing enough air flow for a long burning fire. This style is also useful for drying wet firewood.

Lean smaller kindling against the square platform above the tinder in tipi fashion
Four small Y sticks can be used as supports to build a raised pyre (pronounced like fire) to keep tinder off the ground and support the preceding pencil size kindling poles of your tipi. In the above photo, the tinder is under the pyre. Either way will work.
Now you’re ready to lean small kindling poles around the tinder material and pyre at the center of the tipi. Leave an opening in the tipi to light the tinder. Continue building on top of the first layer with progressively larger kindling to fuel-size material interlocking at the peak. As it burns, the inner layers will collapse to create the coal bed needed to ignite the fuel poles. Keep adding fuel poles to maintain the structure.
Two fuel logs, one with a Y at one end, offers a sturdy frame for the tipi
#4) Lean-To Fire Lay
Like a lean-to style shelter, you’ll need a large log to brace the kindling and smaller fuel material on to create a pocket for your tinder.
The brace log is heated and charred as the kindling burns and lasts a long time before being consumed. The brace log can be turned to shield or funnel wind depending on the need.

A front view of the Lean-To with larger fuel
Once the fire burns down, add another larger fuel log parallel to the brace log and you have a ready-made platform for cooking over the coals.
Practice Makes Permanent
Notice I didn’t use the word perfect. There are too many methods and variables involved in fire craft to ever perfect the skill. But like all good fire-makers, you have to spend time Doing the Stuff to make the skill permanent.
A recent text gave me the pleasure of some much-needed dirt time with my buddy, Kevin Bowen, who wrote a recent article on Horace Kephart and Classic Camping for our blog. He helped me process cedar and tulip magnolia bark for tinder material, collect smalls, build the fire lays, and used his magnifying lens (solar ignition) to bring the tinder to flame.
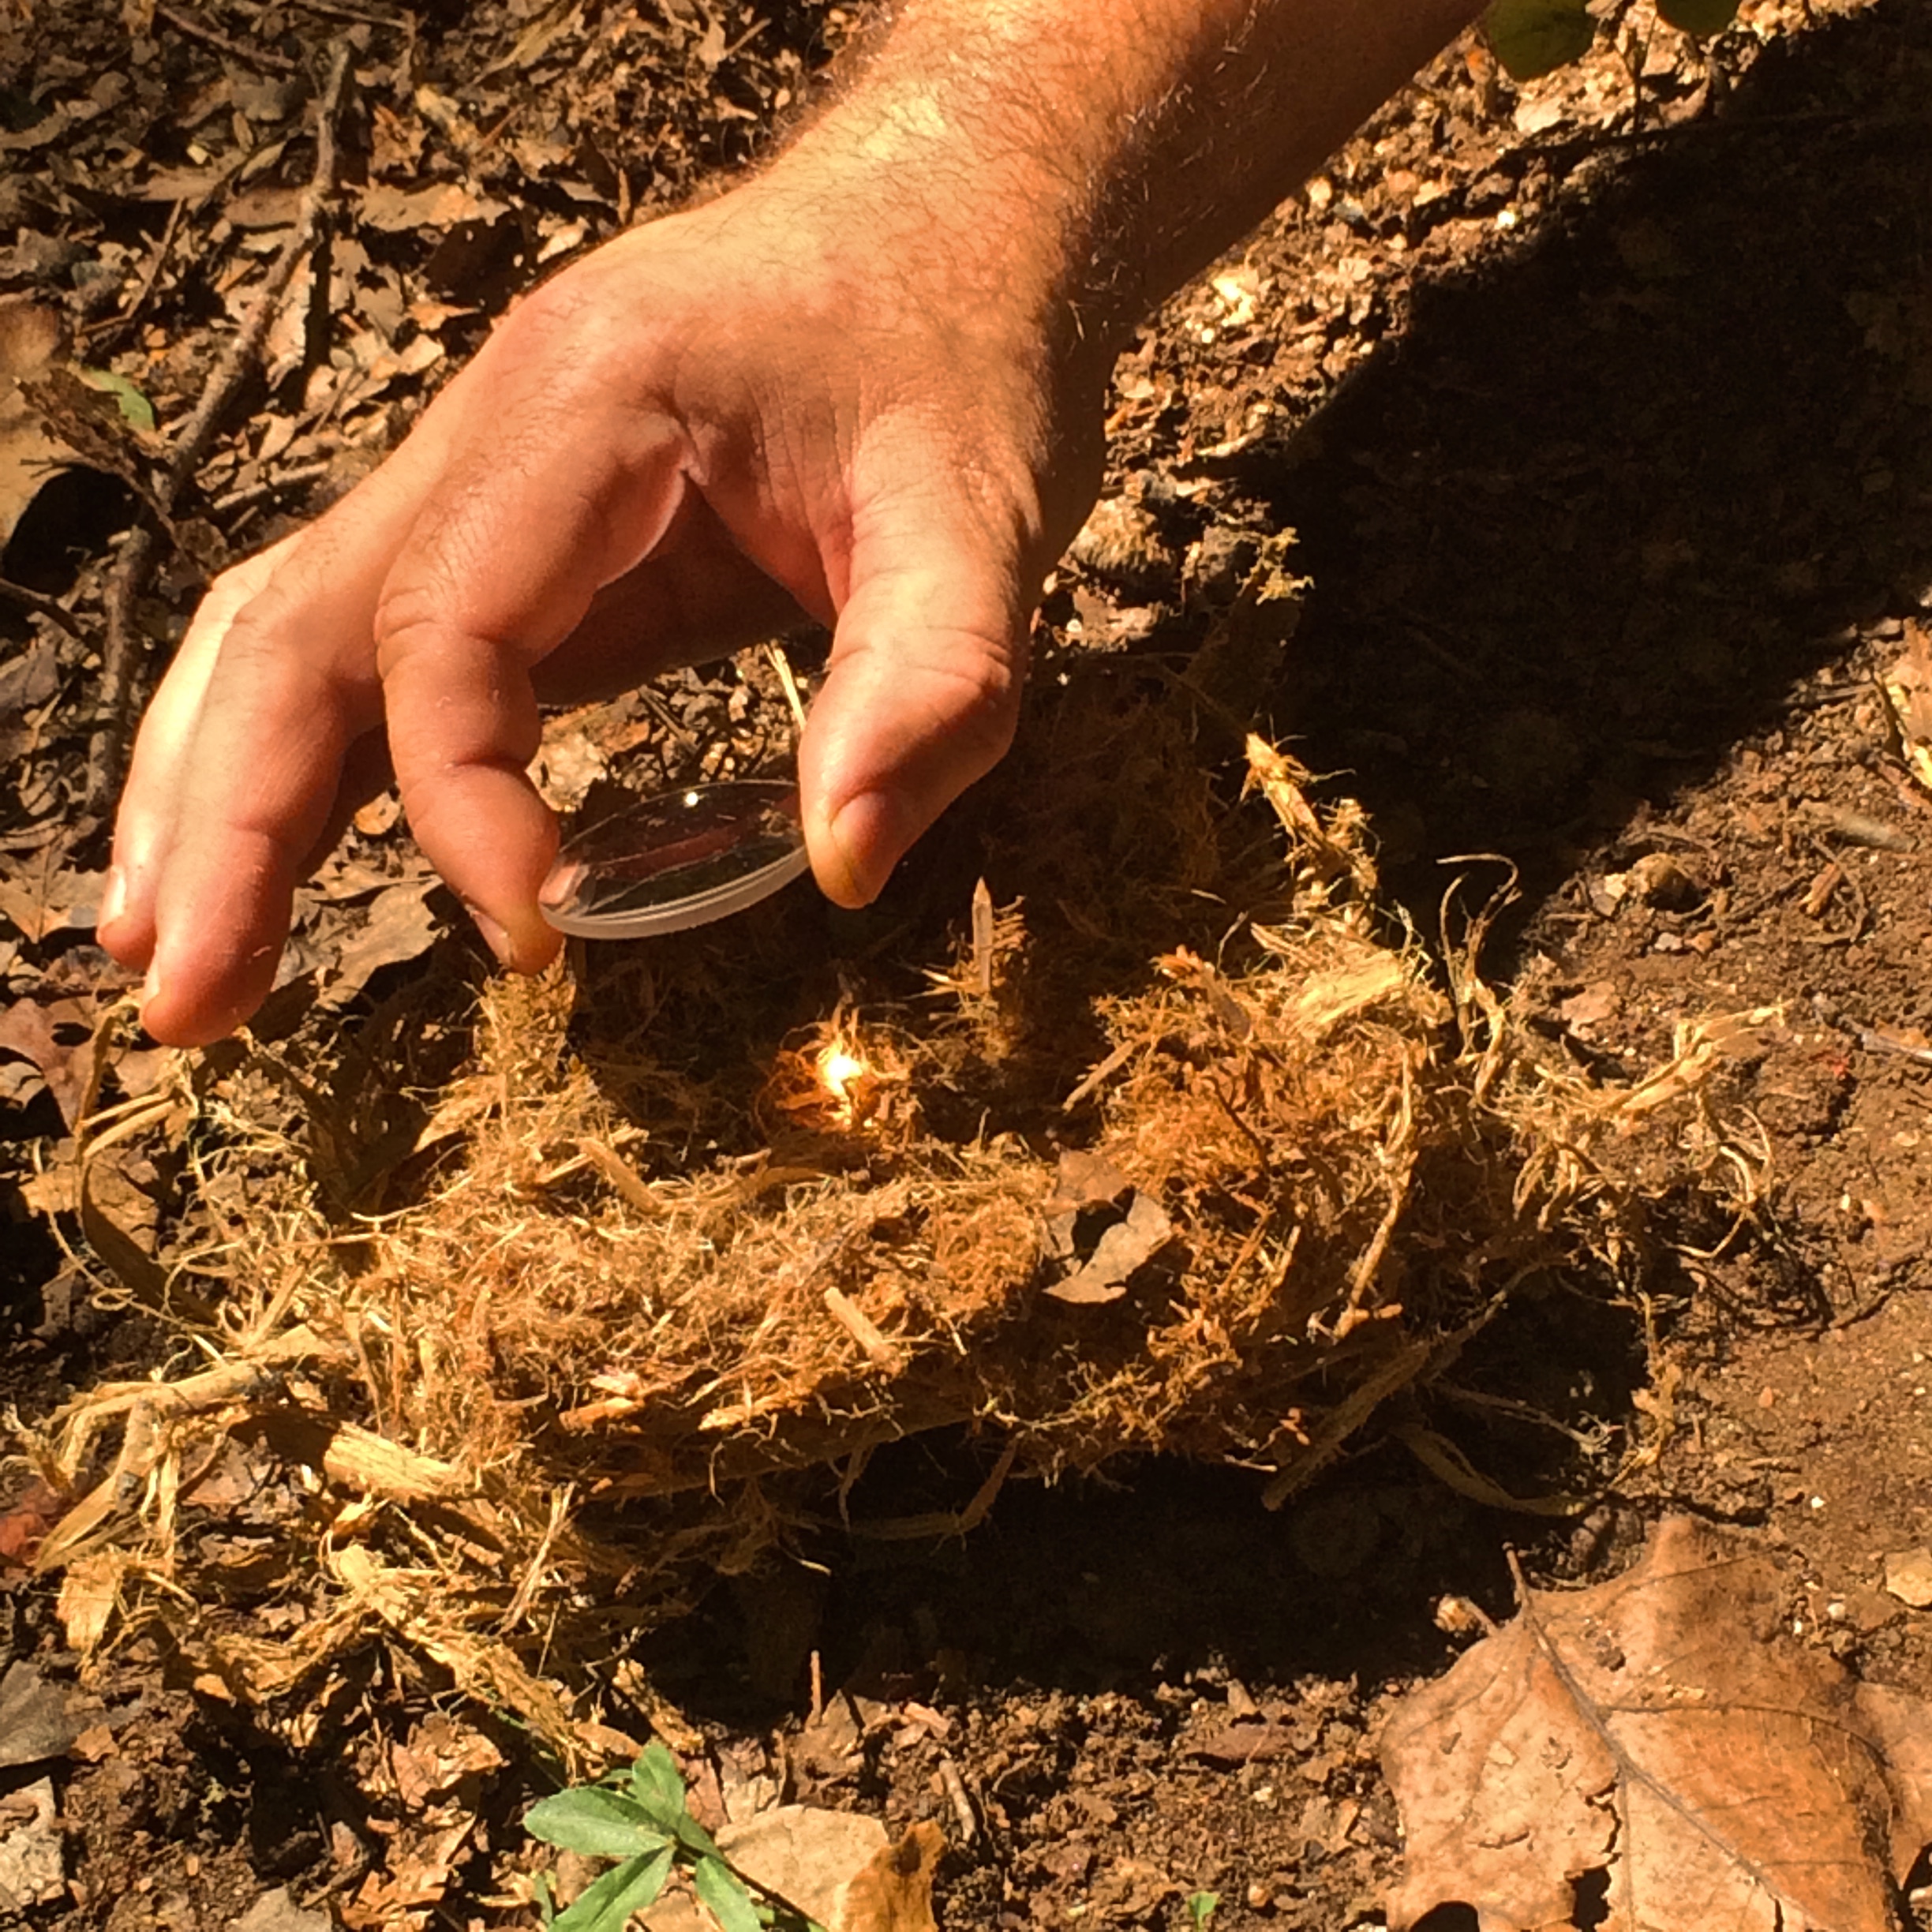
Solar ignition saves other fire resources
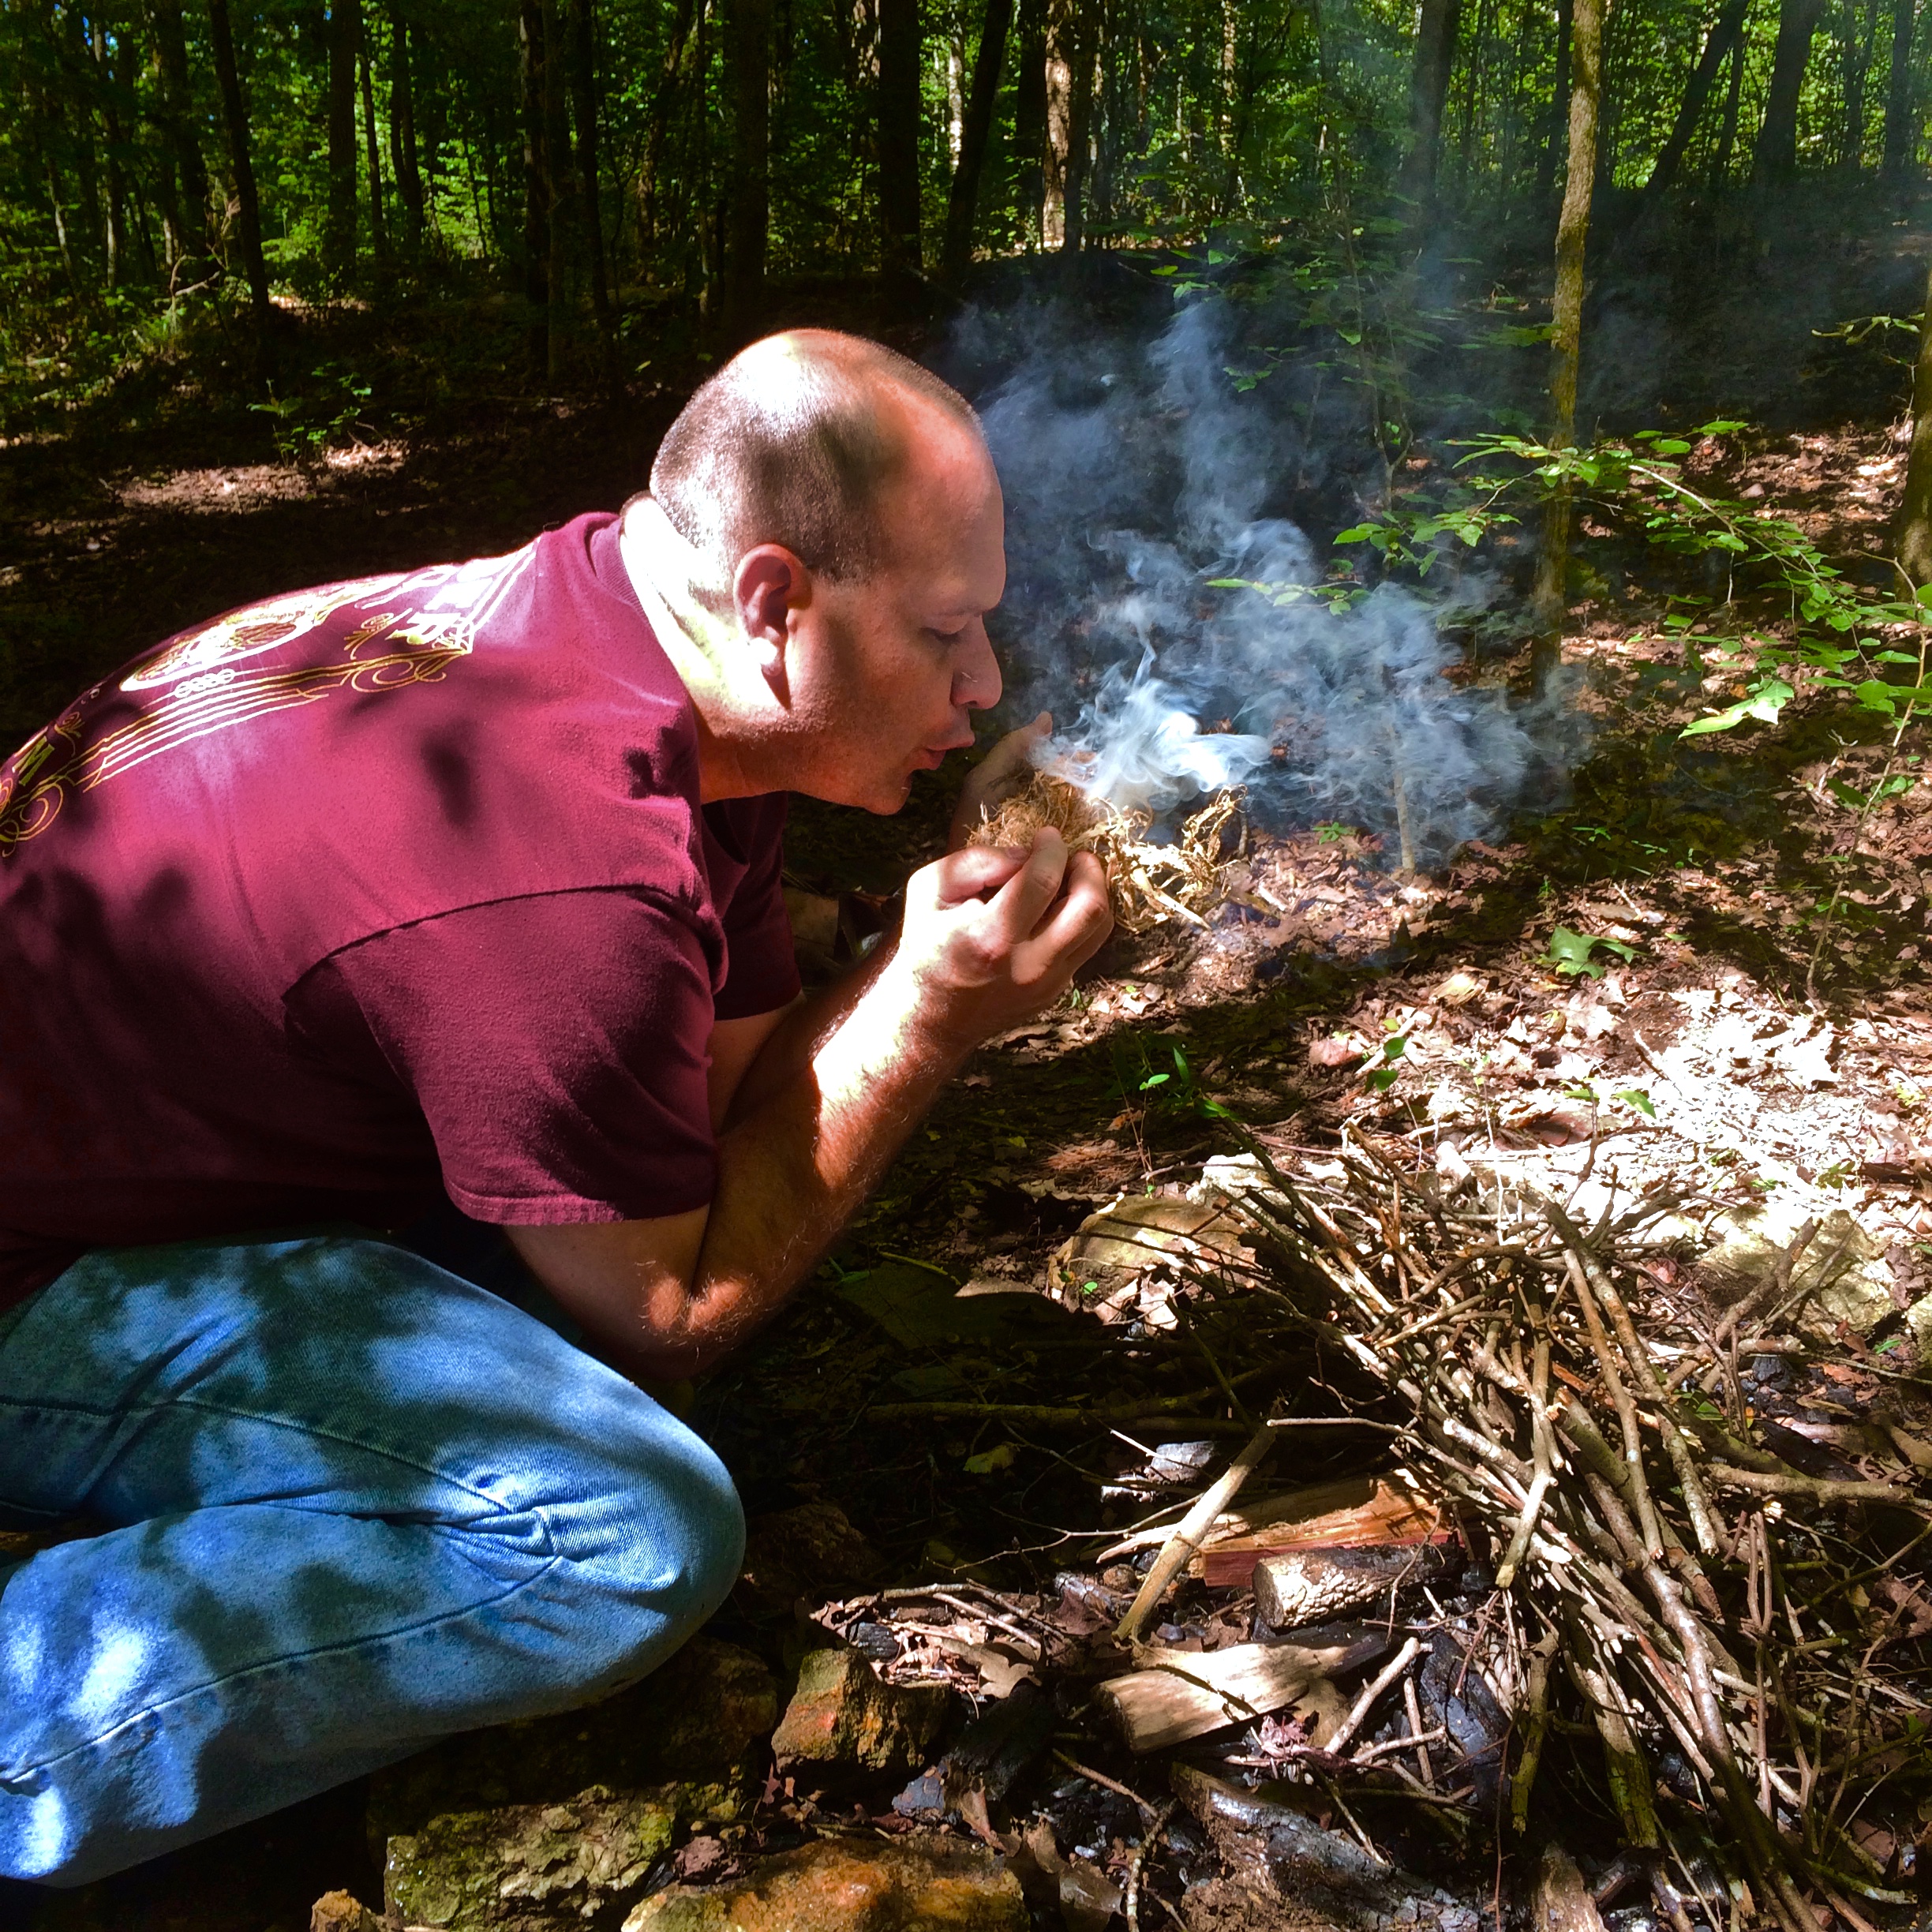
Kevin blowing the tinder bundle into flames and placing it under our Twig Fire Lay

Chaotic success!
I purposely didn’t include other worthy fire lays in this article. Now it’s your turn…
If you have a favorite fire lay not mentioned here, share it in the comments. We’re always learning together!
Keep Doing the Stuff of Self-Reliance,
Todd
P.S. – You can also keep up with the Stuff we’re Doing on Twitter, Pinterest, Google +, YouTube, Instagram, and Facebook… and over at the Doing the Stuff Network.
P.P.S – If you find value in our blog, Dirt Road Girl and I would appreciate your vote on Top Prepper Sites! You can vote daily by clicking here or on the image below. Check out all the other value-adding sites while you’re there… 
Thanks for Sharing the Stuff!
Copyright: Content on this site (unless the work of a third-party) may be shared freely in digital form, in part or whole, for non-commercial use with a link back to this site crediting the author. All links in articles must remain intact as originally posted in order to be republished. If you are interested a third-party article, please contact the author directly for republishing information.


Pingback: How to Build 4 Down-N-Dirty Campfires | Redrock Outdoors Life
A nice chapter for a bushcraft survival manual!
LikeLike
Good, solid stuff.
LikeLike
Thank you, Steve.
LikeLike
THANKS ,inspiring , Its been awhile ,its time to get back to nature ….when I went thru my divorce I was devastated and self destructive for the last 8 years….digging out my mocs and heading back in the woods…. Rick
LikeLike
You’ve got dirt time to catch up on, bud! Keep us posted on your journey.
LikeLike
“Fire don’t care about pretty. It eats ugly. In fact, fire loves chaos.”
This is one of the finest lines I’ve ever read when it comes to fire-craft. Way too often people get caught up in building the perfect log cabin or tipi, and not enough time developing a good tinder bundle or gathering tinder and kindling. I myself have been guilty of this more often than I care to admit! Thanks for the reminder that building a good fire is better than building a pretty fire!
LikeLike
Thanks, Wade. Kevin will tell you how irritated I got building that tipi lay. My ugly twig fire lay is so effective when, as you mentioned, I collect the proper smalls and process enough tinder material to catch the bundle on fire.
Keep doing the stuff, Wade!
LikeLiked by 1 person
Pingback: How to Build 4 Down-N-Dirty Campfires - Survivalot
Pingback: 7 Secrets for Burning Sticks in the Rain | Survival Sherpa
The Altoid mini tins are great for carrying hardened pine sap in. They are small, light, and fit into a backpack easily!
LikeLike
Pingback: A Beginner’s Guide to Avoiding Bloated Bushcraft | Survival Sherpa
the lean-to fire is genius.
I never thought of that one
LikeLike
Glad you liked it Ray.
LikeLike
Pingback: Survival Times: A Winter Survival Skill Where Speed Counts | Survival Sherpa
Pingback: Campfires From Scratch: No Boy Scout Juice Required | Survival Sherpa
Pingback: Making Fire: The ULTIMATE Guide - Southern Dreams Homestead