by Todd Walker
I stand in countless hardware stores mumbling my frustration… “can I get a double bit ax handle, please!?”

Finding a suitable handle for a double bit ax restoration project is like searching the proverbial haystack for that lost needle. It’s a horrible waste of time. I could have ordered a handle from a few U.S. ax handle suppliers. But I’d never made my own ax handle.
Mike, our across the street neighbor and good friend, had a large hickory snap in a recent storm. I loaded my chainsaw and wood cutting tools into our garden wagon, pulled into his yard, and cut the fallen tree into firewood lengths.
One four-foot section at the base of the tree had spit down the middle in the fall. For some reason, I didn’t cut these two split sections into firewood. A few weeks later I’d understand why…
Mike was taken from us. The unexpected, sudden loss of his life nudged me into action. The two uncut sections eventually made their way to my backyard for a labor of love.
Before the ingenious Paleo person came up with the idea of lashing a stick to a sharp stone, people simply palmed axes in their hands to chop stuff. The invention gave primal man leverage and a powerful mechanical advantage needed to work more efficiently. Later, in the Iron Age, this idea changed the course of human history when wooden handles were attached to metal cutting tools. Doing the Stuff of Self-Reliance just got easier!
To make your own ax handle, here’s some stuff you’ll need…
Tools and Material
- A Tree ~ Hickory was available so I used it. Other suitable trees include ash, white oak, sugar maple, or hornbeam (ironwood). A tree with a diameter of at least 10 inches with straight grain will give you the best chance at finding a billet to use.
- Wedge(s), Sledge Hammer, and/or Spitting Maul ~ A metal wedge is used to split the round into quarters. A splitting maul can be used if you don’t own a wedge. Wooden wedges can be used after the initial split in the log.
- Ax or Hatchet ~ Used to cut the rough shape of the handle.
- Draw Knife ~ Refines the shape
- Rasp ~ For removing detailed amounts of wood
- Shaving Horse ~ Holds stock in place while working the draw knife or rasp. A bench vise will also do the job.
- Wooden Maul ~ Hitting stuff
- Pencil and Measuring Device ~ You’ll do a lot of drawing and measuring
- Fine-Toothed Saw ~ Cutting the slot to accept the wedge and cutting handle to length. I used my Japanese saw from my carpenter’s tool kit.
- Sand Paper – 80 and 150 grit
Here are the steps used to make my handcrafted hickory handle which holds sentimental value.
Step #1: Split the Log
Lay the log on flat ground. My log was already halved when it fell. With a full round, drive a wedge in the top of the log to start a split down the middle of the wood. Continue the split with another wedge or splitting maul. Once separated, use an ax to cut any wood fibers holding the two pieces together.

Lay the half on the ground (flat side down) and split it into two quarters. Depending on the size of your log, you may need to cut quarters into eighths. Now you have billets with about 4 to 6 inches of bark on the outside of the wedged-shaped wood.
Step #2: Find a Handle
Look at the end of the billets and select one with annual growth rings that run straight through the length of your handle. Avoid billets that have twists and defects (knots).
The growth rings should run length wise on the long part of the rectangle
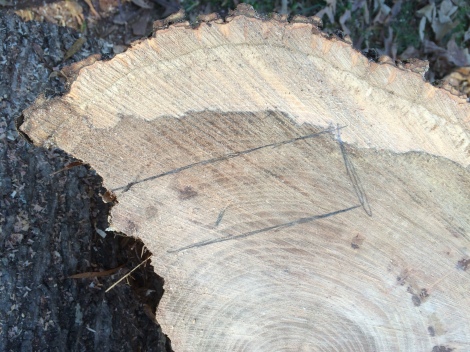
Draw a 1.5 x 5 inch rectangle on the end of the billet with the growth rings running as straight through the length of the rectangle as possible. The closer the growth rings are to each other the stronger the handle will be.

Baton an ax on the mark unless you’re very accurate swinging an ax
Stand the billet on end and score one of the long rectangle lines with an ax and wooden maul to start a split. Remove the ax and finish the split with a wedge. Repeat the process for the remaining lines on the rectangle. If all goes well, you’ll have a piece of stock in a rough rectangular shape.
Step #3: Hew the Handle
Stand the billet on a wooden anvil at a slight angle. Begin hewing the form of the handle. Score down the length of the handle in 1 to 2 inch spacing with a sharp ax or hatchet. Then go back and remove the score marks with controlled chopping/slicing motion of the ax. This technique is safely done by chopping with the ax perpendicular to the wood anvil.

Use a small ax or hatchet to remove as much wood as possible on the rough handle
Work down the billet on all the sides until you have a rough shaped handle. Remember that you can’t add wood back once it’s removed. But the more you take off in this step, the easier your job will be in our next step.

Step #4: Refine the Handle
Sketch an outline of handle shape on the roughed handle. Place the stock in a shaving horse or some type of vise that will hold securely.
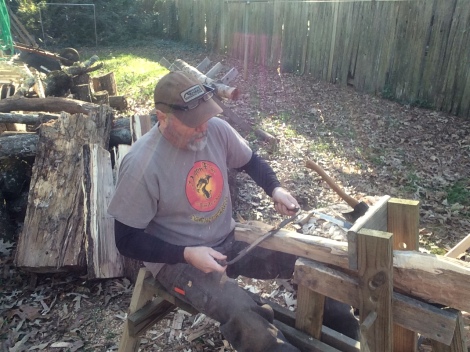
Way too much stock left for draw knife work… back to the ax work
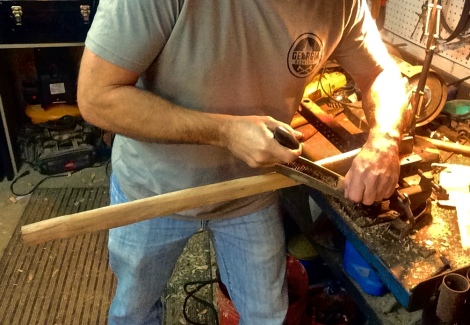
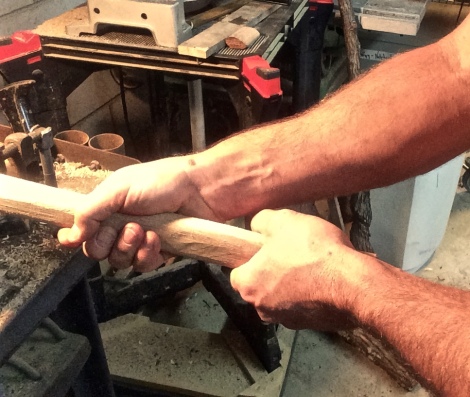
Begin shaving off the wood that isn’t the handle (outside the lines). A sharp draw knife is essential. Go with the grain to remove material. If the knife digs into the stock at a sharp angle, you’re going the wrong way. Turn the handle around and work the grain the other way.
Leave the handle portion that fits in the eye of the ax as a rough shaped rectangle for now. Concentrate on material removal on the shaft. The shaft should begin to take the shape of an oblong handle with narrow edges that run the same plane as the ax bit(s). The wider sides of the shaft help prevent the handle from turning in your hand when using the cutting tool.
Step #5: Rasp Time
Once the shaft is close to your finished size, begin removing wood from the head end with a draw knife. Check the size needed by placing the ax head against the end so that it is about a 1/4 inch larger that the ax eye. Place the axhead against the end and draw a line from the inside of the ax eye.
My marker wouldn’t fit and draw inside the eye very well so I finished the outline free-hand
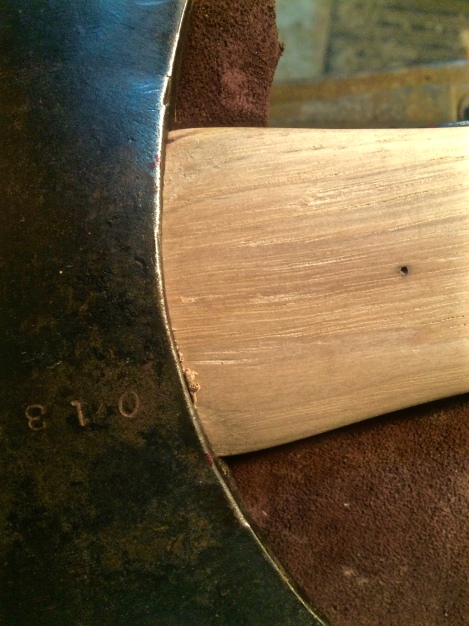
Secure the handle and begin removing wood from the head with a rasp. Get the head close to size and try fitting the axhead on the handle. If it goes on the tip of the head, tap the butt of the handle with a wooden mallet or maul until the axhead stops moving on the handle. You’ll hear a ringing sound instead of thud once it’s seated.
Remove the axhead from the handle. You’ll see marks on the head showing you how much more wood needs to be removed for a proper fit. Rasp more off the head end and check the fit again. Take your time and remove small amounts of wood until the axhead fits down to the shoulder of the handle with at least a 1/4 inch sticking out of the top of the ax eye.

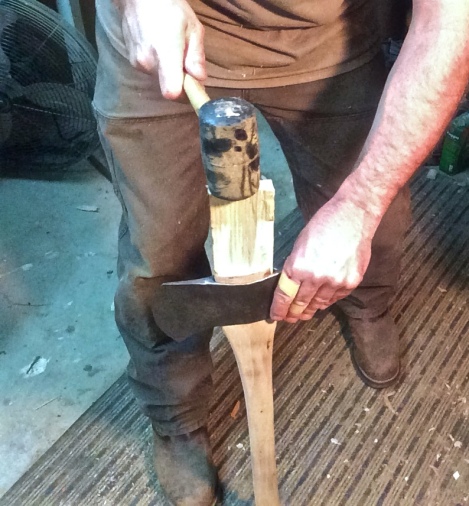
To remove the axhead from the handle, I carved another piece of hickory slightly smaller than the ax eye but larger at the opposite end to be used as a punch. Place the axhead on a raised platform so that the handle is off the ground. I used my shaving horse for this task. Drive the handle out of the eye with the wooden punch and hammer or wood maul. You’ll do this procedure several times while testing the fit.
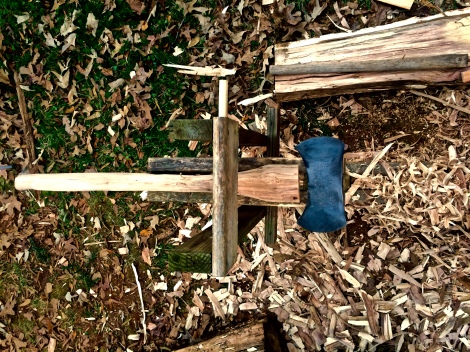
Rasp work in my shop vise
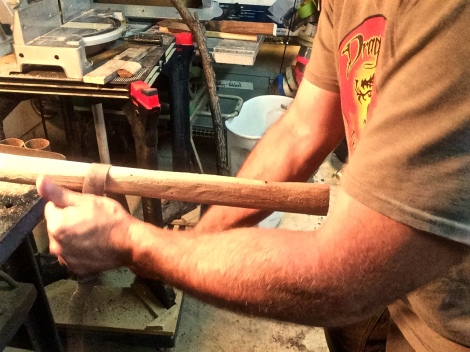
With the axhead removed, begin shaping the shaft and head of the handle with your rasp.
Step #6: Sand the Handle
With the handle close to size, begin sanding to smooth the surface. I began using a broken 42 inch 80 grit sanding belt by hand. I eventually switched to my orbital sander with 80 grit paper to speed up the process. 150 grit finished the handle.
How it feels in your hands is what matters
Step #7: Cut Slot and Wedge
With a fine edged saw, cut a slot in the head end of the handle about half the depth of the ax eye. I used a piece of scrape leather in my bench vise to prevent marring the sanded handle. Japanese saws are excellent for fine, clean cuts. They cut on the pull stroke.

Make a wedge from a scrap piece of wood. I used a piece of seasoned Tulip Poplar in my shop. The grain orientation of the wedge ran perpendicular to the grain of the handle.
Step #8: Hang the Ax
Time to hang the ax on the finished handle. You should be good at this by now. Whack the butt of the handle with a maul while holding the handle in a vertical position. Smack the butt until you hear that solid ring when the axhead seats on the shoulder.
Look for a small curl or two on the shoulder of the handle
Trim any curls off where the ax eye and shoulder bottom out. Check the alignment of the head on the handle by sighting down the handle towards the bit of the ax. The center line of the handle should line up with the ax bit. If not, remove the ax and sand wood from either side to achieve alignment.
Tulip poplar wedge going in
When everything is in line, drive the wedge into the slot on top of the handle. Add a little wood glue to the wedge. The wedge, properly seated, will expand the top of the handle in the eye to secure the axhead to the handle. Cut the wedge off with a saw and sand the end until 1/8 to 1/4 inch of handle is sticking out of the axhead.

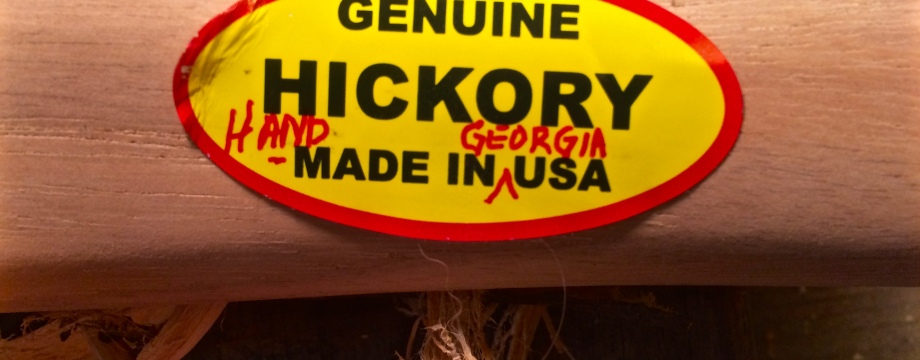
Customized sticker for a custom ax handle
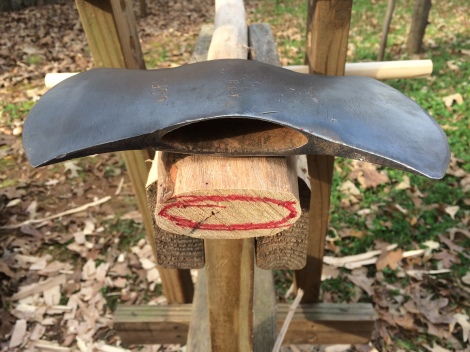
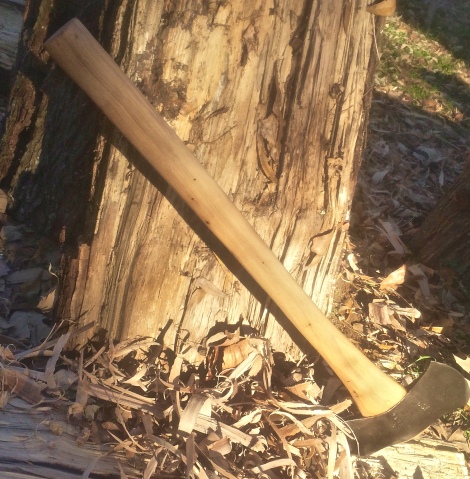
I cut this straight handle at 29 inches. This is a good length for the 3 pound Warren Axe and Tool double bit ax. It’s a custom handle that feels good in my hands. That’s all that really matters.
Step #9: Oil the Handle
Apply a coat of boiled linseed oil to all the exposed wood. Repeat this application daily for one week. Then once a week for a month, and once a month for a year.
This ax handle started out as the half log pictured in the background
My next project is to make a double bit sheath for this special ax. I’ll let you know when it’s done. Nothing beats making stuff with you own hands!
Keep Doing the Stuff of Self-Reliance,
Todd
P.S. – You can also keep up with the Stuff we’re Doing on Twitter, Pinterest, Google +, YouTube, Instagram, and Facebook… and over at the Doing the Stuff Network.
P.P.S – If you find value in our blog, Dirt Road Girl and I would appreciate your vote on Top Prepper Sites! You can vote daily by clicking here or on the image below. Check out all the other value-adding sites while you’re there… 
Thanks for Sharing the Stuff!
Copyright: Content on this site (unless the work of a third-party) may be shared freely in digital form, in part or whole, for non-commercial use with a link back to this site crediting the author. All links in articles must remain intact as originally posted in order to be republished. If you are interested a third-party article, please contact the author directly for republishing information.


Pingback: How to Handcraft a Custom Ax Handle from a Tree - Survivalot
Awesome tutorial ! Very detailed as ever! Really like it!
LikeLike
Thanks brother! Appreciate your time and comment. It was a fun project for sure.
LikeLiked by 1 person
Appreciate your time and comments, always, Mattia!
LikeLiked by 1 person
Your blog inspire me a lot of new projects and ideas!
LikeLiked by 1 person
Pingback: Prepper News Watch for December 7, 2015 | The Preparedness Podcast
Excellent article
________________________________
LikeLike
Appreciate you reading, bud!
LikeLike
Terrific, thanks for sharing another great project.
LikeLike
Thanks man. Very rewarding to make your own.
LikeLike
As one of my hobbies is refurbishing old axes, I’ve reshaped and hung many heads. My one attempt to shape a handle out of apple wood failed miserably. My hat is off to you.
LikeLike
This being my first it turned out okay. I’m an ax junky too 👍
LikeLike
Pingback: 27 Basecamp Projects Guaranteed to Elevate Skills and Fun in the Woods | Survival Sherpa
Great piece, all axemen should know how to craft a axe helm.Saves a good bit of cash. They are not cheap! Just one point, all good ones have the grain running across the eye. Stronger and more lively!
LikeLike
Thanks, Bob. From all I’ve ever been taught and learned on my own, the handle is more resilient with the grain running parallel in the ax eye instead of running perpendicular. The grain of the poplar wedge is running opposite to the grain of the haft. Never heard that advice before. Hope I’m understanding what you mean by “the grain running across the eye”. Thanks for reading and sharing your take.
LikeLike
Pingback: How Cherokees Used Trees of Southern Appalachia for Food, Medicine, and Craft | Survival Sherpa
Pingback: How Cherokees Used Trees of Southern Appalachia for Food, Medicine, and Craft – The Prepper Dome
Pingback: Wild Resources: Only a Fool Comes Home Empty Handed! | Survival Sherpa
Pingback: Cutting to the Chase When Choosing an Ax for Self-Reliance | Survival Sherpa
Fantastic! how have I not seen this one on here until now? A timely find even. I have two axes in need of handles and many hard wood trees here thanks for posting this. I have my first skill to learn for 2018. Thanks man keep it up. love your stuff.
LikeLike
The great thing about making your own is the fact that you can make it to fit your hands and specs. Appreciate your support, bud!
LikeLike
Pingback: Brute Force vs Finesse: The Art of Working Axes | Survival Sherpa
Thanks for the detailed steps, I have a hickory down and planned to cut a 6’ pc for handle applications. I will probably use a chain saw with a ripping chain to get close to the size. I need a handle for 2 old pitchforks with a curved top for the fork tang. See how it turns out. Thanks again. Jack
LikeLike
Yeah man, let me know how it turns out on those handles. BTW, you’re just a hop and skip from me in Walton County.
LikeLike
Pingback: how to make a log cabin with only an axe and saw - Saw Tool