by Todd Walker
Technology, a modern marvel, keeps our hands clean and our hearts distant from the trees which built and furnish our homes. Very few ever experience turning a log into dimensional lumber with an ax and saw. Those days are long gone except for a few holdouts, myself included. While our production rate is dwarfed by modern milling methods, resurrecting traditional skills is worth every ounce of effort, sweat, blood, and fears.
In 1969, we left the city and moved to the country. The old house at the front of our family farm rested on massive hand hewn timbers. Crawling between the stone pillars at age 7, I still vividly remember the ax-scarred wood, a signature left by men who carved out a living homestead from trees.
It was just an old dilapidated house. But those timbers told the forgotten story of the old ways.
And, like their story, my journey to preserving lost skills continues… in the old ways.
Hewing Timber by Hand
There are three basic steps in hewing timber: scoring, juggling, and hewing. There’s no complicated gear list required to turn round logs into square timber. Here’s what you’ll need.
Tools
- Ax(es) – Start with what you’ve got. A dedicated broad ax (hewing ax) is not required.
- Saw – Something to cut the end of the log flat. A chainsaw is not traditional but certainly advised if you don’t have a good crosscut saw.
- Log Dogs – Two large metal staples to secure the log in place while hewing. A 2×4 nailed/screwed to the log works as well.
- Marking Tools – Chalk line and carpenters pencil.
- Level – To create plumb and level lines for the layout.
- Measuring Device – Measuring tape or ruler for layout dimensions.
- Cant Hook – Not essential but helps when moving larger diameter logs.
Tree Selection
Tulip Poplar grows fast, straight, and uniform. However, if you’ve ever split this wood, you’ve probably noticed that the grain tends to run off in a spiral fashion to one side of the log. My experience hewing, which is limited, Tulip Poplar caused me to change directions of swinging a few times to follow the grain orientation in such a way as to cut across the grain. This prevented my ax from following the grain deep in the stock.
I’m now experimenting with pine. Whatever tree is used, green wood hews easier than seasoned. A tree with clear grain and no knots (or not many of these rascals) is desirable.
Dog the Log
The first order of business is securing the round log to prevent movement in the hewing process. You’ll need two shorter logs which the longer log will rest on perpendicular. These supports are called cribbing. Larger cribbing logs will lift the work off the ground to a more comfortable working height. Your back will thank you.
Drive one end of a log dog into the long log with the other end driven into the cribbing log. Repeat this step on the opposite end. This process is called dogging the log.
My crude log dogs are two pieces of rebar which I forged in my shop. This metal is not the best as it can be brittle and break under stress while forging.
Below is our video of the tulip poplar hewn above.
Lay Out Dimensions
Cut both ends of the log perpendicular with a saw. Now you have a smooth surface to lay out the dimensions of your timber on opposite ends of the log.
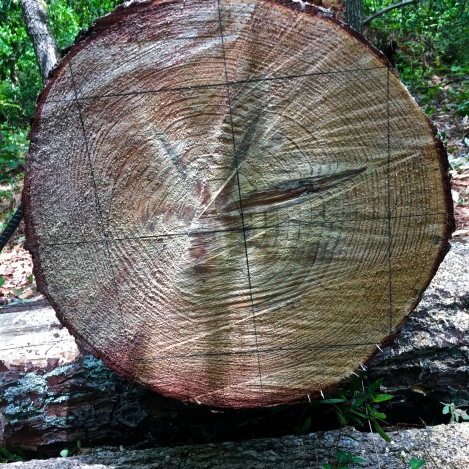
Start the lay out at the top end of the log (smallest diameter). Measure and mark the center of the log with your ruler and pencil. This may not be in the pith of the tree. Place your level on the mark and draw a plumb line down the middle of the log. Measure over from that line your desired width and make a mark. If you’re finished timber width is 10 inches, this mark would be 5 inches from the center mark. Repeat this layout on the opposite side of the center mark. Use the level to mark both of these vertical plumb lines.
For a 10 x 10 inch square timber, measure and mark from the center line up 5 inches and down 5 inches. Draw the top and bottom lines level. All four lines should be drawn to the edge of the log.
Repeat this lay out on the butt end of the log.
Snap Chalk Lines
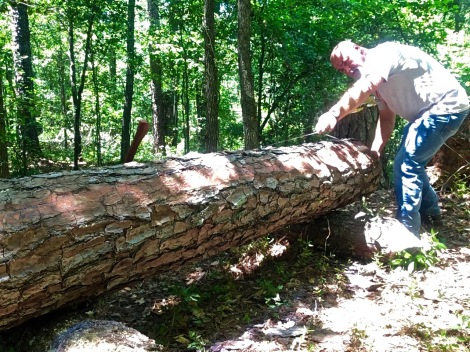
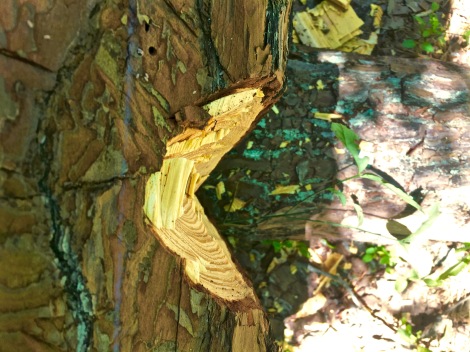
Strip or flatten the bark off the log where your chalk line will be snapped. I use my felling ax for this step. Cut a notch or slice on the pencil line at the top edge of the log. Secure your line on the end of the log and run the line through the notch, down the length of the log, and through the other corresponding line notch at the opposite end. Secure the line and snap the chalk line.
Snap the line by lifting and releasing the string vertically. This will create a plumb line down the length of the log. This is the plane you will follow for a squared off timber. Note: If you lift the line out away from the log, your plane will not match your layout on the end of the log.
Scoring
The pine I’m hewing now is the largest diameter (18 inches) I’ve worked. This size is large enough to stand on to score. I’ve only done two types of scoring: slash and juggling (or joggling).
Slash scoring is done by making a series of overlapping ax cuts down the length of the log. These slash cuts are angled (30-40 degrees) into the log and about 3 inches apart down the side of the log. A sharp felling ax with a 36 inch handle is what I use. The longer handle makes reaching the bottom side of the plumb line “easier.” There’s really nothing easy about hand-hewing timber.
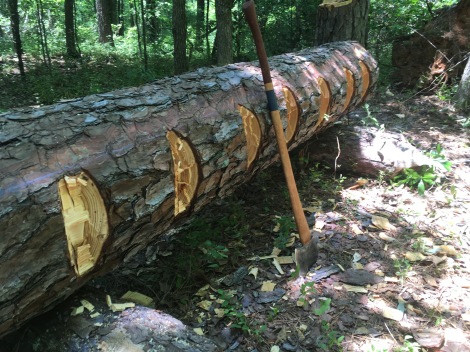
V-notches cut to the line create jogs which are removed in the juggling process. The notches don’t have to be super clean.
The other scoring method I’ve used is juggling. Also called joggling due the joggles protruding between the V-notches down the side of the log. If the log is large enough to safely stand on, step up on the top of the log and cut notches to the line about a foot apart the entire length of the log. Make your notches about twice as wide as the depth needed to reach the line. Standing on top the log gives me a better read on making my notch vertical down the entire plane of the log.
Slash scoring, in my experience, is best when there is not a lot of wood to be removed to reach the line. With more than a couple of inches to be removed, juggling works better for me.
Juggling
You’re now ready to remove the joggles or the slashes, depending on the scoring method used. For simplicity sake, I’ll describe the method for removing joggles. Either way, this step holds the most potential for injury. The reason being, if your juggling on the ground, is that your making powerful vertical ax strokes which are not backed up in your frontal zone.
There are ways to reduce the risk of an ax in the foot. The safest way is to swing from on top of the log to remove the jogs… that’s if the you’re able to stand on top of the log. Be sure to keep your feet behind the chalkline and the swings below your feet.
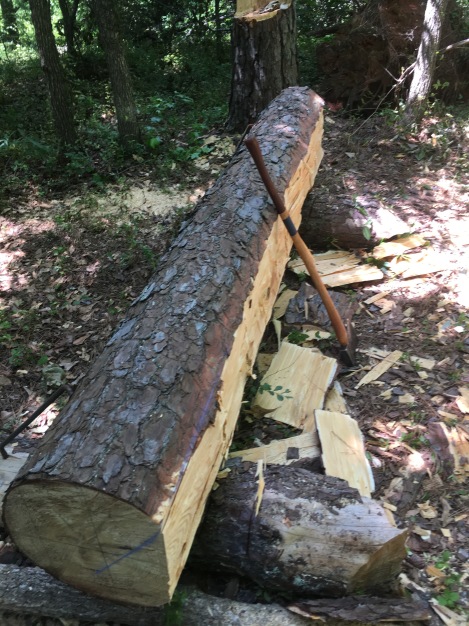
Jogs removed with a felling by standing on top of the log. I tend to cut too close to line. About a half-inch of wood should be left for the hewing process.
You can remove jogs while standing on the ground. With the log to your left, place your right foot forward and about two feet to the right of the log. Your left foot should be well behind your body with the left leg braced on the log.
I’ve also removed joggles by standing on the opposite of the log. This is very safe but requires that you turn the log at an angle so you can reach the joggles with your ax. This also means the log must be repositioned to plumb before hewing. On smaller diameter logs, straddling the log is an option.
I like using my felling ax to remove joggles. I’ve seen some use a broad ax to do the job. And then again, Tim at Oxbow Farm (link to his YouTube channel) has demonstrated hewing beams using his felling ax only. Do what works for you.
When the joggles are removed, there should be about a half-inch of wood proud of the chalk line. This remaining wood will be removed in the next step.
Hewing
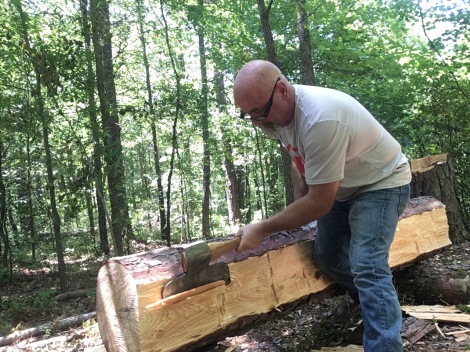
Hewing to the line transforms a round log into square timber. The hewing swing is not a full ax stroke. It’s mostly performed through forearm movement. Hewing is best performed with a circular slicing motion on each swing regardless of the style of ax used.
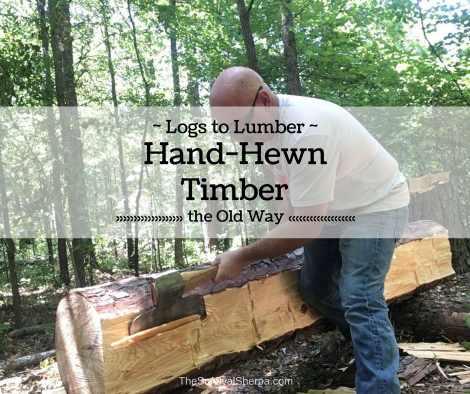
Note: The pictures shows me using my broad ax which is hung left-handed. I’ve yet to re-handle it for right-hand hewing. However, when hewing with my felling ax, I hew right-handed, which is described below.
Stand with the log to the left of your body for right handers. Place your right foot forward and away from the log with your left foot back. Brace your left leg against the log for stability. Grip the ax handle right hand forward and left to the rear. The forward hand should be close (6-8 inches) to the ax head.
The traditional broad ax handle in America was short, in the 20 inch range. Handles were steam-bent into S-shapes or dog leg patterns to help the hewer’s knuckles clear the log edge on swings. My handle is straight and causes me to bark my knuckles from time to time.
Start from the top of the log and work towards the butt end. Begin with gentle strokes on the line to separate the remaining wood. Continue to raise and lower the ax in a controlled manner as you follow this kerf to the bottom of the log.
Each swing should end in a slicing motion. Some of the chips removed will be as thin as potato chips. When your forearms need a break, and believe me, they’ll be screaming, standup and sight down the log edge to check for plumb. I usually notice that my bottom edges have un-hewn wood proud of the plumb line.
The process described above is repeated on the remaining three sides of the log. To hew the opposite side of the log, remove one log dog and reattach it on the hewn side of the log. Removing both dogs at once may shift the log out of plumb. With two sides are hewn flat, the timber will lay steady on the cribbing. If the cribbing is level, the remaining two sides can be hewn plumb. Adjust as needed.
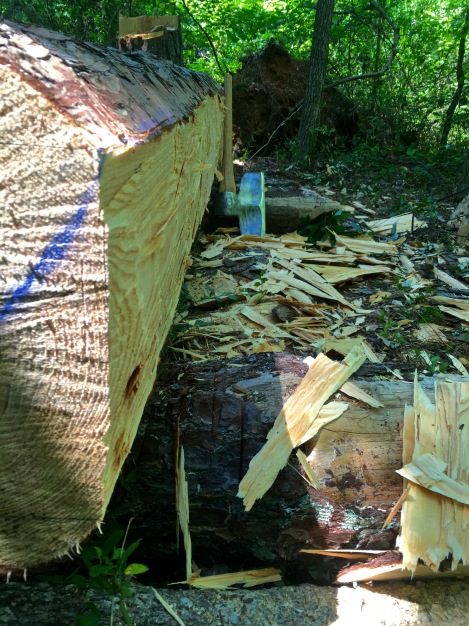
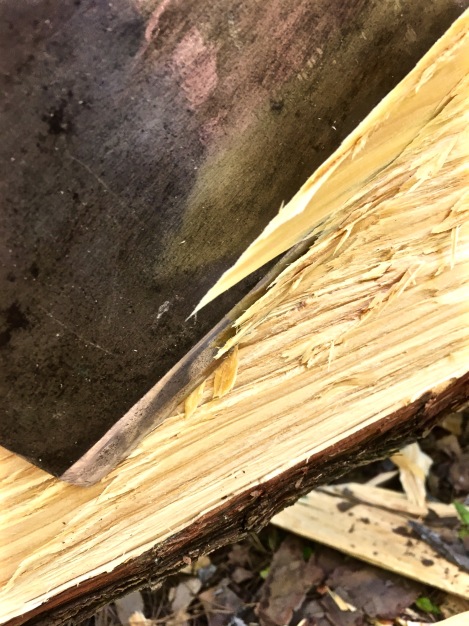
The hewn surface isn’t as smooth as I’d like on the first pass with the broad ax. It needs a another pass to help smooth out the side.
My journey in the traditional skill of hand-hewn timber has just begun. I’m rewarded with useable timber, rough to experienced hewer’s standards, and a deeper connection to simple technology and the old ways.
Keep Doing the Stuff of Self-Reliance,
Todd
P.S. – You can also keep up with the Stuff we’re Doing on Twitter, Pinterest, Google +, YouTube, Instagram, and Facebook… and over at our Doing the Stuff Network.
P.P.S – If you find value in our blog, Dirt Road Girl and I would appreciate your vote on Top Prepper Sites! You can vote daily by clicking here or on the image below. Check out all the other value-adding sites while you’re there…
Thanks for Sharing the Stuff!
Copyright © by Survival Sherpa: In light of the recent theft of all my content by a pirate site, my sharing policy has changed. I do not permit the re-posting of entire articles from my site without express written consent by me. My content on this site may be shared in digital form (200 words or less) for non-commercial use with a link back (without no-follow attribute) to the original article crediting the author. All photos, drawings, and articles are copyrighted by and the property of Survival Sherpa. You are more than welcome to share our photos and articles on social media for educational purposes as long as you link back to the original article/photo with credit to the author.



excellent post
my hewing attempts have been on a smaller scale than yours
while you are correct that it can be done with what you have…if you do have a broad ax or an appropriately sized adze the work moves along better and the resulting timber is a finer product
LikeLike
This type of work is not my strong suit. I definitely plan to work on increasing my skill with techniques such as this. Thanks for the great walk through!
LikeLike
Neither is it mine per se. But with practice, the skill improves. Really appreciate you reading and your feedback, Joe!
LikeLike
Pingback: Old Fashioned Rough Cut Wood Lumber DIY Project | The Homestead Survival
This is the coolest thing ever! Or should I say ‘warmest’? Given the sheer amount of sweat and heat generated…
LikeLike
It will get your motor running, lol. Thanks for reading and the feedback!
LikeLike
Finished my first attempt at this yesterday afternoon. I started very small – 4′ log with a 5(ish) inch diameter. Used a small hatchet to do most of the work. My shoulders and forearms were screaming. Thanks for the inspiration! My eventual plan is to build a wood shed with such lumber.
LikeLike
Pingback: Dirt Poor Floor Joists for an Off Grid Log Cabin | Survival Sherpa
Nice web site I’m working an ash log now Learning as I go Just ordered a hewing ax just using a chopping ax and a hatchet now Can’t wait to get my new old antique axes
LikeLike
Pingback: Dirt Poor Floor Joists for an Off Grid Log Cabin – Smokey Bottom
Pingback: how to rough saw logs - Saw Tool
Pingback: What Is A Hewing Axe? (Complete Guide For Beginners)