
by Todd Walker

Several years ago I decided to give hammock camping a shot. It was miserable!
I’d been better off laying in a zipped body bag. That first morning felt as if my shoulders had been clamped in a vise while wrapped in a cheap tortilla shell. Claustrophobic, sore, and sleepless was not my idea of happy camping.
Here’s the thing. I’m stubborn and didn’t give up on hammock camping. With a few adjustments on my hanging technique, my hammock raised my sleeping to new levels.
Here’s how to avoid the misery of my horrible hammock hang…
A Well-Hung Hammock
“One of the hallmarks of the veteran woodsman is the way he contrives to make himself comfortable in camp”. ~ Warren H. Miller

A typical backyard hammock with spreader bars is not what you take camping.
Camp hammocks are gathered at each end unlike the rope hammocks with spreader bars in the backyard. Ever been dumped out of one of these hammocks? It happens easily because they have a high center of gravity. I stretched my first camp hammock horizontal as tight a banjo string. I thought this would help me lay flat. That’s the biggest mistake I made.
Set the Sag
This is how I make my ENO DoubleNest hammock smile. Smile = Sag.
Wrap your suspension straps (mine are ENO Atlas straps) around two live tree as your anchor points. My straps are a little over head-high depending on the distance between my trees. Now clip the carabiners to the strap loops. Remember to leave a little sag.
In our video below, I replaced Atlas straps with mule tape for my suspension straps. Use whatever works for you.
I have a fixed ridge line (550 paracord) which runs between the two carabiners at both ends of the hammock. Expert hammock campers recommend a non-stretchy cord. I use 550 paracord because that’s what I have a lot of. My set up allows me to adjust the ridge line length, and, thus, make it sag just right.
Here’s how…

A bowline knot through one carabiner.
One end of my ridge line is permanently attached to a carabiner. The other end loops through the opposite connector and is tightened with a Trucker’s Hitch knot. I can easily tighten or loosen the line to make my hammock smile just right.
After hanging your hammock, step back to see if it smiles back at you. The middle should be low with both ends high.
Dig the Diagonal
Why do I like sag better than tight? The sag allows me to lay diagonally so I don’t become a shrink wrapped banana. Sag has revolutionized my sleep!
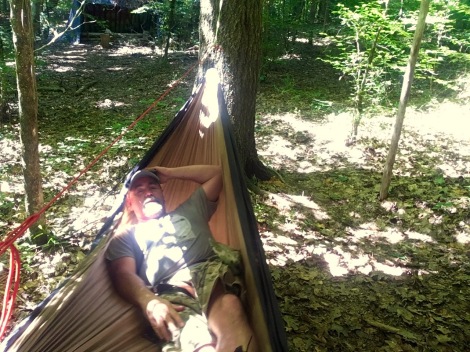
Sag allows for a diagonal lay for comfort. No shoulder squeeze!
A smiling hammock is easy to enter and exit. Stand next to your hammock. Spread the fabric with both hands, sit back, and lift your feet over. Now you can easily adjust your body to a diagonal position without fighting taut sides. You’ll know the sweet spot when your body lays flat. To exit your comfortable bedding, hold both side of the hammock and swing your feet over the side to stand up. I sometimes grab the ridge line for assistance.

Makes a great camp lounge chair, too!
Knots to Know
I already mentioned the Trucker’s Hitch I use on my fixed ridge line. There are three simple knots I use for my setting up my rain fly (tarp). We’ll cover all three below:
- Bowline
- Trucker’s Hitch
- Prusik Loop
It’s difficult to describe knots in writing. Grab some practice rope and watch this quick video demonstration of these three knots.
Here’s a tip for quickly setting your ridge line for your rain fly/tarp. Wrap the Bowline end around your anchor tree. Instead of threading 25 feet of cordage through the Bowline to cinch it tight to the tree, use a toggle (Our first video above shows an even quicker way to secure a non-weight bearing ridge line). Slip a bite of cordage through the bowline to form a loop. Place a finger-size stick (toggle) through the loop and pull tight against the tree. This ridge line only has to support a lightweight tarp – not your body weight.
Wrap the opposite line end around your other anchor point at the same hight. Secure it with a Trucker’s Hitch.
Place your rain fly/tarp over the ridge line. I have a Prusik Loop which stays connected to my tarp ridge line near the Bowline end. Slip the Prusik Loop through a tie out or grommet hole on the Bowline side of the ridge line. Insert a toggle.
Move down the ridge line keeping the tarp taut to keep the toggle in place. Repeat the same procedure in the above paragraph – but use the loop of the Trucker’s Hitch just like the Prusik Loop. Toggle this loop and pull the tag end of the Trucker’s Hitch to tighten the tarp. Adjust the tarp, right or left, by moving the Prusik Loop and loosening/tightening the Trucker’s Hitch loop.
Stake out the four corners of the tarp. My tarp/fly has tie out line already attached for this purpose. I use a Trucker’s Hitch to secure and tighten the lines around the ground stakes. This creates an A-frame around your hammock.
Another tip worth knowing for warm weather hanging. To take advantage of a breeze, I use a 5-6 foot stick to lift the corners of my tarp. Make a single wrap around the stick at the 4 or 5 foot mark. Take the remaining line and secure it to the ground stake as described above. If you’re lucky, you may have saplings or trees at the right spot making the sticks and stakes unnecessary. This method lifts the corners of your tarp allowing welcome airflow in warm weather.
Cool Weather Hanging
The beauty of hammocks in warmer weather is they allow convective cooling from breezes. I like sleeping cool to cold. However, when temps drop below 60 degrees F, I add a layer of insulation to the bottom of my hammock. Under quilts are available but expensive. I spread a cheap closed cell foam mat inside my hammock and lay out my sleeping bag on top of the mat. This system works for me when temps are in the high teens in Georgia.
Where to Hang
Give careful attention to the 4 W’s when selecting a campsite.
- Widow Makers: No dead limbs or trees overhead. Never hang your hammock from a dead tree(s).
- Wind: Hang to take advantage of the prevailing wind direction for cooling or warmth.
- Water: Close to rivers or creeks but not too close (flash floods). If possible, avoid stagnate, standing water (bugs).
- Wood: If open fires are allowed, look for a campsite with standing dead trees close by but not within reach of your hammock.
Hanging from a dead tree is inviting disaster. Not only from falling limbs, but the entire tree could topple over on you.
Additional Resources:
- My friend, Glenn (Outside the Box channel), inspired me to continue to tweak my hang with his video below…
Keep Doing the Stuff of Self-Reliance,
Todd
P.S. – You can also keep up with the Stuff we’re Doing on Twitter, Pinterest, Google +, YouTube, Instagram, and Facebook… and over at our Doing the Stuff Network.
P.P.S – If you find value in our blog, Dirt Road Girl and I would appreciate your vote on Top Prepper Sites! You can vote daily by clicking here or on the image below. Check out all the other value-adding sites while you’re there…

Thanks for Sharing the Stuff!
Copyright © by Survival Sherpa: In light of the recent theft of all my content by a pirate site, my sharing policy has changed. I do not permit the re-posting of entire articles from my site without express written consent by me. My content on this site may be shared in digital form (200 words or less) for non-commercial use with a link back (without no-follow attribute) to the original article crediting the author. All photos, drawings, and articles are copyrighted by and the property of Survival Sherpa. You are more than welcome to share our photos and articles on social media for educational purposes as long as you link back to the original article/photo with credit to the author.


Much obliged for the article sir. A lot of great tips and explanations why a hammock can be easier than sleeping on the ground.
Living in the buggy south, we have some biting / stinging insects that reside on the ground we want to avoid. Scorpions, fire ants, centipedes and poisonous snakes. So sounds at night while sleeping on the ground is not very restful. Hammocks are a godsend.
LikeLike
This article is perfectly timed for me; I just got my first hammock, and I’m eager to spend a few nights out in the woods. Thanks for the advice!
LikeLike
Do you use any type of mosquito netting?
LikeLike
woohoo ! Trucker’s Hitch — this is a new kind of thing for me. yhanks for the quick demonstration
LikeLike
That’s one of my go-to knots for a quick release when securing stuff. Thanks for stopping by and joining the conversation, Rahul!
LikeLike