
by Todd Walker
The box of logs suddenly resembles a log cabin.
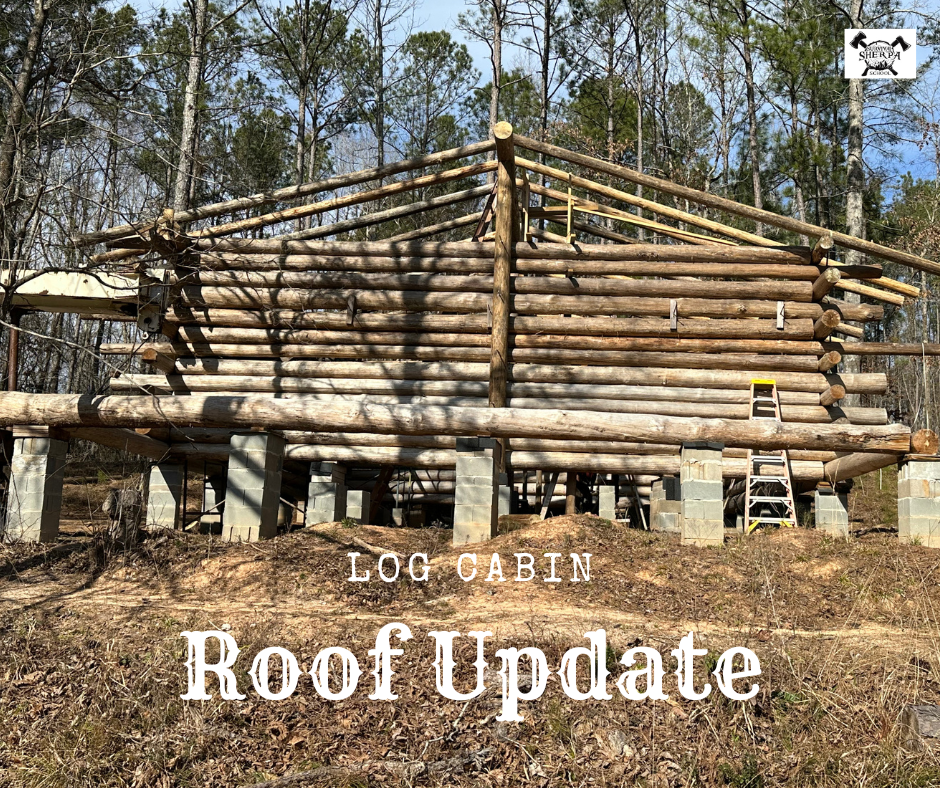
The roofline gives a glimpse of my future home. There are many more steps to make it livable, but I needed this boost of hope.

Ridgepole Support Logs
Three ridgepole support logs (RPSL) are installed on the two outside walls, and one in the middle of the cabin. They do what their name implies, support the large ridgepole.
The first two rest on the foundation piers vertically against the front and back walls. Once set and plumbed, we strapped the RPSL to the wall and drilled holes through the wall logs and RPSL. 5/8″ all-tread secures the RPSL firmly to the wall.

We used a 2.5″ Forstner bit on the interior wall logs before drilling the 5/8″ hole. This allowed us to countersink the all-thread and nut which will be filled later with a wooden peg to hide the bolts.

Setting the Ridgepole
With the two outside RPSL’s installed, we were ready set the ridgepole. DJ gently sat the ridgepole on top of the two RPSL’s. I climbed the wooden scaffold next to the first RPSL, drilled through the ridgepole into the RPSL, and hammered a stick of 1/2″ rebar to secure the union. We repeated these steps on the other RPSL.

To stabilize the ridgepole, we installed one set of log rafters and knocked off for the day.

Installing the middle RPSL was bit more challenging in my mind. This support log, cut 3/8″ proud, needed to be wedged under the ridgepole on the center foundation pier. My idea was to get it close and pound it plumb with a sledgehammer at the top of the support log. A couple of swings while on top of a 30 foot extension ladder was like shooting an elephant with a BB gun.
DJ, not only operates the boom with precision, but, has superpowers when we need mechanical solutions. In his usual southern draw, he says, “Let’s put the top of the support log under the ridgepole and let the boom do the work.” A true man of genius!
We followed along and the center RPSL slide into place with ease. All-thread attached the support log to the girder beam. Rebar was then hammered through the ridgepole into the middle RPSL. Now the ridgepole is supported with three points of contact at 15 foot sections.

The Tale of Two Rafters
On my Practice Cabin (12’x16′), we simply sank one screw in the top of two 2×6 rafters so they would hinge open to sit on the ridgepole. Easy peasy. In theory, this same technique would work for larger, longer, heavier log rafters. I’d just use 5/8″ rebar for the hinge pin.
Theory doesn’t always produce desired results.
Day two began with over two hours experimenting with different rigging techniques to get the bolted rafter set spread apart and off the ground without scissoring back together. Frank’s idea finally offered a solution… so we thought.
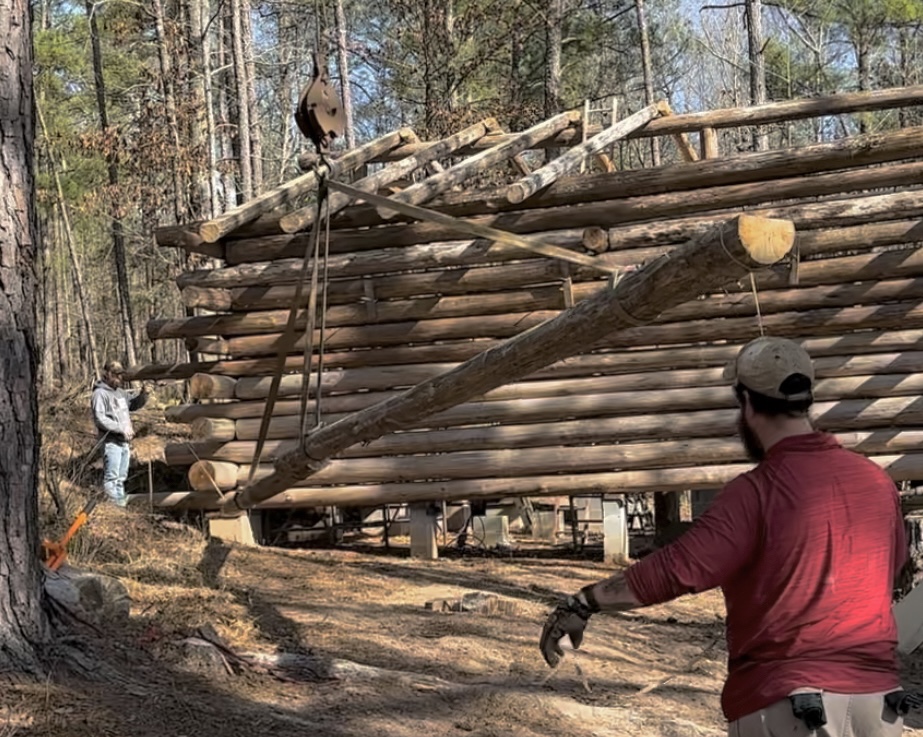
The rafter set was lifted in nearly a flat plane (see pic above). However, once the hinge touched the ridgepole, the rafter set lost its middle support and the tails would come down on the wall logs with reckless abandon. We stuck with this method for a few sets. Yet another problem became apparent.
When building with dimensional lumber, the hinge pin can be centered so the rafters are level across the roof. When building with “carrots”, not so much. While one flat side of the rafter would sit level, the other one would cant down due to the hinge bolt not being exactly centered. I figured we’d have to shim the un-level rafter later.
We finally abandoned this lifting technique when a rafter set rolled as it was lowered on the ridgepole. The flat side was facing down instead of up. This set had to be lifted off the ridgepole and back to the ground.
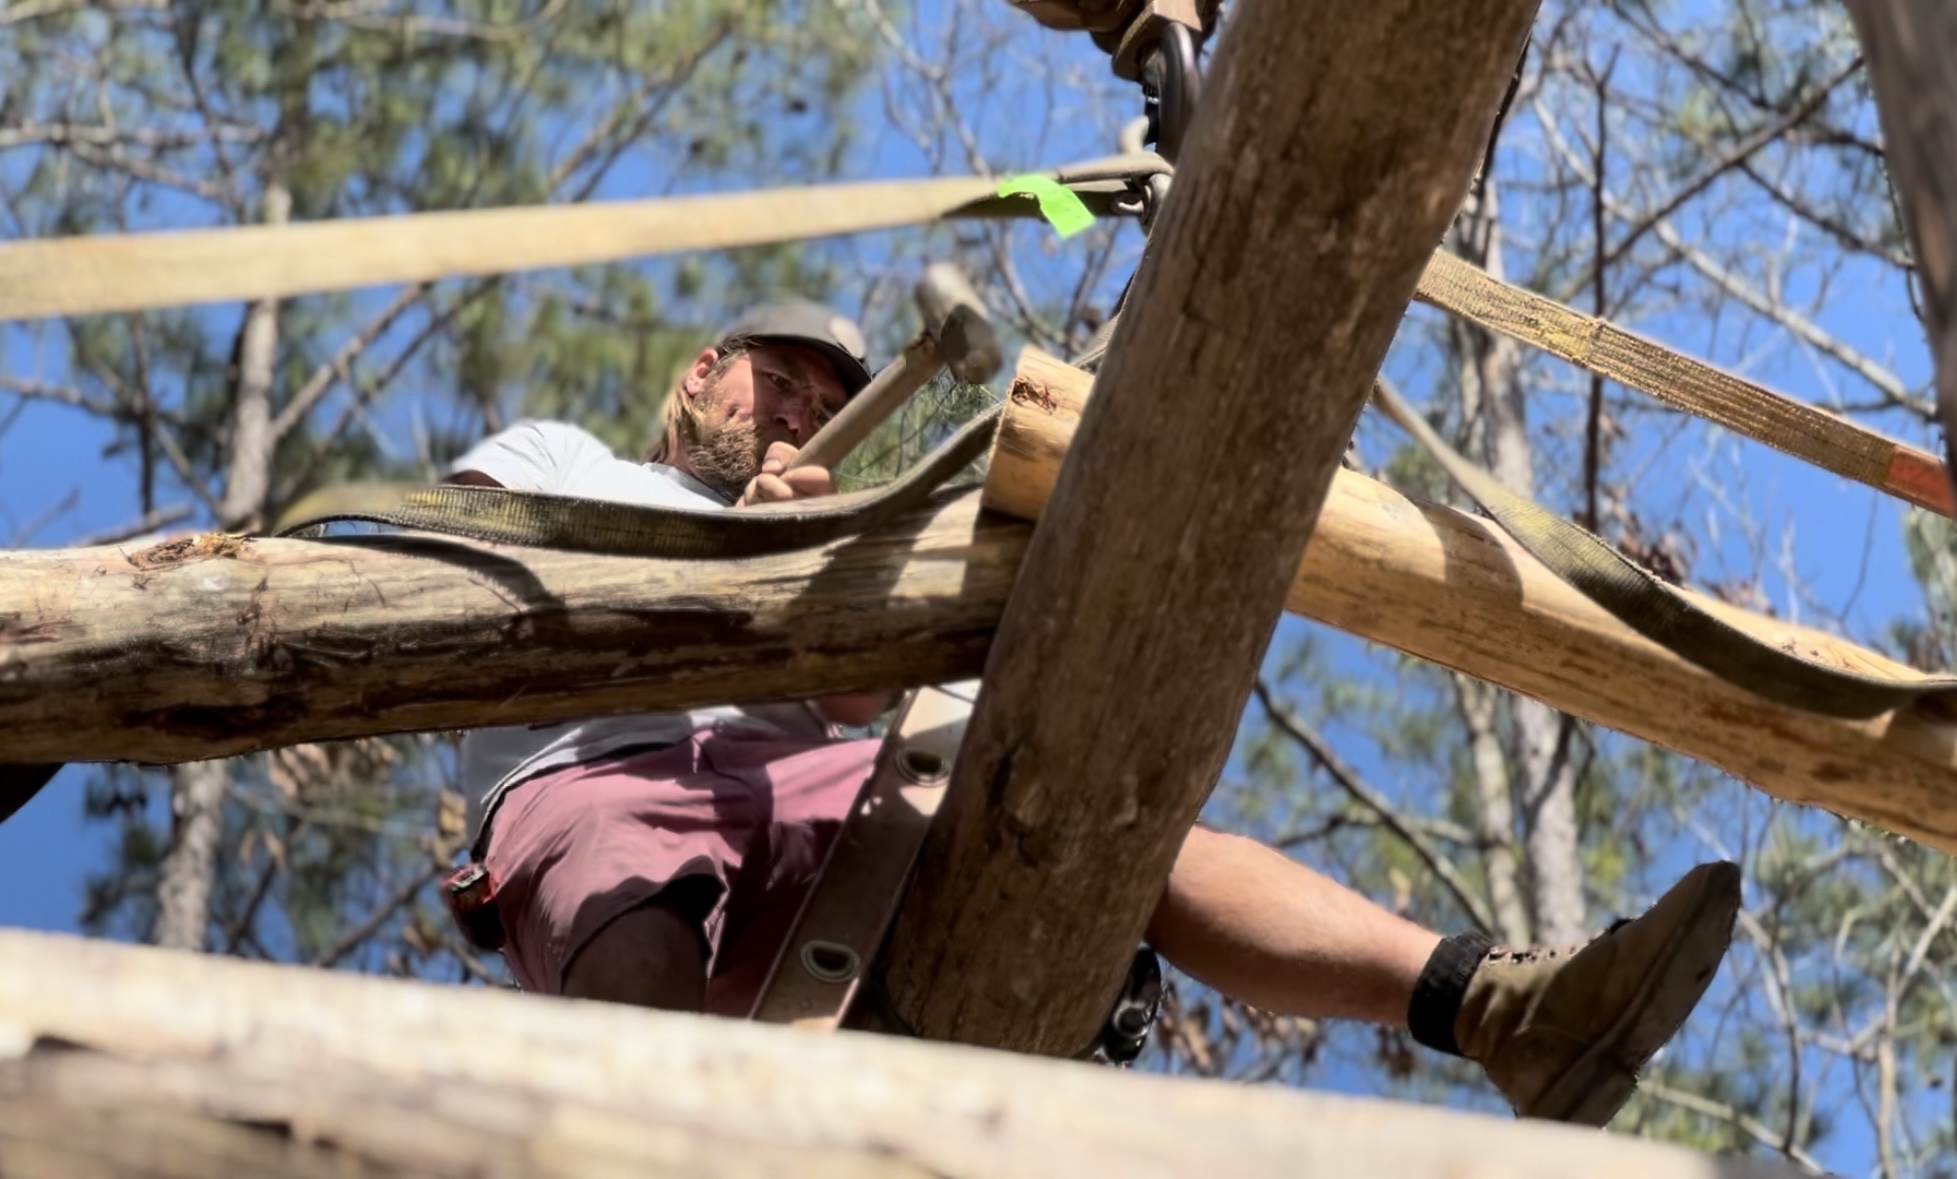
For safety reasons, we started setting rafters one pole at a time (see pic below). The rafter could be rigged at the approximate roof pitch on the ground. This revolutionized the process. I wish we had done this from day one. Hindsight, huh?

We only pinned the rafters to the ridgepole. The rafter tails need to be notched/shimmed to make the flat side of the rafters as level as possible. Also, as I mentioned earlier, those bolted rafters which twisted when set will have to be reworked. Remember, I’m building with a bunch of carrots.

Below is a short video of highlights from the roof raising weekend. I can’t say thank you enough to my family and friends for all your help on this project!
Keep Doing the Stuff of Self-Reliance,
~ Todd
P.S. – You can also keep up with the Stuff we’re Doing on Twitter, Pinterest, YouTube, Instagram, and Facebook… and over at our Doing the Stuff Network.
P.P.S – If you haven’t done so already, be sure to check out the new Survival Sherpa School and smash that subscribe button at the top of the page!

Thanks for Sharing the Stuff!
Copyright © by Survival Sherpa: Content on this site (unless the work of a third-party) may be shared freely in digital form, in part or whole, for non-commercial use with a link back to this site crediting the author. All links in articles must remain intact as originally posted in order to be republished.


Ever hear of half dove tail using an axe of chainsaw to make proper log fix instead of using nuts and bolts?*%!!!
LikeLike
Yessir, I have. Thanks for the comment.
LikeLike