by Todd Walker
Five years ago, I built Dirt Road Girl an eight foot farmhouse table from dimensional lumber. It served our family well but was really too large for our dinning room. It had a tendency to bruise unsuspecting thighs. For Christmas, a smaller, less aggressive piece of furniture was in order.
From Tree to Table
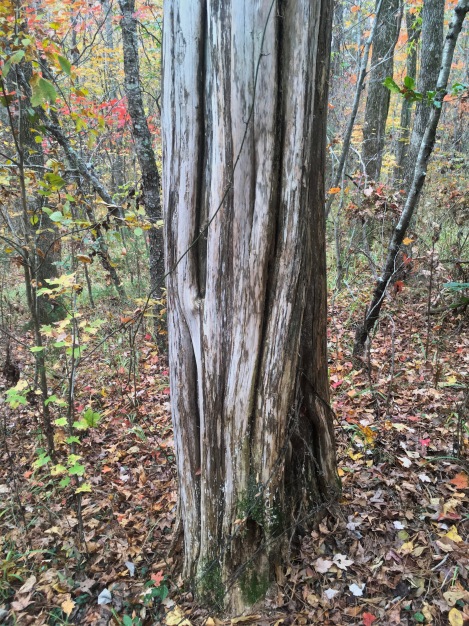
My nephew, Blake, showed me a standing dead cedar on our family land last year. Easy access since it was just past a field’s edge. Just after Thanksgiving I made the trip south to cut and haul the tree home. I was disappointed after it was on the ground. The trunk was hollow a good portion of the widest table-top material. After a bit of hemming and hawing, I decided to buck it anyway and hope to get enough useable live-edge slabs. With the help of two other nephews, Kyle and Casey, the trailer was loaded and headed north.
Mill Work
You either pay with time or money when milling lumber. My Alaska chainsaw mill demands a lot of elbow grease and belt sanding to achieve a smooth surface on lumber. By the first of December I realized I’d better spend some money to save time. My buddy up the street gave me a lead on a man with a large bandsaw mill. Boy, was that mill fancy! It quickly sliced up two-inch thick slabs from three logs like cutting through hot butter. And the surfaces would need only minor sanding.
Note: Sawn and sanded red cedar may smell delightful, but breathing it has been linked to ill effects on lungs. Wear appropriate respirators or dust masks when working with red cedar.
Sizing up my slabs, I knew I’d have to use the lumber or find and fell a tree with a solid trunk. No time for that. Dirt Road Girl and I chose what we thought would be best for her new table. I went to work figuring out how to fill the holes and save the character of this cedar on our family farm.
Ripping Live Edge Lumber
My tree wasn’t near wide enough to use only one slab as the table top. I would need four boards, two outside with a live edge, and two square edge boards joined in the middle.
How do you rip a straight line on boards without one side being square? My table saw died but wouldn’t be much good anyway squaring live edge sides. A square side is needed to run along the fence of a table saw. My solution? I laid a seven-foot straight edge (aluminum square stock) on the slab and eyeballed where the square edge should be cut. I marked the cut line and then clamped the aluminum straight edge 1 and 3/16th inches off the line which would put the blade of my circular saw on the cut line. Ripping commenced.
With at least one square edge on each of the four boards, I marked the ends using a framing square and cut the boards six feet long. A two foot level was clapped on the ends with the same offset described in ripping to ensure a clean cut. You could freehand the cut if you’re that good with a saw. I prefer using a fence to keep it square.
I also ripped more slabs for the table legs. Each of the legs and cross supports was cut with one live edge intact. Again, I used the eyeball method and the straight edge. The leg lumber turned out about 3.5 inches wide by two inches.
Joining the Table Top
My trusty Kreg Jig is meant to be used on 1.5 inch lumber or smaller. My boards were 2 inches thick. I monkeyed around with the jig to modify it for 2 inch boards. I used the longest pocket screws, meant for 1.5 lumber, which worked fine on all the glued joints. I tested the pocket joinery on two scrap pieces beforehand.
Once the top is glued and screwed, you’ll need clamps to hold it all together. I used two pipe clamps and a vintage bar clamp to squeeze the top together overnight. The next morning I hit the top with my belt sander – 80 grit and then 120. To remove bark from the live edges, I use a side grinder with a wire wheel. I do this on my cedar benches as well. Then I use an orbital sander to smooth up scratches left by the wire brush.
Table Frame
This step is a simple “H” frame. You could go fancy but simple suits DRG. I secured a cedar 2×4 (all sides squared) about a foot in from both ends under the table. These pieces served as cleats to attach the legs and frame.
Flip the table over with the bottom up. Saw horses are helpful. We wanted a 30 inch high table. I cut four legs 28 inches each. Use a framing square to plumb each leg. I glued and screwed the legs to the ends of the 2×4 cleats with the live edge facing the ends of the table. No Kreg Jig pocket holes needed on these joints since they’re hidden under the table.
Add two cross pieces (live edge up) between each pair of legs. Pocket holes and screws were facing toward the middle of the table and filled with glue and wood pegs. They were secured about 12 inches from the bottom of the legs. Just make both match on each set of legs.
Next, I centered the long crossbar on both of the previously installed cross pieces, checking for plumb legs again. Drill pocket holes, glue, and screw. Leave live edge facing up when table is set on the floor.
By the way, it’s easier to sand the “H” frame before installation. You can go back and sand pocket wood plugs flush after the glue dries.
Hole Filler Fiasco
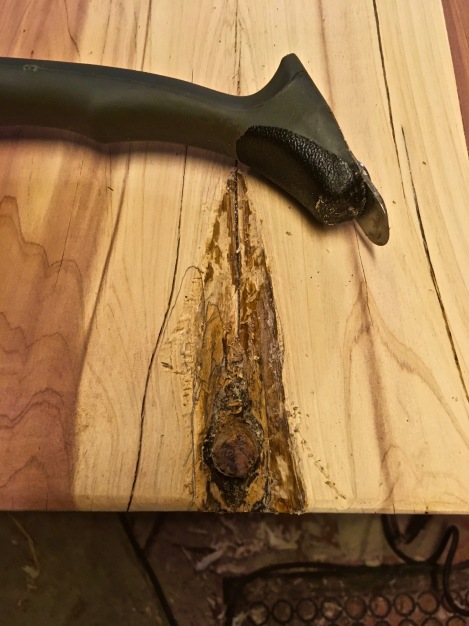
What a horror story. I didn’t do my homework on hole fillers. I read somewhere that epoxy will do the trick. My idea was to fill the holes with clear epoxy. Gorilla Brand epoxy, the kind with two push syringes, don’t dry clear – no matter what it says on the package. Actually looked like puss in a wound. I discovered this disturbing fact after stripping the shelves clean in our little town of the stuff and filling holes and crevasses. Stupid of me not to test it on scrap wood. I was sick and told DRG that I might have to go find another cedar tree to mill. Time was running out in Santa’s workshop.
To remove the nastiness which had bonded in every nook and cranny, I spent the day with a heat gun and a variety of paint scrapers whittling and digging “puss” from this beautiful wood. Crank the heat gun on high and keep the heat moving over the target area. When warmed/hot, epoxy will turn loose with some determined coaxing.
Table Top Finish
After fixing the fiasco, I purchased a self-leveling epoxy called Glaze Coat. By now I was apprehensive as to how any product would work. Some of the knot holes went all the way through the table top. The live edge could not be boarded to allow a pour like one might do on a rectangular bar top. One table end presented a couple of crevasses which I attached boards to using painters tape and waxed freezer paper. This would hopefully dam up the epoxy until it sets.
I followed the detailed instructions on the box for mixing. Poured epoxy into all holes and prayed it would set clear. I waved my heat gun over the pours to release trapped air bubbles which form in the mixing process.
The next morning all was good. The clear epoxy revealed all the interior details of the holes and highlighted the character of this old cedar tree. My attention was now directed to raised areas where I had poured.
Since I couldn’t fence in liquid epoxy on a live edge table to cover the raised epoxy over the holes, I hesitantly decide to sand the areas flat along with the table end. The progression went from 80 grit to 400 on my belt and orbital sanders. From there I used 600, 1,000, and finally, 1,500 grit on hand-held drywall sanders – the same grits I use to sharpen my axes. It was a tedious process of replacing sets of scratches until the surface was clear. It worked.
Wipe all dust from the table with a damp rag a few times before starting the next step…
Pouring a 1/8th inch layer of epoxy on the top, as recommended in the instructions, was not an option for live edges. I bought the cheapest “nice” oil brush as a sacrificial applicator. Chip brushes will shed bristles. Mix another batch of epoxy and bush a thick coat on the table top. The product is self-leveling so brush strokes will flatten. This top coat blended in well with the epoxied holes and made the colors pop!
Apply a coat on the live edges while your brushing. Obviously, you’ll want a drop cloth under your project. Be vigilant as the top coat levels over the live edges. Blend any runs/drips on the live edges with a brush. You’ll have about a 30 minute time frame as the top coat levels and sets. In the meantime, use a heat gun or propane torch to remove air bubbles on the top coat.
As a side note, one of the holes, not completely patched from underneath, dripped a 12 inch pool of epoxy on my uncovered shop floor. Let it dry and scrape it up the next day. It’ll break up by chiseling under the edges.
For the “H” frame legs, I bushed a few coats of polyurethane left over from my cedar bench projects. I’ve never been so relieved to have a project completed. What matters most was that Dirt Road Girl was happy, too!
Keep Doing the Stuff of Self-Reliance,
Todd
P.S. – You can also keep up with the Stuff we’re Doing on Twitter, Pinterest, Google +, YouTube, Instagram, and Facebook… and over at our Doing the Stuff Network.
P.P.S – If you find value in our blog, Dirt Road Girl and I would appreciate your vote on Top Prepper Sites! You can vote daily by clicking here or on the image below. Check out all the other value-adding sites while you’re there…
Thanks for Sharing the Stuff!
Copyright © by Survival Sherpa: In light of the recent theft of all my content by a pirate site, my sharing policy has changed. I do not permit the re-posting of entire articles from my site without express written consent by me. My content on this site may be shared in digital form (200 words or less) for non-commercial use with a link back (without no-follow attribute) to the original article crediting the author. All photos, drawings, and articles are copyrighted by and the property of Survival Sherpa. You are more than welcome to share our photos and articles on social media for educational purposes as long as you link back to the original article/photo with credit to the author.


Pingback: Tree to Table: Building Live Edge Dining Room Furniture - Survival Guides HQ
That’s a beaut. Patience is key when working with all that stuff, not my forte’, but I just finished a cherry wood, butcher block style small table top for my wife. It took me days, but it was worth it, because my wife was happy. I could do no wrong for the next month 🙂
LikeLike
Nice job, coming from an old carpenter.
LikeLike
Came out great.
LikeLike
Pingback: How to Build a Rustic Outdoor Swing Bed | Survival Sherpa