DIY Preparedness Projects

How to Build a Rustic Outdoor Swing Bed

by Todd Walker

How to Build a Rustic Outdoor Swing Bed - thesurvivalsherpa.com

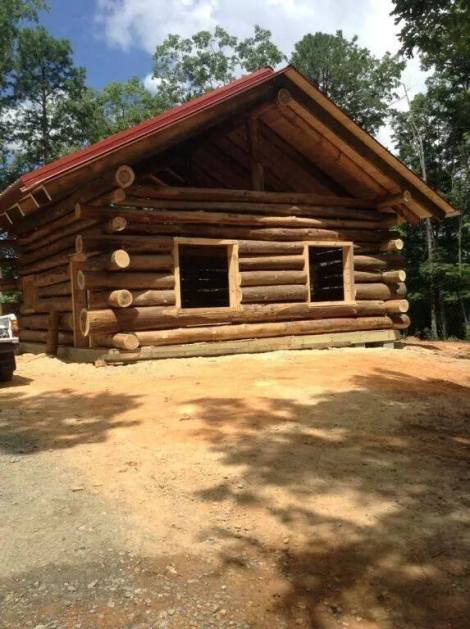
This rustic swing bed provides mind-blowing naps! A swing bed is typically hung under a large porch or other roofed structure. Since I have neither of these structures, I decided to build one from rot-resistant Eastern Red Cedar (Juniperus virginiana) and hang it under the trees at the log cabin.

Here are the materials and tools I used.

Material List

  • Rot-resistant lumber milled or purchased. Pressure treated dimensional lumber could be used but will not offer the rustic feel I was going for. My main frame was approximately 4×4’s with live edges.
  • 1x? boards for slats. Limbs used for footboard spindles.
  • Rope or chain. For hanging my bed from two trees, I chose 5/8 inch poly rope I already had for my log cabin projects.
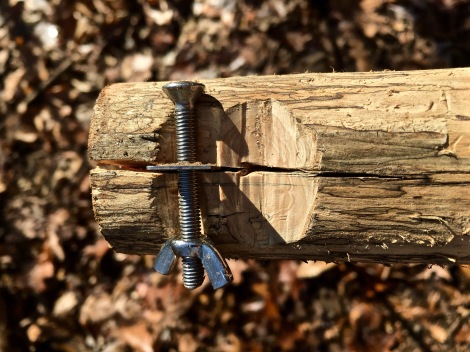
  • Screws. Trim screws, 3 inch deck screws, and 6 inch TimberLoc screws.
  • Polyurethane to help preserve the wood and color of the red cedar.
  • 2 – Two inch wide auto tow straps.

Tools

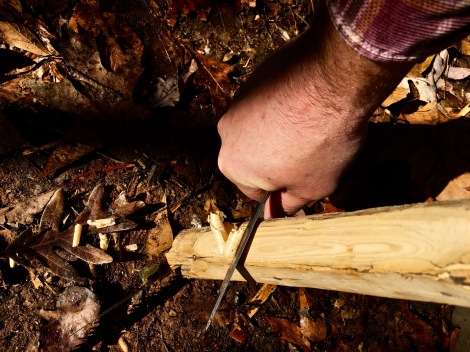
  • Chainsaw mill. My Alaskan chainsaw mill has provided lots of lumber for several projects over the years. See DRG’s dining room table.

How to Build a Rustic Outdoor Swing Bed - thesurvivalsherpa.com

  • Impact driver and drill… for driving screws and drilling pilot holes and rope/chain holes. Use appropriate sized drill bits as needed.

Size It Up

When this project came to mind, I had no real idea how large a frame I needed. Then I remembered DRG’s air mattress she bought for her tent but never got to use. The queen air mattress measured about four inches short on length than a typical queen mattress (60×80 inches). And since the swing would be under trees (no roof), the air mattress is waterproof and the best choice.

Size Dimensions
Twin 39″ X 75″
Twin XL 39″ X 80″
Full 54″ X 75″
Qu 60″ X 80″
King 75″ X 80″
California King 72″ X 84″

Chart courtesy of American Mattress.

I built the frame to handle the 60×80 inch queen mattress if I ever move the swing under a roof. On the frame, I added 5 inches to the queen width and about 15 inches to the length to accommodate the mattress and give enough room for corner holes for hanging the bed.

How to Build a Rustic Outdoor Swing Bed - thesurvivalsherpa.com

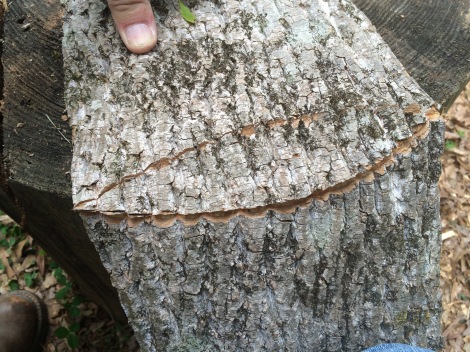
These milled pieces have live edges.

Live edges had to be shimmed to make a flush top surface for the frame. I drilled pilot holes and ran the 6 inch screws in to secure all corners.

How to Build a Rustic Outdoor Swing Bed - thesurvivalsherpa.com

As you can see above, two of the three sides are taller. This is to provide a headboard of sorts for the top and side of the bed. The shorter side would of course be the footboard. The short side is about 16 inches tall with the others being about 24 inches.

I used the toenail method to screw the four corner posts to the frame. I used both deck and TimberLok screws. I was pleased with how sturdy it turned out.

I ran a 2×3 down the middle of the frame lengthwise to help support the bed slats. Since I didn’t want to mill one inch boards, I used 1×6 cedar boards from a box store. Trim screws secured the slats to the frame.

How to Build a Rustic Outdoor Swing Bed - thesurvivalsherpa.com

Corner posts and slats installed. A ledger board was screwed to the frame to give the ends of the slats a resting place.

How to Build a Rustic Outdoor Swing Bed - thesurvivalsherpa.com

Vertical spindles installed the two tall sides.

How to Build a Rustic Outdoor Swing Bed - thesurvivalsherpa.com

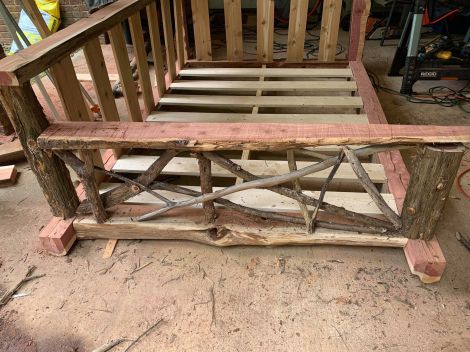
Red cedar limbs made the footboard spindles.

I attached the footboard spindles with trim screws. If you’ve ever cut down a red cedar tree, you know how many limbs become available to you for other projects.

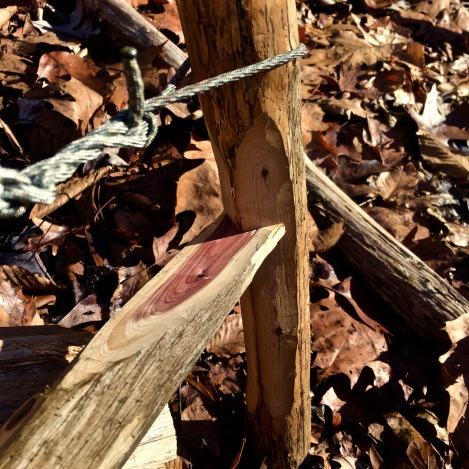
Choosing non-natural rope will give your swinging bed longer life. Natural fiber rope tend to degrade in weather sooner.

How to Build a Rustic Outdoor Swing Bed - thesurvivalsherpa.com

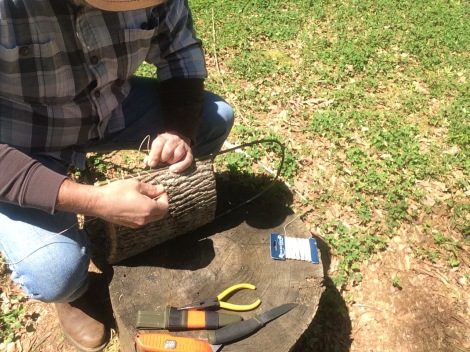
Drilling 3/4 inch holes in the four corner beams to accept the 5/8 inch rope. Tip: tape the end of the rope tightly to form a sharpened pencil point to insert into the hole. You’ll thank me later.

How to Build a Rustic Outdoor Swing Bed - thesurvivalsherpa.com

A simple overhand knot holds the rope secure.

How to Build a Rustic Outdoor Swing Bed - thesurvivalsherpa.com

Applying an exterior polyurethane to highlight and protect the beautiful color of red cedar.

With a two-point connection, the bed is less stable getting in and out than if you had a four-point connection. I used two towing straps with hooks wrapped around two trees near my log cabin.

How to Build a Rustic Outdoor Swing Bed - thesurvivalsherpa.com

Philip giving it a test run after helping me hang the bed.

How to Build a Rustic Outdoor Swing Bed - thesurvivalsherpa.com

The air mattress is 18 inches high, too high really for this swing bed.

Bug proofing is handy here in the south. I bought two of the bug nets pictured below. One of these nets is intended for a twin size cot or mattress. I figured two sewn together would cover a queen size mattress. I was right. Melonie, who helped install the log cabin subfloor and porch deck, was nice enough to cut, design, and sew these two together in her “spare” time.

How to Build a Rustic Outdoor Swing Bed - thesurvivalsherpa.com

I bought two mosquito nets, which when sewn together, made a full-coverage net for the bed.

How to Build a Rustic Outdoor Swing Bed - thesurvivalsherpa.com

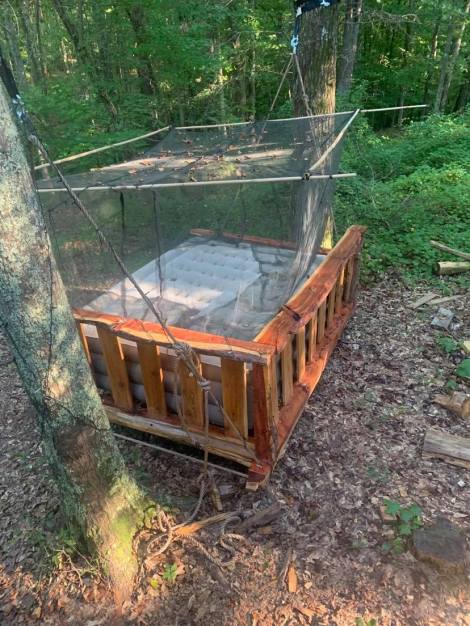
Queen size bug net hung with bamboo frame.

I enjoy cooler evening temperatures in the swinging bed at the log cabin. The whippoorwills serenade and I usually nap. It’s a peaceful place indeed!

Keep Doing the Stuff of Self-Reliance,

~ Todd

P.S. – You can also keep up with the Stuff we’re Doing on TwitterPinterestYouTubeInstagram, and Facebook… and over at our Doing the Stuff Network.

P.P.S – If you find value in our blog, I would appreciate your vote on Top Prepper Sites! You can vote daily by clicking here or on the image below. Check out all the other value-adding sites while you’re there…

Thanks for Sharing the Stuff!

Copyright © by Survival Sherpa: Content on this site (unless the work of a third-party) may be shared freely in digital form, in part or whole, for non-commercial use with a link back to this site crediting the author. All links in articles must remain intact as originally posted in order to be republished. If you are interested a third-party article, please contact the author directly for republishing information.

Categories: Camping, DIY Preparedness Projects, Doing the Stuff, Homesteading, Log Cabin, Self-reliance | Tags: , , , , , | 5 Comments

If You Build it, They Will Come

by Todd Walker

If You Build it, They Will Come - TheSurvivalSherpa.com

I’m not one to ask for help often. But I’m glad I did. They kept showing up in the Georgia heat and humidity ready to sweat through 90+ degree temperatures.

The Crew disassembled the log cabin in one day at the end of June. Once the logs were moved to the new site, I started putting the puzzle back together. I managed to stack 7 courses on the sill logs before The Crew reached out and scolded me for not extending an invitation sooner. “All ya gotta do is ask.” I’m still amazed, but shouldn’t be, that they keep coming to this party. True friends do that, ya know.

Now we’re to the point of needing metal for the roof. Here’s a look at the progress since my last log cabin update (July 31, 2019).

 Stacking Wall Logs

If You Build it, They Will Come - TheSurvivalSherpa.com

Just before The Crew showed up.

Re-assembling the wall logs was like a paint by numbers set. Dianne had labeled the logs before we took it down. It was just a matter of putting numbers back where we found them on the walls.

If You Build it, They Will Come - TheSurvivalSherpa.com

Jeff and I swinging “Good Times” to secure logs with rebar pins.

If You Build it, They Will Come - TheSurvivalSherpa.com

Two 21 foot plate logs finished up the walls.

Setting the Ridge Pole

I dreaded this task. I wasn’t sure if the plan would work. How could we get a 21 foot log over thirteen feet above the floor, balanced and secured atop two vertical ridge pole support logs?

Turns out that raising the ridge pole (RP) may have been the easiest part of the build. We cut and peeled two ridge pole support logs (RPSL) and attached them to the back and porch walls with 1/2″ all-thread rod. The poles reached about 5 feet above the plate logs to give me the pitch I wanted for the roof.

If You Build it, They Will Come - TheSurvivalSherpa.com

Peeling the freshly cut ridge pole support logs with draw knives.

If You Build it, They Will Come - TheSurvivalSherpa.com

Lifting the second ridge pole support log into place on the front porch.

We attached 2×6’s to the top of each RPSL as temporary lifting poles. A 2×6 spacer board was screwed between the RP and the temporary lifting pole. This would give the space needed for the RP to rest on the center of the RPSL’s when lifted in place. Two chain falls were secured to the 2×6 lifting poles before the RPSL’s were lifted into place.

If You Build it, They Will Come - TheSurvivalSherpa.com

Ridge pole secured on front porch wall.

If You Build it, They Will Come - TheSurvivalSherpa.com

All-thread in a counter-sunk hole which will be plugged with wood.

If You Build it, They Will Come - TheSurvivalSherpa.com

Chain falls ready for lifting.

We predrilled holes for the rebar pins in the RP before lifting. With rigging in place, we slowly lifted the RP to the top of the RPSL’s. This went smoother than I could have imagined. JT aligned his end and drove a rebar pin through the RP into the RPSL with 3 inches of rebar above the RP. The 3 inches of rebar was bent over on top of the RP for added holding power.

If You Build it, They Will Come - TheSurvivalSherpa.com

JT pinning the ridge pole in place.

Even though we measured hole placement on the RP, my end was 4 inches short of center on the RPSL. I re-drilled my end from the scaffolding we built. I drove in my rebar to secure the RP. Time for much needed break!

If You Build it, They Will Come - TheSurvivalSherpa.com

The ridge pole once the temporary lifting poles and chain falls were removed.

Rafters

I had originally planned to use log rafters and log gables on this project. However, with all the delays we encountered with the disassembly and reassembly, I opted for dimensional lumber to expedite the process. This is just a practice cabin, by the way.

We sank a deck screw in two of the 2″x6″x14′ laid out at a 45 degree angle. The screw allowed the boards to “scissor” on top of the RP as we rested the tails on the top plate logs.

If You Build it, They Will Come - TheSurvivalSherpa.com

Staging rafters over the ridge pole and top plate logs.

We slid the rafters down the RP and set them on 2 foot centers. We eyeballed the first rafter’s placement on the plate logs and toe-nailed it into place. I probably should have sawn the RP and plate logs flat to get a level run on the rafters. To correct the situation, we’ll have to lift or lower individual rafters at the top plate logs as needed. There’s always challenges when using dimensional lumber on raw logs.

If You Build it, They Will Come - TheSurvivalSherpa.com

Jeff snapped this shot after we ran out of lumber for rafters.

Gable Framing

The gables, as mentioned earlier, will be dimensional lumber. I’m not sure what I’ll use for sheathing the gables. A few ideas are floating in my head.

A top plate log needed to be installed between the long porch plate logs. We skinned a log, measured and cut to length, and pinned it. We used two of the original ax-hewn floor joists from the first build to vertically support the cross member.

If You Build it, They Will Come - TheSurvivalSherpa.com

Jeff and JT doing the heavy lifting on the cross member.

We laid two rafter boards flat over the RP to create a top plate for the gable studs. We started framing under the RP and worked our way out to the plate logs with 2×6 studs. Dianne did a fine job of cutting bevels and lengths for the studs.

If You Build it, They Will Come - TheSurvivalSherpa.com

This pics shows the flat 2×6 top plate studded up from the inside of the porch.

If You Build it, They Will Come - TheSurvivalSherpa.com

Gable view from the outside of the porch.

If You Build it, They Will Come - TheSurvivalSherpa.com

The Crew on gable day!

The sleeping loft will be above the porch where The Crew is standing. Like most of the plans on this project, we’ll figure it out as we go.

Keep Doing the Stuff of Self-Reliance,

~ Todd

P.S. – You can also keep up with the Stuff we’re Doing on TwitterPinterestYouTubeInstagram, and Facebook… and over at our Doing the Stuff Network.

P.P.S – If you find value in our blog, Dirt Road Girl and I would appreciate your vote on Top Prepper Sites! You can vote daily by clicking here or on the image below. Check out all the other value-adding sites while you’re there…

Thanks for Sharing the Stuff!

Copyright © by Survival Sherpa: Content on this site (unless the work of a third-party) may be shared freely in digital form, in part or whole, for non-commercial use with a link back to this site crediting the author. All links in articles must remain intact as originally posted in order to be republished. If you are interested a third-party article, please contact the author directly for republishing information.

Categories: DIY Preparedness Projects, Doing the Stuff, Homesteading, Log Cabin, Self-reliance | Tags: , , | 5 Comments

Self-Reliance on Trial: Using Hand Tools to Build a Log Cabin in the Woods

by Todd Walker

Self-Reliance on Trial: Using Hand Tools to Build a Log Cabin in the Woods ~ TheSurvivalSherpa.com

Image used with permission from the builder, Wiley Log Homes.

We built crude log forts in the woods growing up. They weren’t water tight or warm. The wind would cut through the muddle of sticks and threaten to take your hat off. Those were fun times. A bona fide log cabin was what I dreamed of then… and that dream remains.

At nearly my age (55), Dick Proenneke set out to live in a remote area of Alaska. For 30 years, he lived in a log cabin he built with his own hands. You can learn more of his remarkable legacy of self-reliance and conservation by watching the documentary, Alone in the Wilderness.

For those following my cabin project on my YouTube channel, I’m in the early stage of cutting and debarking logs. I don’t have the luxury of waiting a year or more for peeled logs to season. I could wait but patience isn’t one of my strong suits. I’ll build my little “practice” cabin with green logs. I’ve already been asked in video comments how long I’ll let my logs season before building.

Here’s the thing, I’m not going to use traditional saddle notches to connect corners. I may try my hand at saddle notches on cured/seasoned logs at some point. Until then, my research turned up a little-known (to me at least) construction method which uses green, unseasoned logs in construction. If you’re not familiar with this style, let me introduce you…

Butt and Pass Style Log Cabin

The advantages of using the butt and pass construction technique is it requires little in the way of tools and construction experience for a DiY log cabin builder. I’ve got plenty of construction experience and tools. My dilemma is that I have green logs and want to finish the cabin before the end of the school year. This no-scribe, no-notch method will speed up the construction process.

The top photo of this article is a butt and pass log home built by Wiley Log Homes. Ronnie, the owner, gave me permission to share a few of his beautiful handcrafted log homes here. I hope to have a few shots of my own cabin corners soon. Until then, take a look at the corners of these Wiley Log Homes.

Self-Reliance on Trial: Using Hand Tools to Build a Log Cabin in the Woods ~ TheSurvivalSherpa.com

This cabin has a stone basement.

Self-Reliance on Trial: Using Hand Tools to Build a Log Cabin in the Woods ~ TheSurvivalSherpa.com

Five foot eves help keep water off the logs.

Self-Reliance on Trial: Using Hand Tools to Build a Log Cabin in the Woods ~ TheSurvivalSherpa.com

A good shot of the butt and pass corner style.

No matter what method is used green logs will shrink. However, with tight-pinned butt and pass construction, settling will only happen if the foundation/piers are not properly formed. With each course of logs, holes are drilled through the top log through the bottom log. A length of 1/2″ rebar is driven through the logs (tight-pinned) about every two feet. As the green logs cure and shrink, the logs shrink around their center line. The gaps between the logs increase but the wall height remains the same. Touching up the chinking over the first few years will have to happen as the logs cure, so I’ve read.

Self-Reliance on Trial

I plan to build my cabin with hand tools only. That’s a tall order especially when I have power tools at my disposal. The pioneer method doesn’t trump someone who chooses to use power tools. I have a comfortable home and don’t “need” this cabin. But somewhere, back in my deeper, primal self, I want this cabin, if for nothing more than to put my self-reliance on trial. Who knows, I may not make it through the project using just hand tools. Either way, this project has been brewing in my gut for years and feels good to take the first step.

Self-Reliance on Trial: Using Hand Tools to Build a Log Cabin in the Woods ~ TheSurvivalSherpa.com

My cousin said this to me after he saw the first logs de-barked. “Hardest step is the first one. I’ve been told this but usually by someone who ain’t doing the stepping.” ~ Tim Hester. This is a photo of Dick Proenneke peering out of his cabin door (Image credit: National Park Service)

I’ve only bucked and de-barked one pine tree so far. My first attempt at skinning logs was with a draw knife. The tool peeled bark really well but would not be a sustainable method for this old man. I needed a method where I’m not bent over scraping with pine sap flying in my face. Enter the tile scraper. I ground the edge on this old long-handled tool and it’s a far cry better than my draw knife on my back. I’ve been using it like a draw knife, scraping long strips of bark off the length of the logs, but will try peeling whole sections off logs by prying around the round part of the log. Not sure how well this will work since the sap is not rising like in spring time.

Another hand-tool concerns that comes to mind is boring holes to accept the rebar pins. Twisting a half-inch auger through logs can’t be easy. Yet another challenge will be transporting 12 and 14 foot logs to the build site in the woods. I won’t be able to split them in half or into rails the way I did in last year’s Axe Cordwood Challenge. I need draught horses, or oxen. Seriously!

Progress Report

To keep up with the log cabin journey, I’ve created a playlist on my channel titled, Log Cabin Build. Most are mine but a few are of Dick Proenneke’s cabin. I’ll also be updating here on the blog.

This is the last video in the log cabin series. I traded my draw knife for a DiY bark spud…

With only one day per week to work on the cabin, progress is slow. Winter break should offer a few extra work days. Below are some photos of my progress.

Self-Reliance on Trial: Using Hand Tools to Build a Log Cabin in the Woods ~ TheSurvivalSherpa.com

A storm blow-over bucked and ready for de-barking.

Self-Reliance on Trial: Using Hand Tools to Build a Log Cabin in the Woods ~ TheSurvivalSherpa.com

Two debarked logs.

After the first two logs, I mentioned in my video about the fun you can have debarking logs. In honor of Tom Sawyer’s fence white washing pitch, I had a buddy and his son show up to my first Barking Party. Evan Newsom, first picture below, was the first to party on!

Self-Reliance on Trial: Using Hand Tools to Build a Log Cabin in the Woods ~ TheSurvivalSherpa.com

Tom Sawyer would be so proud!

I even have my school students convinced…

Self-Reliance on Trial: Using Hand Tools to Build a Log Cabin in the Woods ~ TheSurvivalSherpa.com

Introduced students at RISE to the draw knife. They have acquired a liking for this tool.

Sure appreciate having the physical health to be able to attack this pioneer project. It will take longer to construct using hand tools. Patience may become a strong suit of mine after all is said and done.

Keep Doing the Stuff of Self-Reliance,

Todd

P.S. – You can also keep up with the Stuff we’re Doing on TwitterPinterestGoogle +YouTubeInstagram, and Facebook… and over at our Doing the Stuff Network.

P.P.S – If you find value in our blog, Dirt Road Girl and I would appreciate your vote on Top Prepper Sites! You can vote daily by clicking here or on the image below. Check out all the other value-adding sites while you’re there…

Thanks for Sharing the Stuff!

Copyright © by Survival Sherpa: In light of the recent theft of all my content by a pirate site, my sharing policy has changed. I do not permit the re-posting of entire articles from my site without express written consent by me. My content on this site may be shared in digital form (200 words or less) for non-commercial use with a link back (without no-follow attribute) to the original article crediting the author. All photos, drawings, and articles are copyrighted by and the property of Survival Sherpa. You are more than welcome to share our photos and articles on social media for educational purposes as long as you link back to the original article/photo with credit to the author.

Categories: DIY Preparedness Projects, Doing the Stuff, Homesteading, Log Cabin, Lost Skills, Self-reliance | Tags: , , , | 6 Comments

Tree to Table: Building Live Edge Dining Room Furniture 

by Todd Walker

Tree to Table: Building Live Edge Dining Room Furniture ~ TheSurvivalSherpa.com

Five years ago, I built Dirt Road Girl an eight foot farmhouse table from dimensional lumber. It served our family well but was really too large for our dinning room. It had a tendency to bruise unsuspecting thighs. For Christmas, a smaller, less aggressive piece of furniture was in order.

From Tree to Table

My nephew, Blake, showed me a standing dead cedar on our family land last year. Easy access since it was just past a field’s edge. Just after Thanksgiving I made the trip south to cut and haul the tree home. I was disappointed after it was on the ground. The trunk was hollow a good portion of the widest table-top material. After a bit of hemming and hawing, I decided to buck it anyway and hope to get enough useable live-edge slabs. With the help of two other nephews, Kyle and Casey, the trailer was loaded and headed north.

Tree to Table: Building Live Edge Dining Room Furniture ~ TheSurvivalSherpa.com

Barbed wire strands ran through this old cedar on our family farm.

Tree to Table: Building Live Edge Dining Room Furniture ~ TheSurvivalSherpa.com

Visited with Mama and Daddy for a while and hauled hollow log back home.

Mill Work

You either pay with time or money when milling lumber. My Alaska chainsaw mill demands a lot of elbow grease and belt sanding to achieve a smooth surface on lumber. By the first of December I realized I’d better spend some money to save time. My buddy up the street gave me a lead on a man with a large bandsaw mill. Boy, was that mill fancy! It quickly sliced up two-inch thick slabs from three logs like cutting through hot butter. And the surfaces would need only minor sanding.

Tree to Table: Building Live Edge Dining Room Furniture ~ TheSurvivalSherpa.com

This is a $50,000 machine. Too rich for my blood but milled up my logs in no time!

Note: Sawn and sanded red cedar may smell delightful, but breathing it has been linked to ill effects on lungs. Wear appropriate respirators or dust masks when working with red cedar.

Tree to Table: Building Live Edge Dining Room Furniture ~ TheSurvivalSherpa.com

Finding four useable boards from a hollow tree was a challenge.

Sizing up my slabs, I knew I’d have to use the lumber or find and fell a tree with a solid trunk. No time for that. Dirt Road Girl and I chose what we thought would be best for her new table. I went to work figuring out how to fill the holes and save the character of this cedar on our family farm.

Ripping Live Edge Lumber

My tree wasn’t near wide enough to use only one slab as the table top. I would need four boards, two outside with a live edge, and two square edge boards joined in the middle.

How do you rip a straight line on boards without one side being square? My table saw died but wouldn’t be much good anyway squaring live edge sides. A square side is needed to run along the fence of a table saw. My solution? I laid a seven-foot straight edge (aluminum square stock) on the slab and eyeballed where the square edge should be cut. I marked the cut line and then clamped the aluminum straight edge 1 and 3/16th inches off the line which would put the blade of my circular saw on the cut line. Ripping commenced.

Tree to Table: Building Live Edge Dining Room Furniture ~ TheSurvivalSherpa.com

Straight edges ripped on the lumber.

With at least one square edge on each of the four boards, I marked the ends using a framing square and cut the boards six feet long. A two foot level was clapped on the ends with the same offset described in ripping to ensure a clean cut. You could freehand the cut if you’re that good with a saw. I prefer using a fence to keep it square.

I also ripped more slabs for the table legs. Each of the legs and cross supports was cut with one live edge intact. Again, I used the eyeball method and the straight edge. The leg lumber turned out about 3.5 inches wide by two inches.

Joining the Table Top

My trusty Kreg Jig is meant to be used on 1.5 inch lumber or smaller. My boards were 2 inches thick. I monkeyed around with the jig to modify it for 2 inch boards. I used the longest pocket screws, meant for 1.5 lumber, which worked fine on all the glued joints. I tested the pocket joinery on two scrap pieces beforehand.

Tree to Table: Building Live Edge Dining Room Furniture ~ TheSurvivalSherpa.com

A view of the bottom side glued, screwed, and clamped.

Once the top is glued and screwed, you’ll need clamps to hold it all together. I used two pipe clamps and a vintage bar clamp to squeeze the top together overnight. The next morning I hit the top with my belt sander – 80 grit and then 120. To remove bark from the live edges, I use a side grinder with a wire wheel. I do this on my cedar benches as well. Then I use an orbital sander to smooth up scratches left by the wire brush.

Table Frame

This step is a simple “H” frame. You could go fancy but simple suits DRG. I secured a cedar 2×4 (all sides squared) about a foot in from both ends under the table. These pieces served as cleats to attach the legs and frame.

Flip the table over with the bottom up. Saw horses are helpful. We wanted a 30 inch high table. I cut four legs 28 inches each. Use a framing square to plumb each leg. I glued and screwed the legs to the ends of the 2×4 cleats with the live edge facing the ends of the table. No Kreg Jig pocket holes needed on these joints since they’re hidden under the table.

Tree to Table: Building Live Edge Dining Room Furniture ~ TheSurvivalSherpa.com

A simple H frame attached for legs.

Add two cross pieces (live edge up) between each pair of legs. Pocket holes and screws were facing toward the middle of the table and filled with glue and wood pegs. They were secured about 12 inches from the bottom of the legs. Just make both match on each set of legs.

Next, I centered the long crossbar on both of the previously installed cross pieces, checking for plumb legs again. Drill pocket holes, glue, and screw. Leave live edge facing up when table is set on the floor.

By the way, it’s easier to sand the “H” frame before installation. You can go back and sand pocket wood plugs flush after the glue dries.

Hole Filler Fiasco 

What a horror story. I didn’t do my homework on hole fillers. I read somewhere that epoxy will do the trick. My idea was to fill the holes with clear epoxy. Gorilla Brand epoxy, the kind with two push syringes, don’t dry clear – no matter what it says on the package. Actually looked like puss in a wound. I discovered this disturbing fact after stripping the shelves clean in our little town of the stuff and filling holes and crevasses. Stupid of me not to test it on scrap wood. I was sick and told DRG that I might have to go find another cedar tree to mill. Time was running out in Santa’s workshop.

Tree to Table: Building Live Edge Dining Room Furniture ~ TheSurvivalSherpa.com

Remnants of painters tape outlining ‘clear’ Gorilla epoxy.

To remove the nastiness which had bonded in every nook and cranny, I spent the day with a heat gun and a variety of paint scrapers whittling and digging “puss” from this beautiful wood. Crank the heat gun on high and keep the heat moving over the target area. When warmed/hot, epoxy will turn loose with some determined coaxing.

Tree to Table: Building Live Edge Dining Room Furniture ~ TheSurvivalSherpa.com

This paint scraper has multiple heads and sizes which came in handy.

Table Top Finish

After fixing the fiasco, I purchased a self-leveling epoxy called Glaze Coat. By now I was apprehensive as to how any product would work. Some of the knot holes went all the way through the table top. The live edge could not be boarded to allow a pour like one might do on a rectangular bar top. One table end presented a couple of crevasses which I attached boards to using painters tape and waxed freezer paper. This would hopefully dam up the epoxy until it sets.

I followed the detailed instructions on the box for mixing. Poured epoxy into all holes and prayed it would set clear. I waved my heat gun over the pours to release trapped air bubbles which form in the mixing process.

The next morning all was good. The clear epoxy revealed all the interior details of the holes and highlighted the character of this old cedar tree. My attention was now directed to raised areas where I had poured.

Since I couldn’t fence in liquid epoxy on a live edge table to cover the raised epoxy over the holes, I hesitantly decide to sand the areas flat along with the table end. The progression went from 80 grit to 400 on my belt and orbital sanders. From there I used 600, 1,000, and finally, 1,500 grit on hand-held drywall sanders – the same grits I use to sharpen my axes. It was a tedious process of replacing sets of scratches until the surface was clear. It worked.

Wipe all dust from the table with a damp rag a few times before starting the next step…

Pouring a 1/8th inch layer of epoxy on the top, as recommended in the instructions, was not an option for live edges. I bought the cheapest “nice” oil brush as a sacrificial applicator. Chip brushes will shed bristles. Mix another batch of epoxy and bush a thick coat on the table top. The product is self-leveling so brush strokes will flatten. This top coat blended in well with the epoxied holes and made the colors pop!

Tree to Table: Building Live Edge Dining Room Furniture ~ TheSurvivalSherpa.com

Merry Christmas, Dirt Road Girl!

Apply a coat on the live edges while your brushing. Obviously, you’ll want a drop cloth under your project. Be vigilant as the top coat levels over the live edges. Blend any runs/drips on the live edges with a brush. You’ll have about a 30 minute time frame as the top coat levels and sets. In the meantime, use a heat gun or propane torch to remove air bubbles on the top coat.

As a side note, one of the holes, not completely patched from underneath, dripped a 12 inch pool of epoxy on my uncovered shop floor. Let it dry and scrape it up the next day. It’ll break up by chiseling under the edges.

For the “H” frame legs, I bushed a few coats of polyurethane left over from my cedar bench projects. I’ve never been so relieved to have a project completed. What matters most was that Dirt Road Girl was happy, too!

Keep Doing the Stuff of Self-Reliance,

Todd

P.S. – You can also keep up with the Stuff we’re Doing on TwitterPinterestGoogle +YouTubeInstagram, and Facebook… and over at our Doing the Stuff Network.

P.P.S – If you find value in our blog, Dirt Road Girl and I would appreciate your vote on Top Prepper Sites! You can vote daily by clicking here or on the image below. Check out all the other value-adding sites while you’re there…

Thanks for Sharing the Stuff!

Copyright © by Survival Sherpa: In light of the recent theft of all my content by a pirate site, my sharing policy has changed. I do not permit the re-posting of entire articles from my site without express written consent by me. My content on this site may be shared in digital form (200 words or less) for non-commercial use with a link back (without no-follow attribute) to the original article crediting the author. All photos, drawings, and articles are copyrighted by and the property of Survival Sherpa. You are more than welcome to share our photos and articles on social media for educational purposes as long as you link back to the original article/photo with credit to the author.

Categories: DIY Preparedness Projects, Doing the Stuff, Self-reliance | Tags: , , , | 5 Comments

How to Craft a Base Camp Bucksaw in the Woods

by Todd Walker

how-to-craft-a-base-camp-bucksaw-in-the-woods-thesurvivalsherpa-com

My regret is that I didn’t watch more quality YouTube videos on my journey of self-reliance. There’s a sea of regurgitated material out there, and, sadly, few quote their sources of knowledge. My latest project was inspired by watching Kelly Harlton build a bucksaw with Mors Kochanski on Randy Breeuwsma’s channel, Karamat Wilderenss Ways.

For larger cutting tasks at base camp, a bucksaw is a thing of beauty and a joy forever. The 21 inch takedown bucksaw I built from scrap dimensional lumber is portable but usually hangs on my shop wall. I needed a dedicated base camp saw stowed away in my shelter.

My first foray into bucksaw building in the woods was a wobbly failure several years ago. The crossbar/upright union was the weak point. Kelly’s design fixed all that. Thank you, Kelly!

Base Camp Bucksaw

Material and Tools

  • Knife
  • Ax
  • Rope
  • Wood
  • Saw Blade
  • Hardware – two bolts, screws, nails, or key chain rings

Step 1: Collect Wood

An abundance of dead cedar surrounds my base camp. A green sapling will work just as well. I used cedar. For the uprights, cut two wrist-size (or slightly smaller) sections measuring elbow-to-finger-tip (approximately 18 inches). The crossbar should be of similar diameter and slightly longer than your saw blade. You will cut this piece to exact length later.

Remove any bark from your chosen wood. The dead cedar I used had only small amounts left. I scraped it off with the spine of my knife and added the “waste” to my tinder pile in the shelter.

Step 2: Prepare the Uprights

Lay the two uprights side by side and compare any bow in the pieces. I purposely used two cedar uprights with slight bows. The concave sides should face each other or inward.

Once aligned, baton your knife down the center end of the upright until a split is created to accept your saw blade. Don’t split too deep or the upright will become two pieces. Repeat this step on the other upright making sure the splits are on the same plane as the previous one.

Carve a shallow V-notch perpendicular to each split at the base of each upright. The notch will allow the bolts or other hardware to seat securely against the wood when sawing.

How to Craft a Base Camp Bucksaw in the Woods ~ TheSurvivalSherpa.com

I recommend carving the notch after you check to see how far the saw blade fits inside the split. My first notch is pictured too far above the bolt.

Now you’ll carve down the sides of both uprights to create a 90 degree corner which faces inward. Only whittle away enough wood to make a sharp corner so that the wood is not weakened. This corner should run from a few inches above the blade to over halfway up each upright. Take care to keep the corner edges in line with the blade splits.

How to Craft a Base Camp Bucksaw in the Woods ~ TheSurvivalSherpa.com

Whittle away to form a 90 degree corner

Step 3: Attach Saw Blade

Insert the saw blade into each split on the uprights. Use your knife to open the split slightly to start the blade if need be. Once the saw blade is inserted into both uprights, attach hardware through the holes in your saw blade. Place one upright on the ground while holding the other upright and blade vertical. Step on the bottom upright and tug to tighten the hardware against both uprights.

How to Craft a Base Camp Bucksaw in the Woods ~ TheSurvivalSherpa.com

Lay the saw on the ground and align the uprights perpendicular to the blade.

Step 4: Prepare the Crossbar

Place the crossbar across the uprights to form an H pattern in the middle of the uprights. With one end aligned at the midpoint of one upright, mark and cut the crossbar to length at the midpoint of the other upright.

How to Craft a Base Camp Bucksaw in the Woods ~ TheSurvivalSherpa.com

Leave the crossbar longer than needed until final measurements.

Next, carve away each end of the crossbar to form a tapering wedge shape. Leave about 3/8th of an inch on the end of the wedge. If using green wood, a knife works fine. I used my ax on the seasoned cedar to expedite the trimming. Again, take your time and keep both crossbar end wedges on the same plane. They should appear identical or very close once carved.

How to Craft a Base Camp Bucksaw in the Woods ~ TheSurvivalSherpa.com

One of the wedged ends of the crossbar.

At the ends of each wedge, carve a 90 degree notch. Again, on softer, green wood, a knife will carve the notch just fine. On seasoned cedar, I used my small saw on my Leatherman tool to remove the bulk of the notch and tweaked them with my knife for final fitting.

Test the fit by placing the crossbar between the uprights. The corner notches should mate without gaps at the union points. If not, trim until they do.

How to Craft a Base Camp Bucksaw in the Woods ~ TheSurvivalSherpa.com

Spaces between these two pieces will cause instability.

Step 5: Make the Rope Windlass

Cut and smooth two paddle sticks about 8 inches long which will be used to tighten the windlass ropes. Set aside for now.

Wrap a length of cordage around the two uprights. Tie the ends of the cords with a secure knot to form a loop. Rope with little to no elasticity is ideal. I didn’t have “ideal” so I used 550 paracord. You’ll need two of these loops so repeat this process.

How to Craft a Base Camp Bucksaw in the Woods ~ TheSurvivalSherpa.com

Place one end of a loop near the top of one upright and move the other end to down the opposite upright near the crossbar. Repeat this with the other loop of cord to form an X-shape of rope between the uprights. Make a note of where the loop ends will rest. Now carve shallow notches at those locations where the loops will rest once tightened.

Step 6: Assemble the Saw

Insert a paddle stick between one set of loop cords. Rotate the paddle until slight tension is created. Repeat this process in the other loop cord. Continue spinning the paddles alternately until the saw blade is tight as a hat band. Note: Kelly used smaller paddle sticks on his saw in the video which didn’t stop on the crossbar but on the opposite loop cords. I tried this method and found, due to the length of my saw blade maybe, I needed longer paddles to create more tension. My paddles held tension by resting on the crossbar.

How to Craft a Base Camp Bucksaw in the Woods ~ TheSurvivalSherpa.com

Fully assembled and ready to go.

The crossbar can be adjusted with a few taps to help square the H frame after tensioning the saw. You can also adjust the saw’s throat depth by bumping the crossbar up or down the corner notches on the uprights.

Put finishing chamfer cuts on all the upright ends and you’re ready for some serious sawdust. This 36 inch bucksaw may be overkill for my woodcutting needs in our mild Georgia winters. Still, I think it will come in handy for the log cabin project floating amongst my gray matter.

Below is Karamat Wilderness Ways video of Kelly Harlton’s H bucksaw with Mors Kochanski’s narration and wisdom.

https://youtu.be/U94JgBQSfUU?si=S-o_sBIpr8QAJfke

Keep Doing the Stuff of Self-Reliance,

Todd

P.S. – You can also keep up with the Stuff we’re Doing on TwitterPinterestGoogle +, YouTube, Instagram, and Facebook… and over at our Doing the Stuff Network.

P.P.S – If you find value in our blog, I would appreciate your vote on Top Prepper Sites! You can vote daily by clicking here or on the image below. Check out all the other value-adding sites while you’re there…

Thanks for Sharing the Stuff!

Copyright © by Survival Sherpa: In light of the recent theft of all my content by a pirate site, my sharing policy has changed. I do not permit the re-posting of entire articles from my site without express written consent by me. My content on this site may be shared in digital form (200 words or less) for non-commercial use with a link back (without no-follow attribute) to the original article crediting the author. All photos, drawings, and articles are copyrighted by and the property of Survival Sherpa. You are more than welcome to share our photos and articles on social media for educational purposes as long as you link back to the original article/photo with credit to the author.

Categories: Bushcraft, Camping, DIY Preparedness Projects, Doing the Stuff, Self-reliance, Survival Skills | Tags: , , , | 5 Comments

The Top 7 Survival Sherpa Articles of 2016

by Todd Walker

The Top 7 Survival Sherpa Articles of 2016 ~ TheSurvivalSherpa.com

This question haunts my mind with each passing year…

Is it possible, at my age, to write my first book?

This week marks 5 years since starting this little blog. Writing for me has been a series of absurd events. C-minuses in all my college english classes, all of which I was super proud to earn, is a poor indicator for a future book-writer. Still, I write words and sentences but couldn’t diagram one if a gun were held to my head.

My English professors would be shocked, almost as much as I am, to find 550 articles penned here. There’s gotta be a book floating in this ocean of words somewhere! Mustering the grit to organize them will be my challenge.

Until then, I’ve listed our 7 best articles from 2016. I’m always interested in which articles add value on your journey of self-reliance (as well as the ones I should have canned).

Our Top 7 Articles of 2016

A) The Number One Knife Skill for Wilderness Survival and Self-Reliance

Dial back to the golden age of camping and woodcraft and you’ll find that the knives of Nessmuk, Kephart, Seton, and Miller played an essential role in all their tramping and wilderness adventures. This simple machine (wedge) was a value-adding tool for, not only survival, but for camp comforts and wilderness living skills.

B) Off-Grid Winch: Incredible Power from Two Logs and a Rope

In an emergency vehicle kit, weight and space are not an issue – unless you scoot around in a Smart Car. For this winch, all you need are two logs and some rope.

C) How Cherokees Used Trees of Southern Appalachia for Food, Medicine, and Craft

In this article, we will explore 3 of my favorite trees in my woods and how the Cherokee and settlers used them for food, medicine, and craft resources.

D) How to Estimate Distance in the Woods with Right Triangles

What if you needed to ford a river, build a fence, or erect a foot bridge over a creek in the woods? I’ve never seen any of my woodsmen friends pull out a 100 foot measuring tape from their pack. But you can get an accurate estimation of width without a measuring device. We use this method with our 8th grade math students as a hands-on learning opportunity.

E) How to Build a Carving Bench from a Log (Rope Vise Plans Included)

One tool my semi-permanent base camp shelter was missing is a dedicated carving bench. Add this to my Paring Ladder, and a future pole lathe, and my non-electric shop in the woods will be fully functional.

F) A Beginner’s Guide to Avoiding Bloated Bushcraft

Bushcraft encompasses a deep and wide field of knowledge. For the beginner, information overload has the real possibility of stopping you before you can even start this new hobby. To avoid bloated bushcraft, build a firm foundation by developing these two core skills outlined in this article.

G) Backcountry Belt Kit: Essential Tools to Carry Around Your Waist

There are many scenarios where you may be separated from your backpack and gear. Tipping a canoe or tumbling down a ravine come to mind. These types of accidents can quickly relieve you of the gear which makes for a comfortable wilderness outing. Having essential gear in your pockets and attached to your belt could turn your luck around, and, not being overly dramatic here, could literally save your life.

The Top 7 Survival Sherpa Articles of 2016 ~ TheSurvivalSherpa.com

The best snow globe ever!

Thanks for taking the time to read the stuff! Dirt Road Girl and I would like to wish you and your family a very Merry Christmas and healthy and productive new year!

Keep Doing the Stuff of Self-Reliance,

Todd

P.S. – You can also keep up with the Stuff we’re Doing on TwitterPinterestGoogle +, YouTube, Instagram, and Facebook… and over at our Doing the Stuff Network.

P.P.S – If you find value in our blog, Dirt Road Girl and I would appreciate your vote on Top Prepper Sites! You can vote daily by clicking here or on the image below. Check out all the other value-adding sites while you’re there…

Thanks for Sharing the Stuff!

Copyright © by Survival Sherpa: In light of the recent theft of all my content by a pirate site, my sharing policy has changed. I do not permit the re-posting of entire articles from my site without express written consent by me. My content on this site may be shared in digital form (200 words or less) for non-commercial use with a link back (without no-follow attribute) to the original article crediting the author. All photos, drawings, and articles are copyrighted by and the property of Survival Sherpa. You are more than welcome to share our photos and articles on social media for educational purposes as long as you link back to the original article/photo with credit to the author.

.

Categories: Bushcraft, Camping, DIY Preparedness Projects, Doing the Stuff, Self-reliance, Survival | Tags: , , , , | 1 Comment

The Alpha Survivalist: An Eighth Grader Doing the Stuff

by Todd Walker

The Alpha Survivalist: An Eighth Grader Doing the Stuff ~ TheSurvivalSherpa.com

What makes my day as a school teacher is watching a student, previously lost like a ball in high weeds, finally have an “Ah Ha” moment. Their eyes light up and I give them a fist bump. These little specks of light brighten my world.

Speaking of bright spots, you have no idea how excited I am as an eighth grade teacher to discover an eighth grade student busy Doing the Stuff of Self-Reliance!

The great aim of self-reliance is not knowledge, but doing.

And doing is what Corton is about. He documents his journey on The Alpha Survivalist with some pretty amazing projects. On the phone, Cort told me his love for the outdoors fueled his interested in survival and self-reliance. Living near Blairsville, GA, he’s had the opportunity to learn from Alan Kay, winner of History’s season 1 “Alone.” His mom says that they can’t keep the boy out of the woods.

Cort "skinning the cat"

Cort “skinning the cat”. Some of you country folk are familiar with this game. (Photo courtesy – The Alpha Survivalist)

Note: All photos are used with permission from The Alpha Survivalist. 

My conversation with Cort reminded me of my childhood. He and his brother spend time building forts, woods running, and climbing trees. One of his shelters is very impressive. Inside he hand-crafted a primitive stove, chimney included, using clay dug from their basement. A mini Mors Kochanski super shelter will keep his raised bed warm well below freezing.

Even ol' Nessmuk would be proud to "smooth it" in this shelter!

Even ol’ Nessmuk would be proud to “smooth it” in this shelter! The plastic sheeting (pictured right) is his super shelter.

Each clay brick was formed by hand and placed one level at a time and dried by the fire.

Each clay brick was formed by hand and placed one level at a time to be dried by the fire.

Displaying his resourcefulness, Cort crafted his own ax handle from a dogwood limb… then proceeded to make the ax sheath from, get this, duct tape and an old sock! Pure genius! Real-world experience teaches more than words on a page.

Add this to another use for good old duct tape!

Add this to another use for good old duct tape!

Cort’s parents are raising their boys right. In today’s “selfie” culture, I could tell from our brief phone conversation that this young man had been taught to respect others and not be the center of the universe. His home-education is paying dividends beyond book smarts.

In the near future, I hope to have a face to face with Cort and smell the wood smoke rising from his primitive stove. Be sure to check out his journey on his blog, The Alpha Survivalist. I guarantee you’ll be encouraged and learn a thing or two!

Keep Doing the Stuff of Self-Reliance,

Todd

P.S. – You can also keep up with the Stuff we’re Doing on TwitterPinterestGoogle +, YouTube, Instagram, and Facebook… and over at our Doing the Stuff Network.

P.P.S – If you find value in our blog, Dirt Road Girl and I would appreciate your vote on Top Prepper Sites! You can vote daily by clicking here or on the image below. Check out all the other value-adding sites while you’re there…

Thanks for Sharing the Stuff!

Copyright © by Survival Sherpa: In light of the recent theft of all my content by a pirate site, my sharing policy has changed. I do not permit the re-posting of entire articles from my site without express written consent by me. My content on this site may be shared in digital form (200 words or less) for non-commercial use with a link back (without no-follow attribute) to the original article crediting the author. All photos, drawings, and articles are copyrighted by and the property of Survival Sherpa. You are more than welcome to share our photos and articles on social media for educational purposes as long as you link back to the original article/photo with credit to the author.

Categories: Bushcraft, Camping, DIY Preparedness Projects, Doing the Stuff, Self-reliance | Tags: , | 7 Comments

My Top 4 Most Useful Basecamp Builds

by Todd Walker

My Top 4 Most Useful Basecamp Builds ~ TheSurvivalSherpa.com

One of the hallmarks of the veteran woodsman is the way he contrives to make himself comfortable in camp.  ~ Warren H. Miller, 1915

Over years of wild camping I’ve learned just how little one needs to be happy in the woods. But a permanent campsite… oh the comforts to be contrived!

Walking through the beech trees and white oaks, I hop rocks across the creek. Then it happens. My soul smiles with every arrival at base camp. My home away from home is a laboratory for adventure and self-reliance skills. More importantly, it’s my place of comfort in the woods!

A few items I find essential for comfort are listed below…

Top Base Camp Comforts

1.) Shelter

Instead of pitching a tent or hanging a hammock, a semi-permanent shelter was needed. Constructed from natural materials (except for the repurposed billboard roof and bank line), it’s large enough to sleep in with room for storage. At both ends of my raised canvas cot, there’s ample room for laying in a good supply of firewood, tools, and gear.

My Top 5 Most Useful Items at Permanent Camp ~ TheSurvivalSherpa.com

The foot of my raised canvas cot

Speaking of firewood…

2.) Sawbuck

Using a plumber’s vise is effective for sawing wrist-size saplings in the field. My daddy taught me this technique when cutting pipe in his plumbing business. For right-handers, place the stick of wood in the bend of your left knee. Kneel on your right knee so the stock rests on your right thigh. This posture holds the wood in place firmly freeing both hands for sawing to the side of your body.

However, when processing larger rounds, a sturdy base camp sawbuck is indispensable.

How to Build a Sturdy Sawbuck with Logs and Rope - www.TheSurvivalSherpa.com

Sawing firewood on this camp sawbuck

Here’s an interesting factoid about why the ten-dollar bill became known as a “sawbuck” in slang terminology. The Roman numeral for 10 being “X”, this reminded old timers of the two X’s used at the ends of saw horses.

3.) Camp Kitchen

“A fellow who cannot throw a flapjack is sadly lacking in the skill one expects to find in a real woodcrafter.” ~ Daniel Carter Beard

A seasoned woods cook will have an open fire lit in short order. Flapjack batter turns golden brown as the smell of freshly brewed coffee and salt cured bacon mingle.

Campfire Cooking: Grill, Cook, and Bake on a Multi-level Fire Pit - TheSurvivalSherpa.com

Time to eat!

The plywood camp house situated near the dam of our family lake is long gone. The memories and the aroma of Uncle Otha cooking over an open fire with heirloom cast iron is as vivid today as they were 45 years ago. Truer words can not be found than in one of Mr. Kephart’s quotes, “A good cook makes a contented crew.”

A permanent camp kitchen, like modern ovens and ranges at home, becomes the center piece of camp life. The cooking fire is that hub. I personally find a raised horizontal surface indispensable. My camp countertop, a split cedar log resting on two cedar rails lashed between trees, keeps cooking utensils and ingredients off the ground.

My Top 5 Most Useful Items at Permanent Camp ~ TheSurvivalSherpa.com

Cooking rice, grilling steak, and baking muffins on one campfire

A few carved pot hooks hung from a horizontal sapling (waugan) allows heat regulation when cooking coffee or simmering stew over an open fire. A solid tripod is another option for hanging pots over a fire.

4.) Paring Ladder

This simple device adds a “third hand” when using a draw knife to shape wood or remove bark.

How to Build a Paring Ladder (Shaving Horse) in the Woods - TheSurvivalSherpa.com

The paring ladder in action

While I use it for its intended purpose, it also makes a fine camp chair. Secure a wool blanket or cargo net to a rung and loop the blanket around another pole near the bottom for lounging.

My Top 5 Most Useful Items at Permanent Camp ~ TheSurvivalSherpa.com

Camp comfort!

It also makes a great drying rack for wet gear and clothing. The ladder is lightweight and easy to move from one tree to the next.

The beauty of building these camp comforts is that few tools are required. A knife, ax/hatchet, saw, and cordage are about all you’ll need to contrive ways to make yourself comfortable in the woods.

Keep Doing the Stuff of Self-Reliance,

Todd

P.S. – You can also keep up with the Stuff we’re Doing on TwitterPinterestGoogle +, YouTube, Instagram, and Facebook… and over at our Doing the Stuff Network.

P.P.S – If you find value in our blog, Dirt Road Girl and I would appreciate your vote on Top Prepper Sites! You can vote daily by clicking here or on the image below. Check out all the other value-adding sites while you’re there…

Thanks for Sharing the Stuff!

Copyright © by Survival Sherpa: In light of the recent theft of all my content by a pirate site, my sharing policy has changed. I do not permit the re-posting of entire articles from my site without express written consent by me. My content on this site may be shared in digital form (200 words or less) for non-commercial use with a link back (without no-follow attribute) to the original article crediting the author. All photos, drawings, and articles are copyrighted by and the property of Survival Sherpa. You are more than welcome to share our photos and articles on social media for educational purposes as long as you link back to the original article/photo with credit to the author.

Categories: Bushcraft, Camping, DIY Preparedness Projects, Doing the Stuff, Real Food, Self-reliance | Tags: , , , , , | 10 Comments

How to Make an Appalachian Berry Bucket from Tree Bark

by Todd Walker

How to Make an Appalachian Berry Bucket from Tree Bark ~ TheSurvivalSherpa.com

Containers made from tree bark existed long before plastic bags, cardboard boxes, and canvas haversacks came about. With every trek in the woods, I find useful resources. That glob of pine sap, stones, bones, or wood somehow ends up going home with me (much to the chagrin of Dirt Road Girl).

It’s a condition which I wish to never be cured.

Scott Jones sums up this affliction with this quote in his book, Postcards to the Past

“The Eskimo say that only a fool comes home empty handed!

~ Lewis Binford, in Looking at Currated Technologies – 1979

If you suffer from this same condition, you’ll need a something to transport your found treasures back home or to your camp. While any container will usually work, nothing compares to a handcrafted bark container for both functionality and aesthetics for us out of doors types.

Traditional Berry Buckets

The best time to harvest tree bark is when the sap is rising in late spring and early summer. I know, I meant to post this tutorial in June. You’ll have to wait a few months to skin a tulip tree ((Liriodendron tulipifera). So bookmark this one for when the sap starts to rise again. 

Material and Tools

  • Knife – about all you really need
  • Ax or saw if you plan to fell a tree
  • Awl or drill
  • Cordage
  • Tulip Poplar tree
  • Rim wood
How to Make an Appalachian Berry Bucket from Tree Bark ~ TheSurvivalSherpa.com

Very few tools are needed for bark containers

Find the Right Tree

Tulip Poplar is a fast growing (soft) hardwood with many uses in the southeastern United States. Other candidates for bark containers include; basswood, cedar, white birch (which we don’t have in Georgia), and others.

You’ll know you’re barking up the tree at the wrong time once you’ve attempted to peel the bark off. If the sap isn’t rising, the bark won’t come off easily. I look for young tulip poplar trees growing under dense canopies. They tend to grow straight with fewer lower limbs and have thinner bark. A 6 to 7 inch diameter tree is ideal.

To fell or not to fell… that is the question. I’ve done both. For smaller containers like my knife sheath, I simply cut a patch of bark off the tree.

You’d think completely girdling around would doom a tree to death. However, as a test this past spring, I removed a section of bark from the entire circumference of a small tulip tree (5 inches in diameter) and it still has its green leaves in early October. Sweetgum (Liquidambar styraciflua) is similarly resilient tree.

[Edit: A fellow woodsman commented on the above paragraph who is concerned that people with access to public land only would take my statement as scientific fact and start completely girdling trees. My actions are not scientific and should only be done on land you own. I was totally surprised that the tree is still living after removing bark from the entire circumference. Also, this particular tree was in a thick grove of tulip poplars. Please, only take trees from private land keeping forest management in mind.]

Score and Skin

Score the bark down to the sapwood with a knife or hatchet. I use a solid stick to strike the back of the blade after a free-hand score mark has been applied to the bark.

Once scored, press the tip of your knife into one corner and lift to separate the outer and inner bark from the sapwood. From that point, I use a wedged stick to run along the edge to loosen and lift the bark. With a gap created, you can use your fingers to further separate the bark from the tree. Warning: There are little spikes under the bark which will draw blood. Go slow and be careful bare handed. Gloves are recommended, but I enjoy the texture and feel of wet sap and bark.

If harvesting large quantities from felled trees, I use a wedged stick to separate bark instead of bare hands. When you’re near the point of full separation, you’ll know the bark is free when you hear a distinctive, satisfying snap sound.

Cut to Length

Place the bark flat on a level surface and cut to length. The length of bark should be a bit over double the intended height of your bucket. Trim all edges smooth to create a long rectangle.

How to Make an Appalachian Berry Bucket from Tree Bark ~ TheSurvivalSherpa.com

Bark length should be double that of the intended height of your container

Score a Football

With the outer bark facing up, measure and mark the mid-point of each long side of the rectangle. Use your knife to score an arch which runs from side to side. Repeat this step to form a football shape on the outer bark. Be careful to not cut through the inner bark. This layer of bark acts as a hinge when folding the basket sides together. When scoring in my shop, I use a utility knife with a about 1/8 inch of blade.

How to Make an Appalachian Berry Bucket from Tree Bark ~ TheSurvivalSherpa.com

The size of the “football” determines the opening size at the top

Turn the bark over with the inner bark facing up. Place your hand on the middle of the bark and gently pull one long end to a vertical position. Now fold the other side. Your berry bucket is taking shape.

Bore Edge Holes

Use an awl or drill to bore a line of holes on both edges of the bucket. The spacing is up to you. I usually leave an inch and half to two inches between holes which are placed about 1/2  to 1 inch from the edge. The hole diameter should be large enough to accept your cordage/lacing.

How to Make an Appalachian Berry Bucket from Tree Bark ~ TheSurvivalSherpa.com

My friend, James Gibson (Knob Creek Forge), traded this handmade awl to me

Lace Edges

Artificial sinew makes strong lacing. It can be purchased online or at craft stores. I’ve also used tarred bank line, leather, and a few other types of string. The artificial sinew can be threaded into a leather stitching needle to make quick work on this part of the project. I’ve seen some buckets laced with other inner barks like hickory (Carya).

How to Make an Appalachian Berry Bucket from Tree Bark ~ TheSurvivalSherpa.com

Stitching the river cane handle into the sides of DRG’s berry bucket

Note: As the bark dries, it will shrink and the lacing may need to be re-tightened.

Start lacing at the bottom edge near the football cut with the edges joined together. Tie off with a simple overhand knot and run the stitching up the edge. Make a pattern if you like. Secure the lace at the top of both seams.

Add a Rim

Cut a flexible stick long enough to form a rim around the top opening of your bucket. I like to use two thin strips of white oak about the size of a hardware store paint stirrer. Thinned enough, they flex just right and add a little contrast. The rim will prevent the bark from curling in as it dries.

How to Make an Appalachian Berry Bucket from Tree Bark ~ TheSurvivalSherpa.com

A white oak rim to finish off the bucket

Bore another series of holes along the rim edge. Place the rim wood pieces on the edges and lace them in as you did the sides. Leave enough lacing on both ends to make loops if you plan to add a carry handle made of rope. If you’re using two rim pieces like mine, you’ll need to bore holes in the ends to tie them together to hold the form you want.

I made a handle out of river cane for Dirt Road Girl’s berry bucket. It hangs in the living room with dried flowers as a conversation piece. Looks pretty too!

How to Make an Appalachian Berry Bucket from Tree Bark ~ TheSurvivalSherpa.com

This one will probably never transport berries… imagine that

Other Bark Containers

Once you’ve made one berry bucket, you’ll want more. With a bit of creativity and imagination, you can begin making many functional and aesthetically pleasing alternative containers from tree bark.

How to Make an Appalachian Berry Bucket from Tree Bark ~ TheSurvivalSherpa.com

An arrow quiver made from tulip poplar bark

How to Make an Appalachian Berry Bucket from Tree Bark ~ TheSurvivalSherpa.com

Neck sheath for one of my Mora knives

Keep Doing the Stuff of Self-Reliance,

Todd

P.S. – You can also keep up with the Stuff we’re Doing on TwitterPinterestGoogle +, YouTube, Instagram, and Facebook… and over at our Doing the Stuff Network.

P.P.S – If you find value in our blog, Dirt Road Girl and I would appreciate your vote on Top Prepper Sites! You can vote daily by clicking here or on the image below. Check out all the other value-adding sites while you’re there…

Thanks for Sharing the Stuff!

Copyright © by Survival Sherpa: In light of the recent theft of all my content by a pirate site, my sharing policy has chanced. I do not permit the re-posting of entire articles from my site without express written consent by me. My content on this site may be shared in digital form (200 words or less) for non-commercial use with a link back (without no-follow attribute) to the original article crediting the author. All photos, drawings, and articles are copyrighted by and the property of Survival Sherpa. You are more than welcome to share our photos and articles on social media for educational purposes as long as you link back to the original article/photo with credit to the author.

Categories: Bushcraft, Camping, DIY Preparedness Projects, Doing the Stuff, Homesteading, Preparedness, Self-reliance | Tags: , , , , , , | 13 Comments

Primitive Preps: Craft a 3-in-1 Tool from One Hand Drill Spindle

by Todd Walker

Primitive Preps- Craft a 3-in-1 Tool from One Hand Drill Spindle - TheSurvivalSherpa.com

Having items in your pack which serve more than one function reduces weight and increases resourcefulness. I’ve written about this multifunctional-mindset with modern equipment here. The concept is far from modern. Otzi the Ice Man carried multifunctional primitive tools over 5,300 years ago.

Here’s our experimental archeology project…

Multifunctional Spindles

How many redundant uses can we find for a hand drill spindle other than its primary use… friction fire embers?

If you have access to river cane, one spindle becomes multifunctional:

  • Friction Fire
  • Primitive Drill
  • Container

Friction Fire

Finding dry, straight wood long enough for a spindle in the field is challenging. Sticks in the 4 to 6 inch range is more likely. They don’t even have to be straight to be used as a friction fire fore shaft in a cane spindle. A quick whittling job will make them fit.

Primitive Preps- Craft a 3-in-1 Tool from One Hand Drill Spindle - TheSurvivalSherpa.com

Burning in the hearth board with the wooden fore shaft stub.

To make the multifunctional spindle, straighten a section of river cane to your desired length in the 1/2 to 5/8 inch diameter range. Make two splits on one end perpendicular to one another just above the end node. Wrap the split with sinew with about a half-inch of split cane extending past the wrap. These four split sections will grip the fore shaft stubs as collets would on a brace and bit.

In my experience, simply carving or abrading the fore shaft in a cone shape is enough to create a tight friction fit in the spindle. However, carving an elongated pyramid shape (similar to brace and bit augers) on the fore shaft would add extra bite inside the collet grooves.

Primitive Preps- Craft a 3-in-1 Tool from One Hand Drill Spindle - TheSurvivalSherpa.com

Similar gripping mechanics as the brace and bit

Primitive Drill

I discovered a gold mine of quartz crystals in a store in downtown Athens, GA. With this project in mind, I bought several in different sizes. A few are now stowed in my haversack for primitive skills tasks.

Primitive Preps- Craft a 3-in-1 Tool from One Hand Drill Spindle - TheSurvivalSherpa.com

Quartz crystal secured in the spindle

If you can’t locate crystals for purchase, a bit of bipolar percussion can create serviceable drill tip. Use a hammer stone and strike the top of a smaller pebble until it shatters. With any luck you’ll have a sharp drill tip and no bludgeoned knuckles. If not, keep smashing rock and you’ll likely get both.

Primitive Preps- Craft a 3-in-1 Tool from One Hand Drill Spindle - TheSurvivalSherpa.com

Bipolar percussion in action at Workshops at the Woods

Insert your drill tip in the spindle and spin it on your hearth board to drill a perfectly round pivot hole. One or two passes with your hands on the spindle should work depending on the hardness of your hearth material. The trumpet vine I used in the video below is soft which makes it an excellent hearth board.

For more robust wood, or even other rock or shells, craft a spindle which can be used in a bow drill set. The end of the river cane spindle which meets the bearing block would need a carved hardwood plug to mate with the bearing block socket. More downward pressure and speed can be applied with a bow drill set than hand drill. Plus, you’ll save the skin on your hands.

Container

Leave enough hollow shaft on the end of the cane opposite the drilling end. While this chamber isn’t very large, repair needles, charred material, or other small items can be stored inside. Whittle a cap to plug the open end. Another cap option is a larger diameter piece of cane with the node joint in place which slides over the open end.

Primitive Preps- Craft a 3-in-1 Tool from One Hand Drill Spindle - TheSurvivalSherpa.com

A river cane vile pictured at top. Plugging the end of the spindle (bottom of photo) creates a container for small items.

I’ve given three uses for one spindle. What are some others you can share?

Keep Doing the Stuff of Self-Reliance,

Todd

P.S. – You can also keep up with the Stuff we’re Doing on TwitterPinterestGoogle +, YouTube, Instagram, and Facebook… and over at the Doing the Stuff Network.

P.P.S – If you find value in our blog, Dirt Road Girl and I would appreciate your vote on Top Prepper Sites! You can vote daily by clicking here or on the image below. Check out all the other value-adding sites while you’re there…

Thanks for Sharing the Stuff!

Copyright: Content on this site (unless the work of a third-party) may be shared freely in digital form, in part or whole, for non-commercial use with a link back to this site crediting the author. All links in articles must remain intact as originally posted in order to be republished. If you are interested a third-party article, please contact the author directly for republishing information.

Categories: Bushcraft, Camping, DIY Preparedness Projects, Doing the Stuff, Lost Skills, Preparedness, Primal Skills, Self-reliance, Survival Skills | Tags: , , , , , | 6 Comments

Blog at WordPress.com.