Posts Tagged With: Sawyer Squeeze Water Filter

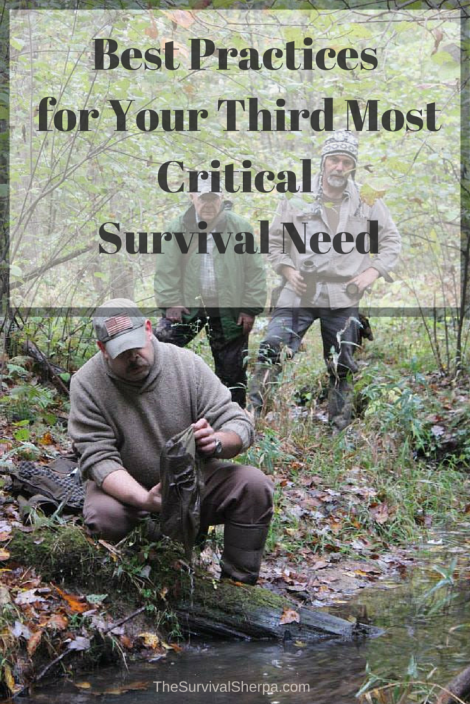
Best Practices for Your Third Most Critical Survival Priority

by Todd Walker

Using the “B” word will automatically rain hell and brimstone on any online discussion. What’s the Best knife, sidearm, rifle, or water filter? Try it for kicks and giggles. Type that four-letter word in front of any piece of gear and watch the internet explode.

Best Practices for Your Third Most Critical Survival Priority - TheSurvivalSherpa.com

Photo courtesy of Iris Canterbury

When it comes to survival priorities, the same spirited debate rages.

In the Pathfinder System, Dave Canterbury ranks water as the third wilderness survival priority. Self-Aid and Shelter take the top two spots respectively. Of course, survival priorities are always dependent on the situation and shouldn’t be written in stone.

Here’s Dave’s full list…

  1. Self-aid
  2. Shelter
  3. Water
  4. Fire/heat
  5. Signaling
  6. Food
  7. Navigation

The subject of this article is the third priority – the substance which every system in the human body is dependent. A dehydrated body can not help you do all the stuff needed to keep you alive if you’re day hike turns into a week-long survival scenario.

Water is easy to find in the eastern woodlands. But it may not be fit for consumption.

That crystal clear stream you’re about to sip from may hold a rotting carcass 100 yards upstream. Also keep in mind that, yes, bears (and other critters) do crap in the woods along rivers and streams… which eventually washes into the pristine creek and into your cupped hands.

Introducing waterborne pathogens to your gut is a sure way to decrease your survivability in the wilderness. You need to assume that every water source in the backwoods contains the following invisible nasties (and more)…

  1. Giardia – A single-celled, microscopic parasite which causes a diarrheal illness called giardiasis. The parasite is passed through the feces of infected animals and humans. Symptoms include diarrhea, vomiting, nausea, bloating, gas (not your normal campfire baked-bean induced gas), weakness, and stomach cramps. Symptoms show up within 1 to 2 weeks.
  2. Cryptosporidium – Crypto, as it is commonly known, is a parasite responsible for causing the most waterborne illnesses in the U.S. according to the CDC. Symptoms of watery diarrhea, dehydration, stomach pain and cramps, fever, and vomiting begin in 2 to 10 days of infection and may last up to 30 days.
  3. Escherichia coli (E. coli) – Some E. colia bacteria are beneficial to your intestinal tract. Then there’s the pathogenic, diarrhea kind transferred through water and food contaminated from human or animal feces. Remember that bear fact? Unfortunately, s**t happens. And ignorant humans have the bears beat!
  4. Salmonella – Most folks infected by this bacteria develop diarrhea, fever, and stomach cramps within 12 to 72 hours. Not good for a 72 hour survival scenario. Oh, and it can spread to other body systems causing more long-term damage.

Bottom line… Don’t drink untreated water! … unless you have no other option in an emergency survival scenario. Dying of dehydration is worse than giardiasis after you’ve been rescued. But we’re talking camping not survival, here. Consider all backwoods water sources contaminated. Period. Even when brushing your teeth at camp, use disinfected water.

We’ve established the fact that the human body needs water to function properly. So what are the best (yeah, I used the B-word) practices to make water safe to drink?

Boiling Water

We took our youth group to a Catholic church in the early 80’s as a cross-cultural field trip. The priest met us at the door and invited us in. One of our really, really country boys asked the priest how holy water was made.

In all seriousness, the priest told us that they pour water in a pot, place it on a hot stove, and…

“boil the hell out of it.”

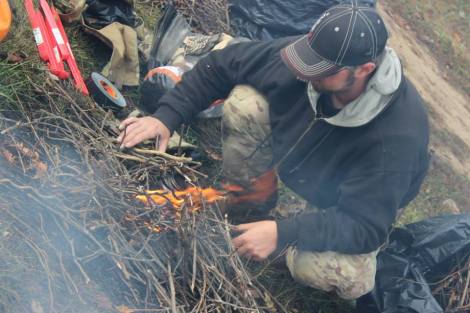
My Basic Class partner, Dave Williams, boiling 32 ounces of water

My Basic Class partner, Dave Williams, boiling 32 ounces of water in under 5 minutes

Boiling Times

There are lots of confusing, un-scientific info floating in the preparedness pool. So how long should you boil water to make it safe to drink?

a.) 10 minutes, b.) 5 minutes, c.) 1 minute, d.) depends on altitude

Answer: None of the above.

I’m not certain how long priests boil water before it becomes holy, but all you need to do is bring water to a boil to render the parasites, viruses, and bacteria harmless. In fact, 185º F for a few minutes will deliver the damage needed to kill the nasties. We boil in the backwoods because thermometers aren’t convenient to carry. Bubbles tell us when it’s done.

Research from the Wilderness Medical Society states that keeping water temps above 160º F for 30 minutes kills all pathogens through pasteurization. Bet you don’t carry a cooking thermometer in your pack. Even at high altitudes, once your water reaches the boiling point of 212º F,  you’re done. Boiling past zero minutes is a waste of fuel and life-giving water via evaporation.

In a perfect world, you whip out your metal container. Fill it with water and bring it to a boil. Take it off the heat immediately and allow the water to cool. Now you have potable water.

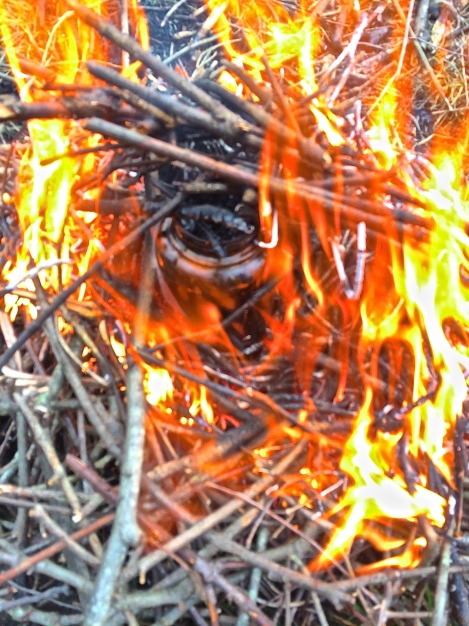
Water boiling challenge

Water boiling

What I carry is the Pathfinder Stainless Steel Cook set. The 32 ounce bottle nests inside the 25 oz. cup for easy storage in my haversack or backpack.

If you’re ever in a situation without a metal container, ask yourself this question…

What would MacGyver do?

Creative Containers

There may be resources in your pack which you’ve never considered could hold water for boiling. These items will help channel your inner MacGyver.

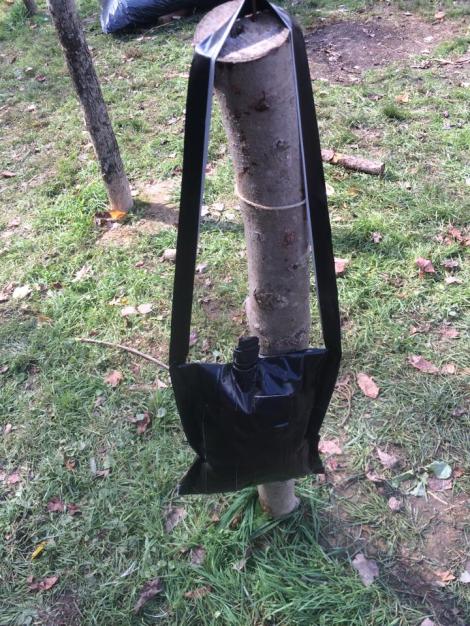
Dave Williams' duct tape water bottle at the Pathfinder School

Dave Williams’ duct tape water bottle at the Pathfinder School

  • Duct tape
  • Emergency space blanket
  • Trash bag
  • Backpack cover
  • Tarp
  • Rain suit or poncho
  • Dry bag
  • Hat

These pieces of kit will melt over a fire quicker than the Wicked Witch of the West from the Wizard of Oz. But the important thing is that they hold water and you can make fire… and rocks litter the ground. Now you’re ready to boil water.

Stone Boil Method

Hot rocks from your campfire will boil water. Be sure to not use river rocks in the fire. The trapped moisture inside these stones are prone to explode when heated sending hot, sharp shrapnel flying. Use dry rocks.

Below are a few fellow YouTubers I respect demonstrating the stone boil method with improvised containers.

Hats off to IHatchetJack for this one…

Master Woodsman using a trash bag to boil water with stones…

Larry Roberts using a burn and scrape wooden container…

No-Boil Methods for Clean Water

You can’t boil water without a heat source. This fact places urgency on the need to carry at least 3 different methods to start a fire. We covered my favorite methods here.

However, even without fire, potable water is available in nature.

Water from Trees

Here are 4 trees found in the eastern woodlands that can be tapped in the same manner as our northern neighbors harvest sap for maple syrup. This hydration source is available when the sap is running in early spring.

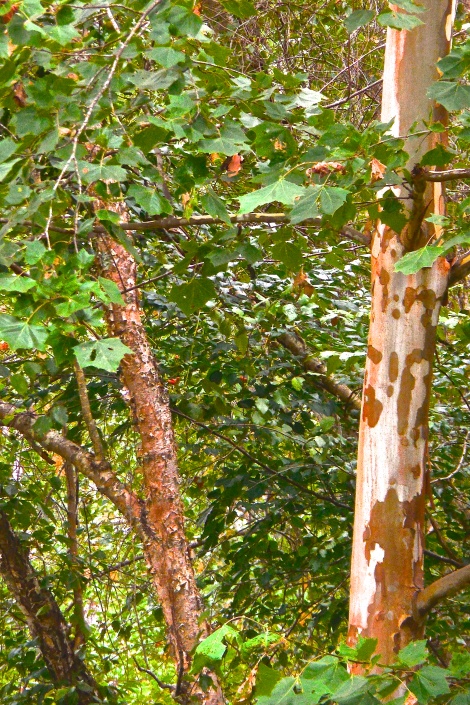
tree-hugger-self-reliance-uses-american-sycamore

A young Sycamore (Right) and River Birch (Left) growing near the roadside

Sap from the trees contains sugars and clean water that can be consumed without filtering or boiling. Collect the sap by boring a hole or notch about a 1/2 inch into the tree. Insert a 4 inch spigot made from a hollow stick or river cane as a conduit for the sap. Use a container underneath the spigot/spile to catch the runoff.

Use your Possum Mentality and collect any plastic water/soda bottles you come across. They can be used to collect sap without ever tapping the tree with a spigot. Darin from East Woodland Survival has an interesting technique I really like…

Water from Plants

Another great seasonal (spring, summer, and fall) source of clean water is found in wild grape vines. Sever the end of a large diameter vine near the ground over a container. It’ll start slowly dripping water into the container. Speed up the process by reaching as high as possible up the vine and cut a notch in the vine. The notch breaks the vacuum in the vine to increase the water output.

Don’t forget that your mouth is a container. Lay under the vine and drink directly from the plant. Be sure you can accurately identify grape vine from poison ivy and oak!

Rain Water

Rainy weather is a two-edged sword. It makes fire craft difficult but can provide needed emergency hydration.

With access to a tarp or rain gear, configure a “V” shape to collect rain and funnel it to a container.

John McCann of Survival Resources shows you how to do this in a homesteading situation easy enough. The same can be done in a survival scenario with sticks and ingenuity. His contraption collects and amazing amount of rain water!

A more primitive rain catchment technique is to harvest tree bark in half-pipe sections set up like a bicycle rim configuration with a collection device positioned at the axle. Tulip poplar, willow, and other non-resinous tree bark can be used.

Water Filters

Modern water filters are convenient and effective for removing parasites and bacteria but not viruses or chemical contaminants. I personally carried the Sawyer Mini on our recent backpacking trip on Eagle Rock Loop. It’s lightweight, easy to use, and effectively removes 99.9% of pathogens and is rated to clean 100,000 gallons of water.

sawyer squeeze water filter

DRG’s new squeeze! This is the larger Sawyer filter pictured.

Filters can be constructed from natural materials in the backcountry. My friend, Joshua Shuttlesworth, has a tutorial on building a Tripod Water Filter you should check out.

Remember to always assume wilderness water sources are contaminated. Drink without disinfecting water in the woods and you could pay a hefty price. Don’t trust what you read here or watch on YouTube videos. Get out and develop the skills needed to quench your thirst!

Keep Doing the Stuff of Self-Reliance,

Todd

P.S. – You can also keep up with the Stuff we’re Doing on TwitterPinterestGoogle +, YouTube, Instagram, and Facebook… and over at the Doing the Stuff Network.

P.P.S – If you find value in our blog, Dirt Road Girl and I would appreciate your vote on Top Prepper Sites! You can vote daily by clicking here or on the image below. Check out all the other value-adding sites while you’re there… 

Thanks for Sharing the Stuff!

Copyright: Content on this site (unless the work of a third-party) may be shared freely in digital form, in part or whole, for non-commercial use with a link back to this site crediting the author. All links in articles must remain intact as originally posted in order to be republished. If you are interested a third-party article, please contact the author directly for republishing information.

 

Categories: Bushcraft, Camping, Doing the Stuff, Potable Water, Preparedness, Self-reliance, Survival, Survival Skills, Water | Tags: , , , , , , , , , , , , , , , | 26 Comments

Water: The 2nd Essential Pillar of Preparedness for SmartPreppers

by Todd Walker

Part 2 ~ Essential Pillars of Preparedness Series

Given enough time without water, you die! It’s that simple.

In our second post in the series, The Essential Pillars of Preparedness for SmartPreppers, let’s take a look at how not to die from dehydration. I thought I’d be able to cover food as well, but it’ll take up a whole post next time.

Getting started on your preparedness journey can be a daunting task. Having potable water is essential for short-term emergencies and long-term survival. At any time you find yourself in a scenario without water for an extended time (three days or so), you’re in a survival situation.

Before you go buy cases of bottled water and 55 gallon drums, think about the storage space needed for water. Also keep in mind that water weighs over 8 pounds per gallon. DRG and I don’t personally store tons of potable water. But we do have several methods to produce drinking water in an emergency. We also have access to a nearby natural water source.

Water Facts

Our bodies, depending on age, gender, and body type, are made of between 77% to 45% water. We can’t survive without water. When building this Pillar, consider your activity level, availability, nearby natural water sources, filtration equipment, storage capabilities, and climate.

Whatever recommendations you’ve read on how much H2O you need, double it. Natural disasters equal lots of manual labor, which increases your bodies need to re-hydrate. If you’ve ever pulled up soaked carpet and pad after a flood, you know the amount of labor and physical exertion involved.

The recommended one gallon per day per person does not include water for hygiene, cooking, pets, and livestock.

I’m a Container Freak

How important are containers? Whole civilizations have been built around these puppies. For thousands of years, lumps of clay on a potter’s wheel turned into bottles, jars, and jugs to store liquids.

If you’re not a potter, here are some simple options for water storage containers.

  • Used drink containers: Two liter soda containers can be cleaned and re-purposed. Since I don’t drink soda, I needed another source. I’ve got an unlimited supply of one gallon jugs from my school. The concession stand sells a sugary, frozen slushy type drink to help wash down the SAD (Standard American Diet) meals from the lunch line. The artificial flavoring comes in 4 – 1 gallon jugs per case. They are HDPE (High Density PolyEthylene) and coded with a #2 inside the recycle symbol on the bottom of the container. I collect these when they’re empty, place them into their handy shipping box, and take them home. I clean them with hot soapy water, a diluted bleach/water solution, and refill with water. They stack very well in the boxes. The boxes also block light to prevent algae growth. [Note: Warnings about reusing plastic milk and sugary drink bottles for water storage abound on the internet. Some say the sugars can’t be completely removed from the plastic which enables bacteria growth. Do your own due diligence before using these containers.]

  • Emergency water: Don’t forget that your hot water heater contains 40 gallons (depending on the size) of potable water. In an emergency, simply shut off the power source (gas shut off or electrical breaker labeled in your breaker box, right?). Even if the power is out at your house, it’s wise to take this step if you’re forced to drain your water heater. If the power is restored to your empty water heater, you’ll be replacing the heating elements on a dry water tank. Next, attach a garden hose to the bottom valve. Open the pressure relief valve on the top or side of the water heater and fill those used drink containers you’ve been hoarding.
    • Toilet tank water. A typical tank (NOT the bowl) will hold over 3 gallons of water. To keep from stirring up the sediment in the tank, scoop the water,  or disconnect the fill-line from the bottom of the tank and drain into a container. Yes, it’s potable – unless you put bowl cleaning chemical cakes in the tank. [If in doubt, don’t drink from the toilet tank.] Reconnect the fill line so you can still use the toilet to flush waste. With a bucket/container, refill the tank with non-potable water. Now you’ve still got the convenience of flushing with the handle. The ladies will appreciate the extra effort.
    • Bath Tub. Plug your tub and fill it with water if you have an early warning of possible disasters bearing down on you. This water can be used, as mentioned above, to flush toilet, personal hygiene, and even drinking. If you have to resort to drinking from the tub, you’ll want to disinfect the water by boiling and chemical treatment. Don’t want to drink from the container (tub) after all those dirty showers? Buy one of these…
    • Water BOB. For $30.00 you can add 100 gallons of potable water to you bath tub. I have no experience with water bobs. Do you?
    • Drain your pipes. In a two-story home, open the tap on the upper floor and collect the water from the pipes at the lowest faucet in your home. On single story homes, find the lowest water spigot (usually an outside garden hose bib) and follow the same advice in the previous line.
    • Kiddy pools and other outside containers can be tapped in an absolute emergency. Be sure to filter, boil and disinfect water from these sources before drinking.
    • Water from natural sources such as lakes, ponds, rivers, and creeks should be filtered, boiled, and treated before drinking. Drinking unsafe water can turn a short-term emergency into a dehydrating, diarrhea disaster – or worse.

On The Go Water

If you had to get out of dodge on foot, having lightweight water filters would come in handy. Remember, water weighs over 8 pounds per gallon. It would be crazy to try to physically carry enough water in your kit for three days on your back.

I’ve got a MSR filter for my 72 hour kit. DRG packs the Sawyer Squeeze Water Filter that weighs only 3 ounces. We both have 2 liter water bladders attached to our bags allowing us to drink while walking or hiking.

We both keep a 32 ounce metal water bottle with a metal cup in our kits. Both bottle and cup can be used to boil water if our other filters options fail or are not available. We also carry chemical treatment in our bags – iodine and purification tablets. Don’t forget to add a cotton bandana for pre-filtering debris from open water sources.

Stationary Filter

For the home, it’s wise to have a gravity fed filter like our Royal Berkey. Can’t afford the Royal Berkey? Buy the filters and make your own. Also, Prepper Helper has an article comparing popular water filtration systems if you’re in the market for one.

Yes, it takes electricity over at your city water works to treat and pump H2O to your tap. Even if you have well water, power is need to pressurize your water lines. A manual hand pump, solar-powered pump, or gravity fed cistern adds another layer of redundancy to your water preps.

If all else fails, you can always fall back on cans of dehydrated water 😉

dehydrated water

Breathing, perspiring, and urinating are a few normal bodily functions that cause fluid loss. You’re losing hydration by just taking the time to read this article. So, drink up SmartPreppers!

Keep doing the stuff,

Todd

P.S.

How are you building this essential Pillar of Preparedness? The comment section is open, as always.

Essential Pillars of Preparedness Series

Categories: Gear, Potable Water, Preparedness, Water | Tags: , , , , | 6 Comments

Sawyer Water Filter: Dirt Road Girl’s New Squeeze

by Todd Walker

A coffee shop and the Army Surplus Store were my two favorite hangouts while Dirt Road Girl was hospitalized during her battle with cancer last year. When I got a break, I’d walk a block, grab a cup of joe, cross the street, and browse cool man stuff.

Last week DRG and I visited the surplus store again. On the door was a 8 1/2 x 11 inch sign stating, “ATTENTION PREPPERS – WE HAVE SAWYER SQUEEZE WATER FILTERS IN STOCK!”

Bam!

DRG needed a portable water filter for her 72 Hour Bag. I carry a MSR water filter in my bag. But what if we had to split up. Or she had to get out of dodge own her on? She needed her own filter that was simple to use and lightweight.

I love my MSR MiniWorks EX. It’s easy to clean in the field with no tools, attaches to my MSR Dromedary Bag, and removes bacteria and protozoa including giardia and cryptosporidia. The only drawback is it’s weight – about a pound with the accessories.

Pound, smound! One pound doesn’t seem like much, but I wanted to make DRG’s bag as light and efficient as possible. Every ounce she shaves off saves energy.

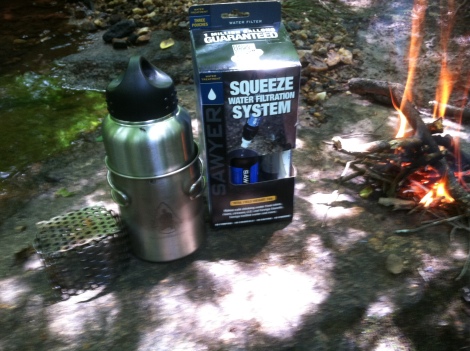
We picked up a Sawyer Squeeze Water Filter. It weighs 3 ounces.

sawyer squeeze water filter

DRG’s new squeeze!

With my yellow jacket stings shrinking, I set to the woods to do some testing. The weight, box and all its contents, was hardly noticeable in my test bag. I brought along my new Pathfinder cook set. A separate review is coming on this bad boy, I promise!

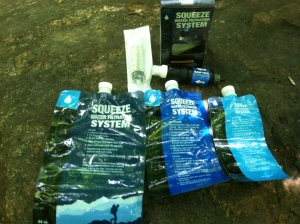
For three ounces, this is what you get:

  • The filter ~ Hollow-fiber membrane with a pore size of 0.1. The MSR pore size is 0.2. Both are effective for filtering out parasites and bacteria.
  • Three mylar squeeze bags ~ 16 fl. oz.: 9 x 5 / 32 fl. oz.: 11 x 6 / 64 fl. oz.: 12 x 8 inches
  • A 60 cc syringe to back flush the filter (with clean water) to maintain proper flow as needed. You could also use this item to flush wounds in the field and other redundant uses.
Only three ounces dry.

Only three ounces dry.

Out of the Box Simplicity

There’s no breaking in this filter or big learning curve. Just fill one of the mylar bags with ‘dirty’ water from a creek or pond, screw on the filter to the bag, and start drinking. I filled the 64 oz. bag and filtered the water into my 32 oz. Pathfinder bottle in under a minute.

One hand squeezing, one hand holding the camera.

One hand squeezing, one hand holding the camera.

It’s important to wipe excess unfiltered water from the bag before transferring to your clean container. Drops of unfiltered water containing bacteria, protozoa, and cysts could cross-contaminate what you think is safe drinking water.

The filter comes with a pop-up spout found on some water bottles. This allows you to drink directly from the filter with a mylar bag of unfiltered water attached. Or you can squeeze water into a clean mylar bag or container for later use. The filter will also fit standard treads of water/soda bottles. I tried a cheapo brand water bottle and the male treads would not tighten in the filter. ‘Standard’ threads do fit.

Keep in mind that this filter, like all other filters on the market, will not remove viruses. Have a way to treat viruses via chemicals or boiling. Don’t roll the dice with water. Keep chemical treatments and fire in your kits.

Capacity

This little Sawyer is rated (guaranteed) for 1,000,000 gallons. That’s not a typo. One Million! I have no way of ever testing to see if they are right. I don’t think DRG will ever get close to that number. It would take a lot of Platypus bottles to equal a million gallons. No way we will ever squeeze that much water. It may become a family heirloom.

I’ve seen videos of the Sawyer used at home to filter water from a 5 gallon bucket. I like this guy’s gravity inline filter set up:

<iframe width=”640″ height=”360″ src=”https://www.youtube.com/embed/JoEzc-ij3sc?feature=player_detailpage&#8221; frameborder=”0″ allowfullscreen>

You can’t live long without water. Whether you’re an ultralight backpacker, prepper, or outdoor enthusiast, you’ll want to have a safe, effective way to create potable water. The Sawyer Squeeze Water Filter is a great way to do that.

Before storing your filter after use, back flush the filter with a diluted bleach water mx from the included syringe. This will help dislodge any clogs and clean up any nasties left from dirty water. Shake all the excess water you can from the filter. You can even blow through clean end to help this process.

Enjoying a cup of wild ginger tea with DRG's new squeeze!

Enjoying a cup of wild ginger tea from DRG’s new squeeze!

I would recommend this lightweight, simple-to-use water filtering system. For under $50.00, you can add one to all you kits. I’m buying one for my get home bag. I may add one as a back up to my MRS filter in my B.O.B.

Stay hydrated, my friends!

Anyone have a new squeeze and want to share tips and experiences? Please leave comments if you do.

Keep doing the stuff,

Todd

P.S.

Be a SmartPrepper and follow us here on our blog, Twitter, and Pinterest. We’d also appreciate a ‘like’, comments, and shares on our new Facebook page. Any information on this site may be shared freely, in part or whole, with a link back to this site crediting the author. Thanks for sharing the stuff!


Categories: Bushcraft, Camping, Gear, Preparedness, Self-reliance, Survival, Water | Tags: , , , | 14 Comments

Blog at WordPress.com.