Posts Tagged With: Camping

9 Extras Guaranteed to Make First-Time Campers Happy

by Todd Walker

9 Extras Guaranteed to Make First-Timer Campers Happy ~ TheSurvivalSherpa.com

We do not go to the green woods and crystal waters to rough it, we go to smooth it. We get it rough enough at home.”

~ George Washington Sears – “Nessmuk”, Woodcraft

A tenderfoot’s first camping trip will be remembered forever, good or bad. Whether car camping or backpacking, comfort in the woods should be the aim. There are no “Roughing It” badges awarded in camp life. The more pleasant the experience, the more likely you’ll want to go again.

New to camping? Our last article on knife craft may be of interest to you. Click on this highlighted link to read more.

No matter how many times I camp, I’ve learned that the following items in my pack are multifunctional and comfort-adders to my outdoor experience. Add these to your normal camp checklist.

Extra Tarp(s) 

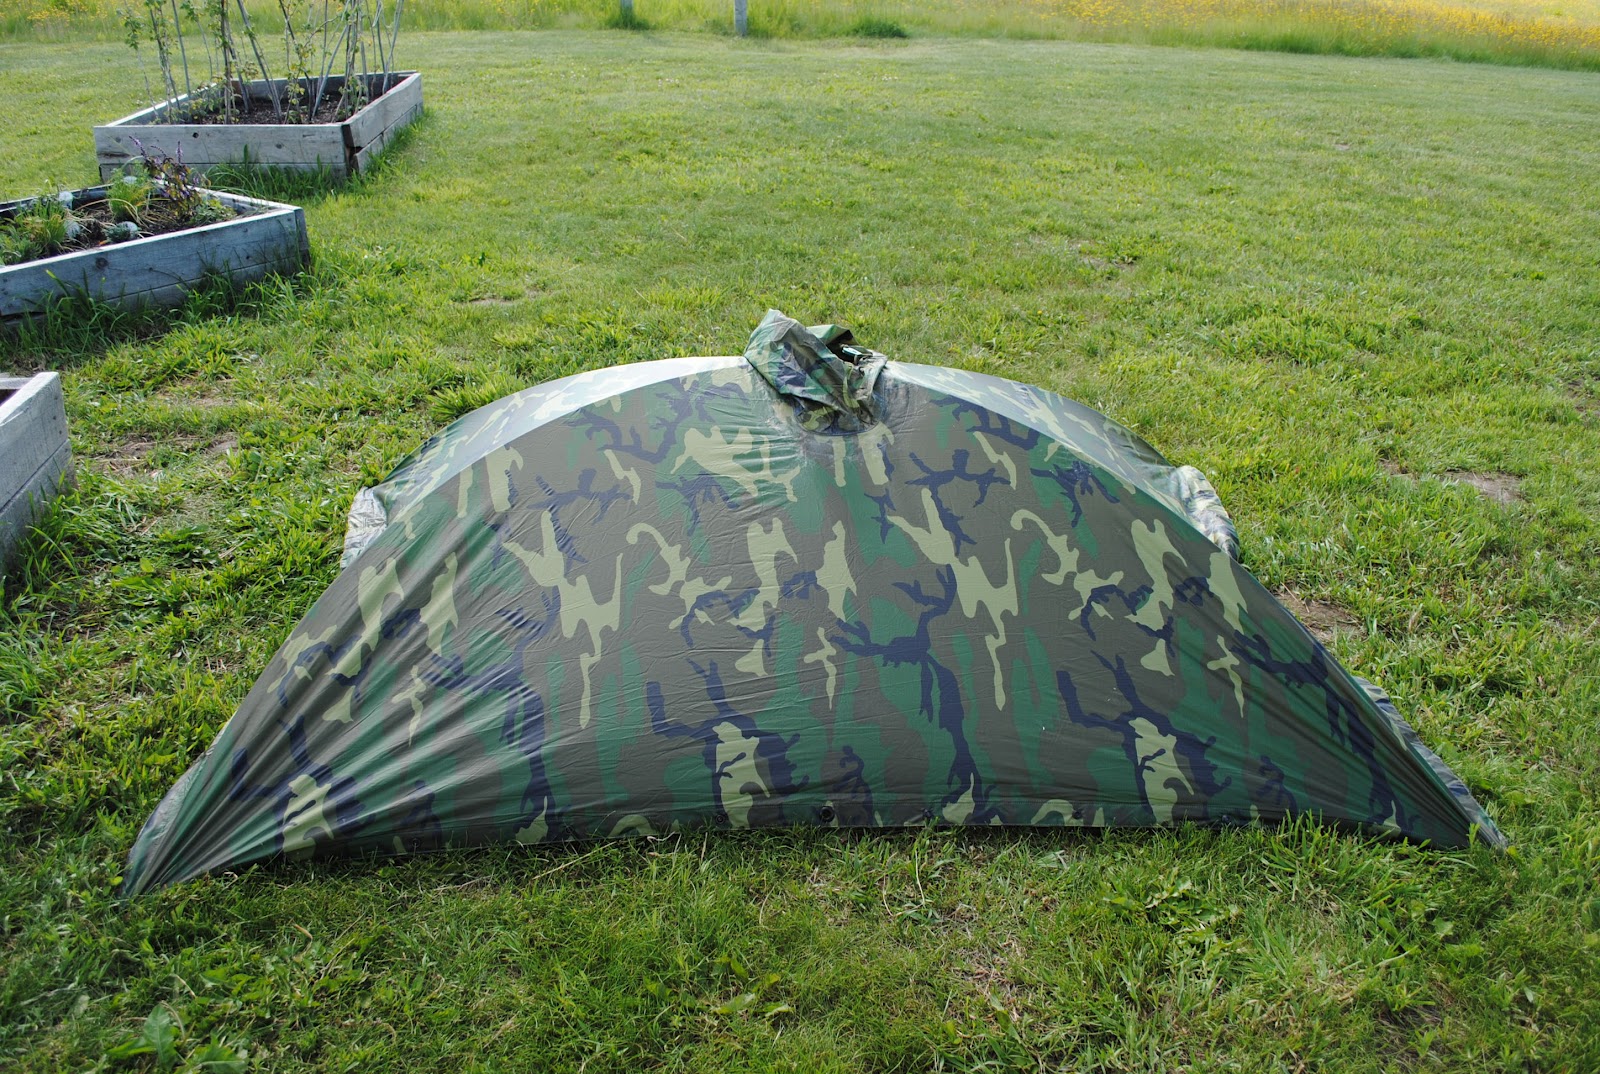
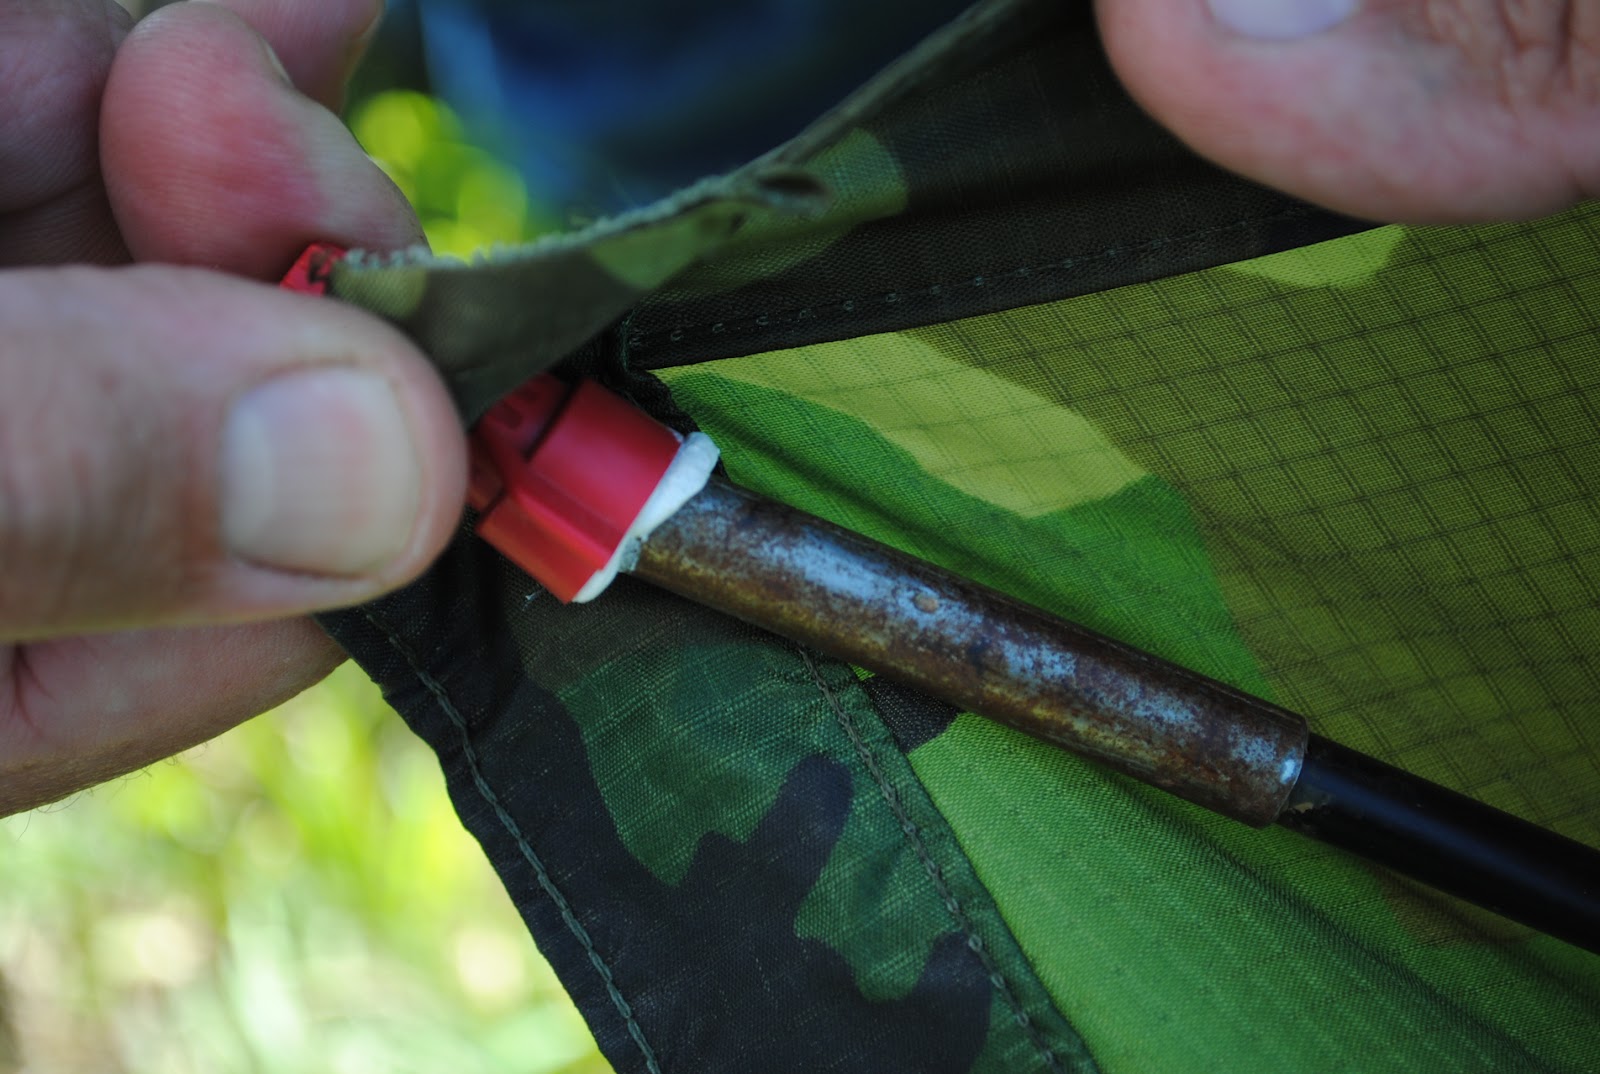
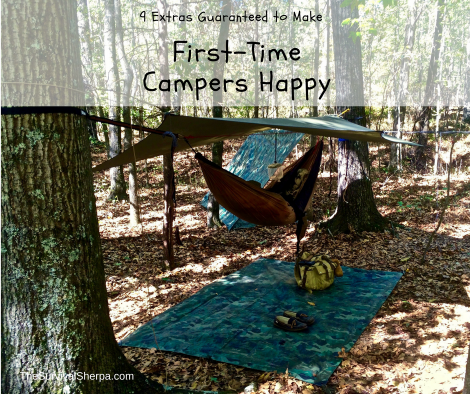
Shelter comes to mind first. My ENO ProFly rain offers enough cover for my hammock and personal gear. If teaching a class at gatherings/campouts, I haul more stuff which needs to be sheltered. Car camping affords the luxury of packing several tarps whether you sleep in a hammock or tent.

9 Extras Guaranteed to Make First-Timer Campers Happy ~ TheSurvivalSherpa.com

Besides my ENO Rainfly, I use extra tarps for equipment/supplies and a welcome mat under my hammock.

Employ an extra tarp as a ground cover under your tent or a welcome mat under your hammock. I find rolling out of my hammock onto a dry surface comforting. No wet/dirty feet to dry before lacing my boots. My haversack and extra gear rests on this vapor barrier preventing ground moisture from transferring while I sleep.

An extra tarp has come in handy on trips when it rained sideways. Tarps can be quickly set up over your camp kitchen or eating area for shade and rain protection. Think of being cooped up in your sleeping quarters on a rainy day in the woods. An 8×10 tarp will provide a dry outdoor living room to enjoy the sound of falling rain while whittling a tent stake, watching wilderness TV (a.k.a. – campfire), or cooking meals. Be sure to set your tarp high enough over a campfire so it won’t melt – 7-8 feet works with an open fire.

Poly tarps are relatively cheap but add max comfort when camping. Don’t hit the trail without an extra one or three. And blue tarps are okay. In fact, one of my Pathfinder instructors once told me that blue is easier to spot in the woods than other colors if you need to be found.

Extra Cordage

If you’re like me, my hammock and rain fly has cordage attached and ready for quick setup. Did you bring enough line to hang extra tarps and stuff? And what line should you use?

I like 550 paracord for certain jobs like ridge lines. However, braided nylon tarred bank line comes in a compact spool with hundreds of feet. A one pound spool of #36 bank from Wally World offers over 500 feet of cordage. Don’t want to take a whole spool, pull off 50 foot hanks and stow in your pack. Below is a photo of how I store hanks of cordage…

9 Extras Guaranteed to Make First-Timer Campers Happy ~ TheSurvivalSherpa.com

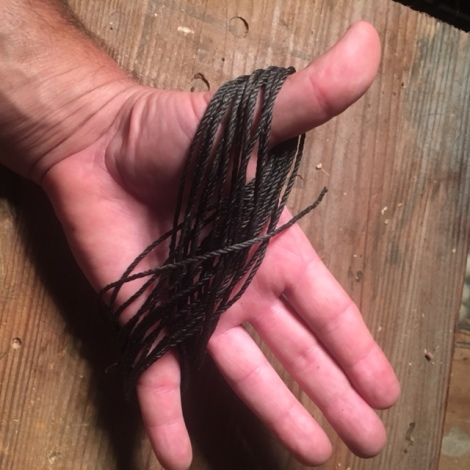
Take the hank of cord off your fingers, wrap the loose end a few times in the middle of the hank, and tie with a half-hitch.

There are too many uses around camp for rope to not pack extra.

Extra Towels

No matter the season, it is my practice, when water is available, to sleep clean. However, when water is scarce, I whip out the wipes and clean a day of sticky, sweaty funk off my body.

Get small packs designed for diaper bags if backpacking. If weight isn’t an issue, buy the jumbo container to clean the whole family. They’re also handy to clean dirty picnic tables and pet fur. Moose and Abby, our fur-babies, make it their mission to rub their neck in the most disgusting, rotted, foul-smelling stuff in the woods.

9 Extras Guaranteed to Make First-Timer Campers Happy ~ TheSurvivalSherpa.com

Dry towel and wet wipes.

When cooking at home, I sometimes hang a hand towel over my shoulder like my daddy. I do the same at camp. Only difference is I tuck it into my belt or dangled from my front pocket. I wipe my hands often while cooking and use it as a napkin while eating. When done, toss the towel in a ziplock bag and stow it in my cook kit.

I carry both cloth and paper towels. Used paper towels are burned or packed out. The beauty of cloth towels is they can be washed and hung out to dry.

Extra Lighting

I have three primary sources of light when I camp: Luci solar lantern, head lamp, and LED Light Specs. Here’s the breakdown of each…

I clip my Luci lantern on my hammock ridge line for nighttime illumination (see top photo). This cool solar lantern never runs out of batteries. Just inflate it like a beach ball and choose the setting; low, high, or flashing. It lights up my entire hammock area and only weighs 4 ounces.

luci-solar-lantern-review

A safe, renewable lighting source

A head lamp frees you to use both hands for camp tasks. Keep a set of spare batteries taped together and labeled with the date of manufacture. This allows you track when you need to add fresh batteries in your pack. If you purchase a head lamp, buy one with a red light to keep your camping mates happy. Nothing ticks folks off more than having a white, blinding light in the eyes.

My reading glasses have LED lights on the outside of both lenses. I know. Coolest thing ever! I use these to find stuff hidden in my pack at night. When I turn in for the evening, they go in my hammock pouch along with my head lamp.

Extra Plastic Bottle

This tip is for our guy readers. Sorry ladies, not much help to you. To stay nice and cozy in your hammock or tent when nature calls, a sports drink bottle is a reliving solution. Do your business carefully, cap the bottle, and sit it aside.

9 Extras Guaranteed to Make First-Timer Campers Happy ~ TheSurvivalSherpa.com

The label is for unsuspecting, thirsty friends 🙂

On a funny note, one of our Georgia Bushcraft members had a horrible hammock experience. It seems he forgot his mosquito net was surrounding him as he attempted to toss the contents of the open bottle. Not a happy camper!

Extra Toilet Paper

While we’re on the subject of bodily functions, you don’t want to run out of this essential item! There are ways to perform the needed paperwork without TP, but a novice may find them a bit primitive. Cowboy toilet paper is an option. So pack plenty of your favorite, soft wipes, even at campgrounds.

Extra Plastic Bags

Do not forget these! Pack several different ziplock sizes. They keep stuff dry and sealed or wet stuff separate from your dry stuff. Use them to pack trash and other dirty stuff out when you break camp.

Oh, and always pack extra trash bags, the big ones. All my packs have a minimum of two contractor grade trash bags. They’re useful for collecting firewood and keeping it dry, pack covers, and even emergency ponchos. Too many uses for these bags to list here.

Extra Shoes

Your feet are an important part to comfortably enjoying camp life. They got you to your scenic spot, now pamper them. In warm weather camp, my flip-flops are welcome relief after a long day in my boots. On colder trips, I change into my insulated leather house slippers while sitting around the campfire. Neither pair weighs much, but boy do they add comfort to my tired feet!

Extra Tape

A-Waterproof-Tinder-Bundle-Hack-That-Guarantees-Fire

Use a carabiner to attach the duct taped lighter to your kit

Last, but certainly not least, is duct tape. Not all duct tape is created equal. Gorilla Tape is the strongest I’ve found. My buddy, Dave, teaches a class on making duct tape water containers. If you do it right, a water-tight container can be fashioned from this often forgotten piece of gear.

Here are just a few uses:

  • Emergency first aid uses; bandages, splints, etc.
  • Repair leaky tarps and tents
  • Wrap a camp ax handle for temporary repair. Makes an expedient ax sheath too.
9 Extras Guaranteed to Make First-Timer Campers Happy ~ TheSurvivalSherpa.com

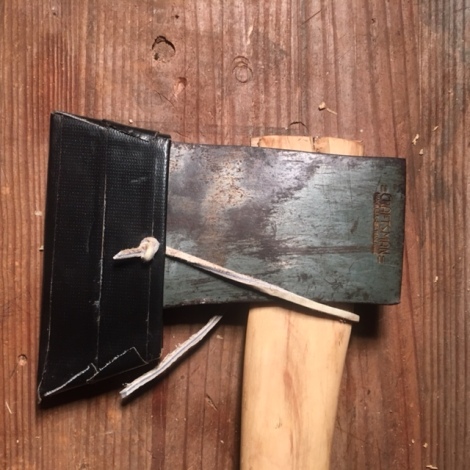
Gorilla tape wrapped around a piece of cardboard for the win!

  • Grommet hole repair
  • Wet weather fire starter. Burns like napalm.

  • Your imagination is the only limiting factor for duct tape.


These are the extras that make me a happy camper. How about you experienced campers? What extras comfort items do you take camping?

Keep Doing the Stuff of Self-Reliance,

Todd

P.S. – You can also keep up with the Stuff we’re Doing on TwitterPinterestGoogle +, YouTube, Instagram, and Facebook… and over at our Doing the Stuff Network.

P.P.S – If you find value in our blog, Dirt Road Girl and I would appreciate your vote on Top Prepper Sites! You can vote daily by clicking here or on the image below. Check out all the other value-adding sites while you’re there…

Thanks for Sharing the Stuff!

Copyright © by Survival Sherpa: In light of the recent theft of all my content by a pirate site, my sharing policy has changed. I do not permit the re-posting of entire articles from my site without express written consent by me. My content on this site may be shared in digital form (200 words or less) for non-commercial use with a link back (without no-follow attribute) to the original article crediting the author. All photos, drawings, and articles are copyrighted by and the property of Survival Sherpa. You are more than welcome to share our photos and articles on social media for educational purposes as long as you link back to the original article/photo with credit to the author.

Categories: Bushcraft, Camping, Gear, Self-reliance | Tags: , , , | 11 Comments

The Number One Knife Skill for Wilderness Survival and Self-Reliance

by Todd Walker

The Number One Knife Skill for Wilderness Survival and Self-Reliance - TheSurvivalSherpa.com

Humans have employed six simple machines throughout history to reduce the amount of work required for tasks. Of these six, my favorite for outdoor self-reliance is the sexy and sleek wedge!

Huh!?

Sleek and Sexy? A wedge sounds rather dull and useless.

Hold on a second. You may change your mind about the humble wedge.

A wedge is an incline plane sharp enough to cut and separate stuff. Stuff like wood, meat, and even metal need to be divided into smaller parts in a civilized manner. No need to gnaw your steak like a caveman.

You see, like all our cutting tools, a knife is a wedge. Hence my love affair with this simple machine!

“I learned how much of what we think to be necessary is superfluous; I learned how few things are essential, and how essential those things really are.” ~ Bernard Ferguson

It’s not just the aesthetics of forged metal that attracts my attention. The wedge may be the most useful tool a person can carry in a pocket or on a belt.

Why?

Knives are designed to do more than spread peanut butter! In skilled hands, stuff can be made. Important survival stuff. Developing knife skills is the best way to replace all those shiny-object-survival kit items. Safely wielding a sharp wedge has always been a top priority for woodsmen and woods-women throughout history.

Survival vs. Self-Reliance

Somewhere along our collective outdoor journey, survival took on the connotation of simply staying alive. I personally don’t get too caught up in the latest terminology… Woodcraft vs. Bushcraft, Survival vs. Self-Reliance, etc., etc. All I know is that spending time in the woods is my passion.

Survival is part of self-reliance. A big part. You can’t develop outdoor self-reliance skills if you’re dead.

Look up a few old “Survival” writers in the 60’s. Survival was much different from how we view it today. These early survivalists taught us more than just making it through a 72 hour scenario. Survival was wilderness living skills back then.

Dial back to the golden age of camping and woodcraft and you’ll find that the knives of Nessmuk, Kephart, Seton, and Miller played an essential role in all their tramping and wilderness adventures. This simple machine (wedge) was a value-adding tool for, not only survival, but for camp comforts and wilderness living skills.

Before addressing skill, let’s begin with safety…

Knife Safety

A sharp knife is a safe knife. Dull knifes take more force for cutting and increase the risk of injury. You want your knife shaving sharp.

Below are a few tips for basic knife safety for outdoor self-reliance…

  • Cut in a direction away from your body. That’s good advice for beginners and seasoned woodsman. However, there are safe methods to cut wood towards your body when carving spoons that can transfer to outdoor self-reliance skills. Experience and band aids will teach more than reading.
  • Work with your knife outside the triangle of death (an imaginary triangle between your knees and crotch).
  • Work within the blood circle when others are nearby (a circle made with your outstretched arms as you turn 360 degrees).
  • Grip and body mechanics ~ standard grip, reverse grip, chest lever, knee lever, and thumb assisted grip for push cuts in fine carving tasks. (These will be covered in detail in a later post.)

#1 Knife Skill ~ Fire

No matter the season or environment, a solid belt knife rides on my hip. If I’m ever separated from my main pack, my knife is on my body. In this case, it is now my one tool option. A good fixed blade knife is your number one tool in a wilderness setting.

Why such a bold statement?

One word… Fire!

Fire covers a multitude of survival sins. That sharp, metal wedge attached to your hip may be your only hope for fire. Campfires are certainly mesmerizing. We build them for much more than to simply stare into the flickering flames. Fire is your best sleep aid. And sleep is the most overlooked skill in outdoor self-reliance.

“The quality of a survival kit is determined by how much it can help you when you need to sleep.  If you can sleep well at night, you have it made.” ~ Mors Kochanski

Which is more important, knife or ax? I totally agree with Mr. Kephart’s statement below.

The thought that a heavy hunting knife can do the work of a hatchet is a delusion. ~ Horace Kephart

However, stuff happens! Situations can relieve you of a fine ax. In that case, you’d be wise to have a knife able to process enough tinder and kindling for fire. In my woodlands, an abundance of small kindling material is available without ever removing my knife from its sheath. However, when it comes to tinder material, a knife really speeds the process.

Processing Wood

Feather sticks are all the rage in bushcraft and an excellent skill to practice. Pretty little curls bunched up on the end of a stick are created by controlled wood removal. Surface area created from these fine curls is what makes them burn so easily.

The classic feather stick

The classic feather stick with a twist

I found a down-n-dirt way to make feather sticks over at Toms Backwoods channel using a spoon knife pictured above. If you have a spoon knife in your kit, use it to process tinder/kindling if you need to do so in a hurry. Here’s a quick video demonstration of the process…

Feather sticks are pretty and all, but my favorite way to make tinder material is using the dull side (spine) of my knife instead of the cutting edge. This technique takes less skill than feather sticks but is a super quick and easy way to produce wood shavings for tinder. Scrape the outer bark of a cedar tree in the same manner to produce a bundle of fine and coarse tinder material. Georgia fat lighter is my all-time favorite, though…

Ax-less, a solid knife can process firewood using the baton method. The baton technique is frowned upon by many in the outdoor community. But as mentioned previously, beating a knife through a piece of wood is my Plan B if I don’t have a proper wood processing wedge (ax). A full-tang knife with a 4 to 5 inch blade should be robust enough to produce tinder, kindling (smalls), and fuel size wood from a single wooden round.

A funny note on smalls: A fellow bushcrafter from across the pond wrote me confused over the term “smalls”. In his part of the world, “smalls” referred to skivvies. I’m not advocating the burning of your underwear. Smalls are pencil lead to pencil size sticks (kindling) used in fire craft from where I come from. 🙂

Knife and Spark Ignition

The steel in your main carry knife is another fire resource. That is, if you carry a high carbon steel blade. The thought of striking the spine of your expensive wedge with a sharp piece of rock to produce sparks is an abomination to knife junkies. However, knowing that your blade can serve as a backup flint and steel ignition source may one day give you fire if that’s all you have available.

I’ve written a few times about using my favorite spark ignition source, flint and steel, here and here. While ferro rods create hotter sparks, they are consumable. A fire steel should last you a lifetime and then be passed down for the next generation to enjoy… like a good knife.

Remember, fire is life out there. How much is your life worth? I’d say way more than an expensive cutting tool!

To further you fire craft skills, I’ve got an entire page dedicated to this outdoor self-reliance skill. Your wedge (knife) is an essential tool for creating fire.

More knife skill articles are on the way. Stay sharp, my friends!

Keep Doing the Stuff of Self-Reliance,

Todd

P.S. – You can also keep up with the Stuff we’re Doing on TwitterPinterestGoogle +, YouTube, Instagram, and Facebook… and over at the Doing the Stuff Network.

P.P.S – If you find value in our blog, Dirt Road Girl and I would appreciate your vote on Top Prepper Sites! You can vote daily by clicking here or on the image below. Check out all the other value-adding sites while you’re there… 

Thanks for Sharing the Stuff!

Copyright: Content on this site (unless the work of a third-party) may be shared freely in digital form, in part or whole, for non-commercial use with a link back to this site crediting the author. All links in articles must remain intact as originally posted in order to be republished. If you are interested a third-party article, please contact the author directly for republishing information.

Categories: Bushcraft, Camping, Doing the Stuff, Gear, Preparedness, Self-reliance, Survival, Survival Skills | Tags: , , , , , , | 30 Comments

Live Wild Where the Pavement Ends

by Todd Walker

Statistically, SUV’s pose a greater threat to life and limb than a charging mama bear. We’re more likely to meet our maker in concrete jungles than in nature.

This begs the question: Why don’t we spend more time in the wild? Answers vary widely.

  • I’m afraid of snakes, biting insects, spiders, and bears!
  • I don’t have time…
  • I don’t know what I’d do out there…

We still retain our wild ancestral genes. We just have to escape the modernized Petri dish and rediscover our wilderness within. Even if the closest you’ve been to nature is watching the Discovery Channel, your wild calls.

self-reliance-here-the-pavement-ends

Live wild and keep doing the stuff!

In some men, the need of unbroken country, primitive conditions and intimate contact with the earth is a deeply rooted cancer gnawing forever at the illusion of contentment with things as they are. For months or years this hidden longing may go unnoticed and then, without warning, flare forth in an all consuming passion that will not bear denial. Perhaps it is the passing of a flock of wild geese in the spring, perhaps the sound of running water, or the smell of thawing earth that brings the transformation. Whatever it is, the need is more than can be borne with fortitude, and for the good of their families and friends, and their own particular restless souls, they head toward the last frontiers and escape. -Sigurd F. Olson (H/T to my FB friend who shares my first name)

Every trial has a story, every tree has a tale, every rock sings. You can smell your history in the wild. You’ll never find true center trapped in the domesticated zoo in which we live. Freedom awaits outside.

Break out of your daily grind and go wild. Your true nature is in the field and forest.

Where the Pavement Ends

I go to the woods for many reasons. Take a pictorial hike with me see how deep the rabbit hole goes.

Live Wild Where the Pavement Ends

I found where Alice went…


Live Wild Where the Pavement Ends

Looking into the hollow tree

Locating Resources

Live Wild Where the Pavement Ends

Beech tree leaves hang around through winter

Live Wild Where the Pavement Ends

Crush the leaves for fire tinder

Practicing Skills

Live Wild Where the Pavement Ends

Blowing an ember in the Beech leaf tinder bundle

Live Wild Where the Pavement Ends

Twig fire lay

Live Wild Where the Pavement Ends

The frame of my traditional trapping shelter

Live Wild Where the Pavement Ends

Using simple machines for mechanical advantage when splitting cedar rails

DSCN0333


Reclaim Your Peace

Live Wild Where the Pavement Ends

Live Wild Where the Pavement Ends

Follow a stream

Live Wild Where the Pavement Ends

Find Feral Food

Live Wild Where the Pavement Ends

chanterelle in the spring

Take your own adventure where the pavement ends!

Keep Doing the Stuff,

Todd

P.S. – You can also keep up with the Stuff we’re Doing on TwitterPinterestGoogle +, and our Facebook page. Trade theory for action and join us in the Doing the Stuff Network on these social media sites: PinterestGoogle +, and Facebook.

P.P.S ~ If you find value in our blog, DRG and I would appreciate your vote on the Top Prepper Sites! You can vote daily by clicking here or on the image below. Check out all the other value-adding Prepper Sites while you’re there…

Thanks for sharing the stuff!

Copyright Information: Content on this site (unless the work of a third-party) may be shared freely in digital form, in part or whole, for non-commercial use with a link back to this site crediting the author. All links in articles must remain intact as originally posted in order to be republished. If you are interested a third-party article, please contact the author directly for republishing information.


their only “guides” were instinct and necessity, not a methodical system.

Categories: Bushcraft, Camping, Doing the Stuff, Natural Health | Tags: , , | 3 Comments

Lighten Your BOB: Pack The Alpha Tent

I spotted this while visiting Paratus Familia Blog. Here’s Enola Gay’s full post on their experiment with the Alpha Tent.

The Awesome Alpha Tent

When we posted our adventures with the Survival Net, one of our readers sent a link that he thought Sir Knight might enjoy.  The link was for the Alpha tent, fashioned from nothing more than a USGI Military Issue Poncho, tent poles and 4 wire nuts.  Thats it!  The wonderful thing about this tent is that is consists mainly of things you already carry in your gear so you are not adding unnecessary weight and bulk.  And, did I mention this was really cool?  To get the real skinny on this tent, and the gentlemen who came up with the idea, you must go to his site, Alpharubicon.  He has dimensions, specifics on the components and explanations for the uses of the Alpha tent.

Knowing a good thing when he sees it, Sir Knight began compiling the necessary articles to put together his own Alpha tent.  He already had a USGI poncho, so he laid it on the ground and measured it to be sure it was the same size as the one used on the Alpha tent site.  Next, he dug up some tent poles that we had saved from a long-ago defunct tent, measured them and proceeded to cut them down to the correct size for the tent.  Sir Knight cut each pole to the same size, rather than just cutting down the one pole that was too long, so that the tent poles bent in the correct manner when inserted into the poncho.  After cutting the poles, he strung the shock cord through the modified poles, tied it off at the end and fitted RED wire nuts to each end of the poles.  The wire nuts keep the poles from going through the grommets on the corners of the poncho and red wire nuts are the perfect size.  The directions on the Alpha tent website instruct you to drill a hole through the wire nuts and run the shock cord through the holes and tie them off.  Because of technical difficulties with our poles, we glued the wire nuts on instead.  The shock cord through the nuts would have been a better option, however, we made do with the materials that were available to us.

Wire nuts through the grommets

Once the tent poles were inserted into the grommets, we tied them down with cording that was already in the poncho.  It was almost like they were designed with the Alpha tent in mind!  Within a matter of minutes we had put together a lightweight one man tent, camouflaged and with a reduced IR signature, with nothing but a poncho, 4 wire nuts and some cast-off tent poles.  The folks at Alpharubicon really know their stuff!

Poles tied to the cording
The Alpha tent can even float your gear across creeks!
Very roomy

It makes perfect sense to fill your 1st and 2nd line kits with a few articles that have multiple purposes.  Rather than carrying a poncho and survival net and a hammock and a tent, you can carry a poncho, a net and a few odds and ends and still have all your bases covered.

USGI Poncho’s can be challenging to find, but really, you can use any poncho.  The difference is that you will have to measure your poncho and customize your tent poles accordingly.

Thank you for coming along for the ride as Sir Knight and I pare down our kits to the bare essentials and find out what works and what doesn’t.  Try an Alpha tent of your own and let us know what you think.


Categories: Bushcrafting, Camping, DIY Preparedness, DIY Preparedness Projects, Equipment, Frugal Preps, Preparedness, Self-reliance, SHTF, TEOTWAWKI | Tags: , , , , , , , , , , | 14 Comments

Blog at WordPress.com.