The cracks and gaps between the logs needed to be filled to make it look like a real log cabin. The process of filling the gaps is called chinking. Before modern products came along, chink was made of mud and/or clay, and straw. Chink serves as an insulator against cold wind, moisture, and insects.
When I started this project in January of 2018, I thought of using Georgia red clay for chinking. That idea lost momentum as the project drug along. I decided to go with masonry mortar. It’s quick, easy and relatively cheap.
I chose to use the Butt and Pass method of log home construction. The folks teaching and using this method recommend masonry cement or mortar for chink. Nothing I read suggested adding anything to the mortar mix to help prevent the chink from cracking over time. Butt and Pass log cabins are not known for settling as other construction styles are prone to do.
My mix ratio of water to one 60 pound bag of mortar was 3.5 quarts to 1 bag. The bag instructions said one gallon per bag. I found that much water made the mortar too wet and had a hard time hanging in the gaps.
We mixed the mortar in a wheelbarrow.
Before slapping any mortar in the gaps, I used my pneumatic framing gun to drive nails 2-3 inches apart in all the cracks between the logs on the outside of the cabin. I dropped the air pressure so an inch or so of the nail stuck up above the wood. Some gaps can be fairly large in the corners due to the Butt and Pass method. I had to get creative there. I then went back and bent the nails vertically to give the chinking something to hold on to.
A lot of nails went into this process.
Once I nailed all the outside gaps, foam (Great Stuff) was sprayed into the large corner gaps. I then stuffed fiberglass insulation into the remaining gaps between the logs. It’s important to not stuff the gaps too full of insulation. There should be a little space between the nails and the insulation in order for the mortar to grab the nails. After the foam set up, I trimmed the bulging foam to make it recessed from the nails.
Now comes the fun part! Experimentation with applying the mortar was frustrating. I tried scooping it in the gaps with the masonry trowel. Most of the mortar ended up on the ground.
Then my good friend Melonie of Mel of the Mountains, who I’m apprenticing under for brain tanning deer hides, came to help with the chinking. She owned a bakery for sixteen years and made extravagantly decorated cakes. While on a scaffold board at the top log of the cabin, I glanced over at her while she was chinking and was shocked at how easily she applied the mortar. When I questioned her ease with this skill, she said it’s the same technique as icing a cake. She held the mortar board up to the gap and swiped the mortar into the gap and smoothed it with her trowel. Amazing! That was a game changer for me.
The same as icing a cake she says.
There’s a learning curve to every skill you’re tackling. Chinking is no different. Having the right tools helps. I used a one and half inch masonry trowel which is rectangular in shape to apply and smooth the mortar. The joints are somewhat convex. A flat finish didn’t appeal to me.
The corners were a challenge to create a smooth finish. The trowel wouldn’t get into the spaces to smooth the mortar. I ended up using my gloved hands to smooth the finish as best as possible. If anyone has a better idea, I’d sure like to hear from you!
Working the mortar with the trowel.
Once the chinking was complete, I stood back and realized that my log building actually looked like a traditional log cabin! A very satisfying feeling came over me.
Satisfied!
Below is the chinking video on my YouTube channel if you’re interested in this sort of thing.
P.P.S – If you find value in the blog, I would appreciate your vote on Top Prepper Sites! You can vote daily by clicking hereor on the image below. Check out all the other value-adding sites while you’re there…
My last cabin update on the blog was from November 2019. Work had stopped on the cabin since DRG’s passing in March of this year. People asked me when I would get back to building the cabin and I’d respond, “When I get motivated again.” Well I’m finally motivated.
July has typically been a very productive month for me on the log cabin build. This holds true for 2020 as well. What follows is a series of photos highlighting the progress.
The swinging porch bed. A whole new how-to post is upcoming on this one.
I built this red cedar rope swing to add to the cabin site. The air mattress is queen size and really too tall for the swing. However, after extensive testing, it works just fine!
Mosquito netting is a must when napping!
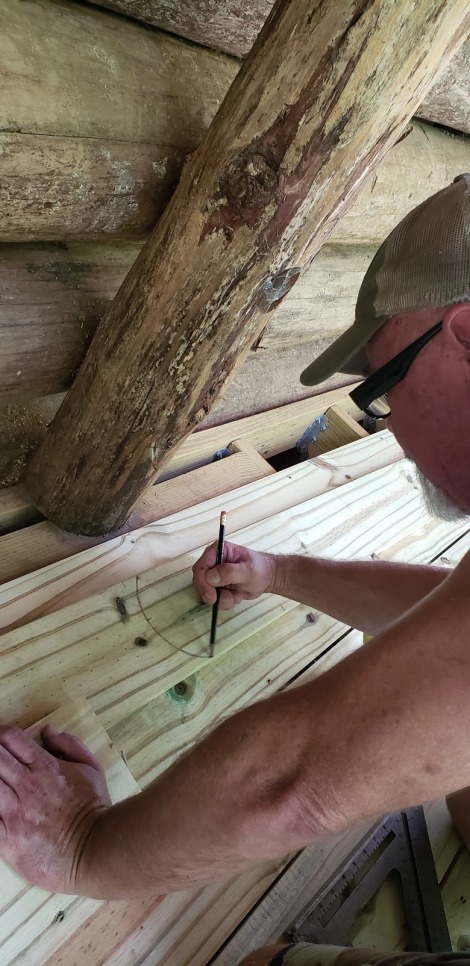
Flooring
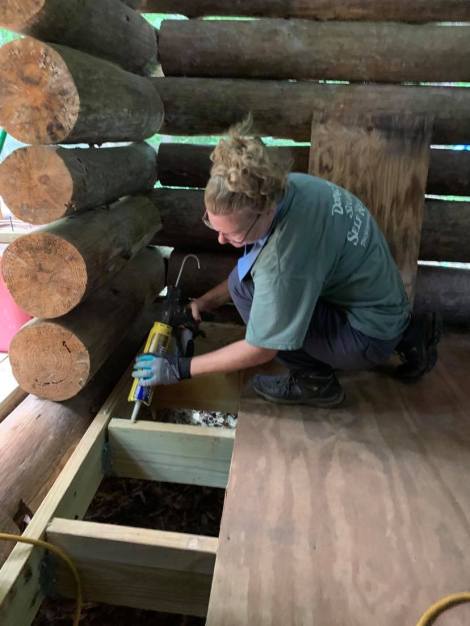
The porch needed something other than old, temporary plywood with spotty coverage. I went with 1x6x12 pressure treated boards. Melonie was nice enough to lend a hand on both the porch and the subfloor inside the cabin!
The finished porch floor.
Mel laying down the glue.
Subfloor complete!
Front Door
I had been carrying a salvaged heartwood pine door around for about 15 years. I knew I would use it on the cabin as soon I started this project. Philip helped me hang this with hand-forged hinges, hasp, and nails gifted and made by Tim at Oxbow Farm. What a great craftsman and friend!
Hammering cut nails into the hinge holes.
Cut nails
Front door finished!
Gable and Loft Floor
To expedite the build, I decided to go with T1-11 plywood to cover the gable ends. I also used this material upside down on the loft floor so the bead board would be visible from the porch below.
Taking a break on the newly laid loft floor.
One of the stained glass windows DRG bought several years ago. Thought it would go well as the center window of the cabin.
Log Steps for the Front Porch
Dimensional lumber would have been an easy choice for the steps. No, we needed to stay with the rustic look. I spent the morning walking the woods to find dead-standing red cedar the right diameter for the stringers and steps. Once hauled back to the cabin, I used my chainsaw mill to make the steps.
Notching stringers to accept the half-round log steps.
Step one.
Satisfied and taking a break on the second step.
Still has some tweaks we want to make but it’s a functional set of rustic steps!
Thank you friends and family for the outpouring of love and support over the years, and especially since my lovely DRG passed away. You are simply the best!
P.P.S – If you find value in our blog, Dirt Road Girl and I would appreciate your vote on Top Prepper Sites! You can vote daily by clicking hereor on the image below. Check out all the other value-adding sites while you’re there…
I’m not one to ask for help often. But I’m glad I did. They kept showing up in the Georgia heat and humidity ready to sweat through 90+ degree temperatures.
The Crew disassembled the log cabin in one day at the end of June. Once the logs were moved to the new site, I started putting the puzzle back together. I managed to stack 7 courses on the sill logs before The Crew reached out and scolded me for not extending an invitation sooner. “All ya gotta do is ask.” I’m still amazed, but shouldn’t be, that they keep coming to this party. True friends do that, ya know.
Now we’re to the point of needing metal for the roof. Here’s a look at the progress since my last log cabin update (July 31, 2019).
Stacking Wall Logs
Just before The Crew showed up.
Re-assembling the wall logs was like a paint by numbers set. Dianne had labeled the logs before we took it down. It was just a matter of putting numbers back where we found them on the walls.
Jeff and I swinging “Good Times” to secure logs with rebar pins.
Two 21 foot plate logs finished up the walls.
Setting the Ridge Pole
I dreaded this task. I wasn’t sure if the plan would work. How could we get a 21 foot log over thirteen feet above the floor, balanced and secured atop two vertical ridge pole support logs?
Turns out that raising the ridge pole (RP) may have been the easiest part of the build. We cut and peeled two ridge pole support logs (RPSL) and attached them to the back and porch walls with 1/2″ all-thread rod. The poles reached about 5 feet above the plate logs to give me the pitch I wanted for the roof.
Peeling the freshly cut ridge pole support logs with draw knives.
Lifting the second ridge pole support log into place on the front porch.
We attached 2×6’s to the top of each RPSL as temporary lifting poles. A 2×6 spacer board was screwed between the RP and the temporary lifting pole. This would give the space needed for the RP to rest on the center of the RPSL’s when lifted in place. Two chain falls were secured to the 2×6 lifting poles before the RPSL’s were lifted into place.
Ridge pole secured on front porch wall.
All-thread in a counter-sunk hole which will be plugged with wood.
Chain falls ready for lifting.
We predrilled holes for the rebar pins in the RP before lifting. With rigging in place, we slowly lifted the RP to the top of the RPSL’s. This went smoother than I could have imagined. JT aligned his end and drove a rebar pin through the RP into the RPSL with 3 inches of rebar above the RP. The 3 inches of rebar was bent over on top of the RP for added holding power.
JT pinning the ridge pole in place.
Even though we measured hole placement on the RP, my end was 4 inches short of center on the RPSL. I re-drilled my end from the scaffolding we built. I drove in my rebar to secure the RP. Time for much needed break!
The ridge pole once the temporary lifting poles and chain falls were removed.
Rafters
I had originally planned to use log rafters and log gables on this project. However, with all the delays we encountered with the disassembly and reassembly, I opted for dimensional lumber to expedite the process. This is just a practice cabin, by the way.
We sank a deck screw in two of the 2″x6″x14′ laid out at a 45 degree angle. The screw allowed the boards to “scissor” on top of the RP as we rested the tails on the top plate logs.
Staging rafters over the ridge pole and top plate logs.
We slid the rafters down the RP and set them on 2 foot centers. We eyeballed the first rafter’s placement on the plate logs and toe-nailed it into place. I probably should have sawn the RP and plate logs flat to get a level run on the rafters. To correct the situation, we’ll have to lift or lower individual rafters at the top plate logs as needed. There’s always challenges when using dimensional lumber on raw logs.
Jeff snapped this shot after we ran out of lumber for rafters.
Gable Framing
The gables, as mentioned earlier, will be dimensional lumber. I’m not sure what I’ll use for sheathing the gables. A few ideas are floating in my head.
A top plate log needed to be installed between the long porch plate logs. We skinned a log, measured and cut to length, and pinned it. We used two of the original ax-hewn floor joists from the first build to vertically support the cross member.
Jeff and JT doing the heavy lifting on the cross member.
We laid two rafter boards flat over the RP to create a top plate for the gable studs. We started framing under the RP and worked our way out to the plate logs with 2×6 studs. Dianne did a fine job of cutting bevels and lengths for the studs.
This pics shows the flat 2×6 top plate studded up from the inside of the porch.
Gable view from the outside of the porch.
The Crew on gable day!
The sleeping loft will be above the porch where The Crew is standing. Like most of the plans on this project, we’ll figure it out as we go.
P.P.S – If you find value in our blog, Dirt Road Girl and I would appreciate your vote on Top Prepper Sites! You can vote daily by clicking hereor on the image below. Check out all the other value-adding sites while you’re there…
I think I now understand why so many pioneer log cabins had packed dirt floors.
Ease of construction may have been the #1 reason. Lacking dimensional lumber, time, and labor, a dirt floor was an easy solution. You weren’t necessarily poor, but the term, “dirt poor”, stuck. Believe it or not, there’s a growing number of wealthy folk returning to earthen floors.
With my self-reliance on trial, I wanted a wooden floor for my little log cabin in the woods… complete with a front porch overlooking the creek. As promised in our last article, here’s what I came up with for my budget floor support system.
Round Log Floor Joists
A big box hardware store is a 10 minute drive from the cabin site. They sell dimensional lumber of all sizes to speed up the build. However, this whole “self-reliance on trial” thing had me going another direction.
The living area with five log joists set in place.
When I first started this project in February, the cabin dimensions were going to be a cozy 8’x10′. The first tree I felled was bucked into 10 foot sections for the 8 foot walls. Since expanding the cabin size to 10’x12′, the 10 footers wouldn’t work for wall logs. Bingo! These would become my floor joists.
Hew One Side Flat
Ax-cut logs need to be sawn flat on both ends to start the hewing process. Secure the log to cribbing with log dogs. Last year I made two from half-inch rebar which work fine. Hammer one point into the log and the other into the cribbing log. Repeat on the other end of the log.
I choose the side with the fewest knots to hew. Pine knots are a curse from the devil for hewers. The chosen side is turned and secured to the cribbing perpendicular to the ground. Dog the log before marking plumb lines.
Measure the center of the log end horizontally and place a mark at the halfway point. Place a level on the mark vertically and draw a plumb line. Do the same operation to draw a level horizontal line through the center mark. You should now have two lines intersecting to form a cross hair on the end of the log. Repeat this step on the other log end.
One more plumb line to draw before we’re done. Determine how much wood you want to remove from the side of the log. Place the level at that point and draw a vertical plumb line. I took off about an inch of wood which created ample flat surface on the joists.
Plumb and level lines drawn
Where this second plumb line meets the top of the round log, use a knife or ax to score a slit through the line. Drive a nail shallow in the cross hair. Hook the string of a chalk line box to the nail. Slip the string into the slit at the top of the log and run the chalk line to the other end of the log. Secure it in the other slit you made. While holding the line in the slit, reach down the line with your other hand and pull the chalk line up vertically, not horizontally. Release and the sting to “snap” or “pop” the chalk line.
The chalkline secured in the ax slit at the top of the line to be hewed.
By the way, all my logs have been debarked. If hewing with bark on the log, strip off a section of bark where the chalk line will be snapped. Read more about hewing with the bark on in this article.
Scoring
Scoring is the process of making relief cuts down the side of the log to remove the bulk of wood before hewing to the line. With so little wood to remove from the floor joist, I thought slash cuts would be best. Slashing is a series of overlapping 45 degree cuts about 4 inches apart down the length of the log. However, the logs had seasoned enough to make it difficult to remove wood after slashing.
Slash scoring with the log turned 30 degrees added too much extra work.
I ended up cutting “V” notches about a 8 inches apart down the log side. The raised wood between the notches are called jogs or joggles. The joggles were removed close to the chalkline with my ax. The log floor joists were all in the 6-8 inch diameter range. Not large enough to stand on to cut notches with my long-handled felling ax. I stood on the opposite side of the log and cut notches using a 26 inch boy’s ax. Make sure that the notches go all the way to the line and are plumb through to the bottom of the log.
Joggling or Juggling
Now is the time to remove the joggles. On these small logs, I used the grub bit of my double bit felling ax mostly. The 36 inch handle allowed me to swing almost upright, saving my back. Removing this excess wood can be the most dangerous part of the whole hewing process. A forceful swing is needed to knock off the protruding joggles. Be aware of where your legs and feet are before swinging.
I hewed several logs with my double bit only.
My most comfortable stance was to straddle the log with my right foot well to the right of the log. A slight bend at the waist and knees adds insurance that the ax will strike the ground and not my boot. The grub bit will strike the ground as it passes through the wood from time to time. Wood chips create a barrier between the bit and ground as the process continues.
A safer way to remove joggles is to rotate the log on the cribbing about 30 degrees (captured two photos above). A lateral swing (out of the frontal zone) is used with the log between you and the moving ax. You’ll need to re-plumb the log before hewing to the line.
Hewing
With a thin layer of wood (1/2 inch or less) proud of the chalkline, hewing begins. I used my broad ax on some, and the double bit felling ax on others. I’ve become fond of using the longer double bit even for hewing. It dealt with lighter’d knot better. I found that once the joists were rough-hewn with the double bit, I could set them in the sill log notches and comfortable hew high spots by swing horizontally with my broad ax. And it could be done while I sat on the adjacent joist.
Hewing to the line with the double bit ax. This log was almost too short to use. Notice the ax-cut end almost makes a nice tenon.
The angle in which the double bit struck the wood had to be adjusted. It’s not a vertical swing like the broad ax. Once the angle is dialed in, the wood begins to slice off. I actually obtained smoother finishes using the double bit over the broad ax. I got closer to the chalkline as well. Keep in mind, this is rough-hewn lumber.
Mortise and Tenon
Before joists could be set, a level line was needed on the inside of the sill logs. Using a water level, I penciled in marks on all four corners. A chalkline was snapped to give me a level line on the two sill logs where the top of the joists would rest.
I marked the sill logs at 2 foot intervals for joist positions along the 12 foot walls. Mortise joints (pockets) were cut into the sill log with a 2 inch chisel and dogwood maul. The mortise pockets measured about 2″x4″. Each joist measurement, from pocket to pocket, was different. Working with round logs of differing diameter is entirely different from building with dimensional lumber.
The faint blue chalkline is still visible. This joist needed to be lowered. I switched to red chalk as it seemed to last longer.
Tenons were cut on the ends of each joist to match the mortise pockets. Joists were set and raised or lowered to meet the level line on the sill logs. A simple wedge of wood underneath or trim of the tenon did the trick.
Mortises chiseled to 2″x4″ dimensions.
Leveling Joists
The four-foot level on top of the aluminum bar extended my reach to four joists at once.
Though each joist tenon met the level line on the sill logs, rough-hewn logs will have high spots… at least from a hewer like me. I used a long piece of rectangular aluminum as a straightedge coupled with a 4′ level to ride atop four of the five joists. I moved the level from sill to sill checking for high spots and dips in the joists.
Close enough!
Taking a comfortable sitting position on an adjacent joist, I planed the high spots down with the broad ax. This was a great change of pace on how I typically swing this heavy hewing ax. Recheck level, plane, recheck, plane… until my OCD subsided. It’s close enough for an off-grid log cabin in the woods!
After shimming and shaving to level joists, I carved and drove wooden wedges into the mortise pockets to take away any wiggle that might be present in the joints. I’m following the same process for the front porch log joists. I’m running 3 long joists perpendicular to the living area joists with a girder underneath at the halfway point. The 6’x12′ front porch will provide hours of relaxing ambiance as creek water tumbles over rocks.
P.P.S – If you find value in our blog, Dirt Road Girl and I would appreciate your vote on Top Prepper Sites! You can vote daily by clicking hereor on the image below. Check out all the other value-adding sites while you’re there…
As the song says, “I started out with nothing, and I’ve got most of it left.”
Those lyrics summed up my feelings since starting this log cabin project in February. I all I had to show for my effort was a bunch of skinned logs scattered through the woods and fields. That all changed this summer. Here’s the progress as of mid July…
Setting Sill Logs
I had my doubts about dry-stacked stone piers as my foundation. The largest sill log measured 14 inches in diameter by 18 feet long. A handy online log calculator estimated the weight for this one log to be 925 pounds. The stones/boulders were far from flat. I did my best to shim them with smaller stones to keep them steady.
Dry-stacked stone piers have supported log cabins for hundreds of years… but I had my doubts.
I spent way too much time with a water level trying to ensure all the piers were the same height. Round logs are not dimensional lumber. Get the stones close to the same height and lay logs on top.
In all honesty, my plan was to use only hand tools for this trial of self-reliance. Trees were felled and bucked with an ax, debarked with a bark spud and draw knife, and hauled to site by me as the mule pulling my LogRite Junior Arch… until I attempted to move those half-ton sill logs. A real mule was needed for this job.
My best friend Philip had just finished skinning the two sill logs when Allen, the land owner, walked up to visit. He told us he had just acquired a Kawasaki Mule. Perfect!
Philip taking a break after debarking one of the 925 pound sill log with the barking spud in the foreground.
Even with Junior hooked to the back-end of the Mule, the big sill logs were a beast to haul back to the cabin site. But it worked!
Log Lifting Tripod
Lifting close to a half a ton of wood, even a few feet off the ground, would require a lot of mechanical advantage using simple machines. Dead cedars were cut and lashed together to form a tripod. The largest leg/pole was about 6 inches in diameter. Standing this heavy tripod up by myself was like watching the Three Stooges. Wish I had filmed this for some comic relief.
Here’s the video of how I lashed the tripod for those interested…
After positioning the tripod over the heaviest sill log, I attached a four-to-one block and tackle system at the top of the tripod. Upon testing the pulley system, I could only lift the log a couple of inches. Not good. I quickly realized that, even if I was able to lift the log, I could not hold the log in place by myself and control the placement on the piers with precision. I needed a lifting device I could control when working alone. I bought a one-ton chain fall (hoist) for $60 the next day. This one tool revolutionized the job!
The chain fall rigged to the tripod made light work of heavy logs.
Our video below shows how maneuverable the logs are when choked at the balance point.
Sill Logs Notched and Set
I positioned the first sill log on the ground next to the piers to mark for notching. I made relief cuts with my bow saw on each mark about one inch deep. I used a boy’s ax to remove wood chips between the saw cuts. This produced a flat surface for the log to rest on the non-flat stone piers.
Flat notches were cut using a buck saw and ax.
I re-choked the log with the tow strap near the bottom of the log. Lifting by myself with the chain fall, the log slowly turned until the notches faced down. Then the log was lifted to the height needed to be lowered onto the piers. On the way up, the log scraped the side of the piers toppling a few. I re-stacked them and lowered the log cautiously. They held up fine but had a touch of wobble. Small rock shims were inserted to steady the piers.
After months of preparation, the feeling of seeing a huge log off the ground and resting on rocks was pure excitement!
The first log up!
Square Corners
The next day I set the second log to create the first corner. How do you make corners square using different sized logs which are not even? Here’s how I did it…
The corner nail is near the head of the hammer where the two chalk lines intersect. The tape measure forms the hypotenuse of the right triangle.
I’ve used the Pythagorean Theorem many times to square corners using dimensional lumber. You need straight lines for this to work. I popped a chalkline down the center of each log. I tacked a nail at the intersection where the two lines crossed in the corner. From that corner nail, I measured three feet down the chalkline and tacked another nail. On the other log, I measured four feet and drove in a nail. I lifted the second log just enough to allow me swing in or out until the distance from both nails measured five feet. This creates a 3-4-5 right triangle ensuring the logs are perpendicular in the corner. A 6-8-10 triangle would be more accurate, but I was by myself and didn’t want to stretch a tape measure 10 feet from nail to nail.
Tight-Pinned Corners
The Butt and Pass method requires no notches. Metal pins hold the logs together to create a sturdy, solid structure.
The brace and bit used to make pilot holes for the rebar pins.
I cut 1/2 inch rebar in 20 inch lengths at my shop. Back at the build site, I use a brace and bit to bore a 1/2 inch hole almost through the first log. Probably should drill all the way through but almost through seems to work. Now I drive the pin through the pilot hole and into the adjacent log. I started using a 6 pound sledge with a 36 inch handle. My accuracy suffered. The long handle also kissed my ribcage a few times while hammering bent over. We sawed the handle in half and found it to be the ticket.
A twenty inch rebar pin hammered flush.
A note worth mentioning on driving pins. If you miss hit and bend the pin, stop. Straighten the pin as best as possible before pounding more. A bent pin will find its way through the side or top of the adjacent log. Once all four corners were pinned together, the sill logs became unbelievably steady on the piers.
Log Floor Joists
3 of 5 log floor joists set in sill logs. I’ll explain the leveling process on our next article.
I’ve begun hewing log floor joists. Dimensional lumber would speed up the process but I want to use as many raw resources as possible on the cabin. One side of a log gets hewn flat and notched with tenons on both ends. The tenons will mate with mortises notched into the sill logs. I’ll do a more detailed article on what I’ve got planned for the floor system.
Until then, here’s our latest video on the floor system…
P.P.S – If you find value in our blog, Dirt Road Girl and I would appreciate your vote on Top Prepper Sites! You can vote daily by clicking hereor on the image below. Check out all the other value-adding sites while you’re there…