Equipment

Deconstructing My Adjustable Paracord Rifle Sling…Just for You

by Todd Walker

One of our readers, winonageek, commented recently on my 550 Paracord Rifle Slings“I love the idea for an adjustable paracord sling. Would you elaborate on how you made the adjustable sling? How did you connect the paracord and webbing?”

So, I thought I’d deconstruct it for him and anyone else interested.

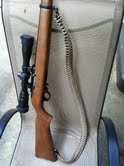
After making my first paracord rifle sling, I attached it to a Ruger 10-22. Hum, nice fit, look, and functionality for redundant cordage. But what if I wanted to adjust the length for, say, a shotgun, or a longer rifle for a barrel-chested friend? My wheels were spinning. Off to Wally World to find a cheap clasp.

I dug into my box of webbing and found a piece of 1 inch material about two feet in length. More digging produced a buckle thingy (Triglide) used to connect the two loose ends of webbing.

I used about 80 feet of black paracord because, well, it’s the only color I had in a 100 foot hank that day.

Stuff you’ll need

  • Paracord – about 80 feet – I use 100 feet ’cause I hate being too short at the climax of a project 🙂
  • 1 inch x 28 inch webbing – more length depending on how many Twinkies you’ve packed away on your waistline
  • Buckle thingy (Triglide)
  • 2 sling swivels
  • 1 buckle clasp – I used a 1 inch clasp to fit my webbing

Connecting the stuff

A.) Start one end of the paracord on one sling swivel and the other end through the female part of the clasp. I loop the cord through four times on both connectors. That’s unnecessary for strength, but just looks better than two loops on the connectors.

Do a basic cobra weave down the entire length starting at the clasp end. Once you reach the sling swivel, begin a king cobra weave (video link) on top of the previous cobra weave. I ran the king cobra weave about 20 inches and terminated the weave. The entire length of the paracord portion, from swivel to clasp, is about 24 inches. This measurement does not include the clasp and sling swivel.

Once you have the sling secured to the female clasp and sling swivel, it’s time to attach the webbing to the remaining hardware: sling swivel #2, buckle thingy (Triglide), and the male end of the clasp. To save you the trial-and-error method and a load of frustration, follow these procedures closely.

B.) I bent about 1/2 inch of webbing and melted it to itself to create a “stop” for the triglide. That step is probably not required. Then take the buckle thingy and feed the webbing through as shown.

Buckle thingy and webbing

Triglide and webbing

Webbing fed through buckle to melted "stop"

Webbing fed through buckle to melted “stop”

C.) Now you can feed the clasp (male end) and sling swivel #2 on the webbing. Make sure they both are facing out like the buckle pictured below.

Progression: buckle, male clasp, sling swivel

Progression: buckle, male clasp, sling swivel

D.) Take the loose end of the webbing and feed it back through the buckle – on top of the end already in the buckle. Your done. Adjusting the length is done by sliding the loose end to fit. My sling is comfortable at around 38-39 inches end to end. Remember to use longer webbing for a longer sling.

Assembly complete

Assembly complete

That’s it. I’m sure there are better, more functional methods, but this is what I had on hand except for the clasp. I used Uncle Mike’s sling swivels that I already had in my gun cleaning box. I never throw away webbing. The buckle was poached from my paracord supply bag. My total cost was under $10.00. I know. If I had to buy all the supplies upfront, it would cost more. It pays to stock up and be a scavenger.

As always, if you have a better idea for making an adjustable paracord sling, don’t be shy. Please let me know how to improve this puppy.

Keep Doing the Stuff,

Todd

P.S. – You can also keep up with the Stuff we’re Doing on TwitterPinterestGoogle +, and our Facebook page… and over at the Doing the Stuff Network on PinterestGoogle +, and Facebook.

P.P.S – If you find value in our blog, Dirt Road Girl and I would appreciate your vote on Top Prepper Sites! You can vote daily by clicking here or on the image below. Check out all the other value-adding sites while you’re there…

Thanks for Sharing the Stuff!

Copyright: Content on this site (unless the work of a third-party) may be shared freely in digital form, in part or whole, for non-commercial use with a link back to this site crediting the author. All links in articles must remain intact as originally posted in order to be republished. If you are interested a third-party article, please contact the author directly for republishing information.

Categories: DIY Preparedness Projects, Doing the Stuff, Equipment, Firearms, Gear, Paracord | Tags: , , , , | 4 Comments

Lighten Your BOB: Pack The Alpha Tent

I spotted this while visiting Paratus Familia Blog. Here’s Enola Gay’s full post on their experiment with the Alpha Tent.

The Awesome Alpha Tent

When we posted our adventures with the Survival Net, one of our readers sent a link that he thought Sir Knight might enjoy.  The link was for the Alpha tent, fashioned from nothing more than a USGI Military Issue Poncho, tent poles and 4 wire nuts.  Thats it!  The wonderful thing about this tent is that is consists mainly of things you already carry in your gear so you are not adding unnecessary weight and bulk.  And, did I mention this was really cool?  To get the real skinny on this tent, and the gentlemen who came up with the idea, you must go to his site, Alpharubicon.  He has dimensions, specifics on the components and explanations for the uses of the Alpha tent.

Knowing a good thing when he sees it, Sir Knight began compiling the necessary articles to put together his own Alpha tent.  He already had a USGI poncho, so he laid it on the ground and measured it to be sure it was the same size as the one used on the Alpha tent site.  Next, he dug up some tent poles that we had saved from a long-ago defunct tent, measured them and proceeded to cut them down to the correct size for the tent.  Sir Knight cut each pole to the same size, rather than just cutting down the one pole that was too long, so that the tent poles bent in the correct manner when inserted into the poncho.  After cutting the poles, he strung the shock cord through the modified poles, tied it off at the end and fitted RED wire nuts to each end of the poles.  The wire nuts keep the poles from going through the grommets on the corners of the poncho and red wire nuts are the perfect size.  The directions on the Alpha tent website instruct you to drill a hole through the wire nuts and run the shock cord through the holes and tie them off.  Because of technical difficulties with our poles, we glued the wire nuts on instead.  The shock cord through the nuts would have been a better option, however, we made do with the materials that were available to us.

Wire nuts through the grommets

Once the tent poles were inserted into the grommets, we tied them down with cording that was already in the poncho.  It was almost like they were designed with the Alpha tent in mind!  Within a matter of minutes we had put together a lightweight one man tent, camouflaged and with a reduced IR signature, with nothing but a poncho, 4 wire nuts and some cast-off tent poles.  The folks at Alpharubicon really know their stuff!

Poles tied to the cording
The Alpha tent can even float your gear across creeks!
Very roomy

It makes perfect sense to fill your 1st and 2nd line kits with a few articles that have multiple purposes.  Rather than carrying a poncho and survival net and a hammock and a tent, you can carry a poncho, a net and a few odds and ends and still have all your bases covered.

USGI Poncho’s can be challenging to find, but really, you can use any poncho.  The difference is that you will have to measure your poncho and customize your tent poles accordingly.

Thank you for coming along for the ride as Sir Knight and I pare down our kits to the bare essentials and find out what works and what doesn’t.  Try an Alpha tent of your own and let us know what you think.


Categories: Bushcrafting, Camping, DIY Preparedness, DIY Preparedness Projects, Equipment, Frugal Preps, Preparedness, Self-reliance, SHTF, TEOTWAWKI | Tags: , , , , , , , , , , | 14 Comments

550 Paracord Rifle Slings

A few years ago, I got interested in making those cool looking paracord bracelets. I watched a youtube video and said to myself, “Self, how hard can it be?” Loving Wife just rolled her blue eyes as I ordered the materials. I’m certainly not an expert at knots like the Paracordist. I only do a couple of simple knots.

There’s so many uses for paracord. Side note: I just watched a Myth Busters episode on duct tape being the only supplies used to rescue the MB’s off a deserted island. Very cool stuff, but they must have used 50 plus rolls of tape to “survive”. The sheer weight would be prohibitive for a BOB. I do keep duct tape in my wallet and BOB wrapped around an old gift card. The wallet tape comes in handy often.

Paracord is the duct tape of outdoor survival. The usefulness of this cord makes it indispensable. This post is not intended to go into its many functions but to highlight one of my DIY projects: Paracord rifle slings.

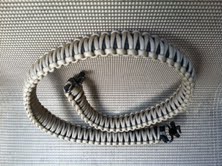
Here are two king cobra-stitch slings I made for my Ruger 10-22 and Remington 870. I used about 100 feet of cordage for the tan sling and about 80 for the black one, which is adjustable. With this much cord accompanying me in the woods, I’m sure I could affect my rescue if need be…or build a log cabin even. There’s no such thing as too much paracord.

The sling is 37 inches (approximately 100 ft of cord) with Uncle Mike swivels.

View off the gun

I made the black sling adjustable with some black webbing I had lying around.

Let me know about any of your DIY paracord projects. I’m always open to improvements and new projects.

Semper Vigilans,

SS

Categories: DIY Preparedness Projects, Equipment, Paracord | Tags: , , , , | 7 Comments

Blog at WordPress.com.