Frugal Preps

Hunt-Gather-Eat: Identifying Plants the Real Food Eats

by Todd Walker

At our spring Georgia Bushcraft campout, Chris Noble began his Plant I.D. class with seven wise words written on the white board…

“Plants are what the real food eats!”

Wild edibles are popular among survivalists and outdoorsy types. Would you survive the learning curve if you were dependent on wild food only?

Hunt-Gather-Eat- Identifying Plants the Real Food Eats - TheSurvivalSherpa.com

We have several articles parked on our Foraging Feral Food page. However, foraging is a hobby of mine and is used to supplement my diet and knowledge base. The supplementary part (knowledge) is what the average person, like myself, should concentrate on when learning to forage. More specifically, which plants are favorites of your local Real Food (animals)?

The idea of long-term survivability as a vegan without our modern food delivery system would be, in my mind, starving times. Even omnivores would be hard pressed to feed their family if semi-trucks stopped rolling. If you’re reading as a vegan, this is not a slam on your food choices. I have nothing against vegetarians or vegans… except for the occasional radical who bashes bacon. In my wild foraging experience, learning to safely identify wild edibles takes time, experience, and preferably guidance from someone with actual expertise in the field. This is not to say living off the landscape can’t be done by hobby foragers. It’s just unlikely.

Crop cultivation signaled the beginning of the end of our hunter-gatherer lifestyle 10,000 years ago. Today, the domestication of our species seems to be complete… almost. Our wild genes remain but must be reprogrammed.

Like any other skill, harvesting the Real Food (non-farm raised) will require hunting and trapping wild animals. Ethical practices should be followed. This is not about killing “trophies.” This is about feeding your family Real Food in hard times.

Favorite Plants of the Real Food 

Most creatures in the Eastern woodlands with fins, fur, and/or feathers are edible, with a few exceptions, and, of course, personal bias. Crawlers and scaly critters aren’t off the menu either.

Having knowledge and familiarity of which plants wild animals prefer can help supplement your food supply. Understanding their habitats and patterns is also important. Even if you’ve never hunted or trapped wild game, or choose not to at this point, find these plants and the Real Food will follow. Below is a list of critters and their favorite munch-ables.

Whitetail Deer

Anyone who has ever grown a garden knows the damage deer can cause. Rows of young butter beans can turn into match sticks poking from the earth overnight. Farm land is a white-tailed deer smorgasbord. With no agriculture in an area, deer browse on a variety of foods available in different seasons.

IMG_0402

  • Browse: Twigs and leaves of woody plants, vines, and shrubs
  • Forbs: Broad leaved flowering plants (herbaceous)
  • Mast Crops: Acorns, hickory nuts, beechnuts, walnuts, pecans, etc.- In my experience, white oak mast is preferred over other oaks
  • Fruit: Apple, persimmon, muscadine (wild grapes), blackberry, mayapple, etc.
  • Fungi: Mushrooms
  • Grasses: Makes up less than 10% of their diet
A power line full of forbs.

A power line full of forbs.

White-tailed deer are typically most active during morning and evening hours. The “rut” (breeding season) in the fall causes bucks to throw caution to the wind in pursuit of receptive does. Conventional hunting wisdom is gone with the wind as well.

Bear

All bears are classified as carnivores even though most of their diet is plant-based. They are not shy about scavenging from trash cans, carrion, campsites, and landfills. Meat and fish, when available, add needed protein and fat to their diet.

This big boy drug our son's trash can to the edge of the woods to help himself in Florida.

This big boar drug our son’s trash can to the edge of the woods to help himself in Florida.

Seasonal plants, especially high-energy fruit, are favorites for bear.

  • Spring: First sprouting grasses and roots in areas where bears hibernate. Grubs and insects under decaying logs.
  • Summer and early fall: Blackberries, huckleberries, persimmon, blueberries, and, near human developments, fruit trees.
  • Fall: As berries disappear, foraging turns to fish and dead carcasses of animals.

Feral Hogs

In Georgia, and many other states, there is no closed season on feral swine. This non-native animal was introduced in North America in the 1500’s by explores. Wild hogs are opportunistic omnivores who can also play the role of predator. Not only a nuisance to landowners, they compete with native wildlife for food sources and destroy natural habitat.

Wild hogs are known carriers of disease and parasites which can be transferred to humans when butchering and consuming. Precautions should be taken when handling/processing a carcass. Wear rubber gloves, dispose of waste properly, cook meat to an internal temperature of 160ºF, wash hands with soap and warm water, and clean/disinfect surfaces/tools after butchering with a bleach solution.

Hogs range to find a wide variety of food in different seasons. Recognizing sign, habit and food sources is your best bet for locating wild hogs…

  • Tracks are more rounded with blunted toes than deer. Dew claw impressions are wider than the toe prints of white-tailed deer.
  • Wallows and tracks in creeks and ponds
  • Bedding areas created by rooting to find cool soil
  • Agriculture crops: corn, peanuts, soybean, watermelon, etc.
  • Large wire traps are used successfully by landowners to control pig populations

Small Game Animals

Part of developing a Possum Mentality applies to not only salvaging resources but trying new food sources. Are you willing to eat meat from mink, otter, raccoon, fox, coyote, opossum, muskrat, skunk, bobcat, and weasel? Sounds disgusting to our refined palate but many of these are abundant.

This post is already getting too long. We’ve only got space and time to cover one of the most prolific of small game animals…

Squirrel

This member of the rodent family deserves the nickname “tree rat.” Squirrels don’t just eat nuts and seeds from your bird feeder. They’re omnivores, and, at times, cannibals. Their favored habitat is deciduous forests but aren’t shy of pine trees. Their diet and habitat are very similar to deer.

  • Soft and Hard Mast: Acorns, hickory nuts, beechnuts, walnuts, pecans, pine nuts, winged seeds of maple, tulip poplar blossoms (one of their springtime favorites), black cherry, fruits, mushrooms
  • Meat/Protein: Baby birds, eggs, lizards, insects, frogs
  • Picture what rats eat (most anything) and add a bushy tail to your mental image

Large rat traps are effective for passively harvesting squirrels. I’ve used peanut butter as bait in the past.

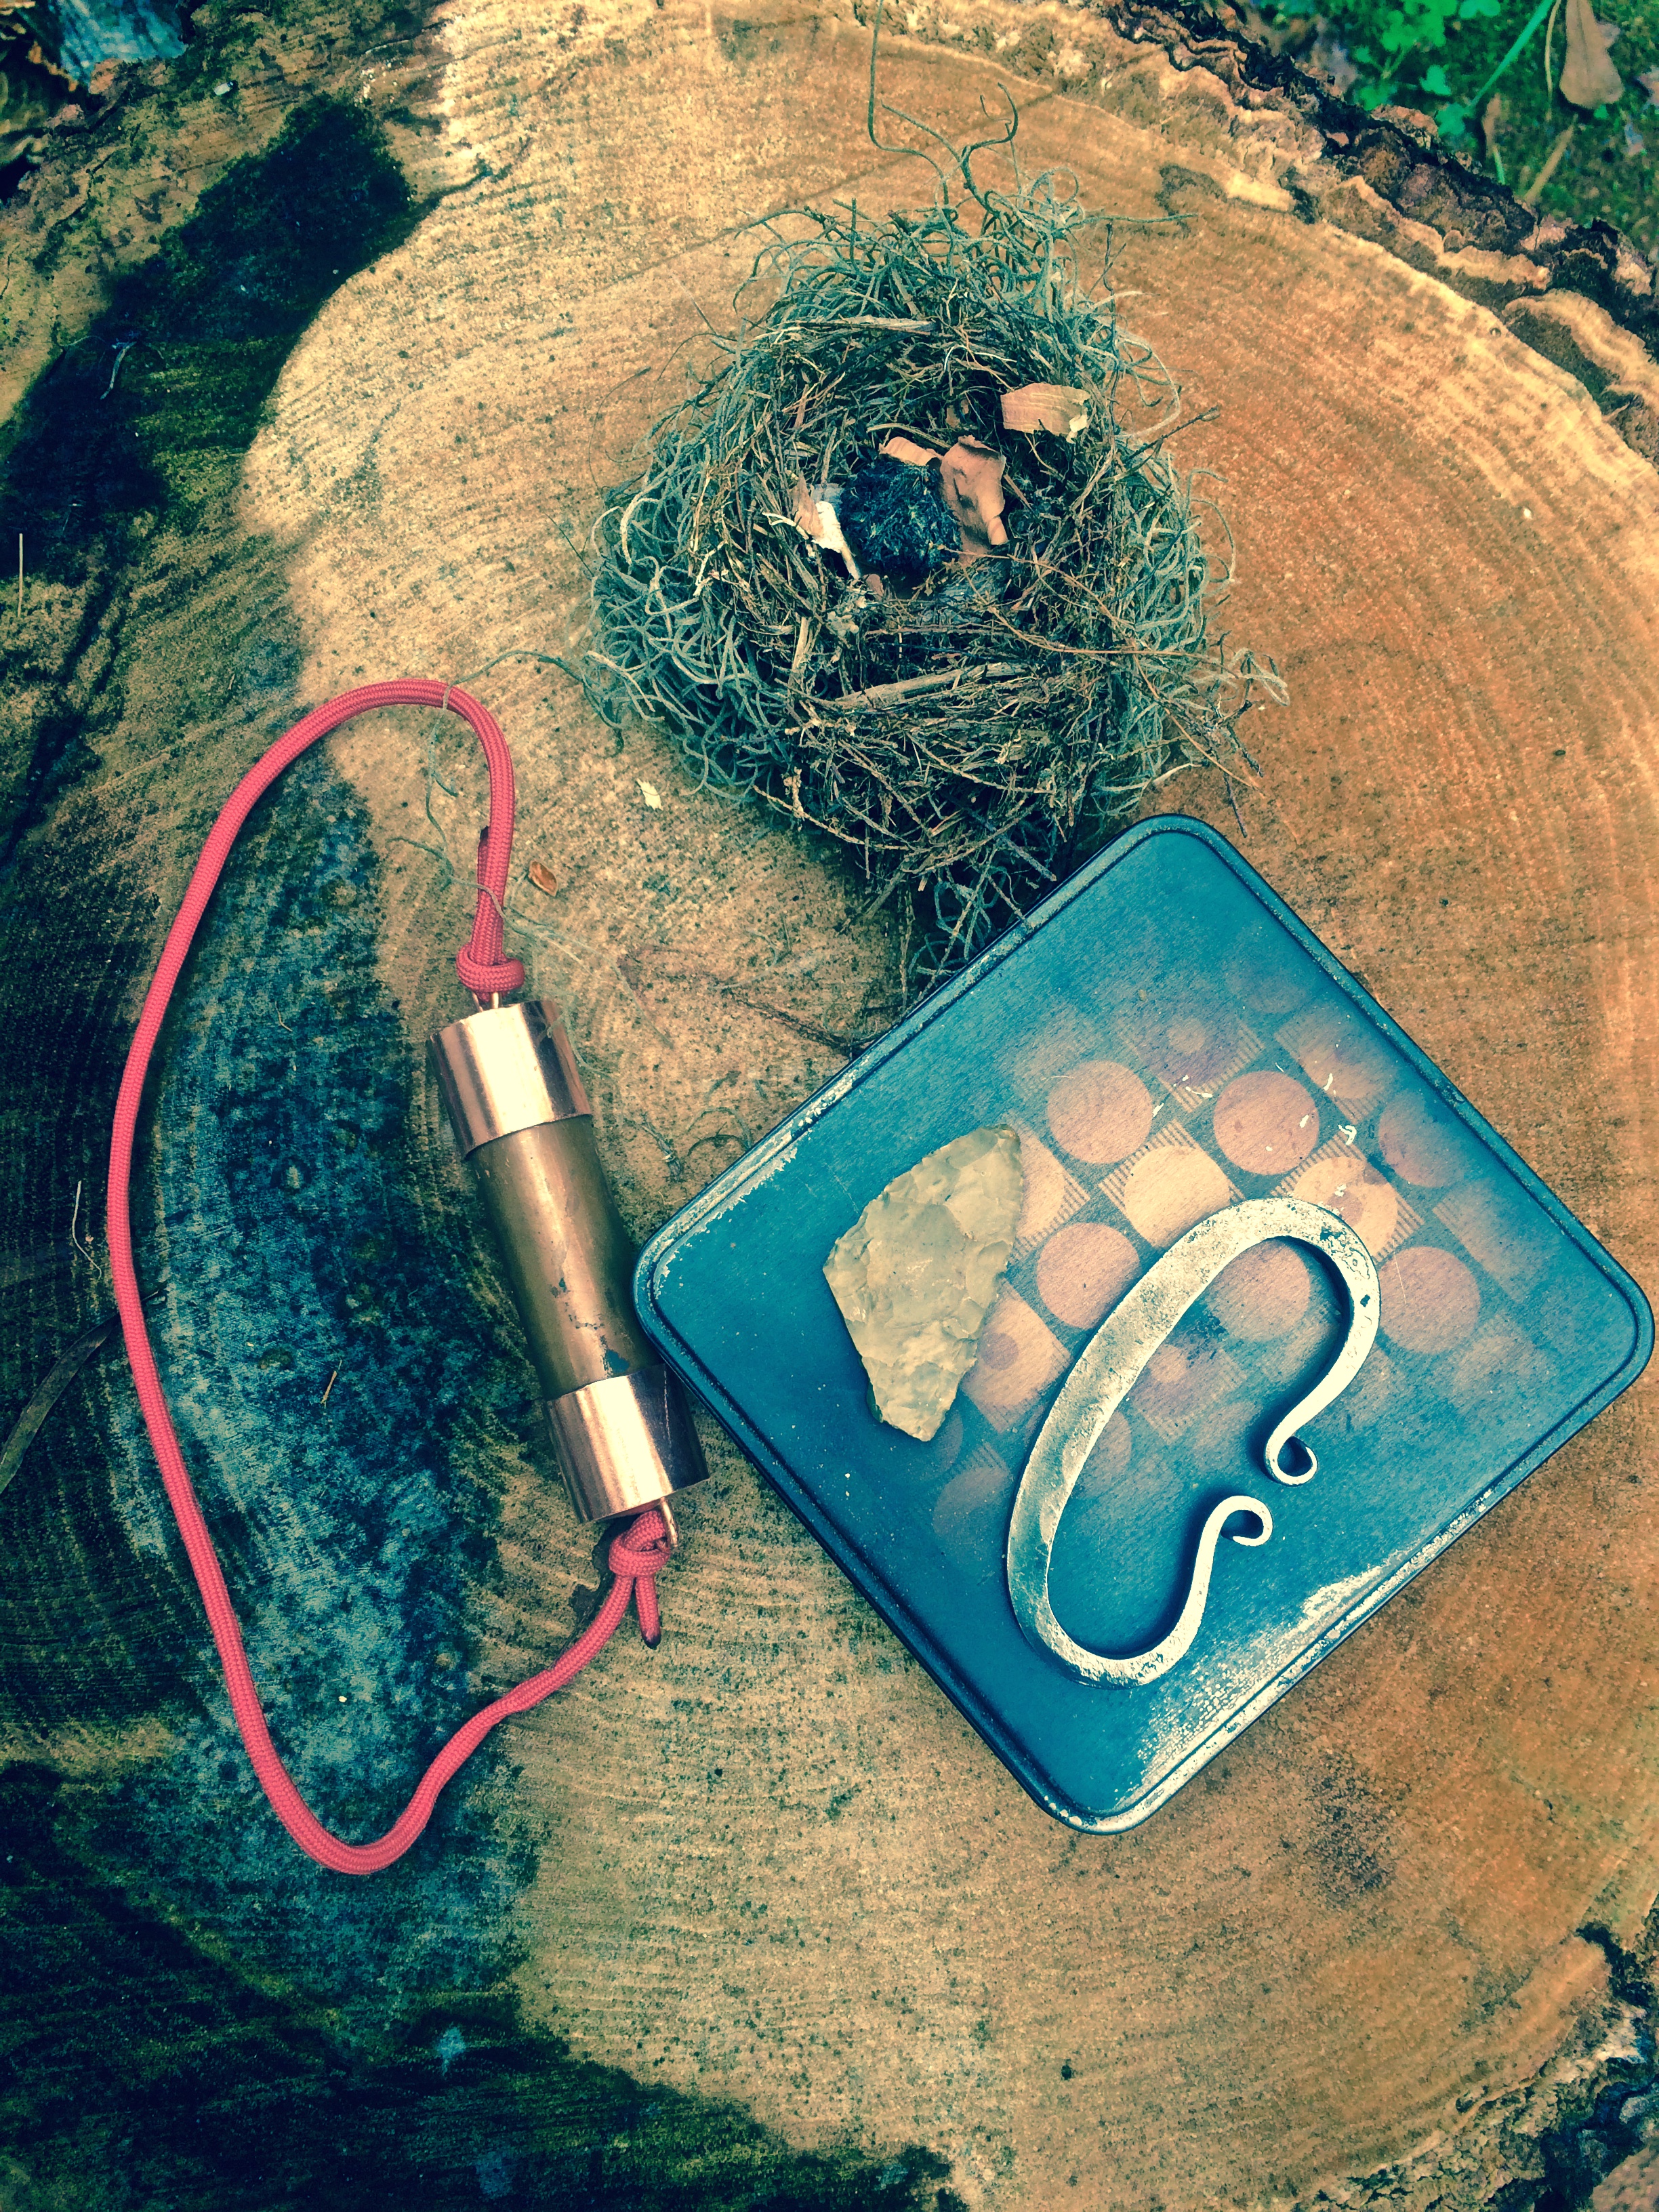
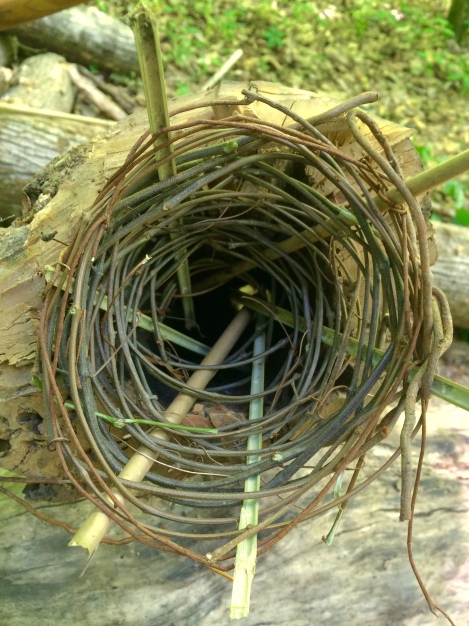
Fun Survival Fact: A squirrel’s nest may appear to be built in the same manner as a bird’s nest with an open roof when viewing from ground level. Not so. Squirrels need a roof over their head as shelter from the elements. Nature’s design for squirrels, an orb shaped home, can be modified for humans caught in the woods unexpectedly without cover. We will address their design in detail in an upcoming post on debris shelters.

 Birds

All birds are edible. However, not all birds are legal to kill and eat. They also produce another good survival food, eggs.

Wild turkey

Wild turkey

All birds do not eat seeds. Fish and insects make up the diet of many birds. Birds need water for hydration and bathing. The water’s edge is always a prime location to find food with fins, fur, and feathers.

To have a realistic chance of trapping a bird, understand their habits and fly patterns. Pellet rifles, sling shots, and bow and arrows were weapons of choice for me growing up to hone my hunting skills. Check your local laws first.

Fish

No worries about eating poisonous freshwater fish. To my knowledge, there are none. They all contain protein and fat and are fun to catch.

The 4 W’s of Wilderness Campsite Selection | TheSurvivalSherpa.com

Rainbow trout on fly rod!

I’ll refer you to our article on fishing techniques for more ideas. Also, consider making a fish trap.

Snakes and Reptiles

I know, I know. People have an innate fear of slithers. But snake meat is tasty and can supplement your diet. Properly prepared, the meat does taste similar to chicken.

This water snakes is often times falsely accused of being a water moccasin.

Water snakes are often times falsely accused of being a water moccasin.

I have dispatched a water moccasin or two in the woods within striking distance of my dog (“Moose”) when my only options were a vet bill or a dead cotton mouth. Snakes are part of nature’s balancing act and are best left alone to do what they do… unless you really need to eat to survive.

A word of caution here. Snake metabolism is really slow so they die slowly. A rattlesnake may be cut in half by your garden hoe, but it can still deliver a strike and envenomation. A large number of people are bitten by venomous snakes after they’ve “killed” the serpent and pick it up to show their buddies.

Where to find snakes…

  • Where you least expect them but should… under the tarp in your woodpile.
  • In a wilderness setting, streams, swamps, ponds, lakes, dead logs, brush piles, etc.
  • Wherever rodents, birds, large insects, frogs, and lizards are plentiful
  • Warm/hot months in daytime hours: brush piles, holes, under fallen trees.

Other reptiles like alligator and turtle (MRE on the half-shell) are also good eating.

Really Small Eats

Opportunities to eat Real Food in the form of small stuff occur more often than finding a large four-legged meal. Again, the water’s edge is a smorgasbord in the wild.

Crawfish

The exoskeleton of crawfish (AKA – creek lobster, mud bugs, crawdads) encase some of the tastiest meat you’ll find in the woods. They can be trapped or caught by hand. I’ve caught them with a piece of bacon on the end of a string. They latch on and you pull them out of the water before they release. Trap bait can include fresh fish or animal guts or any form of fresh meat. I’ve discovered that they love bacon! The key is to load lots of fresh bait in your trap to keep ’em coming.

The woven funnel is inserted in one end of a hollow log with the other opening plugged to create a bushcraft crawfish trap.

The woven funnel is inserted in one end of a hollow log with the other opening plugged to create a bushcraft crawfish trap.

Insects

The most abundant non-plant edible on our planet. I’m not a bug eater, but I’d eat them if my survival were on the line. A rule of thumb when eating insects is…

Red, orange-yellow, forget this fellow. Black, green or brown, wolf it down.

To kill parasites, cook the protein-packed creepy-crawlers.

Additional Resources:

Keep Doing the Stuff of Self-Reliance,

Todd

P.S. – You can also keep up with the Stuff we’re Doing on TwitterPinterestGoogle +, YouTube, Instagram, and Facebook… and over at the Doing the Stuff Network.

P.P.S – If you find value in our blog, Dirt Road Girl and I would appreciate your vote on Top Prepper Sites! You can vote daily by clicking here or on the image below. Check out all the other value-adding sites while you’re there… 

Thanks for Sharing the Stuff!

Copyright: Content on this site (unless the work of a third-party) may be shared freely in digital form, in part or whole, for non-commercial use with a link back to this site crediting the author. All links in articles must remain intact as originally posted in order to be republished. If you are interested a third-party article, please contact the author directly for republishing information.

Categories: Bushcraft, Camping, Doing the Stuff, Frugal Preps, Preparedness, Real Food, Self-reliance, SHTF, Survival Skills | Tags: , , , , , | 3 Comments

A Glorified Shaving Horse: How to Build a Paring Ladder in the Woods

by Todd Walker

When I first discovered this old device, my mind was officially blown at its simplicity. Peter Follansbee makes furniture with 17th century hand tools. His work and research is fascinating! If you search the term “Paring Ladder”, you’ll find his article which is responsible for the idea of this post. You won’t find much else on the internet about this apparatus.

How to Build a Paring Ladder (Shaving Horse) in the Woods - TheSurvivalSherpa.com

While carving a handmade ax handle in my shop with hand tools, my shaving horse and bench vise proved essential for the process. Lugging my shaving horse to the woods is not something I’d find enjoyable. I modified the paring ladder’s traditional design to meet my need for making wooden stuff at camp.

Woodcraft and bushcraft projects hone self-reliance skills and make camping comfortable. For this build, you get to work with sharp objects in a scenic setting, cutting stuff, lashing stuff, and shaving stuff. What’s not to like?

Hopefully our video will explain the process…

Here’s how to build a shaving horse alternative from stuff found in the woods…

Gather Stuff

  • Uprights/Rails ~ I used two standing dead cedar saplings; one was about 3 inches in diameter, the other was 2 inches. Young cedars grow straight. Tulip Poplar (Magnolia) is another straight grower.
  • Rungs ~ wood for two ladder rungs. The traditional paring ladder has 3 rungs (I don’t know why).
  • Platform ~ a board used as the work surface which supports the working stock. I split and hewed a 5-6 inch diameter dead cedar log which was about 4 foot long.
  • Cordage ~ paracord, tarred bank line, or any strong lashing material.
  • Tools ~ ax, knife, saw, wooden maul, wood wedges, and draw knife.

Step #1: Harvest Uprights

Cut two uprights about 8 foot long with an ax or saw. Once down, de-limb the rails by cutting from the trunk end of the tree toward the top of the tree. Removing limbs in this fashion prevents the limb from splitting strips of sap wood off the pole.

You can save the tops of the saplings for ladder rungs if they are large enough (2+ inches diameter). I used two split staves of cedar from half of the log used to hew my platform board. I’ll explain in a later step.

Step #2: Lash the Uprights

With the rails even and laying side by side, apply a tripod lash about 18 inches (elbow to finger tip) from the top of the poles. Below is our Tripod Lashing tutorial if you need to learn this knot.

Once you’re done lashing, spread the uprights to make a “V” at the intersection. Lean the “V” against a tree with the bottom spread wide and about 3 to 4 feet from the base of the tree.

Step #3: Attach Rungs

Measure down (eyeball it) about a foot below where the poles cross and make a score mark for the location of the first rung. Use either a square or diagonal lashing to secure the rung to the rails. Check out our square lashing tutorial for assistance.

How to Build a Paring Ladder (Shaving Horse) in the Woods - TheSurvivalSherpa.com

Add a second rung about a foot below the top rung in the same manner as above. This rung will be longer than the top rung since the base of the uprights are spread apart.

Step #4: Hew a Platform Board

I had originally planned to bring a 2 x 6 of dimensional lumber to camp for this piece. I was glad I forgot. This gave me an opportunity to split and hew a 6 inch diameter cedar log (maybe 5′ long) left over from when I built my shelter two years ago.

Lay the log to be split on the ground. I like to place long logs in a “Y” branch on the ground when splitting. Start a split in the log with your ax. Continue the split with wooden wedges until the two pieces are separated. Repeat the process to split off a section of one half log to form a board about 2 inches thick.

Of course, my cedar log was twisted and didn’t cooperate when I tried to split off a board. It split into two wedged billets. Not wanting to chance the same fate for the other half log, I hewed the round side down with my ax.

A Possum Mentality Note: Save all the wood chips and bark for future fire tinder/kindling.

Your platform board should be long enough to fit between the two rungs with the lower end reaching mid-thigh when in place. Your thigh will press down on the board to create the pinching pressure needed to secure stock in the shaving ladder.

Step #5: Notch the Platform Board

Place the platform board between the two rungs. Test the fit and length so that the bottom of the platform board reaches your thigh and about 4 inches extends past the top rung. Score the bottom of the board where it rests on the second rung.

How to Build a Paring Ladder (Shaving Horse) in the Woods - TheSurvivalSherpa.com

Seven notch fits the wedged rung perfectly

Satisfied with the fit, remove the board for notching. Use your ax and a maul or baton and make a notch where you marked. The notch should be about 3/4″ deep. Not deep enough to compromise the boards strength, yet deep enough for the board to bite into the rung.

How to Build a Paring Ladder (Shaving Horse) in the Woods - TheSurvivalSherpa.com

A view from underneath

Since my rungs were made of wedged billets, I cut a seven notch which mated very well with the rung. If using round rungs, be sure to carve the notch enough to fit securely.

Slip the platform board in place with the notch on top of the second rung. The notch should keep the board from slipping in use.

Step #6: Use Your Shaving Ladder

Lift the bottom of the board on the fulcrum (second rung) and place the wood you want to shave between the board and the top rung. Release the board to rest against the top rung.

How to Build a Paring Ladder (Shaving Horse) in the Woods - TheSurvivalSherpa.com

Pinch the work piece with pressure from your thigh


Put downward pressure on the platform board with your thigh to pinch the wood against the top rung. Use your draw knife to begin shaving. To turn your work piece, lift the platform to release pressure, turn the wood, and shave some more.

To adjust the height of the platform, raise or lower the ladder on the tree. There are more ideas I’d like test with the shaving ladder. I’ll update you when I do.

Straight grained green wood is a pleasure to carve on this paring ladder. I also shaved a piece of seasoned cedar with no problems… except for the occasional knot. All sorts of camp crafts can be made using a paring ladder.

How to Build a Paring Ladder (Shaving Horse) in the Woods - TheSurvivalSherpa.com

The paring ladder held a section of seasoned Beech in place with little effort

Even in your shop or garage, it won’t take up as much room as a shaving horse. For a shop shaving ladder, I’d actually make the ladder more permanent and designed like the one in Peter’s blog from the first paragraph.

If you’ve ever used a paring ladder, I’d really like to hear your ideas and learn some new tricks.

Keep Doing the Stuff of Self-Reliance,

Todd

P.S. – You can also keep up with the Stuff we’re Doing on TwitterPinterestGoogle +, YouTube, Instagram, and Facebook… and over at the Doing the Stuff Network.

P.P.S – If you find value in our blog, Dirt Road Girl and I would appreciate your vote on Top Prepper Sites! You can vote daily by clicking here or on the image below. Check out all the other value-adding sites while you’re there… 

Thanks for Sharing the Stuff!

Copyright: Content on this site (unless the work of a third-party) may be shared freely in digital form, in part or whole, for non-commercial use with a link back to this site crediting the author. All links in articles must remain intact as originally posted in order to be republished. If you are interested a third-party article, please contact the author directly for republishing information.


Categories: Bushcraft, Camping, DIY Preparedness Projects, Doing the Stuff, Frugal Preps, Self-reliance, Survival Skills | Tags: , , , , , , , , , , | 35 Comments

How to Improvise and Use a Three Stick Roycraft Pack Frame

by Todd Walker

How to Improvise and Use a Three Stick Roycraft Pack Frame - TheSurvivalSherpa.com


Debates happen from time to time over which is more important for self-reliance… gear or skills?

With our emphasis on developing Doing the Stuff skills here, you probably already know my position. But, then again, you may be surprised.

Here’s my take…

Both skills and gear are essential to self-reliant living! Modern gear is not evil. Neither are primitive tools.

Every primitive skills practitioner, prepper, homesteader, and woodsman needs tools. It has something to do with opposable thumbs. Tools wrapped by skilled thumbs are capable of making gear.

For instance, take the modern backpack. They’re constructed with state of the art material and built with internal frames. They’re designed to haul loads comfortably over long distances. My Osprey pack has many convenient pockets, pouches, and bells and whistles. But what kind of burdens can you carry with modern internal frame packs? Clothing and camping stuff mostly.

Here’s the thing though…

Try carrying a load of firewood back to camp or a quartered deer with an internal frame pack. They’re pretty one-dimensional.

How to Improvise and Use a Three Stick Roycroft Pack Frame - TheSurvivalSherpa.com

Camp Chuck Box strapped to the Roycroft

People all over the world have been using crude A-frame packs to carry heavy burdens for thousands of years. Otzi The Ice Man used an external frame pack over 5,000 years ago made of a bent sapling. Though his was not an A-frame style pack, an external frame can carry odd-shaped loads that modern internal frame packs can’t.

Let’s get started. You’ll get to use knife skills, knots, and lashings to make your own.

Roycraft Pack Frame

The Roycraft pack frame was named (not self-named, btw) after Mors Kochanski’s friend, Tom Roycraft. Mr. Roycraft, a survival instructor in the Canadian military in the 1960’s, used the time-tested idea of using 3 sticks and cordage to teach downed pilots how to construct a pack. The simple idea was adopted and used successfully.

Material List

  • Three sticks
  • Cordage
  • Cutting tool

Knots and Lashing

  • Trucker’s Hitch
  • Bowline
  • Blood Knot
  • Clove Hitch
  • Lark’s Head

Step #1 ~ Harvest Three Sticks

Upright Poles: Harvest saplings that are straight and thumb-size in diameter. For the uprights, cut two sticks that measure from arm pit to finger tip in length. Stripping the bark from the poles will help preserve the wood but isn’t necessary.

Lumbar Pole: This stick should measure from elbow to finger tip. Try to find a stick that is slightly curved to conform to your belt line. However, a straight stick will work.

Step #2 ~ Lashing Uprights

Start by using a tripod lashing on the two uprights. Place the two uprights together with the bottoms even. Begin lashing about three inches from the top of the poles. When done, spread the two apart to form the A-frame.

Lashing at the top of the A-frame

Lashing at the top of the A-frame

Check out our video tutorial on how to lash a tripod. You’ll only lash two sticks though.

Lashing with natural cordage may require a butterfly notch at each intersection.

Step #3 ~ Lash the Lumbar Pole

[Edit – 10/20/15: After publication, Chris Noble, a friend and writer/owner of Master Woodsman, noticed something about my frame. My lumbar pole is to the inside of the frame. By lashing this piece to the outside of the upright poles, a small shelf is created which would offer a ledge for loads like a camping chuck box to rest upon. Thanks for suggesting this Mors Kochanski modification and your attention to detail.]

Place the lumbar stick on top of the uprights so that the bend is protruding between the two uprights. Make sure you have about an inch and half of overhang at each intersection of the lumbar and uprights.

Diagonal lashing holding the lumbar support securely to the upright

Diagonal lashing holding the lumbar support securely to the upright

The intersections will not be perpendicular. Use a square lashing or diagonal lashing to secure the lumbar section to the upright poles. I used a square lash on one and a diagonal on the other just for practice.

Learn to tie a square lashing here. I’ll have to do a diagonal lashing tutorial soon.

Step #4 ~ Attach Loops to Frame

Loops of cordage are multifunctional. Besides being handy tie-outs to secure loads on the frame, the loops can be used to set up a tarp shelter. You can check out my first video how I set up an emergency 5 minute shelter.

To make quick-release loops, cut six pieces of cordage 18 inches long. Tie a blood knot in each piece of cordage. This knot is easy to untie after being cinched tight.

These 6 loops are also used to set up my tarp system

These 6 loops are also used to set up my tarp system

Attach each loop with a larks head knot; one on the lumbar pole, two on one upright, and the remaining three on the other upright. The larks head knot is easy to adjust on the poles depending on where you want the loops placed.

Step #5 ~ Add Shoulder/Belt Straps

Cut a piece a rope three double arm-lengths (from outstretched finger tip to your other outstretched finger tip). One of my outstretched double arm-length is about 6 foot – X3 – equals about 18 feet. I used a piece of 3/8 inch rope from my strap/rope box in my shop which measured about 16 feet.

Note: If you use natural rope like hemp or manila, you’ll need to add whipping to the cut ends to prevent fraying.

Double the rope evenly to form a loop in one end. Thread the loop under the top A-frame intersection from the inside of the frame. Tie a larks head by inserting the working ends of the rope through the loop. Work the knot tight so that the two loose ends are going through the top of the “V” on the pack frame.

Simple lark's head knot

Simple lark’s head knot

Lift the empty pack frame onto your back with the lumbar support at or slightly above belt height with the ropes over each shoulder. Reach back and wrap one rope around the upright and lumbar intersection on the same side of the shoulder strap. Repeat the process for the other shoulder strap. Pull the pack tight to your back.

Now you can secure the remaining rope around your waist as a belt. To make a quick-release waist belt, tie a trucker’s hitch (watch our video of a trucker’s hitch here at 2:30 mins.) on the belt portion of the rope. Once secured, tuck any remaining rope behind the pack frame.

Step #6 ~ Load the Frame

Use your shelter system (tarp, poncho, or other waterproof cover) as the shell. I used my homemade Oil Skin Bed Sheet Tarp. Lay the frame on the ground with the outside facing up. Make sure the loops are to the outside of the frame for easy access.

Place the tarp on top of the frame. Here’s the key to packing a comfortable Roycraft frame…

My favorite Alpaca wool sweater

My favorite Alpaca wool sweater

Cushion required to carry the pack comfortably

Cushion required to carry the pack comfortably

Stuff a sweater or other soft material (sleeping bag) in the triangle so that it protrudes past the frame as a cushion for your back. Now you can add your other items on top of that layer. I pack a dry bag with items I won’t need until setting up camp.

Dry bag with stuff I'll need once I set up camp

My dry bag which will be rolled into the wool blanket

Once your load is ready on top the tarp and frame, wrap the sides of the tarp over the burden. Wrap the bottom of the tarp up and over the sides. The top of the tarp folds over last like an envelope to shed rain.

Sides of tarp wrapped over the burden first

Sides of tarp wrapped over the load first

Bottom of tarp folded over next

Bottom of tarp folded over next

Top of tarp folded down to form a waterproof envelop for the contents

Top of tarp folded down to waterproof the contents

My shelter uses a 25 foot piece of paracord as the ridge line. Double this cord to form a loop. Place the loop end over one of the upright poles at the top of the A-frame. Run the working end through the loop on the lumbar pole and back around the upright pole. Cinch tight. Begin threading the cordage through the side loops in a crossing fashion to alternate sides of the pack frame, cinching tight on each loop.

Cinched and secured pack

Cinched and secured pack

You may not use all six loops. For larger loads, don’t double the 25 foot section of paracord. Simply tie a bowline knot on one end and slip over an upright to give you more cordage to secure the load.

To terminate the cordage, tie a trucker’s hitch after going through the last loop. This allows a quick release while tightening the load.

Trucker's Hitch or Hillbilly Come-Along

Trucker’s Hitch – aka: Hillbilly Come-Along

Step #7 ~ Mount the Pack

For a light load, stand behind the upright frame on the ground with the shoulder straps in each hand. Lift the pack up and around your body so that the shoulder straps are in place. Secure the bottom two corners as described in Step #5 above. Tie off the belt securely.

You’ll notice that the rope will dig into your shoulder and trapezium muscles. To distribute the load, slide a thin piece of wood under each rope to bridge the gap between your pectoral muscles and shoulders. Prepare these pieces before you lift the pack on your back.

How to Improvise and Use a Three Stick Roycroft Pack Frame - TheSurvivalSherpa.com

Simple wood strips disperse weight when carrying heavy loads

Sherpa Style

External pack frames have played a key role in conveying heavy loads over long distance. The Roycraft frame offers a lightweight option for anyone needing an improvised backpack.

All I need for a weekend in the woods

All I need for a weekend in the woods

I’m planning to modify my Roycroft frame with padded shoulder straps from an old ALICE pack to be my go-to backpack. Why not? I’ll be able to carry the large stones my rock-loving Dirt Road Girl picks out for her yard collection. Yep, I’m her beast of burden!

If you’ve ever built and used a Roycraft pack frame, we’re always interested in learning new tips and tricks to make ours better. Share your knowledge in the comment section or social media.

Keep Doing the Stuff of Self-Reliance,

Todd

P.S. – You can also keep up with the Stuff we’re Doing on TwitterPinterestGoogle +, YouTube, Instagram, and Facebook… and over at the Doing the Stuff Network.

P.P.S – If you find value in our blog, Dirt Road Girl and I would appreciate your vote on Top Prepper Sites! You can vote daily by clicking here or on the image below. Check out all the other value-adding sites while you’re there… 

Thanks for Sharing the Stuff!

Copyright: Content on this site (unless the work of a third-party) may be shared freely in digital form, in part or whole, for non-commercial use with a link back to this site crediting the author. All links in articles must remain intact as originally posted in order to be republished. If you are interested a third-party article, please contact the author directly for republishing information.

Categories: Bushcraft, Camping, DIY Preparedness Projects, Doing the Stuff, Frugal Preps, Gear, Preparedness, Self-reliance, Survival Skills | Tags: , , , , , | 19 Comments

How to Make a Pocket Tonteldoos (Tinderbox) for Flint and Steel Fires

by Todd Walker

Forgive me for butchering the pronunciation of tonteldoos in my video below. No matter how it’s spoken in Afrikaans, this portable tinderbox just became my favorite fire-starter for spark ignition fires. Simple, yet effective!

How to Make a Pocket Tonteldoos (Tinderbox) for Flint and Steel Fires - TheSurvivalSherpa.com

Tonteldoos is a small town in South Africa who’s name actually means tinderbox. Information on the traditional tinderbox itself was a bit scarce as I researched. I was fortunate enough to find a description of a tonteldoos in a Facebook learning group shared by a gentleman (Eben) raised in South Africa. I built mine based on his helpful instructions.

Thank you, Eben, for sharing some history and the idea of making this pocket tinderbox!

Tonteldoos History

The tonteldoos was introduced in South Africa by European settlers in the 17th century. The tinderbox was an effective and portable method of creating fire up until the introduction of stick matches in the mid 1800’s. As wars tend to do, the Anglo-Boer war (1899-1902) created a scarcity of stick matches causing people to revert back to the traditional tonteldoos to start fires in homes and afield.

Even after the war ended and matches became widely available, the use of this traditional tinderbox continued through to the mid 20th century. Testing my pocket tonteldoos, I can certainly see why. It’s easy to make, easy to use, and employs one of man’s time-tested ignition sources – flint and steel.

Tonteldoos Testing

Consistent ignition with flint and steel requires a dry source of charred material. Once the material catches a spark, the glowing ember is placed in a tinder bundle and blown into flame. With marginal or damp tinder, I’ve gone through several pieces of char from my fire kit before reaching ignition temperature.

This pocket tinderbox offers a controlled solution to eating up all your charred material. Here’s how…

With the tonteldoos, the only material consumed is at the end of the tube. The remaining un-charred material is preserved within the cylinder. Saving this valuable next-fire resource is the smart move.

I tested two methods…

  1. Char all the cotton material before inserting in the tube
  2. Char only the cotton material protruding from the end of the tube

By far, the best results came from charring the end of the material (method #2).This is the traditional method used for tonteldoos.

Method #1 failed, as I suspected, due to the fragile nature of charred material. It’s difficult to push crumbly material through a tube without turning it to dust. The charred rope provided an awesome glow but was consumed too quickly.

If it ain’t broke, don’t fix it.

Make Your Own

After reading Eben’s description, my possum mentality kicked in as I walked to my shop. I needed a metal tube and cotton material. I considered using a small, gutted Maglite but the diameter would not allow me to push the material up with my finger. The same goes for 1/2 inch copper pipe unless you’ve got really skinny fingers.

I dove into my scrap copper from previous plumbing jobs. If you don’t have copper lying around, home improvement stores sell all you need.

Here’s what I came up with for my tonteldoos…

Stuff you'll need

Stuff you’ll need

Material and Tools

  • 3/4 inch copper pipe about 4 inches in length
  • Two 3/4 inch copper caps – bought new for about $1.50 each
  • 100% cotton material – several strands from a mop head works well
  • Cordage is totally optional
  • Scissors or sharp knife
  • Copper wire if you make a loop through the end caps like mine
  • Drill and drill bit the diameter of the wire used to make the loop
  • Pipe cutter
  • Flint and steel

Step 1: Cut Pipe

Cut a 4 inch section of 3/4 inch pipe. Ream each end of the pipe with the attachment on the pipe cutter – or use a file. This removes burrs from snagging the cotton material as it passes through the pipe.

Pipe reamer attachment

Pipe reamer attachment

Step 2: Pack the Pipe

Any 100% cotton material would probably work. I had a new industrial mop head lying around I had intended to use as char rope. Perfect!

Cut several strands off a mop head and feed them through the pipe with a twisting motion until 1/4 inch of material is sticking out of the top end of your cylinder. Let the bottom end run wild. You can remove the excess later.

IMG_3389

Char the 1/4 inch of material with an open flame. I used my new Mullein Slush Lamp… just because! Any open flame will do.

Charring the cotton mop head strands

Charring the cotton mop head strands

Once the end is charred, pull the wick down from the bottom end so the charred end is even with the top of the pipe. Place the cap on the smoldering end to extinguish the embers. Now cut the excess material from the bottom end of the tinderbox.

IMG_3411

Step 3: Attach Wire Loops to Caps

This is completely optional. I added loops to my caps for three reasons…

  1. Tying cordage to connect the two loops may aid in keeping the caps found in the field.
  2. A steel striker can be attached to the cordage.
  3. Cordage can be tied to keep the end caps secured if you actually carry your tonteldoos in your pocket while tramping through the woods.

If the end caps fit loosely, tweak the pipe ends by lightly tapping them with a hammer to take them out of round. Not too much or your cap won’t fit (square peg in a round hole). Another way to tighten the cap connection is to solder the caps on and then remove them. The layer of solder would make the caps fit tightly once cooled.

How to Make a Pocket Tonteldoos (Tinderbox) for Flint and Steel Fires - TheSurvivalSherpa.com

The blood knot before tightening

How to Make a Pocket Tonteldoos (Tinderbox) for Flint and Steel Fires - TheSurvivalSherpa.com

Blood knot tightened to secure caps

Or just tie them securely with a blood knot (how to tie a blood knot video here) as mentioned in #3. For this part, you’ll need a loop on each end cap…

Drill two holes in each cap the diameter of a piece of copper wire. I stripped a section of scrap 12 gauge wire to form my loops. Needle-nose pliers are most helpful for this task. I opted not to solder the wire inside the cap since bending them down inside each cap held the loops in place securely.

How to Make a Pocket Tonteldoos (Tinderbox) for Flint and Steel Fires - TheSurvivalSherpa.com

Copper wire bent in the bottom of the cap

How to Use Your Tonteldoos

As with any charred “next-fire” material, keep the tonteldoos in a dry place in your haversack or fire kit. I keep a couple of pieces of chert/flint inside my square tinderbox (pictured below) with other charred material and finely processed tinder material. The tonteldoos fits perfectly inside this large tinderbox.

Every thing fits in the tinderbox

Every thing fits in the tinderbox

To ignite the charred end of the tonteldoos, push the wick from the tube bottom with your finder so that 1/8th inch of the charred wick is exposed. Hold the cylinder in your non-dominant hand with your pinky and ring finger. Hold a sharp piece of chert/flint between your thumb and pointing finger. The tinderbox should be below the flint so the sparks have a better chance of landing on the wick – unlike the photo below.

How to Make a Portable Tonteldoos (Tinderbox) for Flint and Steel Ignition - TheSurvivalSherpa.com

Dirty hands and dirt time!


Strike down lightly and repeatedly over the edge of the sharp stone so that sparks are produced and hopefully land on the charred end. The tiny shards of metal oxidize and spontaneous combust to produce 800 degree sparks hot enough to create a glowing ember on the charred wick.

Spontaneous combustion from flint and steel

Flint and steel showering sparks on the tonteldoos

Once a spark finds its mark, a glowing ember appears. Blow the ember to spread the glow over the end of the wick.

How to Make a Portable Tonteldoos (Tinderbox) for Flint and Steel Ignition - TheSurvivalSherpa.com

Should look like a lit cigar when ready


Of course, you’ve prepared fine to course tinder material beforehand and shaped a stellar tinder bundle (a.k.a. – birds nest). I use two methods to ignite tinder bundles with my pocket tondeldoos.

First, place the glowing end of the wick directly into the finest part of your tinder material and blow to ignition. Be sure to push the wick out of the tube a bit so as to make good contact with the fine tinder.

The other method is to use the glowing end of the tonteldoos to ignite a fire extender like punk wood, black sooty mold, etc., etc. Then place the fire extender in your bird’s nest and blow it to flame.

Here’s our video demonstrating my DiY tonteldoos…

If you want a portable, long-lasting, reliable source of char for flint and steel ignition, give the tonteldoos a try. I think you’ll be pleased.

Be sure to let us know your results and any other creative ideas to build one.

Keep Doing the Stuff of Self-Reliance,

Todd

P.S. – You can also keep up with the Stuff we’re Doing on TwitterPinterestGoogle +, YouTube, Instagram, and Facebook… and over at the Doing the Stuff Network.

P.P.S – If you find value in our blog, Dirt Road Girl and I would appreciate your vote on Top Prepper Sites! You can vote daily by clicking here or on the image below. Check out all the other value-adding sites while you’re there… 

Thanks for Sharing the Stuff!

Copyright: Content on this site (unless the work of a third-party) may be shared freely in digital form, in part or whole, for non-commercial use with a link back to this site crediting the author. All links in articles must remain intact as originally posted in order to be republished. If you are interested a third-party article, please contact the author directly for republishing information.


Categories: Bushcraft, Camping, DIY Preparedness Projects, Doing the Stuff, Frugal Preps, Lost Skills, Preparedness, Self-reliance, Survival, Survival Skills | Tags: , , , , , | 41 Comments

An Emergency Slush Lamp Hack Using a Torch Plant Leaf

by Todd Walker

An Emergency Slush Lamp Hack Using a Torch Plant Leaf - TheSurvivalSherpa.com


Full credit for this hack goes to our Georgia humidity, a buddy of mine, and my fondness for fire.

Trading theory for action is the only way to prove for yourself if something you’ve read or watched will work in real-life. For instance, will dry mullein (Torch Plant) leaves ignite with a ferro rod. I tested the theory and found that they smolder when 3,000 degree sparks landed on their dry surface. Dry is a relative term in Georgia humidity.

Noticing the properties of the once velvety leaves and their ability to hold an ember, an idea lit in my mind. I stripped the dry leafy portion off to expose the pinnate vein. The main vein became pliable with a light coat of coconut oil and absorbed the fuel like dry sponge.

Bingo!

I’ve made mullein torches with my grandson before.

backyard-bushcraft

Mullein torch in the backyard

Soaking the dry seed head in oil, resin, or wax makes a great tiki-type torch for night-time illumination. Hence the name Torch Plant. But burning a mullein torch inside a shelter or tent is not advisable. You’ll need a safe, controlled source of light.

Hummmmm…

Could the Torch Plant leaf serve as a slush lamp wick?

Yup!

Remember to never leave an open flame unattended.

How to Make Your Own Slush Lamp

Here’s the stuff you’ll need…

  • Small container – Altoids tin, sea shell, aluminum foil, etc. – more container ideas below
  • Fuel – coconut oil, olive oil, cooking oil, rendered animal fat
  • Mullein leaf(s)
  • Beer bottle cap (optional)

IMG_3343

Step 1: The Wick

Common Mullein (Verbascum thapsus) has many practical uses for self-reliance. I’ve listed 27 here. Other natural fibrous plants can be used as well. However, with mullein, you won’t have to twist any fibers into cordage. Simply remove the dry leafy portion from the vein and saturate the wick in oil.

The tallest mullein stalk leaning against my shop measured 9 feet 9 inches

The tallest Torch Plant leaning against my shop measured 9 feet 9 inches

Fashion the bottom of the vein in a simple overhand knot forming a lasso-like loop as the base of the wick. Bend and form the tag end of the wick so that 1/4 to 1/2 inch is above your oil.

The wick in the top corner is two veins twisted together

The wick in the top corner is leaning against the tin’s side

Richard, a friend of mine, recommended using another technique to support the wick. Punch a hole in a bottle cap, feed the wick through and place it on the bottom of your container.

This camp hack is worth the price of admission…

An Emergency Slush Lamp Hack Using a Torch Plant Leaf - TheSurvivalSherpa.com

Brilliant!

Thanks to Terrapin Beer Co. and Richard’s brilliant idea, my slush lamp took on a new form of awesome!

Step 2: Fuel

I used coconut oil from my bushcraft mess kit. It liquefies once it touches your skin (melting point is 76º F). Apply a generous coat to the leaf vein. Add 1/4 inch of oil to your container.

Place the looped wick in the container with the tip above the oil level. Lean the wick over the outside edge of the container if additional support is needed and there are no bottle caps available.

WARNING: Seems like common sense but I need to add this disclosure. Do not use flammable liquid like white gas or gasoline. It will explode and ruin your day! If this does not compute, take up another hobby.

Step 3: Container

An Altoids tin works fine for this application. Unlike olive or vegetable oils, coconut oil solidifies in colder weather preventing it from leaking all over your pack while on the move.

Simple makeshift containers can be found in nature or crafted from supplies in your pack. Ideas include:

  • Aluminum foil
  • Rocks with an indention
  • Wood with knot holes
  • Dehydrated food pouches
  • Large leafs from sycamore trees laid in a small indention in the ground
  • Duct tape fashioned into a bowl… yep, a crazy amount of uses for this stuff!

Wicks can be added to the long list of uses for this plant. Over a thirty minute test, I had to adjust the hight of the wicks a couple of times. Other than those few tweaks, the slush lamp provided a steady, reliable source of light.

Torch Plant and Fire Craft

Mullein is my most dependable spindle material for friction fire via the hand drill. Below is a picture of two pieces of mullein stalk lashed together to form a hearth board. My old faithful mullein spindle, cracks and all, created a coal in the crevice between the two-stick hearth board.

Mullein on mullein hand drill coal

Mullein on mullein hand drill coal

The take away from this tutorial is to stay curious and observant as you practice self-reliance skills. You never know what you’ll discover!

Hope this helps if you ever need an emergency source of lighting.

What other natural plant material have you used for slush lamp wicks?

Keep Doing the Stuff of Self-Reliance,

Todd

P.S. – You can also keep up with the Stuff we’re Doing on TwitterPinterestGoogle +, YouTube, Instagram, and Facebook… and over at the Doing the Stuff Network.

P.P.S – If you find value in our blog, Dirt Road Girl and I would appreciate your vote on Top Prepper Sites! You can vote daily by clicking here or on the image below. Check out all the other value-adding sites while you’re there… 

Thanks for Sharing the Stuff!

Copyright: Content on this site (unless the work of a third-party) may be shared freely in digital form, in part or whole, for non-commercial use with a link back to this site crediting the author. All links in articles must remain intact as originally posted in order to be republished. If you are interested a third-party article, please contact the author directly for republishing information.

Categories: Bushcraft, Camping, DIY Preparedness Projects, Doing the Stuff, Frugal Preps, Preparedness, Self-reliance | Tags: , , , , , , , | 15 Comments

How to Build a Sturdy Takedown Bucksaw

by Todd Walker

A saw is safer to use than an ax. My Bacho Laplander folding saw has performed admirably for over 4 years. With an eight inch blade, this fine folding saw has its limitations when cutting larger diameter wood. But I love its portability. It has a permanent spot on my ring belt when I venture into the woods.

how-to-build-takedown-bucksaw

I’ve used my folding saw to cut up to 4 or 5 inch logs. Over that diameter, I usually reach for my ax. But here’s the catch…

I sometimes need a clean cut on larger logs for projects at my trapping shelter. A bucksaw would fit the bill perfectly. The thing is, I don’t want to haul one of my bucksaws to the woods. They’re too cumbersome to carry.

A takedown bucksaw would solve my problem! I needed something that I could break down and toss in my rucksack.

My attempt to make one from red cedar was a fail. I didn’t carve a mortise and tenon joint on the cross member (fulcrum).  I figured, lazily, that a point on both ends of the cross beam would work. Not so. It was fun to make but was not sturdy enough to cut small dried limbs.

Back to the drawing board in my shop.

Here’s how I made mine. (I’ve uploaded a video I made that may help with details on this project. It’s at the end of this article if you’d like to watch.)

Gather the Stuff

  • 1 Bacho 51-21 Bow Saw Blade, 21-Inch, Dry Wood (under 10 bucks on Amazon) – the saw blade will be your biggest expense on this project
  • 60 inches of 2×2 lumber (dumpster dive at building sites or buy at a building supply store)
  • 10 inches of 1×2 lumber (scrap pallet wood)
  • 2 – 10 d nails
  • 50 inches of 550 paracord

Tools

  • Saw
  • Drill and bits
  • Hammer or maul
  • Wood chisel
  • Vice – helpful but not necessary
  • Pencil
  • Measuring device

Note: I built this takedown saw in my pajamas at 2 AM. Couldn’t sleep so thought I better get busy Doing the Stuff. The only power tool used was an electric drill. Didn’t want to risk waking DRG and the neighbors. 🙂

Cut the Stuff

If you don’t have scrap 2×2 lumber lying around, rip a 2×4 in half (with a table saw). Unless you’re skilled in carpentry, I don’t recommend using a circular saw to rip 2×4’s. You’ll need those fingers later.

Cut List

  • 2 – 15 inch 2×2’s (verticals)
  • 1 – 20 inch 2×2 (cross beam)
  • 1 – 8 inch 1×2 (tension paddle)

Prep the Wood

Make a center mark on the two vertical pieces. This is where the cross beam will mate in a mortise (female) and tenon (male) joint.

Cut tenons on both ends of the cross beam. Mark a line about 1/2 inch on all four sides of each end of the cross member. Secure in a vice and cut the lines about 1/4 inch deep on all four sides on each end to create a shoulder tenon. Once cut, chisel the cut pieces away from the ends of the stock.

Cut a 1/2 to 3/4 inch slot on the bottom ends of each vertical piece. These slots will receive the bow saw blade. Drill a hole that will snuggly fit the 10d nails in each of the two slotted ends.

Now align the tenon on each vertical at your halfway mark and pencil in the shape for the mortise. Drill a hole inside the outline to match the depth of the tenon. My tenon’s were 3/4’s long – about half the depth of the 2×2 verticals. Chisel out the remaining wood from the mortise joint to the proper depth. Dry fit the cross beam to the verticals. Tweak the mortise as needed to gain a snug mortise and tenon joint.

Assembly

With the cross beam inserted into the verticals, install the saw blade in the two slotted ends of the verticals. Remove the blade and place it on top of the slotted verticals. With your pencil, outline the holes and bore the appropriate size hole that matches the nail you will use as a pin for the saw blade. Reassemble the saw and insert pin nails.

Drill two holes about one inch in from the end of the 1×2 paddle. Use a drill bit that will allow enough room for the paracord to pass through. Lace one end of the paracord through the two holes in a weaving fashion. Loop the paracord around the top  ends of the two verticals. Pull tight and secure the cordage with a knot. I used a fisherman’s knot.

Wind the paddle in a circular motion to tighten the cordage. Once you are satisfied with the tension on the saw blade, allow the paddle to toggle on the cross beam.

Now you’re ready to test your inexpensive takedown bucksaw. I cut a 3 inch piece of dried poplar with ease in my shop. Even the 9 inch hickory log in my sawbuck was no match for this little beast. The Bacho dry wood saw blade is fantastic for processing large dry wood rounds!

To break the saw down, simple untwist the paracord and disassemble the frame. The entire saw can be wrapped in a large 100% cotton bandana and packed in your rucksack or backpack. You can always use a multipurpose bandana for other camping or wilderness self-reliance training.

While I’ll always carry my folding Bacho Laplander, this takedown bucksaw just made wood cutting tasks at my base camp much more convenient.

Here’s my video tutorial… and a short clip of my failed attempt with natural material. If you haven’t checked out my channel yet, we’d appreciate you subscribing, liking, and sharing any material you find valuable.

Keep Doing the Stuff of Self-Reliance,

Todd

P.S. – You can also keep up with the Stuff we’re Doing on TwitterPinterestGoogle +, YouTube, Instagram, and Facebook… and over at the Doing the Stuff Network.

P.P.S – If you find value in our blog, Dirt Road Girl and I would appreciate your vote on Top Prepper Sites! You can vote daily by clicking here or on the image below. Check out all the other value-adding sites while you’re there… 

Thanks for Sharing the Stuff!

Copyright: Content on this site (unless the work of a third-party) may be shared freely in digital form, in part or whole, for non-commercial use with a link back to this site crediting the author. All links in articles must remain intact as originally posted in order to be republished. If you are interested a third-party article, please contact the author directly for republishing information.

Categories: Bushcraft, Camping, DIY Preparedness Projects, Doing the Stuff, Frugal Preps, Gear, Self-reliance | Tags: , , , | 22 Comments

50+ Dumpster Diva Hacks that Convert Waste to Wealth

by Todd Walker

Part of our Self-Reliant Summer series

possum mentality will lead people to think you’re cheap. In our propped up economy, I call it industrious, resourceful, and plain smart. Why buy stuff with hard-earned cash when other people’s trash is everywhere?

Over 50 Dumpster Diva Hacks to Convert Waste to Wealth

Dumpster diving is certainly NOT above the members of our Doing the Stuff Network. These resourceful folks embody the Dumpster Diva mentality. In fact, repurposing or up-cycling everyday items is an integral part of homesteading, prepping, bushcrafting, back-to-basics living, and emergency first aid.

Once you catch the Dumpster Diva bug, you’ll view dumpsters as treasure chests! I’m sure our handlers have pesky prohibitions against this uncivilized pursuit – so dumpster dive at your own risk. Ask permission from business owners before taking what you think is trash. Especially when prowling for pallets. Most businesses recycle pallets and consider taking without permission theft.

But here’s the thing…

You don’t have to actually dig in dumpsters to repurpose stuff. Up-cycle, repurpose, and re-trash are trendy terms for what our grandparents did to get through hard times. Use it up, wear it out, and then find another use for the item other than its intended purpose.

Check out the projects below and get in touch with your trashy side.

Dumpster Diving for Self-reliance

1.) Cheap to Free Stuff

That metal DVD rack collecting dust could be repurposed to feed rabbits.

Grace (DST Networker) up-cycled a 25 cent yard sale find to dispense hay in her rabbit hutch.

Grace (DST Networker) up-cycled a 25 cent yard sale find to dispense hay in her rabbit hutch.

She could have dumped several dollars at the local feed and seed but went all Dumpster Diva and made an unconventional – yet functional – rabbit feeder.

2.) Landfill Love

Michael, my brother from another mother, found an 18 foot long tent and other items he repurposed from the local landfill.

Landfill Love

I think his best up-cycling miracle performed was when his gas tank on his old Datsun pickup ruptured. He ran a gas line from a gallon gas can to his engine with the can sitting inside the hood of his truck. A fire hazard? Yes. But he had to drive to work and this was a short-term fix. Might come in handy in a bug out scenario. Redneck genius!

3.) Billboards

You didn’t hear me wrong. Large tarps are expensive but have endless uses around a homestead…

  • Protect equipment from weather
  • Wind block
  • Shade animals
  • Ground cloth
  • Roofing, etc., etc.
Here's Your Sign: Turning Trash Into Survival Treasure

A shot of my 14′ x 40′ tarp from my shop roof

I bought a 14′ by 40′ billboard for $14 a few months ago. A portion was used as a roof for my trapping shelter (personal space). A few of our readers have scored free tarps by just asking the work crew for old billboards!

4.) Pallets

With a little sweat equity, free wood for projects around your homestead, yard, handicrafts, or house can be found in wooden shipping pallets. No disassembling required for some projects. Here’s some DiY pallet projects from around the web to get your mind geared to repurpose…

I love it when people start trading theory for action! Resilient Man emailed the first steps of his journey to self-reliance and active resilience. He’s getting his hands dirty using pallets to build a chicken coop.

5.) Containers

Without becoming an obsessive compulsive hoarder, you can turn waste into wealth. The key here is to organize waste to prevent your house from becoming a death trap of trash.

The plastic five gallon bucket may be the most under appreciated prep item ever… until you need one and none are to be found. Ever tried to create your own containers from raw materials? Not an easy task! That goes double for glass.

Keep your wine bottles, mason jars, and other glass items. For an unusual use of mason jars, check out our post on Mason Jar Oil Lamps. They make Healthy Fast Food meals as well!

6.) Think Before You Toss Everyday Items

Here’s a round-up from a few of my Prepared Blogger friends who can help you take dumpster diving, repurposing, and up-cycling to new levels.

7.) First Aid/Medical

Lizzie over at Underground Medic put together Ten unconventional additions to your emergency medical kit worth checking out.

If you haven’t discovered the many survival uses for duct tape yet, The Survival Doctor (Dr. James Hubbard) wrote an entire book on how to use duct tape for medical emergencies – Duct Tape 911: The Many Amazing Medical Things You Can Do to Tape Yourself Together

The Dumpster Diva Award goes to…

One of our amazing members of the Doing the Stuff Network is now crowned Dumpster Diva! She and her husband are building a homestead house (Earthship) out of old tires!

Earthship house being built by a Doing the Stuff Networker

Dumpster Diva’s house in progress!

I hope Part 2 in the Self-Reliant Summer Series encourages you to trade theory for ACTION! We’re planning an entire summer of self-reliance articles to keep us Doing the Stuff. If you missed Part 1, you can find it here.

What’s your favorite repurposing hack for self-reliance and preparedness? Comments are always welcome…

Keep Doing the Stuff,

Todd

P.S. – You can also keep up with the Stuff we’re Doing on TwitterPinterestGoogle +, and our Facebook page… and over at the Doing the Stuff Network on PinterestGoogle +, and Facebook.

P.P.S – If you find value in our blog, Dirt Road Girl and I would appreciate your vote on Top Prepper Sites! You can vote daily by clicking here or on the image below. Check out all the other value-adding sites while you’re there…

Thanks for Sharing the Stuff!

Copyright: Content on this site (unless the work of a third-party) may be shared freely in digital form, in part or whole, for non-commercial use with a link back to this site crediting the author. All links in articles must remain intact as originally posted in order to be republished. If you are interested a third-party article, please contact the author directly for republishing information.


Categories: DIY Preparedness Projects, Doing the Stuff, First Aid, Frugal Preps, Preparedness, Self-reliance | Tags: , , , , | 11 Comments

Self-Reliant Summer: DiY Custom Leather Mask for an Heirloom Ax

by Todd Walker

Part of our Self-Reliant Summer series

A large part of self-reliance is learning to make your own gear. You’ll get FAT in two areas – your wallet and skill set!

Self-Reliant Summer: A DiY Custom Leather Mask for a Heirloom Axe

Tools are essential for self-reliance, survival, and preparedness. You want the best you can afford. You’re not going to find heirloom quality tools, the kind you pass down to your children and grandchildren, in a big box store. Nor do you want to stake your survival on “Made in China” junk. So what’s the common man and woman to do?

Make your own!

Remember the True Temper ax I bought that wasn’t for sale? Well, it needed some TLC and a mask/sheath. Every cutting tool you use in the field should have a cover to protect the tool and you. Instead of paying to have a custom-made mask, I decided to make my own.

It’s been exactly 40 years since I did any serious leather craft. Check out the last picture in this post to see my first leather project I made in Industrial Arts Class in the 7th grade – back in the day when school kids were allowed to learn self-reliance skills like leather work, welding, and carpentry.

Ahhh, Smell the Leather!

You can make a sheath or mask for your cutting tools by repurposing old leather goods. Since I’ve taken on leather work as one of my Doing the Stuff skills this year, I decided to buy a shoulder of 8-9 ounce vegetable tanned leather from Tandy Leather. A few leather working tools were added to my arsenal as well. Of course, you could use common everyday tools to get the job done.

Gather the Stuff

Leathercraft: Making a Custom Leather Mask for a Heirloom Axe

Tools and stuff

  • Leather
  • Razor/utility knife
  • Hammer
  • Cardboard or file holder for the template
  • Marker and pencil
  • Straight edge
  • Glue
  • Needles and thread
  • Awl/Punch
  • Hardware – snaps and studs (optional)
  • Scissors
  • Clips

You don’t have to tap your 401k to get started. Substitute an ice pick or other pointy object for an awl. I used a drill with a 5/32″ bit to make stitching holes for the rounded portion of the mask. Get creative and save money.

Make Your Template

Use a thin cardboard box or file folder to lay out your template. A cereal or 12 pack beer box makes a thicker template and is easier to trace around.

Leathercraft: Making a Custom Leather Mask for a Heirloom Axe

You’ll need two folders

Outline the ax with a pencil and cut out the image with scissors.

Leathercraft: Making a Custom Leather Mask for a Heirloom Axe

Draw a straight line on the other folder using a straight edge.

Leathercraft: Making a Custom Leather Mask for a Heirloom Axe

Outlining the top profile of the ax

Center the ax head on the line and draw the shape on the folder.

Leathercraft: Making a Custom Leather Mask for a Heirloom Axe


Now align the full cut out of the ax to the top profile you just traced. Draw a line around full ax profile. Be sure to match the ends of the full profile to the top profile.

Leathercraft: Making a Custom Leather Mask for a Heirloom Axe

Once you trace the full ax, you will sketch a 1/2 welt where the cutting edge will rest in the mask. The welt is where the blade rests inside the sheath to protect the stitching. I took this design from my Wetterlings ax mask. As you can see, the welt at the toe of the ax is short. If the welt is extended too far towards the handle on this design, the ax head won’t fit in the mask.

Leathercraft: Making a Custom Leather Mask for a Heirloom Axe

Cut one side of the template, fold over the center line and trace to the other side

Label and store the template for later projects.

Ready for Leather

Lay the template on your leather and outline it with a marker.

Leathercraft: Making a Custom Leather Mask for a Heirloom Axe

Transfer the mask template to your leather

I’ve seen people cut leather with scissors and razors. I chose to use a utility knife. Take it slow and cut the line. You want a tight fit as the leather will stretch with use.

Leathercraft: Making a Custom Leather Mask for a Heirloom Axe

Cutting the leather

Next, cut the welt portion off of the template. Transfer the welt template to the leather. After I traced and cut the full welt, it dawned on me that I only need half of the welt in the mask. Learn from my mistake.

Leathercraft: Making a Custom Leather Mask for a Heirloom Axe

Making the welt

Dry fit the mask by securing the welt inside the mask with a few clips. This will revel any needed adjustments and test the fit on the ax head.

Leathercraft: Making a Custom Leather Mask for a Heirloom Axe

Dry fitting

Holes – Glue – Grooves

To secure your mask to the ax head, punch an appropriate sized hole in one side of the leather to accept a snap. Without hardware, you could use a leather thong to secure the mask. Use whatever you have on hand.

Leathercraft: Making a Custom Leather Mask for a Heirloom Axe

Punching holes

Once you punch the first hole, align the mask by folding it over and punch through the first hole to create the second hole on the opposite side of the mask. You’re now ready to add snaps or studs to secure the strap.

Self-Reliant Summer: A DiY Custom Leather Mask for a Heirloom Axe

Beveling edges

Bevel the inside and outside edges with a beveling tool. This isn’t necessary for function but adds a finished touch to the project.

Self-Reliant Summer: A DiY Custom Leather Mask for a Heirloom Axe

Grooving the edges for stitching

If you have an adjustable grooving tool, set the width to about 1/4 of an inch and groove the edges where stitching will go. I got carried away and ran a groove all the way around the mask even where no stitching will appear. Very cool tool!

Self-Reliant Summer: A DiY Custom Leather Mask for a Heirloom Axe

Gluing the welt

Self-Reliant Summer: DiY Custom Leather Mask for a Heirloom Ax

Apply an all-purpose cement to one side of the welt and the mask. Follow the directions on the glue for wait times before connecting the two pieces.

Self-Reliant Summer: DiY Custom Leather Mask for a Heirloom Ax

Punching stitching holes

Once the glue is cured, punch holes in the groove for stitching through the mask and welt. I used the new 4 pronged thonging tool. You can use an ice pick, awl, or anything that will punch through the leather. I used a drill for the rounded corners. [Experienced leather crafters, I need advice on lining up the stitching holes on the other side of the mask.]

Self-Reliant Summer: DiY Custom Leather Mask for a Heirloom Ax

Attach a strap to the mask with a rivet or stud. I used a screw stud. The strap needs to fit snug. Leather will stretch with use.

Self-Reliant Summer: DiY Custom Leather Mask for a Heirloom Ax

Setting the snap for the strap

I dressed up the strap with a fancy buffalo snap from Tandy.

Stitching

Here’s a quick video I found helpful for the saddle stitching on my mask.

<iframe width=”640″ height=”390″ src=”//www.youtube.com/embed/YE_hTVloTRo” frameborder=”0″ allowfullscreen>

I haven’t decided if I will dye this project or not. I may just treat it with Fixin’ Wax and call it good!

Self-Reliant Summer: DiY Custom Leather Mask for a Heirloom Ax

Stitched and ready to go!

As promised, the picture below captures my 40 year span of leather work – ha! Don’t laugh, folks, mushrooms and leather were hot in 1974!  🙂

Self-Reliant Summer: DiY Custom Leather Mask for a Heirloom Ax

Can’t believe I kept this thing all these years.

This is our first post in a series called Self-Reliant Summer. We’re highlighting the top skills members are learning in the Doing the Stuff Network! Hope you’ll join us.

Check out more stuff in the Self-Reliant Summer series

  1. DiY Custom Leather Mask for an Heirloom Ax
  2. 50+ Dumpster Diva Hacks that Convert Waste to Wealth
  3. Sick of Ticks? Take Brad Paisley’s Advice
  4. Functional Fitness: The Wild Woodsman Workout
  5. 6 No-Drama Survival Tips for a Clothed and Confident Summer
  6. 5 Tips for Epic Self-Reliance Skills
  7. Surviving Large on Small Stuff
  8. 27 Survival Uses for Common Mullein Besides Cowboy Toilet Paper

Keep Doing the Stuff of Self-Reliance!

Todd

P.S. – You can also keep up with the Stuff we’re Doing on TwitterPinterestGoogle +, and our Facebook page… and over at the Doing the Stuff Network on PinterestGoogle +, and Facebook.

P.P.S – If you find value in our blog, Dirt Road Girl and I would appreciate your vote on Top Prepper Sites! You can vote daily by clicking here or on the image below. Check out all the other value-adding sites while you’re there…

Thanks for Sharing the Stuff!

Copyright: Content on this site (unless the work of a third-party) may be shared freely in digital form, in part or whole, for non-commercial use with a link back to this site crediting the author. All links in articles must remain intact as originally posted in order to be republished. If you are interested a third-party article, please contact the author directly for republishing information.


Categories: DIY Preparedness Projects, Doing the Stuff, Frugal Preps, Gear, Self-reliance | Tags: , , , | 13 Comments

Here’s Your Sign: Turning Trash Into Survival Treasure

by Todd Walker

It’s well documented by DRG that I’m a container freak. Plastic jugs, metal tins, glass bottles, clay pots – I hoard collect them all.

Here's Your Sign: Turning Trash Into Survival Treasure

A small sampling of my metal tin fetish

Wooden pallets – don’t get me started! This free wood can be used to build bird houses, fences, furniture, compost bins, and other useful stuff with a little sweat equity, imagination, and simple tools.

Here's Your Sign: Turning Trash Into Survival Treasure

A bluebird outhouse built from old barn and pallet wood

Yesterday, I received a sign from above pointing out my inability to turn down “trash”...

Here's Your Sign: Turning Trash Into Survival Treasure

Here’s Your Sign! How could I turn down a 14′ x 40′ used billboard!?

If you’ve priced tarps this large at retail stores, you’d spend a decent wad of your hard-earned cash. One box store sells 20′ x 30′ heavy-duty tarps for over 100 bucks. My tarp sign set me back $14. They don’t look this large when you pass them on the freeway.

I won’t be using it with the printed side exposed. The backside is solid black and can be used for projects like ground cover or emergency roof repairs.

I may use this portion as a training aid for our dogs. If I could only teach “Moose” and “Abby” to read.

Here's Your Sign: Turning Trash Into Survival Treasure

Doggy boot camp

I cut a section of the sign and plan to use it as a tarp for my base camp shelter I’m building. Modern debris for a debris shelter. It pays to have a possum mentality!

Here are a few more up-cycle ideas for fellow dumpster divers:

You don’t have to break the bank to get prepared. With consumerism gone wild, people have to have the latest stuff. If you’re anything like me, which I suspect you are, other people’s “trash” is survival treasure!

What’s your best method of using other people’s “trash”?

Keep Doing the Stuff,

Todd

P.S. – You can also keep up with the Stuff we’re Doing on TwitterPinterestGoogle +, and our Facebook pageReady to trade theory for action? Join us in the Doing the Stuff Network on these social media sites: PinterestGoogle +, and Facebook. Use the hashtag #DoingTheStuff when sharing your stuff on Twitter.

P.P.S – If you find value in our blog, DRG and I would appreciate your vote on the Top Prepper Sites! You can vote daily by clicking here or on the image below. Check out all the other value-adding Prepper sites while you’re there…

Thanks for sharing the stuff!

Copyright Information: Content on this site (unless the work of a third-party) may be shared freely in digital form, in part or whole, for non-commercial use with a link back to this site crediting the author. All links in articles must remain intact as originally posted in order to be republished. If you are interested a third-party article, please contact the author directly for republishing information.

Categories: DIY Preparedness Projects, Doing the Stuff, Frugal Preps, Preparedness | Tags: , , | 16 Comments

A Simple Fixin’ Wax Recipe for Fixin’ Stuff

by Todd Walker

Need another DiY fix? Stay tuned, I’m fixin’ to give you one!

Wouldn’t it be great to have an all-purpose, all-natural, miracle substance that, when applied, fixes most stuff?

Stuff that would fix chapped lips, busted knuckles, ax-heads, wooden tool handles, bow strings, a squeaky hinge, wooden spoons, leaky tents, rusty metal, leather sheaths, and… be edible!

First, for those unfamiliar with Southern speak…

Fixin’ means:

  • About to do stuff or in the process of doing stuff – replacing such worn expressions as ‘about to”, ‘going to’, ‘preparing for’, etc. Examples: “I’m fixin’ to cook dinner.” Or, “I’m fixin’ to go fishing.”
  • An accompanying food dish to round out a meal. Example: “Grandma made Thanksgiving dinner with all the fixins.
  • The process of repairing stuff. Example: “The fence needs fixin’.”

Then there’s the simple, multi-functional stuff called fixin’ wax. It’s also an edible emergency lamp fuel (replace the olive oil with fixin’ wax).

Ingredients for Fixin’ Wax

  1. 2 parts tallow – click here to make your own
  2. 1 part bees wax
  3. shea butter (optional) – 1 tablespoon
  4. essential oil (optional) – a few drops
A Simple Fixin' Wax Recipe for Fixin' Stuff

Tallow and bees wax are the must have ingredients

A Simple Fixin' Wax Recipe for Fixin' Stuff

Optional ingredients

Fixin’ Wax Procedures

The ratio of tallow to bees wax is 2:1. In hotter climates, you may want to make it half and half to keep a more solid consistency.

Step 1: Melt the tallow and bees wax together in a container. Remove from heat and stir occasionally while it cools to ensure these two ingredients combine.

A Simple Fixin' Wax Recipe for Fixin' Stuff

Double boiler method is best

If you choose to add the optional stuff (shea butter and essential oil), do so while over the heat. For a pine scent, add chopped pine needles and strain the liquid through a clean cloth to remove the needles from the liquid wax.

Step 2: Line your mold(s) with wax butcher paper. I used the press n seal wrap in my tins. Wax paper would work better as the thinner press n seal wrap made removing the fixin’ wax from the tins more challenging. Live and learn. I had to use a butter knife to pry the product out. Not a problem.

A Simple Fixin' Wax Recipe for Fixin' Stuff

The benefit of using the sticky press n seal stuff was that it formed to the tin and produced beautiful, tin-shaped fixin’ wax! I’m guessing you could use a muffin tin for larger batches. Maybe insert cupcake liners in the individual forms for easy removal when the fixin’ wax sets.

Step 3: While liquified, carefully pour the stuff into your mold. The half-pint jar filled one and one half tins.

A Simple Fixin' Wax Recipe for Fixin' Stuff

Ready for some fixin’

Step 4: Allow a few hours for the fixin’ wax to cool and set. Once solid, rub it with your finger. You should get a film on your finger tip. Apply it to your lips so you don’t waste any. I used a few drops of peppermint essential oil. I like the cooling effect on my skin.

Step 5: Remove from the form. Wrap the fixin’ wax in butcher paper – wax side touching the fixin’ wax. I placed the partial block back in the Altoids tin for use around the house.

A Simple Fixin' Wax Recipe for Fixin' Stuff

For my bushcraft kit, I wrapped the full block in wax paper, placed in a brown paper lunch bag, and tied it up with a length of jute twine. This gives me an excellent emergency fire starter – jute twine, brown paper, and fixin’ wax are known to burn well.

A Simple Fixin' Wax Recipe for Fixin' Stuff

Wrap it up, I’ll take it!

Wrap it up and give it as a gift to someone for their bug out bag.

Here’s an old leather screw driver pouch I repurposed for my Bacho Laplander folding saw sheath. It needed some fixin’ wax love.

A Simple Fixin' Wax Recipe for Fixin' Stuff

Before

Rub the bar of fixin’ wax all over the surface and massage in with a cloth. Rejuvenating and sealing leather and dried wood is easy and effective with fixin’ wax.

A Simple Fixin' Wax Recipe for Fixin' Stuff

After

Do you have a recipe or other uses for this amazing fixin’ wax? Drop us a line in the comments.

Keep Doing the Stuff… with Fixin’ Wax,

Todd

P.S. – You can also keep up with the Stuff we’re Doing on TwitterPinterestGoogle +, YouTube, Instagram, and Facebook… and over at the Doing the Stuff Network.

P.P.S – If you find value in our blog, Dirt Road Girl and I would appreciate your vote on Top Prepper Sites! You can vote daily by clicking here or on the image below. Check out all the other value-adding sites while you’re there…

Thanks for Sharing the Stuff!

Copyright: Content on this site (unless the work of a third-party) may be shared freely in digital form, in part or whole, for non-commercial use with a link back to this site crediting the author. All links in articles must remain intact as originally posted in order to be republished. If you are interested a third-party article, please contact the author directly for republishing information.

Categories: Bushcraft, Doing the Stuff, Frugal Preps, Preparedness, Self-reliance | Tags: , , | 52 Comments

Blog at WordPress.com.