We all expect a certain amount of certainty in our lives. The bad news is that the universe toys with us.
Certainty, like security, is an illusion. If you’re thinking those preps you’ve got stored away will insulate you from disaster, you’ve obviously never experienced Murphy’s Law.
Murphy’s Original Law – If there are two or more ways to do something, and one of those ways can result in a catastrophe, then someone will do it.
Murphy’s Law – If anything can go wrong — it will.
Murphy’s First Corollary – Left to themselves, things tend to go from bad to worse.
Murphy’s Second Corollary – It is impossible to make anything foolproof because fools are so ingenious.
Quantized Revision of Murphy’s Law – Everything goes wrong all at once.
Murphy’s Constant – Matter will be damaged in direct proportion to its value.
The Murphy Philosophy – Smile… tomorrow will be worse.
I’ll put a pot of coffee on. It’s time to sober up. You’re drunk on the perfect prepping poison.
Even building redundancy into your preps – two is one, one is none – isn’t always enough. See Quantized Revision of Murphy’s Law above.
The power of uncertainty
Uncertainty powers your preparedness. You know hard times have hit the fan for many people. That single mom down the street just lost her job. The plant shut down as the talking heads babble on about an economic ‘recovery’ on the TV screen.
It’s tempting to buy their snake oil. It’s peddled daily with thousands of sound bites to keep the herd from stampeding. But you’re smart. You recognize true lies. Like their Federal Reserve Notes, their safety-net promises aren’t worth the paper they are printed on or the lying lips they come from.
What’s a smart prepper like you to do?
Allow uncertainty to be your motivation!
Maybe you’re thinking…
“I’d like to start a home business to escape the cubicle world, but I’m not certain it would succeed.”
“If I knew I wouldn’t fail, I’d start homesteading.”
“I’d home school my child, but I’m not certain I know enough to teach him.”
“If I knew I could kick that habit for good, I would try.”
“I’d sling a stone at the giant’s head, if I was certain of my aim.”
“I’m certain I can’t lose 50 pounds. Obesity runs in my family.”
“I’d write that book if I were certain it’d be a best-seller.”
“I’d embrace uncertainty if I was certain it would help.”
Go ahead. Learn to love uncertainty. It lights your fire, sparks creativity, challenges conventional wisdom, engages your right-braininess, builds resilience, rewards risk, creates curiosity, stretches you boundaries, and makes you fail at times. But that’s the only path to learning, freedom, growth, and self-sufficiency.
Uncertainty is a two-edged sword cutting both ways. It can deliver a paralyzing wound to the faint of heart, or motivate you keep doing the stuff.
What if we all saw uncertainty as our greatest ally?
We’d find better ways to grow more nutrient dense food, start micro businesses, resist tyranny, use technology to our advantage, learn new skills, and liberate our lives. Consume less, produce more.
Certainty is a poison. Uncertainty is our antidote.
I’m certain you’ll agree.
What are you certain about? Leave you thoughts in the comment section, please.
The bee, feared for its nasty sting, comes as an unwelcome visitor in our gardens. People often scamper away when they see the buzzing insect approach their direction. Scary as the bee is, it brings a product enjoyed for its sweet natural taste and its number of alternative uses – honey. As a practical soul, you can make your domestic life a bit more convenient with such a useful item. Purchase a jar of honey and discover all of its benefits.
Honey, aside from being a tasty snack, can be used for a variety of home and health-related applications. With its natural formulation, it is used as a treatment for some illnesses and a vitamin supplement. It is also known to moisturize and disinfect the skin, making it an unconventional moisturizer, antiseptic and antibacterial solution. For years, vegans have used honey to promote good health. Now it’s your turn to reap the rewards in using the bee’s healthy byproduct. Here are 15 unconventional uses for honey.
Skin Moisturizer – Honey, when mixed with eggs and some flour, is an effective skin moisturizer. Best of all, it is gently formulated, so it can be used by people with sensitive skin. Mix four tablespoons of honey with a couple of egg whites and a few tablespoons of flour, depending on your desired consistency. Stir the mixture until it thickens. When the mixture is ready, you can use it as a hand and body lotion or a moisturizing face mask, eliminating the effects of dry skin.
Antiseptic – Hydrogen peroxide is a chemical used for cleaning wounds and helping them heal quickly. Honey happens to contain a good amount of the chemical. It only needs to be released by diluting the substance in water or body fluids. When applied on an open wound, the glucose, contained by honey, is diluted and gradually releases hydrogen peroxide. The substance facilitates your wound’s faster healing. Due to its viscous consistency, it also prevents wounds from sticking to the dressing and the appearance of scars.
Acne Remover – Honey might be a gentle skin moisturizer but it is certainly tough on acne. With constant exposure to the bee fluid, pimples eventually wither and fade. Apply a small amount of honey on the pimply regions of your face. Cover them with adhesive bandages. Soon, your zit attack will be nothing more than a distant memory.
Read the other 12 unconventional uses for honey here.
In the March Against Monsanto, millions of people peacefully took to the streets in protest over our unhealthy (being kind here) Industrial Food Machine operated by the little man behind the curtain in the Wizard of Oz. The switches, pulleys, and levers are connected to BigFarma, BigPharma, corrupt politicians, main stream media, and our protected predator class.
Monsanto’s ‘man’ behind the curtain is busy pulling levers that rabidly promote the un-scientific fact that eating GMO’s has little ill effect on human health. What they’re really trying to say is you can pick up a turd by the clean end. Crass but true.
Genetically Modified Organisms should be avoided at all costs. But how can you ensure a safe food supply for your family? You don’t have 40 acres and a mule. You live in a neighborhood with quarter acre lots. You may have never grown a garden in your life. How in the world can you produce even a small amount of real food that’s safe to eat?
There’s a movement gaining momentum around the world. The idea is to make your home as resilient as possible. Having multiple backup systems gives you options when things go wrong. And things always go south with the fragile systems that run our houses. When the lights went out on our farm where I grew up, my daddy was famous for saying, “Bob’s dog must have peed on the power pole again.”
Our industrial food system is no different. Since the end of World War II, our system of food production shifted from small local farming outfits to mega farmzillas. We use to know where our food came from because we produced most of what we ate for ourselves. Following jobs into the city, producing our own food has become a lost skill.
Step by step, we’ve lost (or forgotten) our independent nature.
Building resilience into your food system may seem daunting. It’s not. You just have to start. Maybe you could start eating your yard.
Here are 13 ways to that you can grow food, not lawns.
Creative container gardening
EarthTainers on the back deck a couple of years ago:
We grew peppers and tomatoes from four EarthTainers with great results
Five gallon buckets of low hanging fruit.
More tomatoes hanging around
You can also set these on the ground, wrap them in burlap, and make them easier on the eye in the front yard.
Plastic buckets are cheaper than pots. Dress them up for the front yard with burlap and twine.
Vertical gardens. There are many ways to get creative for space limited yards. Grow up if you can’t grow out.
For more ideas on growing up, get your mind (and salad) in the gutter here.
The base of the garden tower below measures 27½ inches on each side. Four 63-inch long cedar boards are attached to a central six-foot cedar post to form the pyramidal framework.
Grow food, not lawns
Foodscaping is landscaping with food. Are your boxwoods under the eve of your house edible? Didn’t think so.
I pruned our ornamental hedges yesterday to make room for plants DRG and I can eat.
Pruning this pile of un-edible plants to make room for yard food.
In Bloom Where You’re Planted, I shared an amazing couple’s foodscaped front yard. Some of us can’t get away with this kind of ‘radical’ foodscaping. The time is coming when front yards will have to be utilized for food production. Might as well test your green thumb before you have to rely on your garden in bad times.
Worried about the food police and your nosy neighbor ratting you out. Give your front yard curb appeal by blending edibles into your front yard. Julie Chai’s article over at Sunset shows you how to make traditional backyard garden crops look good out front. Some of the favorites mentioned are:
“Artichoke. ‘Violetto’―especially when interplanted with large pink cosmos.
Basil. ‘Purple Ruffles’ and ‘Green Ruffles’ basil, with their unusual, frilly leaves.
Chives. With thin, grasslike foliage and pink flowers, they look great in or out of bloom.
Japanese red mustard. Large burgundy-colored leaves are very dramatic.
Kale. ‘Russian Red’, for greenish purple color and oaklike leaves.
Lettuce. ‘Black-Seeded Simpson’, ‘Red Oak Leaf’, and ‘Royal Oak Leaf’ lettuce.
Peas. ‘Dwarf Gray Sugar’ is compact and has showy lavender and maroon flowers.
Peppers. ‘Super Chili’ (peppers change from green to orange to red) and ‘Golden Bell’.
Swiss chard. ‘Bright Lights’, for its many colors, including orange, pink, red, and yellow.”
Wild foods
Learn now how to utilize all those weeds growing in your yard and waste places. Be cautious and avoid weedy area that have been treated with pesticides and herbicides.
Here’s several ways to learn on our Wildcrafting tab.
Hospital personnel said our surgeon wanted to meet with me. It’s only been an hour waiting. Why so quick? The doctor said to expect a four-hour operation.
Fear of the worst paralyzed me. I braced my mind with a shaky hand. Hold it together, Todd.
“The cancer has spread. We can’t do the operation. I’m sorry.”
A year later we realized this was the best news we’d ever gotten from a doctor. You see, DRG still has the top lobe of her lung and is basically cancer free today! We thank God for this blessing and for what we thought was a cruel turn of events.
You’re probably thinking I messed up on the title of this post. How’s he going to transition into a Big Green Egg story?
The surgery that thankfully didn’t happen was scheduled on my 50th birthday last May. DRG was so down about the news it took her weeks to recover emotionally. On top of that, she was beating herself up about not being able to do what she had planned for my big day.
She wanted to get me a present to cover both birthdays this year. Enter the BGE. We’d seen and heard about them for a few years. She goes out and buys me one from a friend who is a BGE dealer. She got a friend discount.
These ceramic cookers are awesome for everyday food preparation. I’ve only used mine a few times but have discovered the BGE would make one heck of an alternative cooking source if the lights went out.
Ceramic Cooker History
The history of ceramic cookers can be traced back to over 3,000 years to China. The Japanese called it “kamado,” their word for stove, oven, heater, or fireplace. The design made its way to America after World War II. There was an immediate and noticeable difference in this ‘new’ cooker and the standard charcoal or gas grill. The food just tastes better. The same way a pig-in-the-ground tastes better than dry pork chops on your charcoal grill.
The BGE is capable of replacing your gas or electric stove in your house – if the need arises. Casseroles, bread, meats, vegetables, you name it, the BGE can handle the job. I just smoked some babyback ribs that DRG has dubbed “Stupid Good Primal Ribs.”
I never would have bought one for myself. They’re pricey. But with proper care, you can pass your BGE on to the next generation of natural-born grillers.
The Big Green Egg Tractor
I’d recommend you build a cooking table if you decide to get one. We looked at the BGE tables at the store and thought they were too flimsy. A sturdy, homemade table was in order. Introducing the Big Green Egg Tractor.
Measuring 60 x 32 inches and sporting 10 inch wheels this tractor plows through a barbecue
It’s constructed with 5/4 x 6 x 8 decking lumber. The stove rests on a piece of slate built into the bottom shelf. On the left, I recessed a 30 x 30 inch cutting board our son gave me that he scavenged. The entire tractor was built around this cutting board.
Time to do the stuff!
Stupid Good Primal Ribs Recipe
Start by buying the best ribs you can find. I bought these from a local farmer at our farmers market. Berkshire pork is the choice of competition BBQ cookers.
Step 1: Remove the membrane from the bone side of the ribs. I use a butter knife to lift the membrane. Then I grab the end with a paper towel and pull, violently at times. Do what it takes to get remove the membrane.
Remove the membrane on the bone side of the ribs with a butter knife and lots of pulling.
Step 2: Wash your slabs with cold water. Pat dry with a paper towel. I then place mine in a large pan and apply my homemade rub. There are many commercially made rubs available. Add generous amounts of rub to the bone side first. Rub it into all the nooks and crannies of the meat – including the sides. Flip the ribs and repeat for the meaty side.
Rub your meat
Step 3: Let the ribs sit for a while. I usually wait an hour or so before starting the fire on my smoker.
The folks at BGE recommend that you use hardwood lump charcoal as your fuel source. Ah, another resilient skill to learn – charcoal making.
I started a layer of lump charcoal (3 inches deep) in the my BGE. I wasn’t sure if that would be enough on my first attempt at smoking meat on this thing. It turns out to be plenty. Ceramic cookers conserve fuel like nothing I’ve ever seen.
After the coals are ready, add your favorite wood chunks for smoke flavor on your ribs. I use apple wood – a few pieces that have been soaked in water (slower burn) and a few that are dry (faster burn). Being from the Peach State, I prefer peach wood.
For indirect cooking, use an EGGcessory called a Plate Setter. This turns your BGE into a convection oven and provides a barrier between your meat and the direct flames.
Regulate the temperature with the top vent and the lower vent until you reach the desired temp of 225 -250 degrees. I was amazed at how well this cooker held a steady temp during the whole smoking process – 240 degrees for 4 hours. And I never had to add charcoal like I did with my old metal smoker. It’s a magic smoking machine.
Step 4: Place a drip pan on top of the Plate Setter. It needs to fit the BGE and be large enough for the ribs to sit over. I poured about an inch of apple cider vinegar in the bottom of the pan to add steam and flavor to the meat. Now, slap the slabs on the a rib rack on top of the grill grate. Close the lid and go do something else for an hour. I made a fresh batch of tallow next to my BGE. Just saying.
EGGcessories come in handy. Here they are after the one hour check up.
Rendering grass-fed beef fat for our cooking tallow.
Step 5: When you check them in one hour, apply some apple juice to the ribs. I use a spray bottle to lightly coat the meat. You don’t want to wash off the rub, so spray lightly. Close the lid and go back to doing something productive. Don’t check it again for another hour.
Step 6: On the next lid lift, bring your favorite local honey, some of your rub, heavy-duty aluminum foil, and a basting brush or mop. A lot of barbecue purists frown on using foil on ribs. I’m no purist. I’ve cooked ribs both ways and decided to keep foiling.
I cut my slabs in half making 4 smaller racks of ribs to fit over the drip pan. You can leave them long if you wish. Place each rack on a double thickness of foil bone side down. Pour enough honey on the ribs and coat it with your brush or mop. Dust the ribs again with your favorite rub. Close the foil loosely. Puncturing the foil will allow all the goodness to escape. Now you can return the ribs to the grill, get your temp back to low and slow, and forget about ’em for another two hours.
Ditch the rib rack and lay the ribs directly on the grill grate.
Step 7: At about the 4 hour mark, take a rack off and check for doneness. Carefully open the foil. Watch out for the hot steam coming out of the pack. Stare in amazement at your creation for about 5 seconds. Now find out if they’re ready to eat. You can use a couple of methods here:
Poke a toothpick between the bones. If goes in like a hot butter knife through butter, they’re ready.
If you cooked the ribs in a whole slab (not cut like mine), pick up the ribs with tongs from one end. If the over hanging ribs bend to create a 90 degree angle, plate ’em. They’re ready. Just eyeball it. Don’t get your framing square out.
Some like to stick a meat thermometer between the bones. If the temp is 200-205, they’re done. Unless you’ve got really thick, meaty ribs, I’d stick to one of the first two methods.
If that pack doesn’t meet the doneness check, carefully close it up and return to the grill. Check it again in 20 to 30 minutes.
Once they’re done, remove from the grill. Open each foil pack. DO NOT let the juice inside the foil escape. I pour the honey juice into a pan, put my sliced ribs on top of the juice, and baste the ribs while they cool down and rest.
We don’t add any BBQ sauce to our ribs or pulled pork. If you cook the meat right, you won’t need to. If you prefer a sauce, nows the time to add it, I guess.
Be sure to capture the honey juice for basting
Stupid Good Primal Ribs ready to eat. We ate these with a side of organic kale cooked in heavy whipping cream and fresh oak leaf salad from the farmers market. Primal dinner is served!
What do you think? Does the Big Green Egg have a place in your post-SHTF cooking plans? I’d love to hear from BGE aficionados out there for this ceramic cooker newbie. Leave your tips in the comment section, please.
P.S.
Did you get here from a friend or link? We’re glad you did. Make yourself at home.
If you’re already subscribed to Survival Sherpa via email or RSS, the latest post will be waiting for you.
If not, go ahead and join over 2,400 other preparedness minded people so you don’t miss a thing. You can also find us on Twitter @SurvivalSherpa and Pinterest.
[Editor’s Note: One of the easiest and best ways to start your journey to being more fit is to move slowly. Walking is one of the principles in The Primal Blueprint that revolutionized my health and fitness. Daisy offers a great primer on how to walk the walk.]
One oft-overlooked factor in survival is fitness. How many preppers do you know who rest on laurels of athletic prowess back in their 20s? Whose idea of exercise is getting up to go to the refrigerator, lobbing a crumpled can to the garbage can? Who talk the talk, but never walk the walk, especially if it consists of walking that walk in inclement weather?
In many different survival situations, your personal fitness level can mean the difference between life and death. We’ve already talked about maintaining and achieving a healthy body weight – now let’s talk about being fit.
A prepper’s forte is playing “what if” so let’s play that game right now and look at some examples where being able to move quickly for a long time, possibly in adverse conditions, would be vital.
Bug out. Perhaps martial law has been instituted, house-to-house searches are occurring, and vehicle checkpoints are everywhere, so you and your family have no choice but to set out on foot, through the backcountry. With a 40 pound bug out bag strapped to your back. Carrying a toddler. Over mountains.
Car crash. Maybe you are returning home after a visit with family. You are, of course, on the most isolated road known to man, in the middle of the night, when your vehicle goes into a skid, takes out the railing and tumbles down a mountain. Miraculously, you survive, but then you realize that no one can see your car. You have no choice but to wiggle out through the window, climb that darned mountain, and walk for help.
Kidnapped. Somehow, you’ve been kidnapped and taken to a cabin someplace deep in the forest. Through a stroke of luck, you escape the cabin, and begin to hie off through the woods, but your kidnappers aren’t far behind. In this situation, the person in the best physical condition wins. Whoever can run for the longest, wins.
EMP. An EMP strike or solar flare has taken out the grid, as well as all the vehicles. If you want to get anyplace other than where you are, it is most likely that you will have to walk. If, for example, you’re at work, you are going to have to trek your way home to be with your family. Whatever the distance, whatever the terrain, you better start walking now.
These examples, of course, are what happens immediately, when you must escape something. What about those long days after the initial disaster, ones of plowing fields, chopping wood, and lugging water?
As a prepper, your personal health and fitness level can be your most valuable asset. Just as important as tools, weapons and plans, your ability to simply move your body for a long time without stopping can be the difference between life and death.
And it all starts with walking.
Just Walk
Of course, there are many components to fitness and eventually we will talk about all of those. But the best place to start is to lace up your sneakers and walk.
(This is where I tell you, as I am legally bound to do, that you should seek the advice of your physician before starting this or any other exercise program.)
When people start a walking program, they tend to make one of two mistakes.
1.) They push themselves way too hard and end up getting so sore on the very first day that they are virtually crippled from Delayed Onset Muscle Soreness.
2.) They don’t push themselves hard enough and stop the second they begin to feel out of breath.
Your starting point depends on your current fitness level, of course, but that can be hard to judge if you have been moving from sitting on your rear at your desk at the office over to sit on your rear on the sofa at your house. So I generally recommend that you start with 30 minutes.
If you are truly sedentary, don’t kill yourself by trying to set a rapid pace for your 30 minute walk. You should walk at a very comfortable pace for at least 5 minutes to warm up your body. Then, speed up to the point that speaking is possible but not super-easy. Your heart rate should be elevated enough that your speech is limited to short bursts of words, not Shakespearean monologues. If you get to the point that you can only gasp out a word at a time, you are pushing yourself too hard, and you need to slow down.
If you need to slow down, that doesn’t mean stop! Keep going, just at a slow, easy pace. This is you, building your endurance. Unless you are having the symptoms of an actual heart attack (extreme shortness of breath, faintness, dizziness, pain down one arm, etc) keep moving at a slow pace as you catch your breath.
About 5 minutes before your walk is over, drop back your pace a little to cool down.
As you become more fit, you can make things more difficult and more akin to survival situations. You can add hills, obstacles, increase your speed, carry a loaded pack, or walk for longer to add to the challenge.
Motivation
Some things that help:
A dog. My dog would walk FOR-E-VER! Walking a dog is a great way to keep motivated and will result in not only a healthier you, but a healthier and better-behaved pet too.
A buddy. A walking buddy will help you maintain a pace. As well, we are much less likely to cancel our walk if a friend is going to be let down when we don’t show up.
Tunes. My Ipod full of headbanging rock is my favorite piece of workout equipment. I opt for music with a beat that mimics the pace I want to keep. I like energetic, heavy driving music to keep me motivated. Make a playlist of whatever inspires you to move quickly. Sometimes I’ll walk a little further just because there is a really great song on. I save the Ipod for walks, making it a special treat.
Safety note: I recommend only using one headphone. Whether you are in the city or out in the woods, like me, wearing two headphones and making yourself deaf is the equivalent of wearing a “Prey” t-shirt. It’s important to always be aware of your surroundings.
Remember that you can have all of the preps in the world, but if you can’t walk far enough to get to them, they will do you no good whatsoever. In fact, they’ll feed the next guy, you know, the one who’s out there pounding the pavement every day! He is in shape enough to get to them.
Your physical stamina can mean the difference between life and death, not only for you, but for those who depend on you. Just get out there and walk and within a month, you will see that your 30 minute walk takes you a lot further than it did when you began.
Excuses
And a word about excuses. Okay, a few words, because there are oh-so-many excuses.
Unless I am going to be struck by lightening or die of hypothermia because I’ve gotten soaked in sub-zero temperatures, I walk. There are many days that I look out the window at the gray skies and think, oh, man, I don’t want to walk today! But I do it any way. Why?
Because, if you are a prepper, you are training for life. You are training for events that happen at the most inopportune times. Rarely does a disaster conveniently time itself on a sunny day of moderate temperatures. Nope, if you have to hike away from a car accident, it likely happened because of ice or rain on the roads. You will be hiking away from it through the pouring rain. If a crime has been perpetrated on you, and you must flee, are you going to take your chance when it presents itself, or will you say, “Yeah, it’s raining, dude. I’m just gonna hang out with this serial killer until it clears up.”
You aren’t made of sugar. You aren’t going to melt. Just walk.
And yes, you do have time. Unless you are moving from the moment you get up in the morning until the moment you go to bed, you can find 30 minutes to go for a walk. Trust me, after you get used to it, your body will crave it and you’ll feel so much better! If you really truly are that busy, break your walk up into two 15 minute walks, or even 3 ten minute walks. There really are very few days that you can’t take 30 minutes from your day to do something wonderful and potentially life-saving.
You’re sick? Are you really, truly sick? If you are, you’re right. You should stay home, tucked under the covers. But if you have a bit of a headache, low energy, some female problems, or just general lethargy, you may be surprised at how much better you feel after a bit of exercise and fresh air. Exercise is nature’s anti-depressant and sometimes those minor aches and pains are related to mood more than they are actual physical maladies.
You don’t have to start with a Marine Corp Mud Run. You see all those big buff dudes running down the road in fatigues, carrying an 80 lb. pack? Let ‘em run! You, my friend, are just going to walk today. You are going to get started and you are going to find your own path to fitness. This isn’t about comparing yourself to those who are more fit or more strong than you. Everyone is not capable of doing what an Ironman Triathlete does but just about everyone is capable of more than they are doing right now. If you challenge yourself, you might just be amazed at what you can do once you’ve built a base of fitness.
Get Started
Today. Right now. If it’s the middle of the night when you’re reading this, then you can wait until tomorrow. But remember that the sooner you start, the sooner you are ready to face survival challenges head on. You, keeling over from a heart attack while you bug out, will be one less thing that you (and those with you) have to worry about.
Getting into better shape is something you will never regret. Even if you never need to be more fit because of a survival situation, you still get all the health and well-being benefits from doing it. Your body and those who love you will thank you!
“I got fit and I never even had to escape from a deranged stalker!
What a waste of time!”
said no one, ever.
About the author: Daisy Luther is a freelance writer and editor. Her website, The Organic Prepper, offers information on healthy prepping, including premium nutritional choices, general wellness and non-tech solutions. You can follow Daisy on Facebook and Twitter, and you can email her at daisy@theorganicprepper.ca
[Editor’s Note: Keeping with the theme that stuff runs out, it’s wise to build sustainable, resilient resources that transition easily from a pre to a post collapse scenario. If you have a little land, goats are an option to consider. Barbara Peterson is proving that “the poor man’s cow” can keep you alive.]
When thinking about survival prepping, most think of collecting as many dried foods as possible to last for as many years as possible, along with whatever other supplies will be needed to take care of oneself and family without having to visit the supermarket, which, in most scenarios, will not be functioning in a post-crash world.
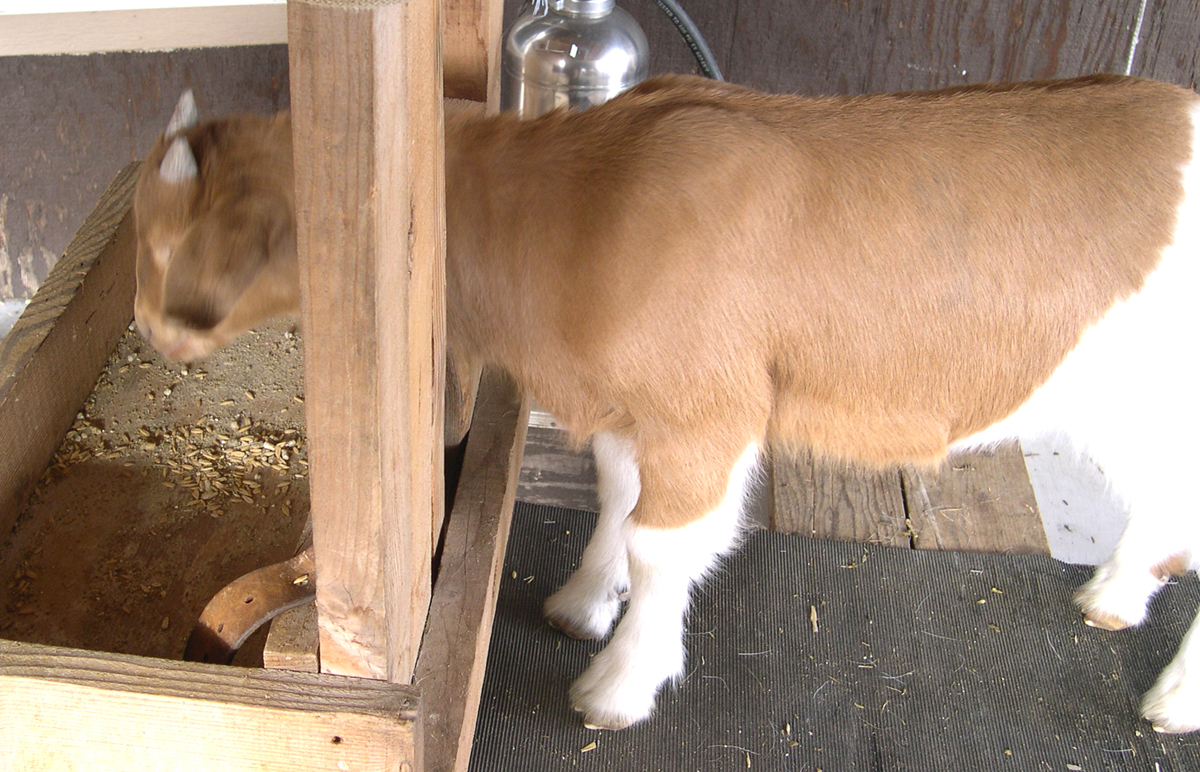
To this discussion, I would like to add something a bit out of the box. And that is – a goat will keep you alive. Yes, it’s true, and I have spent the last several weeks proving just that.
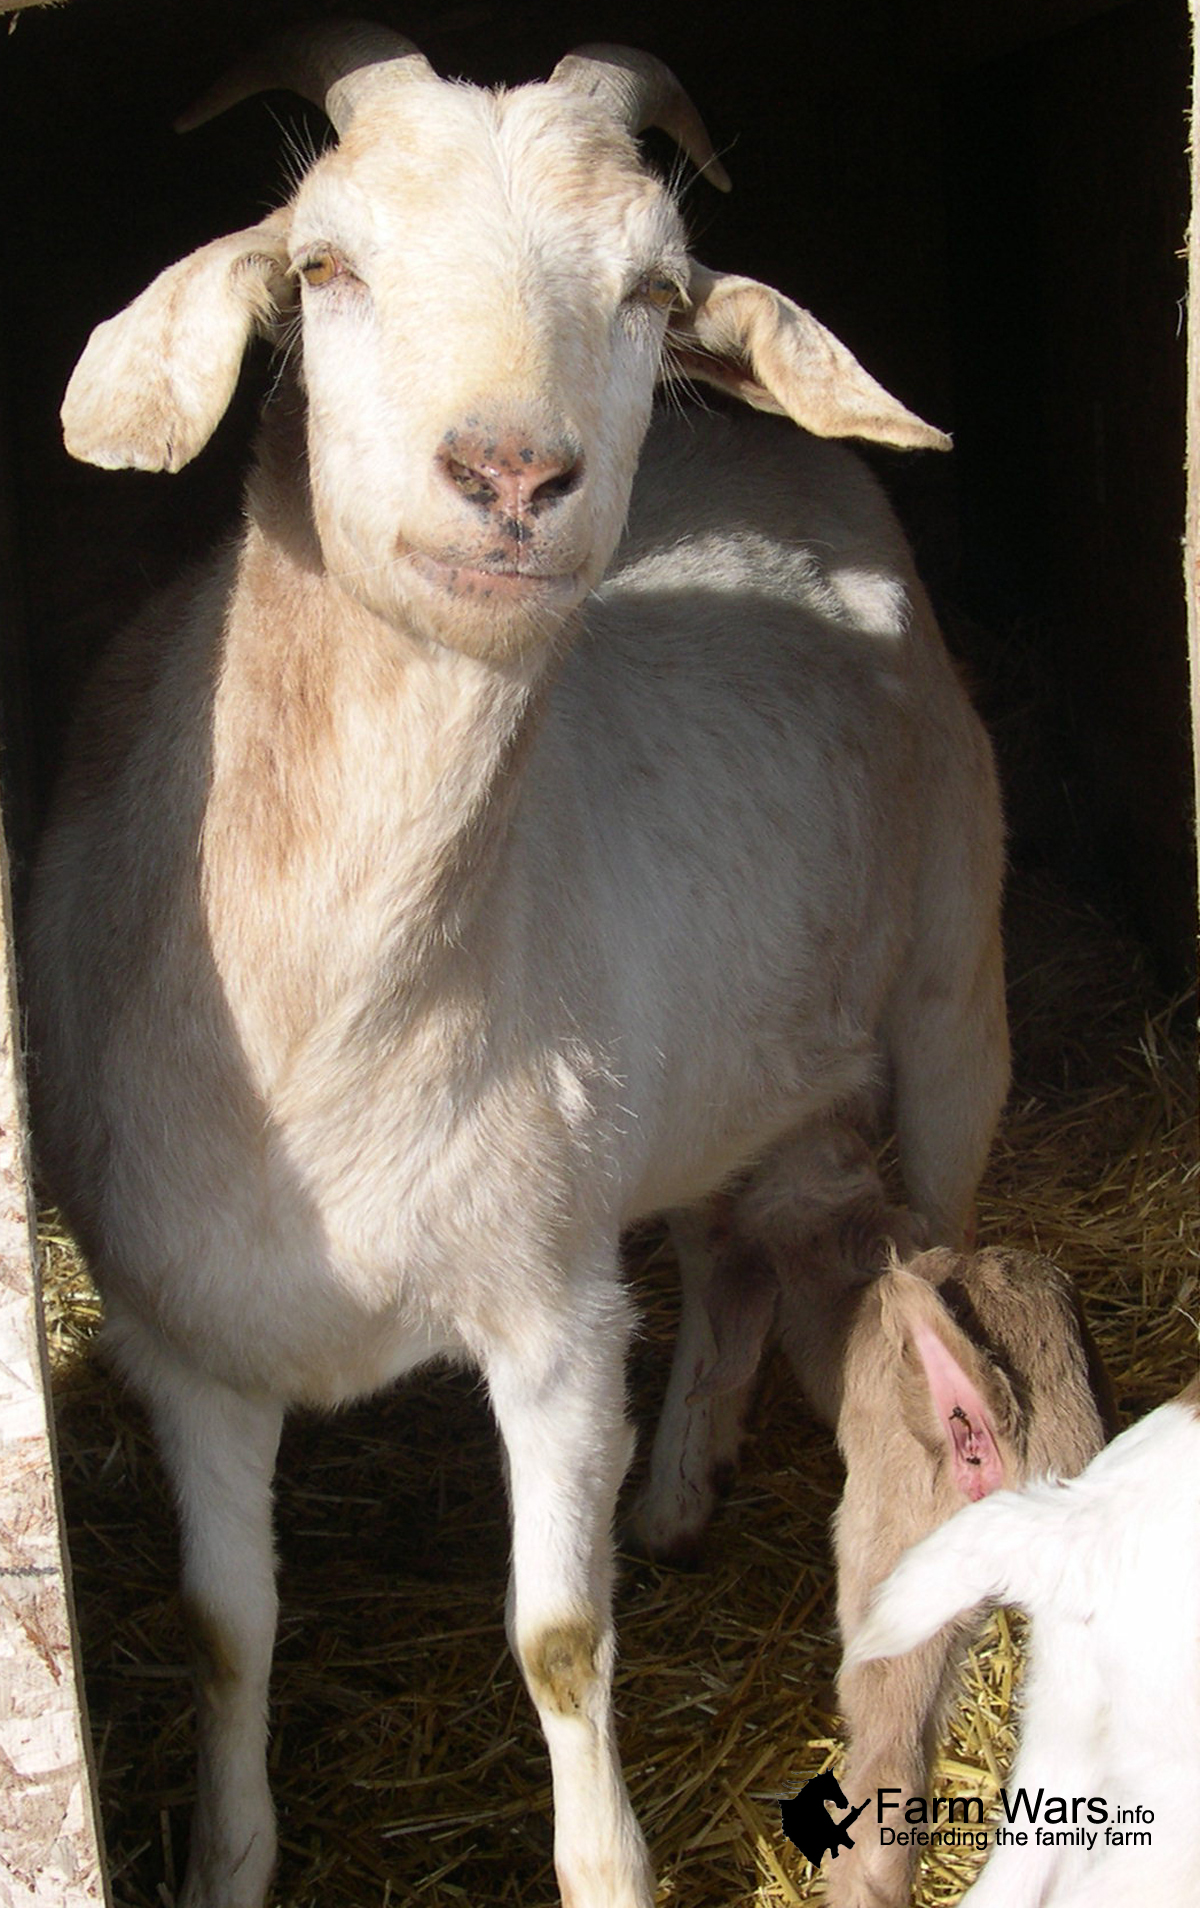
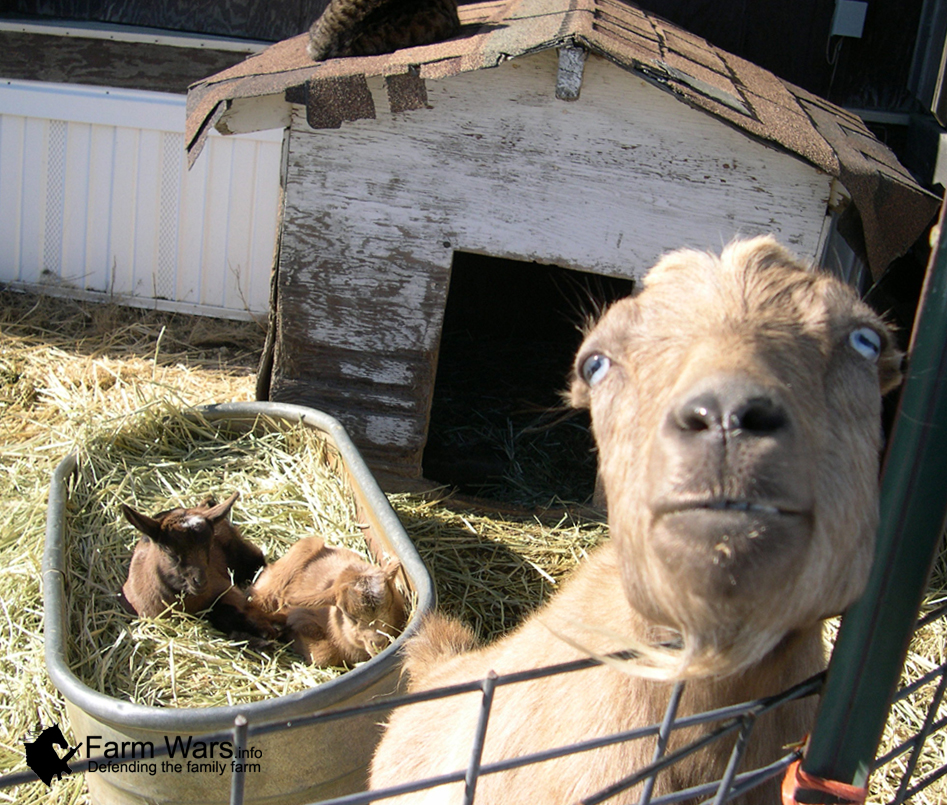
The survival system that I decided on was geared towards providing me and mine with fresh, whole food that is renewable and sustainable. So, I purchased two milking goats to go along with my garden. One is an Alpine cross whom I named Sunny, and the other a Mini Mancha (La Mancha and Nigerian Dwarf cross) who goes by the name of Fiona. They were pregnant when I bought them, and almost ready to kid.
I have to admit that I knew Alpines were good milkers, but had no idea what a Mini Mancha would do, and was delightfully surprised when it came time for milking at the amount that my little gal produces. For such a small individual, she is a powerhouse.
So, with these two ladies by my side, I began my journey into food freedom. Could my ladies actually keep me alive and healthy? I would soon find out.
The Experiment
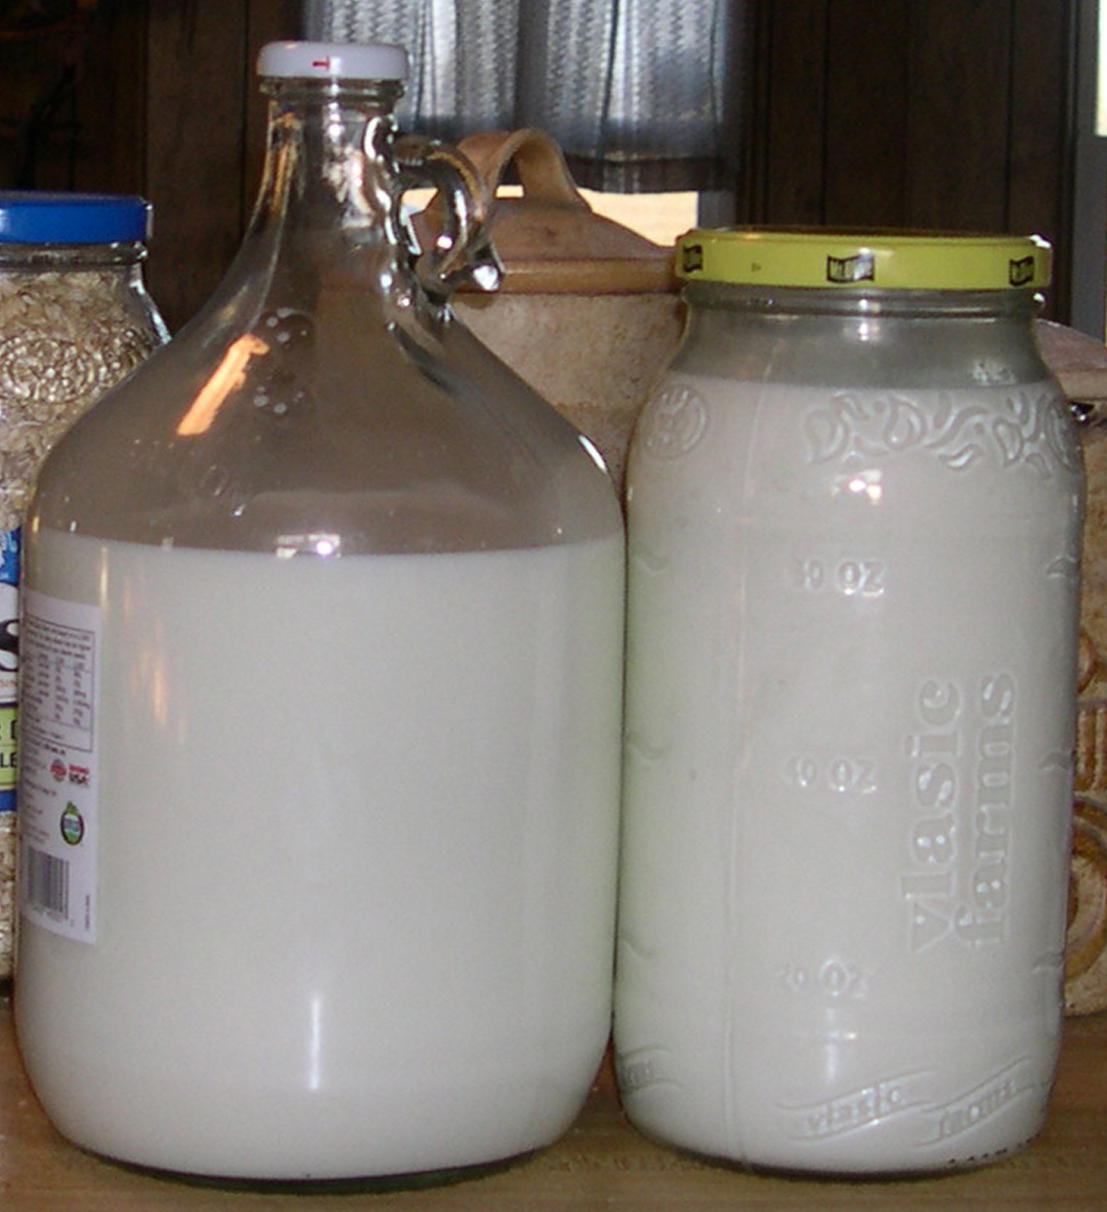
The babies were born the first week of February, and I did not milk until I weaned them at 2 months of age. After that, I started milking twice per day and get 1 – 1 ½ gallons per day. Since my ladies started producing I haven’t eaten much of anything that doesn’t come from the ranch and/or local sources.
Why a goat?
My first thought was nutrition. Could I really get the nutrition I need from a diet of goat milk, veggies and fruit? So, I looked up a bit of nutritional information:
Nutrition
Goat milk is also a healthier alternative to cow milk. Why? Cow milk has to be homogenized to be more easily digested, which is a process where the fat globules are broken down. However, this is not necessary with goat milk because it is naturally homogenized. Therefore goat milk is much more easily digested than cow milk is.
Goat milk has more of the essential vitamins that we need. Goat milk has 13% more calcium, 25% percent more B6, 47% percent more vitamin A, and 27% more selenium. It also has more chloride, copper, manganese, potassium, and niacin than cow milk. It also produces more silicon and fluorine than any other dairy animal. Silicon and fluorine can help prevent diabetes.
Scientist are not sure why, but people who are lactose intolerant can often drink goat milk without having to worry about side effects. Goat milk does not cause phlegm like cow milk does, so you can drink goat milk even when you have a cold or bad allergy problems.
For a complete nutritional breakdown comparing goat milk to cow and human milk, go toFias Co Farm.
Ease of upkeep
The next concern was how easy are they to keep? It turns out that they are the best bet for the money when it comes to dairy critters. Goats are less time consuming, eat less, and are less labor intensive than cows, making them much more economical. They are also browsers and not grazers, meaning that they will eat stuff that cows simply will not touch, and can be used to clear weeds. If you turn them out on your property to browse, they will eat brush and weeds, leaving you with cleared, fertilized land, sans the heavy machinery and spendy store-bought fertilizers. Just be careful of the weeds that they eat as the taste will end up in your milk.
Often the dairy goat has been called the “poor man’s cow,” because good dairy goats do not cost near as much as good dairy cows do. You can raise more goats on a smaller amount of pasture than you can cows. While it takes an acre for a cow/calf, you can successfully raise six goats on one acre. Cows usually have only one calf per year, while goats have two kids (that’s what you call a young goat) after their second year. Pound for pound a good dairy goat will produce more milk than a cow will. Unlike a cow, a good dairy goat can produce up to 10% of its body weight in milk.
There are several breeds to choose from, and what is right for one, might not be right for another.
The most frequently asked question that people ask me about goats is, ”What is the difference in each breed’s milk taste, and how much milk do they average.” And that is always one of the hardest questions to answer, simply because there really aren’t any solid answers I can give! Each individual goat is going to have its own amount of milk it’s going to give, and it’s going to have its own taste. Think of it like a grab bag. You never know what you’re going to get.
But that sounds rather discouraging. How on earth is a body supposed to choose a goat breed if they’re hesitant about each one? Over the years, I’ve had the privilege to own almost all the dairy breeds out there, and then try the milk from countless of other goats. Through much experience (read: trial and error as we bought goats that gave horrid tasting milk!), I’ve gotten to know each breed’s quirks and histories, and I’ve come to realize that it actually is possible to give people an idea of what to expect from each breed.
Saanen, Alpine, Nubian, Toggenburg, Oberhaslis, La Mancha, Nigerian Dwarf, and combinations thereof are the main dairy breeds. I would rather not get hooked on buying a purebred since they are more expensive, and certain crosses yield excellent milk, in my opinion. My gals are both crosses and their milk is wonderful.
So, when you are looking for your milking goat, go with taste, volume, temperament, size of teats if you are hand milking, and orifice size. You can determine all of these things if you go to the place where you are considering purchasing your goat and observe the hands on experience. Watch the goats to see how they relate to each other, watch your prospect getting milked, ask questions, and taste her milk. I always recommend buying from a trusted source, and if in doubt, get a vet check before purchase.
Preparing for your goat
I asked the local goat-keeper what type of fencing my girls would need. He said that if I can make an enclosure that would hold water, I should be able to keep them in at all times…. Okay! A challenge. Well, I ended up with a 52” fence because I used large pallets. So far, it has worked. My friend uses 5’ high woven wire fencing. That is optimal, but since the pallets were free, that is what I chose.
The feeder is outside of the pen, allowing them to put their heads through the holes and eat without trampling it on the ground and soiling it. Hay nets are another option, but if your goat has horns, she can get them caught in the hay net.
Large dog houses are excellent shelters, but just about anything can be used such as a raised camper shell, a-frame structures, etc. Basically, your goats need to have some place dry and out of the elements to get to. A good straw bedding inside will keep them warm, dry and happy, and provide a good kidding area.
They will also need a good supply of fresh, clean water. Goats do not like dirty water, and if you live in freezing conditions you will need to get a water heater. I use 5 gallon buckets that are cleaned regularly.
Keeping your goat healthy
Feed
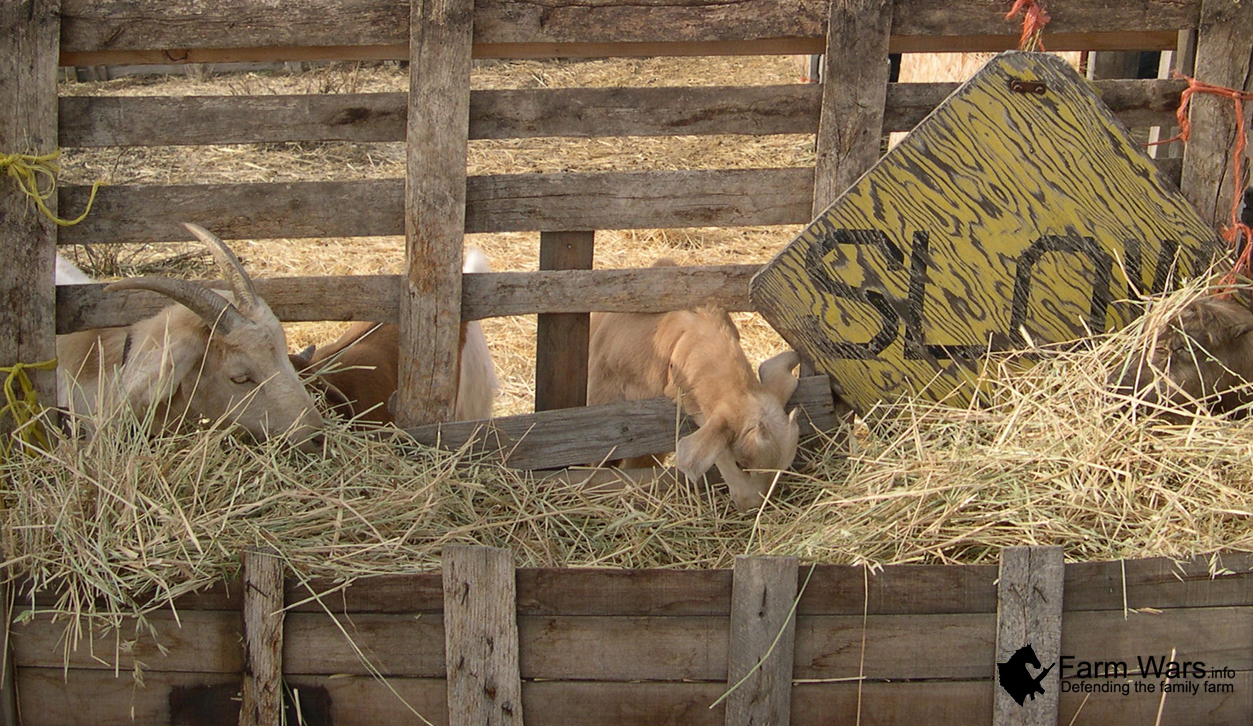
You will want to get a good supply of high quality hay for your girls. I let the babies browse the ranch, but the milking mamas get a controlled feed so that the taste of the milk can be regulated. As I stated before, whatever they eat affects the taste of the milk. If you cannot get feed for your girls, they can be turned out to forage in an emergency and will do just fine as long as there is plenty of grass and other vegetation. Click HERE for a list of edible and poisonous plants for goats.
Each goat needs 2 to 4 pounds of hay each day, although some of this need can be met by available pasture or other forage. Make it available free choice throughout the day when pasture is unavailable or feed twice a day when goats are also browsing.
You can feed alfalfa (and some grass hays) in pellet form if you don’t have storage or if you want to mix it with grain. The goats don’t waste so much alfalfa when it’s in pellets, and you can limit who gets it by combining it with their grain.
I am currently feeding a free-choice oat/pea hay combination along with a non-GMO dairy goat pellet , whole oats, rolled barley, alfalfa pellets, timothy grass pellets, and molasses. They also get free-choice loose minerals and baking soda.
Worming
When it is time to worm, I mix food grade diatomaceous earth with their grain ration along with a bit of warm water and molasses to coat everything so that it all gets eaten. Here is some info about diatomaceous earth:
Food grade diatomaceous earth makes a very effective natural insecticide. The insecticidal quality of diatomaceous earth is due to the razor sharp edges of the diatom remains. When diatomaceous earth comes in contact with the insects, the sharp edges lacerate the bugs waxy exoskeleton and then the powdery diatomaceous earth absorbs the body fluids causing death from dehydration.
Food grade diatomaceous earth has been used for at least two decades as a natural wormer for livestock. Some believe diatomaceous earth scratches and dehydrates parasites. Some scientists believe that diatomaceous earth is a de-ionizer or de-energizer of worms or parasites. Regardless, people report definite control. To be most effective, food grade diatomaceous earth must be fed long enough to catch-all newly hatching eggs or cycling of the worms through the lungs and back to the stomach. A minimum of 60 days is suggested by many, 90 days is advised for lungworms.
Food grade diatomaceous earth works in a purely physical/mechanical manner, not “chemical” and thus has no chemical toxicity. Best yet, parasites don’t build up a tolerance/immunity to its chemical reaction, so rotation of wormers is unnecessary.
Goats are hardy creatures, so a bit of prevention goes a long way. I keep Povidone Iodine around for minor cuts, along with hydrogen peroxide and colloidal silver. My medical kit is stocked with sterile cotton, vet-wrap, sharp scissors, an enema bottle, small bottles of hydrogen peroxide, colloidal silver and Betadine, cotton swabs, thermometer, and small towels.
Trimming feet
Your milking stand can also be used to secure your goats for hoof trimming.
Comprehensive instructions along with pictures can be found by clickingHERE. Also, remember to keep a bottle of blood-stop powder handy just in case you trim a little too deep and draw blood. If this happens, simply sprinkle a bit on, and that will stop the bleeding.
To horn or not to horn
Most goat people will insist on disbudding the babies. I don’t. I know that this is a contentious subject, but clearly, goats are born with them and they serve a purpose. We disbud (remove) them for our own personal convenience, not theirs. The choice is yours, as I have already made mine. Here is an article that supports my belief:
Yes, horns get in the way. Yes, they can cause some damage. But did you know that in most countries, disbudding is considered akin to surgically removing a leg, or ears, or an udder? And well it should be, in my book. That said, goat owners have to take their individual circumstances into consideration. Maybe, if I had a lot of little kids around, I might think differently. But I would probably just do what I did when my kids were little and there were sharp pointy goat horns around: put tennis balls, or some sort of rubber, squishy thing, on the end of the horns.Worked great. Goats didn’t care. No eyes got poked out. If I had a bajillion goats in a small space, maybe I would disbud. If I was going to show my goats, I’d have to – it’s THE LAW. Hmmm. I’m not showing. In my particular case, I’m willing to make management changes in order to let my goats be goats.
If you decide to disbud, click HERE for some instructions.
Milking
A happy goat is a good milking goat. At first arrival to a new home, your goat will take some time to get used to her surroundings. Since they are herd animals, they like company. So, a compatible goat buddy is better for your goat than being the lone stranger.
Goats can hold back their milk of they are unhappy, and if they are satisfied, can deliver it easily. It is really up to them. This means that developing a good relationship with them is paramount. When I started milking my mamas, I sang to them. Now that we are in a routine, and they love routines, I open the gate and they run to the milking stand. This took a bit of doing.
At first, Fiona didn’t want to get on. She hadn’t been milked on a stand before and would have none of it. I had to lift her up and place her on it. Well, that wasn’t going to last for long, so I started only giving them grain when they were on the stand. Problem solved. They now associate the stand with grain, and the longer I milk, the more grain they get to eat, so they give me as much milk as possible.
Click HERE for detailed instructions on how to hand milk a goat. I like to use a mild solution of warm water and apple cider vinegar for an udder wash and teat dip.
Click HERE for detailed instructions on how to construct a milking stand.
If you have more than a couple of goats, and you will after kidding, you might want to invest in a milking machine. I invested in an aspirator purchased from an eBay seller for $109, some hose for $25, a couple of replacement batteries for $25, two fittings, a dosing syringe, and a gallon jar with lid that I had around the house. My friend had already made one, so she put the fittings and hose together for me, and showed me how to use it.
The main thing to remember about goat milk is that it will pick up the flavor of anything it comes in contact with. Therefore, cleanliness will yield the best tasting milk. Also, I don’t let my milk come in contact with plastic containers. I use a stainless steel bucket and glass jars. Immediately after milking, I strain the milk into a glass jar and place it in the fridge to cool. No “goaty” taste for me! People who taste my milk say it tastes like creamy, sweet cow’s milk. They can’t tell it’s from a goat.
Food and other stuff
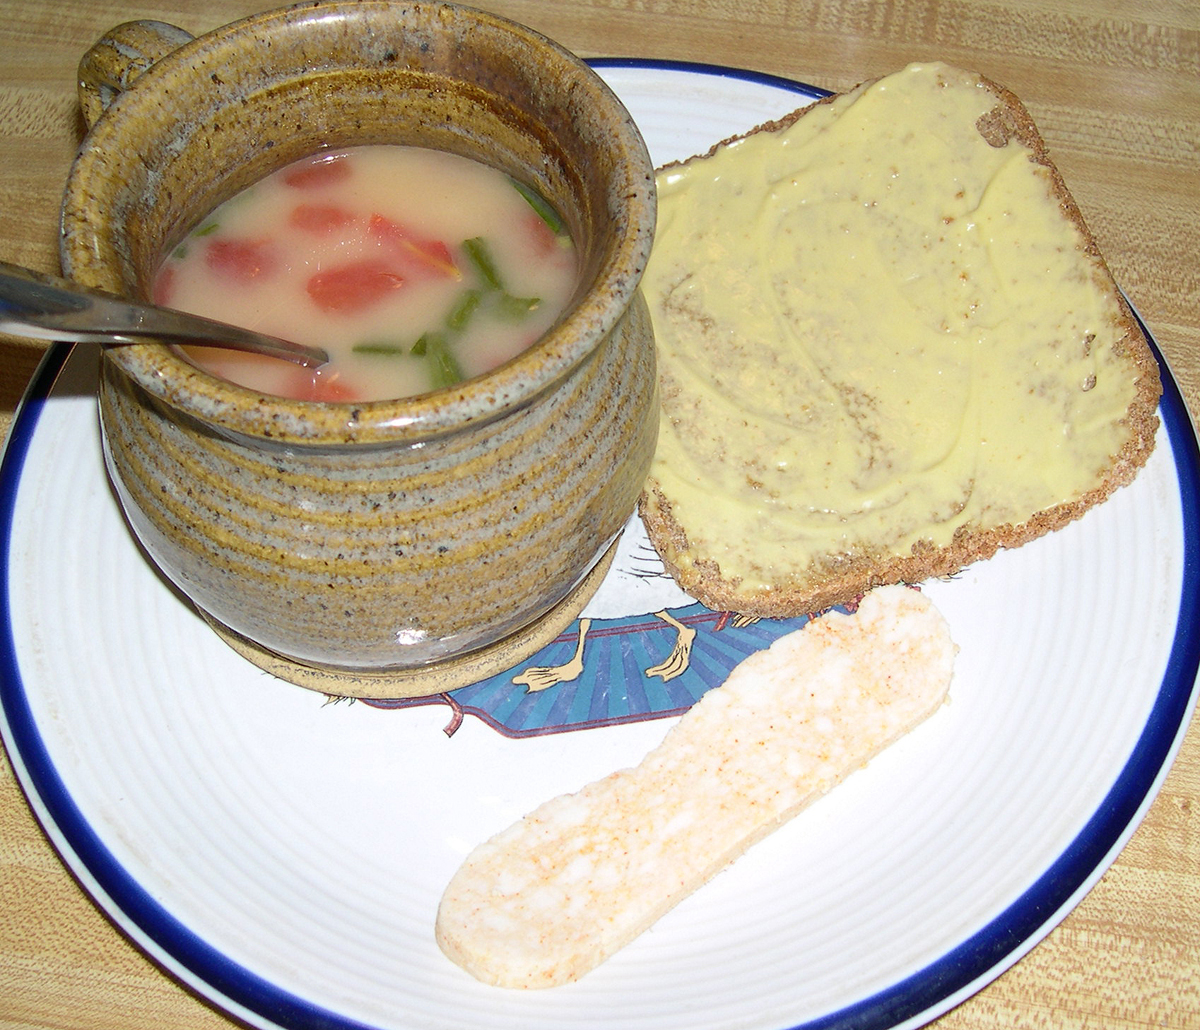
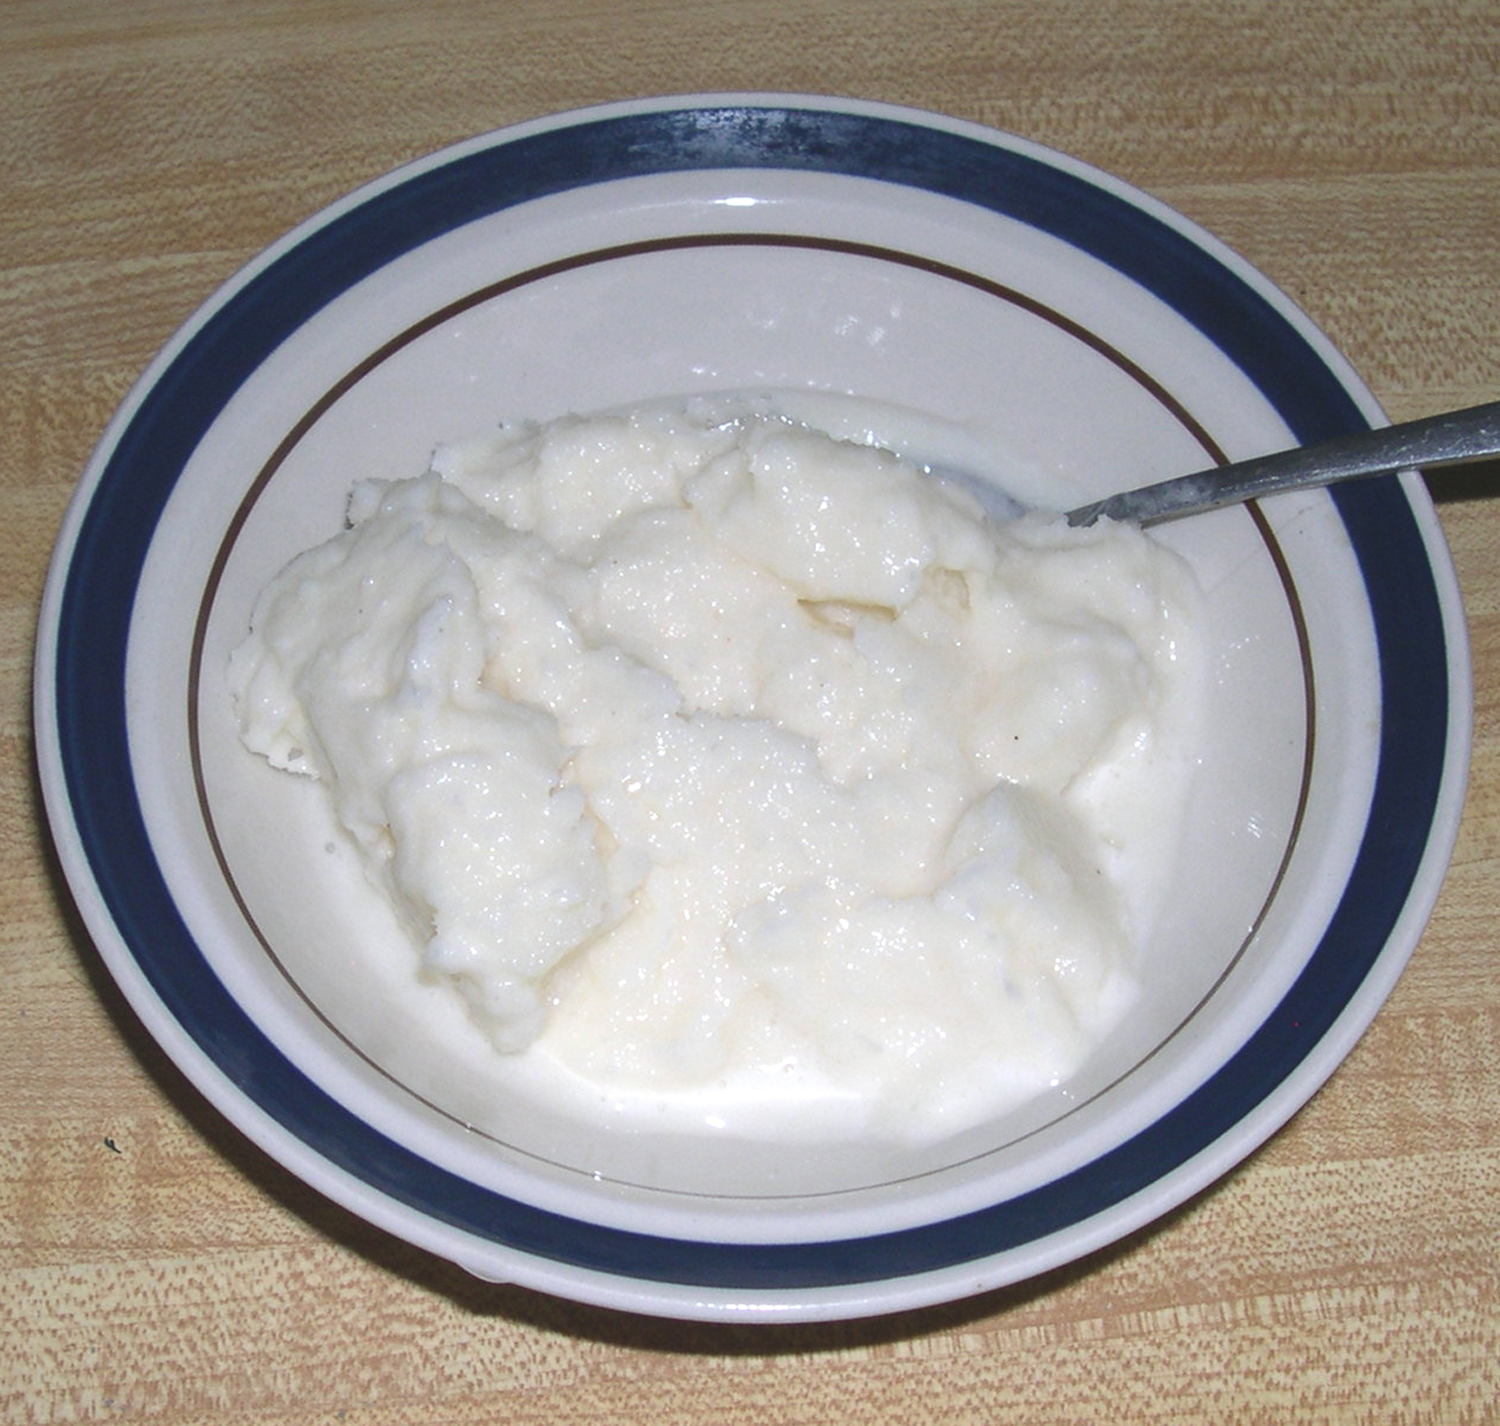
When I say that a goat will keep you alive, I mean it. Here is a typical day’s meal:
Breakfast:
Goat milk smoothie – goat milk, whatever fruit is handy and honey placed in a blender and blended until smooth and creamy, or goat milk and homemade granola made with oats, fruit and nuts.
Lunch:
Goat cheese and spinach salad.
Dinner:
Vegetable soup and homemade bread made with whey from the cheesemaking process.
Snack:
Goat ice-milk mixed with fruit, nuts, and any other flavors you like.
Here are pics of a couple of the cheeses that I make with stuff from the garden, goat milk and apple cider vinegar.
Walking Onion Goat Cheese
Wild Celery Goat Cheese
I also feed the whey and excess milk to the cats and chickens. It keeps them fat and healthy.
You can also make a very mild and gentle soap from goat milk.
Goats are also used for packing, and will leave a much more invisible footprint than other animals such as donkeys and horses.
Conclusion
The results of my experiment are that I am feeling strong, energetic, am definitely healthy, and do not feel one bit deprived. And what do I owe it to? My two milking mamas, fresh fruit, veggies, local honey and a penchant for independence. I am confident that if the store shelves run dry, I can still eat healthy, good tasting food and get the nutrition that I need. A goat will keep you alive.
Author bio: Barbara Peterson, Writer/Activist, lives on a small ranch in Oregon where she raises geese, chickens, goats and horses. This rural lifestyle is under attack at the most basic level. Federal regulations and the corporate takeover of our food supply with Monsanto’s invasive GMO technology is designed to make it next to impossible to raise animals and organic food.
It is time to step up to the plate and fight or lose it all without a whimper. Choose to take a stand and fight. We can make a difference.
John C. Maxwell once said that leadership is influence. Having the position ‘leader’ means nothing. You’re only a leader if people are following you. Otherwise you’re just taking a long walk by yourself.
I’ve been there, done that, and got the lesson I deserved.
Position does not equal leadership. A wise leader must understand that he/she may hold the title of ‘leader’ in an organization, or group, or family – but not be the real leader. If you’re in that scenario, your job is to influence the influencer – their voice gets heard over positional leaders.
When times are rosy, this principle applies. After the SHTF, leadership becomes even more important.
Here’s why.
I’ve read leadership styles promoted within the prepper community. Many have said that it’s crucial that one person take control of their retreat group or prepping community. No ruling by committee. A single leader needs to micro manage everything.
The problem I have with this model is – what if that person is not the influencer? Force and coercion would be needed to make followers follow.
Pride in position blurs a leader’s vision. Misguided assumption #1 – I’m the appointed ‘leader’ so people should follow. If they don’t, I’ll make them. That’s coercion, pure and simple. A leader is a leader when people voluntarily follow. Swallowing your pride is the first step to being an effective leader.
You can lead a horse to water, but you can’t make him drink.
We’ve all seen real life examples of top down leadership. Dictates come from the top and everyone below is expected to jump. Our military, corporate world, schools, churches, and even our government are models of this centralized system of control. Fear of reprisal keeps followers following. Forced association wins.
I have more questions than answers on leadership. Is our present model the cause of the mess we’re in now? Why do we need to be told what to do, what to think, and how to act? Can individuals practicing self-ownership thrive in a group? Who owns you? Can we really self-govern? Why do we clammer for a “leader?”
What I’ve unlearned from school history class (this has taken a lifetime) is that individual initiative is far superior to listening to dictates from a Dear Leader. Schools teach compliance. So does organized religion along with all the previously mentioned institutions.
Here’s a way to determine your follow-ability. Try this the next time you’re in a church service. When it comes time to bow your head, close your eyes, and pray, do the opposite. Keep you eyes open and look around while you pray. Pay attention to how you feel. Do you feel defiant? Does it seem ‘wrong’? Does God really care if you pray with your eyes open – in a church service?
Did you feel a creepy uneasiness crawl up you legs and spine? If so, ask yourself why? This doesn’t make you a bad person. It’s just a simple test to determine the level of your programming. To what degree do you feel programmed to comply?
Here’s another experiment. When they pass out the donation card during a job luncheon or faculty meeting to raise money for the United Way or Relay for Life or other charity, to give your company or school bragging rights for meeting the fundraising goal – sign the card and write why you are not giving across the top of the card. Don’t give because you’re expected to give. If you choose to give, give anonymously where no one can give you credit. It saves a lot of chest thumping.
Not participating in this public display of giving may have made you uneasy. Why? The unease is planted in you by the collective to influence you to “fill in the blank” and comply. The goal is to destroy your ability to provide for yourself and your family.
You might be shocked to find one or two others that don’t participate in compliance rituals. You’ve just discovered that some people reject mass compliance and think for themselves. Connect with these people. They are unconventional, independent thinkers, and good influencers.
Finding your influencers
Below I’ve compiled a list of non-compliant influencers that have helped me on my journey to self-sufficiency, liberty, and freedom.
Lew Rockwell – The most viewed libertarian site on the planet. Coming from a lifetime R voter, I highly recommend you read this site at least once a week. Daily is better.
Mark Sisson – The godfather of the primal/paleo lifestyle movement. He changed my lifestyle and attitude towards food, personal responsibility, and primal prepping.
John Taylor Gatto – He’s responsible for confirming what I’ve always thought about our public school system. Whether you like schooling or not, you’ll enjoy his poetic skill with words.
James Wesley Rawles – I discovered SurvivalBlog 6 years ago and have applied many concepts from his blog and books – even though I’m not moving to an unknown Western state.
Durable Faith – DF is someone I respect highly for his lifestyle of no-compromise and his pursuit to wake up the institutional church. He’s the guy you’d see ramming a whaling ship with a dingy if he was in GreenPeace.
Daisy Luther – A frequent contributor to this blog, Daisy is an activist prepper I hold in high regard. Love her style!
Claire Wolfe – Not only great at preparedness stuff, she’s Freedom Outlaw worth your time.
Gaye Levy – Practical prepping advice without all the hype.
Brain Clark is responsible for waking me up to the realization that there really is no box to get outside of. He’s the founder and CEO of Copyblogger Media. While I don’t advertise on my site, I’ve found his copywriting principles have improved my writing – at least in my mind.
You – my Sherpa community
Dirt Road Girl – I saved her for last. She inspires me. Y’all should see her write. Maybe she’ll listen to your request to share stuff on this blog. I’m still trying to convince her to start posting here.
Your turn. Who has influenced your lifestyle of preparedness, self-reliance, and liberty? Please let us know in the comments.
What’s a better solution? Eat your weeds. Caroline Cooper posted this excellent article recently atEatkamloops. Thought you might want to try this recipe.]
“The common dandelion, enemy of well-kept lawns, is an exceptionally nutritious food. Its leaves and root contain substantial levels of vitamins A, C, D, and B complex as well as iron, magnesium, zinc, potassium, manganese, copper, choline, calcium, boron, and silicon.” Dandelion Leaf by Mountain Rose Herbs
Dandelion Green Chips are a wonderful spring snack. If this snack caught on it would improve everyone’s health while reducing lawn herbicide!
Are you looking for a non-toxic dandelion control? Eat your weeds and improve your health at the same time!
This winter I discovered Kale Chips. Kale Chips have become my favorite snack food. I couldn’t seem to get enough. As the winter progressed my husband started complaining about the cost of organic kale.
My husband has since planted kale in the garden and will try to overwinter the plants to satisfy my winter comfort food. While in the garden, I was looking at the tiny kale plants and wondering when I could have my first snack. A bright yellow flower caught my eye and said: “Why not Dandelion Green Chips?” It’s times like this that I realize I am walking through my days only half awake.
6-8c garden dandelion greens, remove stem end
1-3T organic extra virgin olive oil
1/2tsp sea salt, ground
pinch of bird’s eye chili or other hot chili, ground
I got a large bowl and started pulling out leaves. I filled the bowl and returned to the kitchen. I removed the stem ends. I tossed the dandelion greens with some extra-virgin olive oil, sea salt and a very small amount of bird’s eye chili. I thought the chili might counter-act the bitterness of the dandelion greens. I cooked the dandelion greens at 300°F for about 10-15 minutes.
About 50% of the people in the household loved the Dandelion Green Chips and the other 50% found the chips too bitter. Of course, I have been eating kale all winter so the dandelion didn’t taste bitter to me. Give the recipe a try and tell me what you think.
Dirt Road Girl wanted something substantial to cage her tomatoes in our front yard. She hates those flimsy wire cages. Our backyard is full shade. We followed the sun and started food-scaping the font yard. There’s sunshine 8 hours a day out front.
She wanted something functional, sturdy, and of course, homemade. I made rolled wire cages last year from fencing. One problem with these cages was that they blew over during summer storms – even after staking them down in the container. We needed something anchored into the ground.
We had an old wooden ladder by my shop. I suggested we use it as a ‘cage.’
“That’ll work!”
Here’s what she came up with… for me to do!
Todd’s Tomato Ladder is not your typical tomato cage.
Keep in mind that these tomato ladders are going in our front yard. I printed Woody’s plans, gather lumber, and set to building. He calls for using 8 foot 1×3 lumber for the legs. I go to work.
8 foot tomato ladders are 2 feet shy of a regulation basketball goal.
It never occurs to me that erecting two “twin tower” tomato ladders in our front yard might draw neighbor’s ire. We try to fly under the radar as much as possible in our front yard food-scaping. These 8 footers would work in the country or a backyard.
I quickly build two of these bad boys, set them over the containers, and think, “wow, those sure are high.”
Painting your house, Walker?
They lasted about a week after we noticed neighbors walking by with thought bubbles over their heads…
“What are they up to this year!?!”
Back to the drawing board.
I needed to shrink Woody’s plans.
Here’s the plan if you want to build our 6 foot model.
Bill of Material
Use non-pressure treated lumber to keep chemicals from leaching into your plants.
Four 1 x 3 boards 8 feet long
Two 1 x 2 boards 8 feet long
10 1/2 inch piece of 2 x 4 lumber
About 40-50 1 5/8 inch screws (I use star drive decking screws. It’s my personal mission to convert everyone to superior star drive screws)
Four 3 inch decking screws (2 will be used to attach the 2 x 4 to the legs – 2 will be used to attach the base of the legs to ground stakes)
Tools List
Circular Saw – If you’ve got a miter saw, it makes quick work of the cutting chores. But a circular saw will do the job.
Drill/Impact Driver
Hammer (for driving anchor stakes in the ground)
1/8 inch drill bit
Tape measure
Pencil
Skill Level
Beginner
Time Needed
30 minutes per ladder (that’s a generous estimate)
Cut List
1. Cut four 1 x 3’s six-foot long.
2. Cut one piece of 2 x 4 scrap 10 1/2 inches long.
3. Cut the 1 x 2’s for the rungs of the inside legs – working from the bottom of the ladder to the top: 19 1/2 inches, 17 1//4 inches, 15 1/2 inches, 13 3/4 inches, and 12 1/4 inches.
4. Cut the 1 x 2’s for the rungs of the outside legs – working from the bottom to the top: 21 inches, 19 inches, 17 inches, 15 1/4, and 13 3/4.
5. Cut two 1 x 3’s twenty inches long (use the extra two feet cut from the leg pieces). These will be the cross braces on the legs.
Putting it all together
If you don’t want to cut all your material ahead of time, that’s perfectly fine. Pre-cutting will streamline your build and save time.
Step 1: Stack two of the 6 foot 1 x 3 inch legs with the ends flush. Drill a pilot hole through one end of the boards with the 1/8th inch drill bit in the center of the 1 x 3 about 3/4 of an inch from the end of the board. This is where you will insert a 3 inch screw into the piece of the 2 x 4 in a moment. Repeat the process with the two remaining 6 foot 1 x 3 legs.
Step 2: With two of the legs stacked flush, screw a three-inch screw through the pilot hole into the end of the 10 1/2 inch piece 2 x 4 stock. The ends of the 1 x 3’s need to be flush and centered (meaning about 1/4 inch of 2 x 4 exposed on either side of the 1 x 3) on the end of the 2 x 4. Don’t over sink the screws or you’ll spit the wood. Then attach the other two legs to the other end of the 2 x 4. This will serve as the top of the ladder and pivot point for the legs.
Step 3: Go ahead and drill pilot holes in each end of the rungs. Attach the bottom rung (19 1/2 inches) with one 1 5/8 in. screw per side – one foot from the bottom on the inside legs. Continue attaching rungs – longest to shortest – up the ladder with one foot spacing. Now, flip the ladder over and repeat the process for the outside legs starting with the 21 inch rung.
Step 4: With the rungs attached evenly, open the ladder and stand it up. Connect the 20 inch braces to the sides of the ladder. I attached mine at the second rung from the bottom. You can adjust the width of the ladder by moving the braces up for a wider base or down to make the ladder more narrow.
Step 5: Place the tomato ladder over your tomato plant. Drive a pointed wooden stake in the ground beside two legs catty-corner style. Screw the legs into the stakes to anchor them securely.
After the growing season, simply take one screw out of each brace, unscrew the legs from the ground stakes, and fold the tomato ladders up for storage. Or move them into your greenhouse for the winter growing season.
Note: I cut two feet off the top of our original “twin tower” tomato ladders to keep neighborly busy-bodying to a minimum. Here’s the finished product.
Four of Todd’s Tomato Ladders anchored and ready with an old wooden ladder on the far left.
Friends don’t let friends use lame tomato cages! What’s your best method of caging tomatoes?
Here’s a non-related byproduct of building these tomato ladders…
My fly rod and this largemouth bass ended my Saturday on a great note!
P.P.S – If you find value in our blog, Dirt Road Girl and I would appreciate your vote on Top Prepper Sites! You can vote daily by clicking hereor on the image below. Check out all the other value-adding sites while you’re there…