Gardening

River Cane: 25 Self-Reliant Uses for “Cherokee Plastic”

by Todd Walker

Bamboo can quickly takes over yards and even entire fields. Though it has many uses world-wide, non-native woody grasses are not our topic of discussion. Today we’ll cover what some describe as the Cherokee Nation’s equivalent to modern plastic… River Cane.

River Cane- 25 Self-Reliant Uses for -Cherokee Plastic- - TheSurvivalSherpa.com

River cane (grass family, Poaceae) is the only native bamboo in the eastern woodlands. Three have been identified: River cane (Arundinaria gigantea), Switch cane (Arundinaria tecta), and a newly discovered (2007) native bamboo called Hill cane (Arundinaria appalachiana). Source

Historical accounts of vast canebrakes stretching for miles along river floodplains were noted by early explorers of the New World. William Bartram, America’s first professional botanist, described clums of river cane “as thick as a mans arm.” John Lawson (1674-1711) recorded that one culm (hollow stem) of river cane could hold “about of pint of liquor.” Cheers!

Without delving into the botanical differences, which would require more space than this article allows, the historical use of cane is well documented as a rich resource for self-reliance. It’s uses are not lost on modern primitive practitioners and experimental archeologists.

Below are three books on primitive skills and technology which have helped me on my journey of experimental archeology and the practice of primitive skills…

I never had the pleasure of personally meeting and learning from Steve Watts but he treated me like a good friend through our online communications. His recent untimely passing spurred me to re-read his book, Practicing Primitive: A Handbook of Aboriginal Skills.

I’m fortunate to have Scott Jones, a student and colleague of Mr. Watts, less than an hour from my Georgia home. I’ve had the pleasure of attending several of his Workshops at the Woods. I have both of his books, A View to the Past, and his most recent work, Postcards to the Past: Context and Continuity in Primitive Technology, gifted to me by my good friend, Kevin Bowen.

My pursuit of primitive technology and skills is largely due to these two authors. Outside the modest cane fishing pole, most of the cane projects within this article come from Watts and Jones.

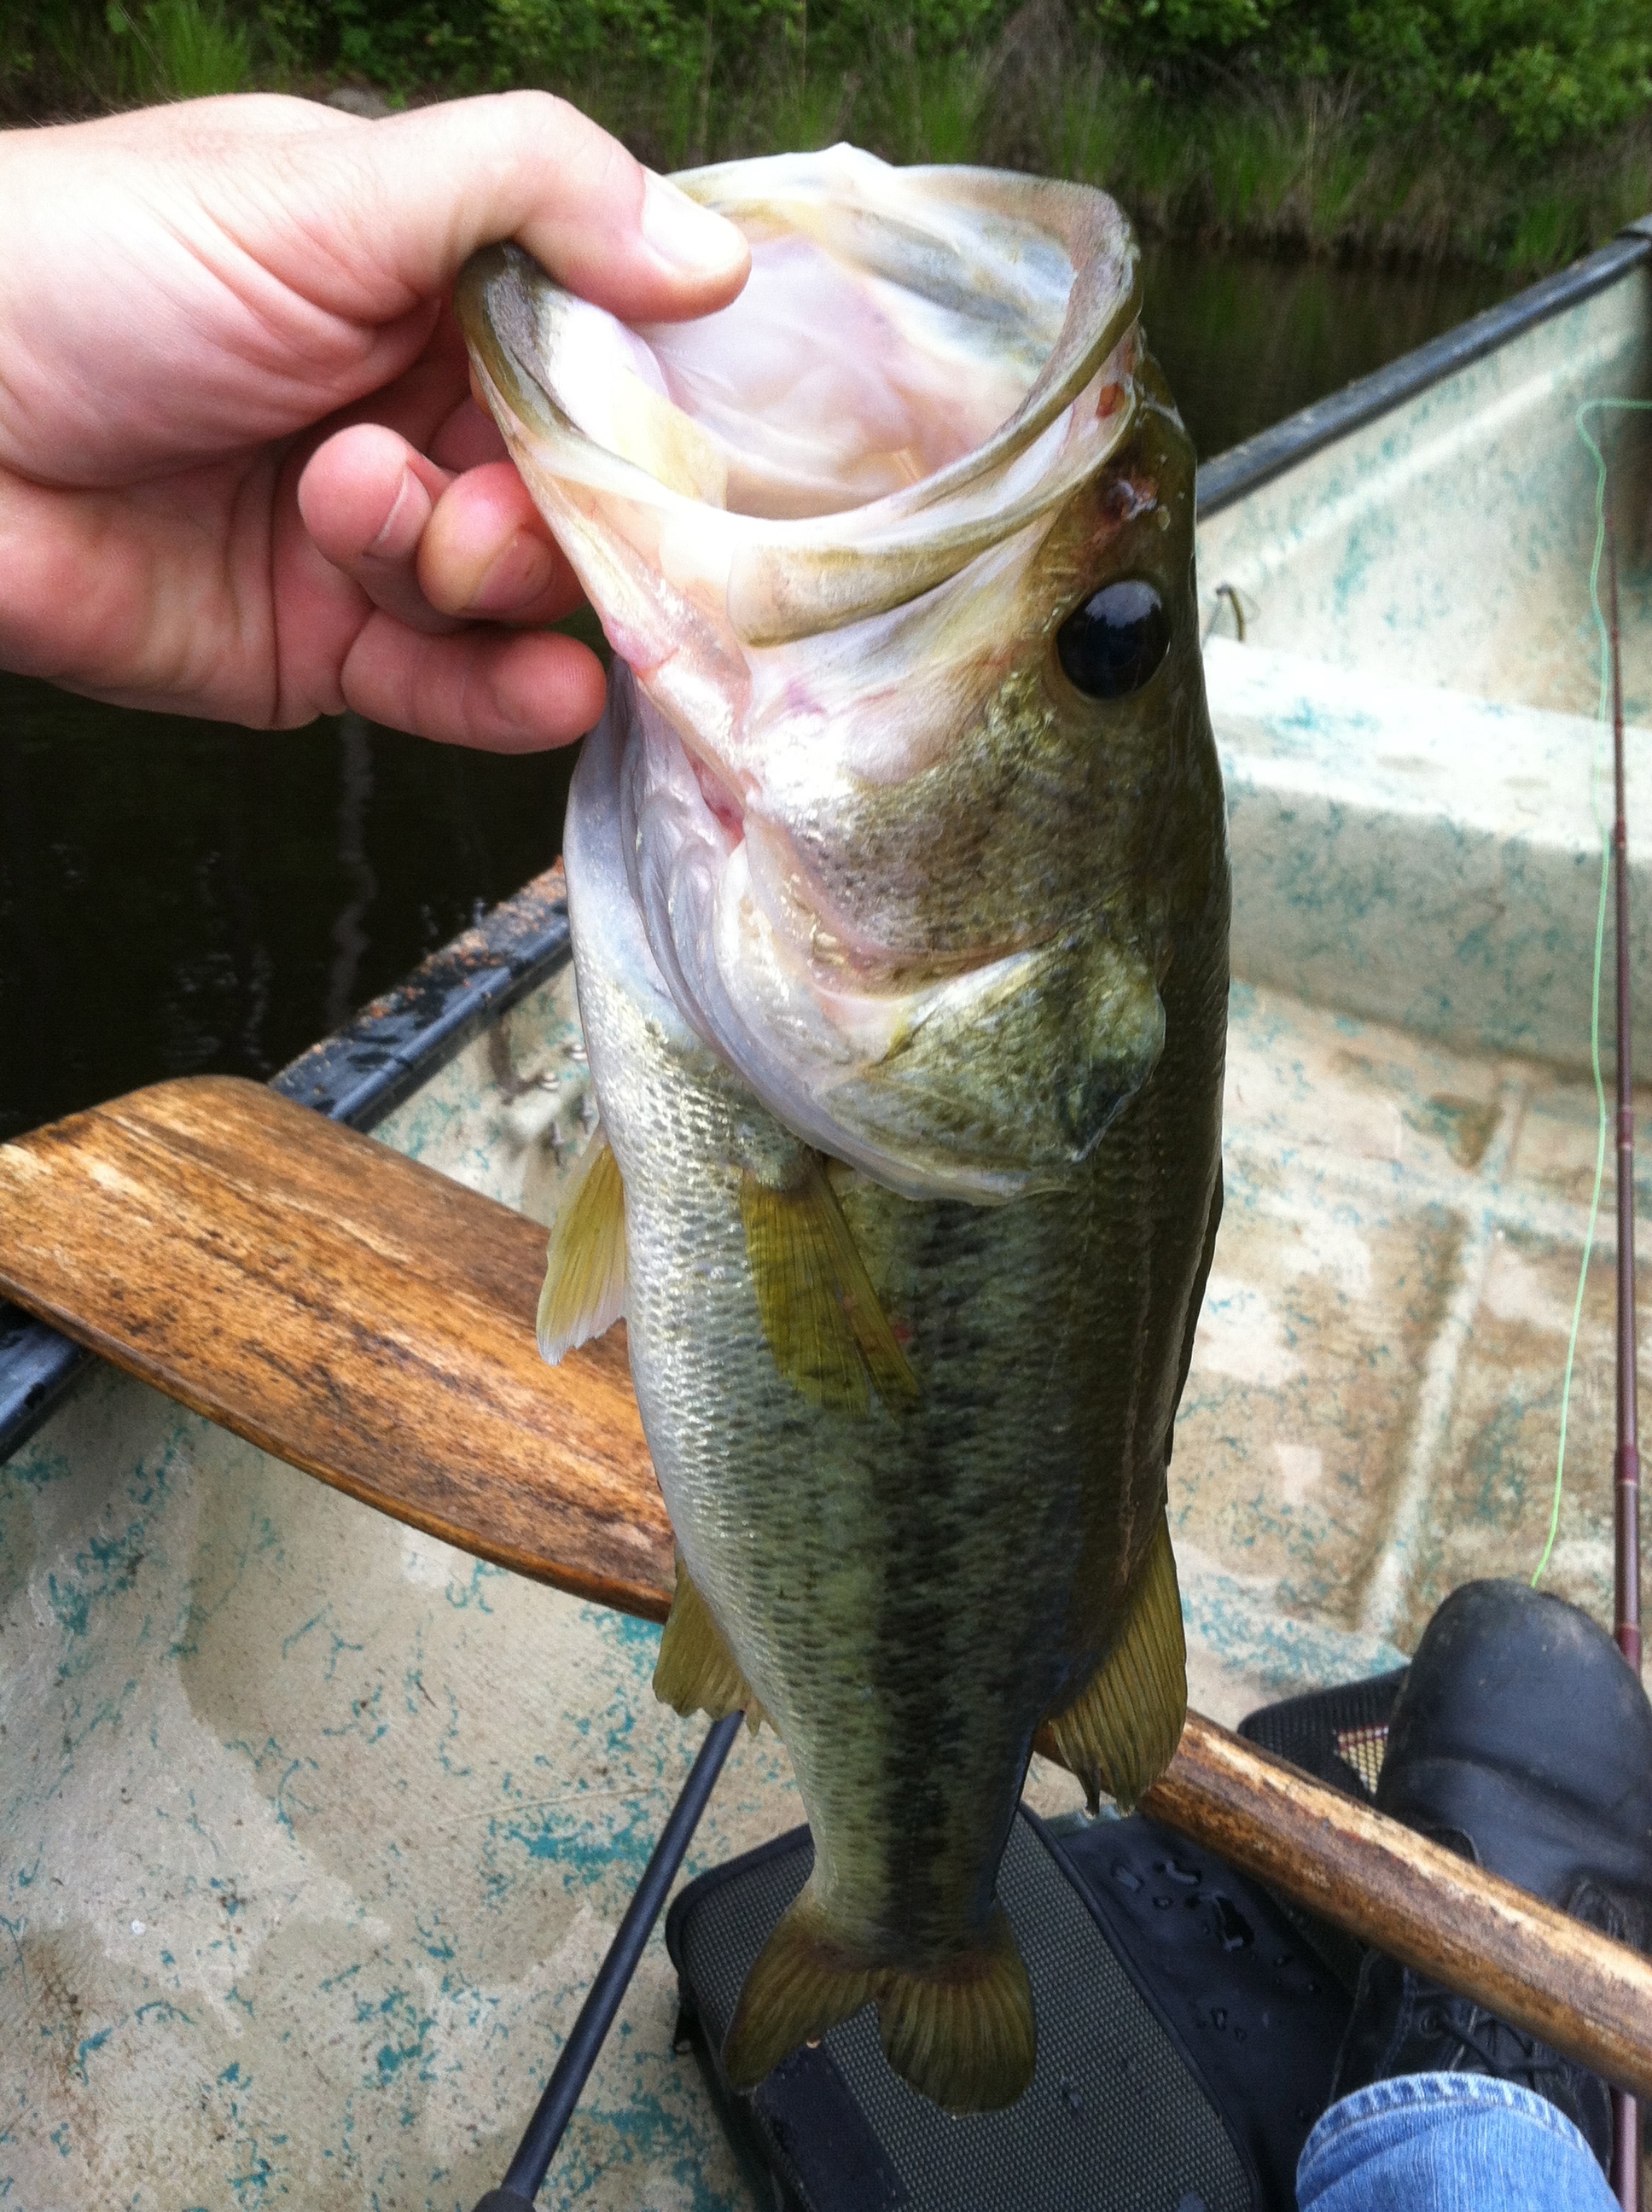
Though my cane craft is limited, every Georgia country boy I know is intimately familiar with catching blue gill from ponds and creek banks with a homemade cane pole. The use of river cane extends far beyond boys fishing and raising cane on hot summer days. Below I’ve listed 25 traditional uses for this amazing plant.

25 Uses for River Cane in Self-Reliance

Hunting

  • Arrow Shafts ~ A preferred material for Southeastern Native American tribes.
  • Atlatl and Darts ~ Cane was used to make darts for these spear throwing tool. Jones describes in Postcards from the Past (pg. 193) and has made spear-throwers entirely from cane.
  • Knife ~ Some tribes made fire-hardened knives from cane capable of skinning game. I have a deep cut on my knuckle which is finally healing from a brush with sharp river cane.
  • Blow Gun ~ Nodes (joints) were removed to form a long, hollow tube of cane to blow darts from. These were effective in hunting small game animals and birds.

Fishing

  • Fish Trap ~ The Cherokee used a funnel style trap at an opening of rock dams and weirs in steams to catch fish.
River Cane- 25 Self-Reliant Uses for -Cherokee Plastic- - TheSurvivalSherpa.com

Cane fish trap in progress

  • Split Cane Gig ~ Easy to carve and fire-harden harpoon style gigs for fish or other aquatic species.
  • Floats ~ A small clum between both nodes can be used for a line float on a cane pole.
  • Jug Fishing ~ Bundle several lengths of cane together with a line and hook attached for passive jug fishing.

Containers

  • Baskets ~ Cane was split into splints and woven into baskets for food gathering and storage, clothing storage, ceremonial uses, and day-to-day containers. Natural pigment were used to dye and decorate.
  • Mats ~ Woven mats were used for covering walls, floors, bedding, burial, and seating.
  • Cane Vial ~ The hollow portion of a clum makes a great container for storing liquid, salt, pepper, medicine, needles, etc.
River Cane- 25 Self-Reliant Uses for -Cherokee Plastic- - TheSurvivalSherpa.com

A vial for my repair kit

  • Sheaths ~ I traded with James Gibson (Knob Creek Forge) for this handy antler-handled awl with a river cane sheath.
River Cane- 25 Self-Reliant Uses for -Cherokee Plastic- - TheSurvivalSherpa.com

A simple but effective sheath

Wildlife

Canebrakes are an ecosystem unto themselves.

River Cane- 25 Self-Reliant Uses for -Cherokee Plastic- - TheSurvivalSherpa.com

A small canebrake

  • At least 23 mammal species, 16 bird species, four reptile species and seven invertebrates that occur within canebrakes (Platt et al. 2001). Source
  • Swainson’s warbler builds it’s nests in dense canebrakes.
  • Canebrake Rattlesnake (endangered) live and hunt in canebrakes.
  • Whitetail deer eat young shoots in the spring.

Farming

  • Food ~ Attractive to many grazing bovine, young cane was the highest yielding native pasture in the Southeast. Indians managed large canebrakes by controlled burning every 7 to 10 years. For humans, boil and eat young shoots in early spring and summer.
  • Riparian Buffer ~ Canebrakes improve water quality by filtering ground water nitrates/phosphates, trapping sediment, and stabilizing erosion.
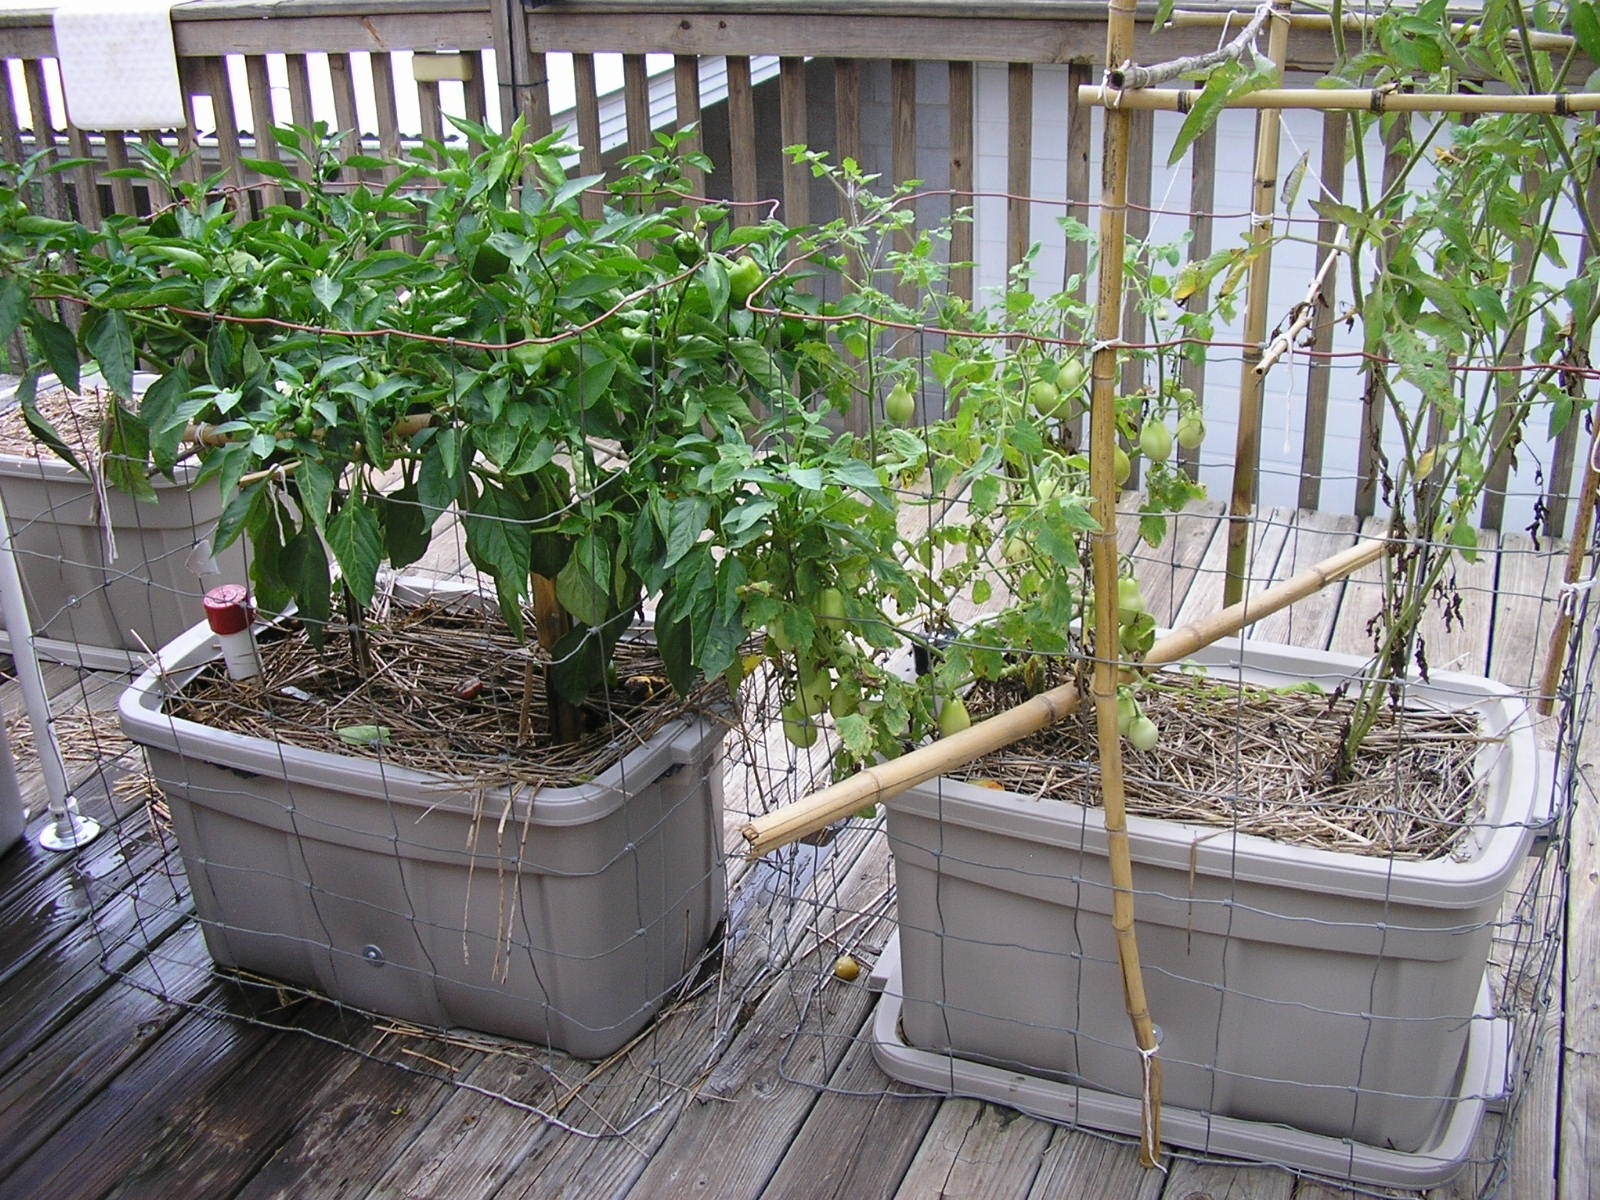
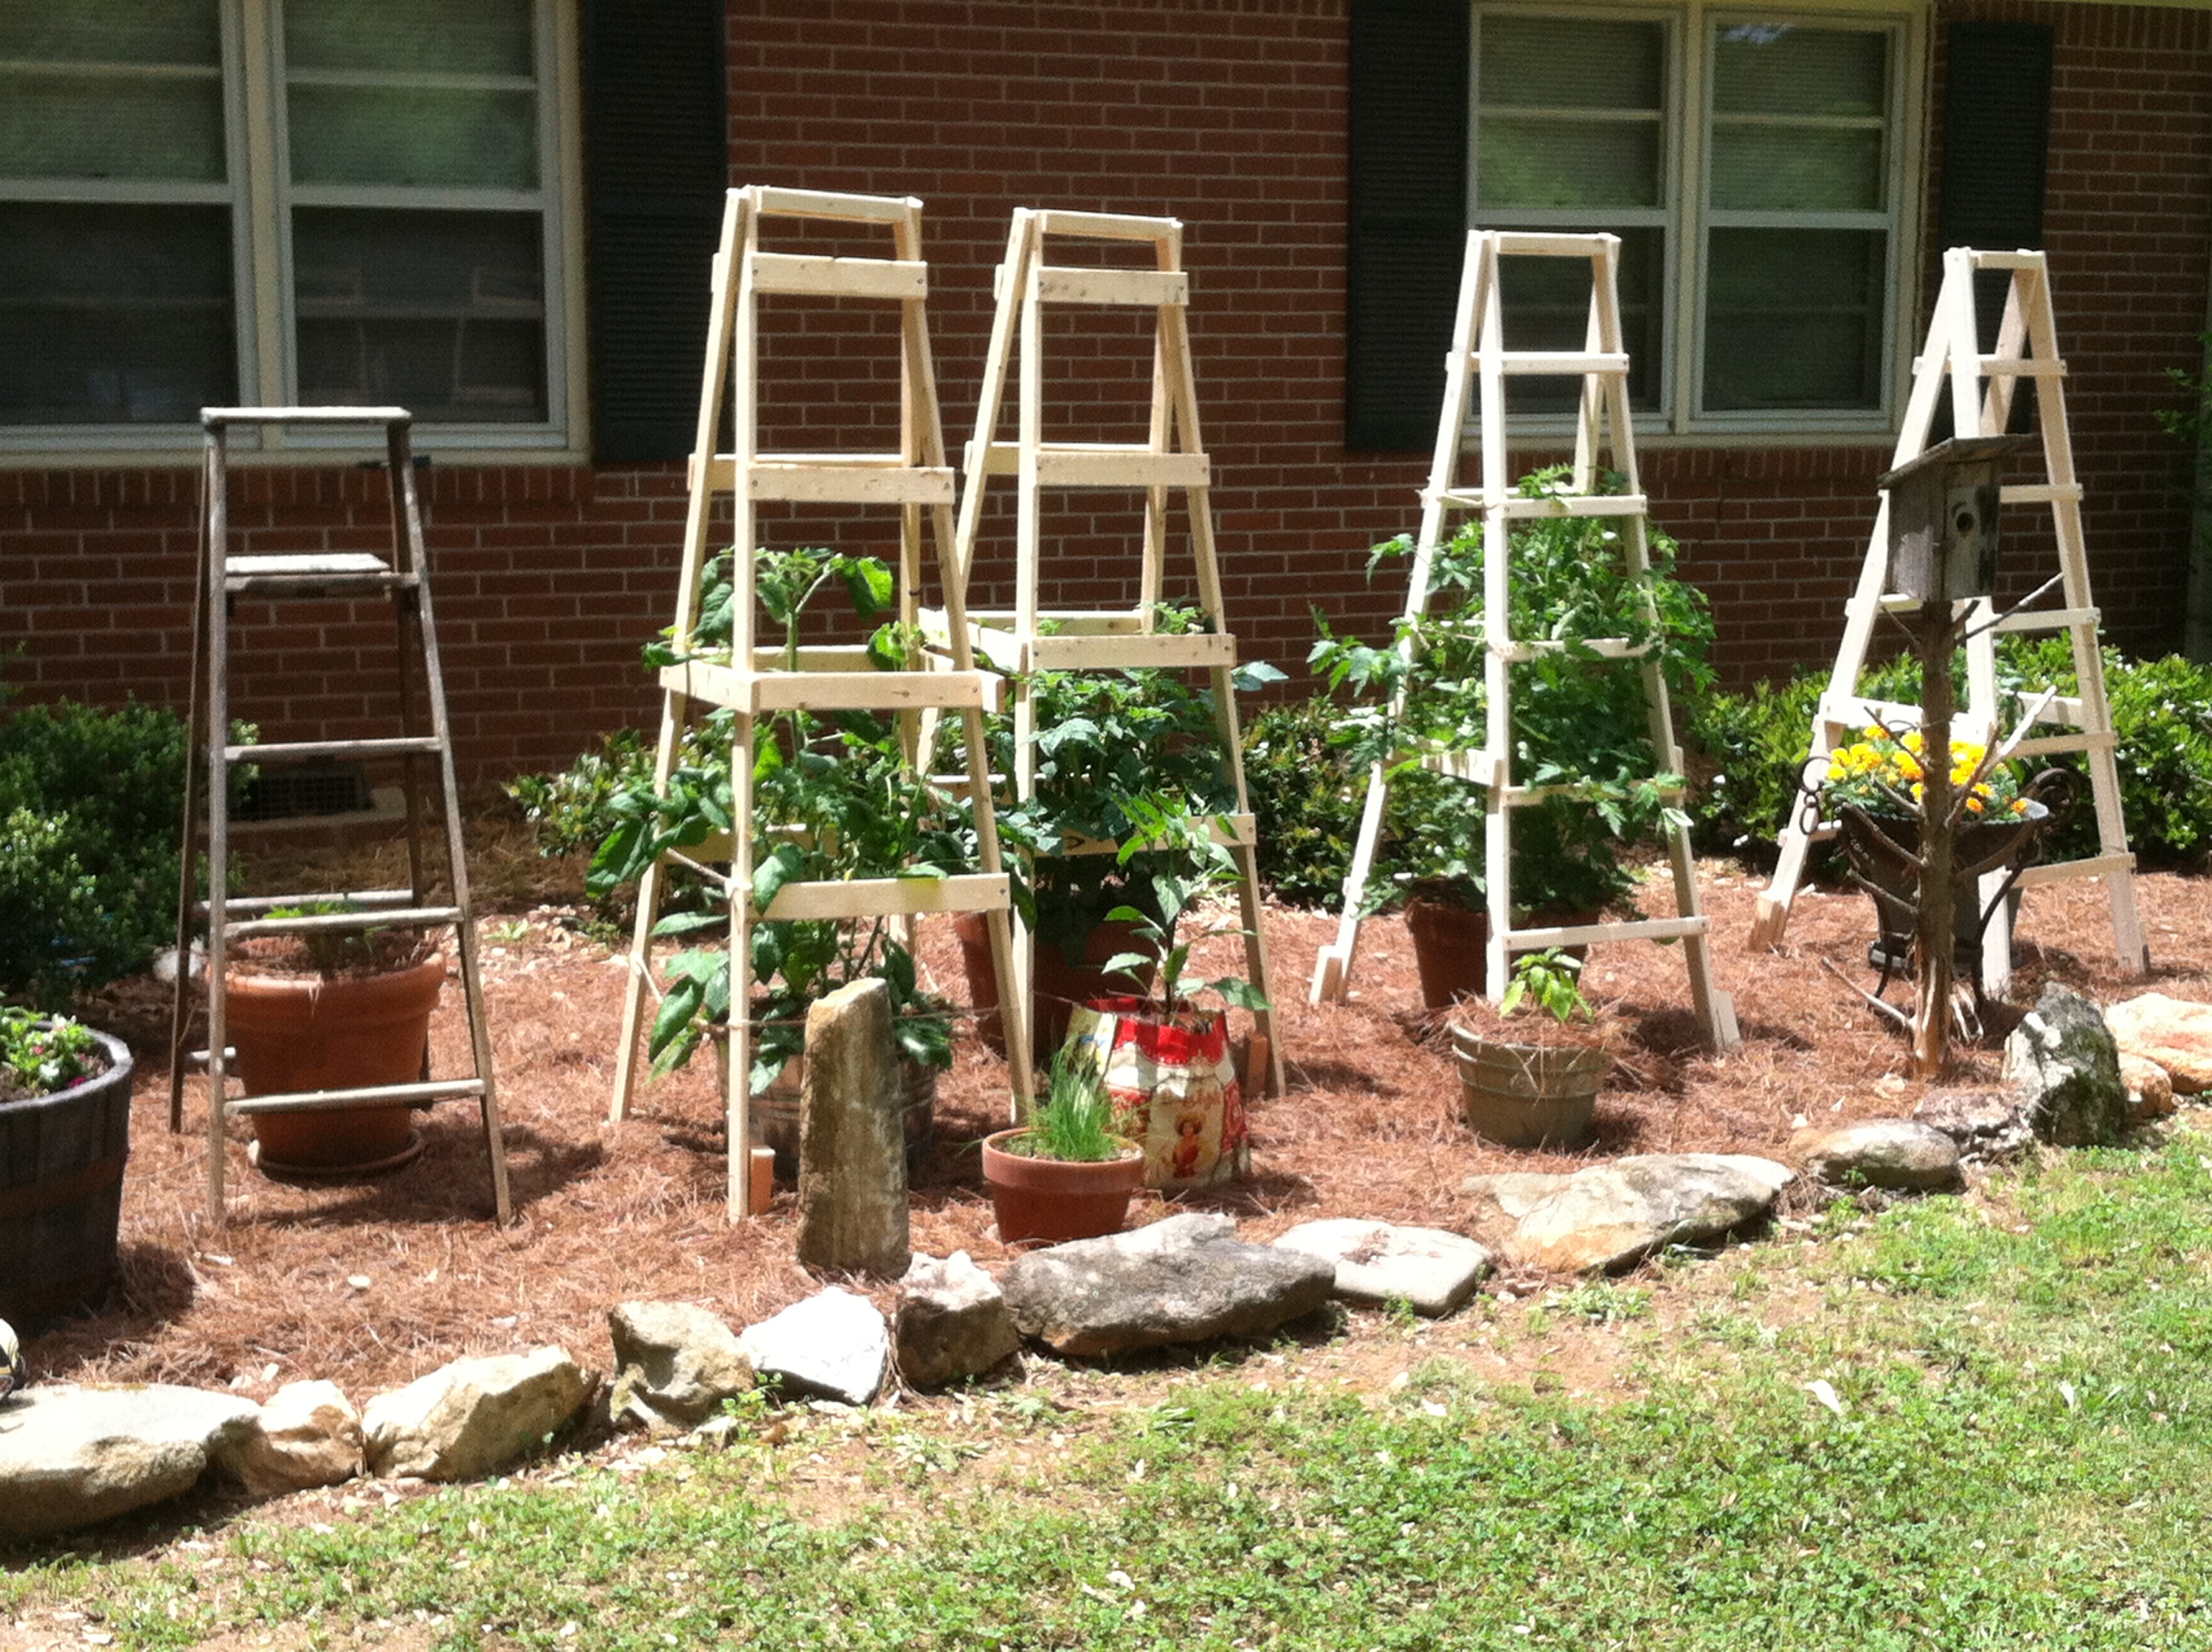
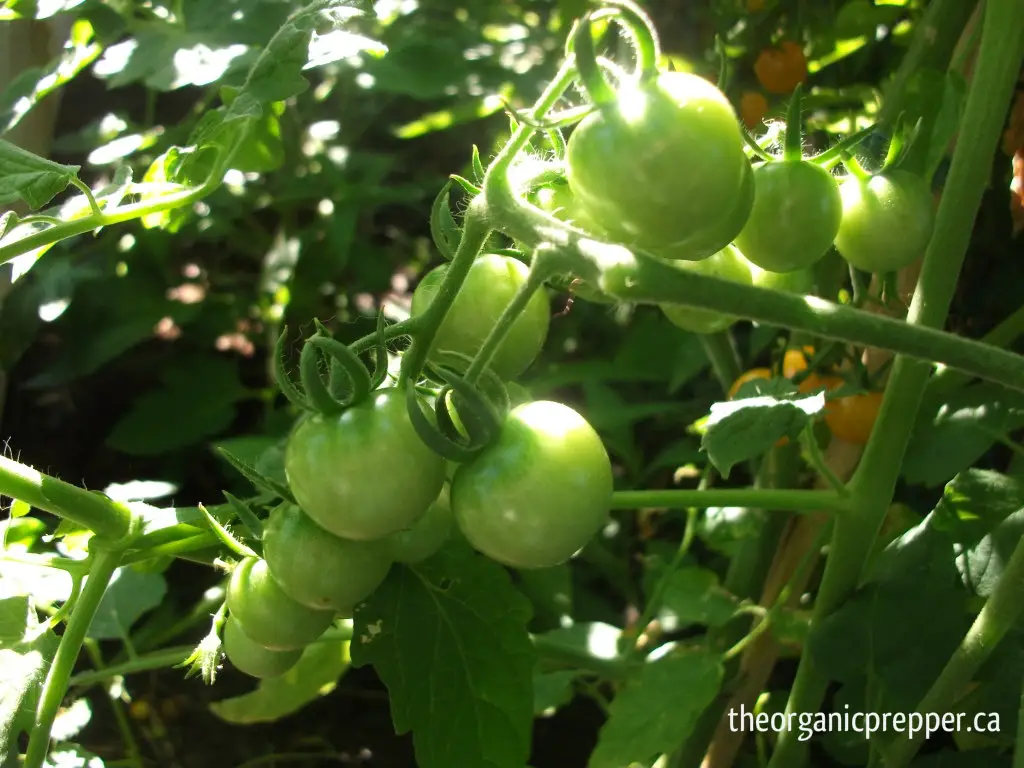
  • Tomato Stakes ~ If river cane isn’t abundant in your area, use bamboo instead.
River Cane- 25 Self-Reliant Uses for -Cherokee Plastic- - TheSurvivalSherpa.com

Bamboo or cane is a great garden companion

Construction

  • Shelter ~ Cane and other flexible saplings were used in wattle-and-daub walled houses.
River Cane- 25 Self-Reliant Uses for -Cherokee Plastic- - TheSurvivalSherpa.com

The crew from Georgia Bushcraft constructing a shelter from river cane’s cousin (bamboo).

  • Watercraft ~ Bundles of hollow river cane lashed together to form pontoons.
  • Pipes ~ Stem for smoke pipes.
  • Blow Tube ~ Perfect for making burn and scrap containers and spoons.
River Cane- 25 Self-Reliant Uses for -Cherokee Plastic- - TheSurvivalSherpa.com

A burn and scrap spoon made while camping with Bill Reese (Instinct Survivalist)

  • Furniture ~ Chairs, beds, tables, etc.

Crafts

River Cane- 25 Self-Reliant Uses for -Cherokee Plastic- - TheSurvivalSherpa.com

Two excellent resources: A river cane handle on a tulip poplar bark berry basket.

  • Paint Brush ~ A short, hollow portion of river cane will accept animal hair or plant fibers to form a brush.
  • Jewelry ~ Necklaces, bracelets, and pendants can be made from cane.
  • Burnishing Tool ~ Used to burnish leather edges or other craft items.

Music

  • Flute ~ A famous poet from Georgia, Sidney Lanier, was also a flutist. It is said that he made his first flute from river cane collected on the Ocmulgee River in central Georgia.
  • Whistle ~ Hank at Sensible Survival shows you how to make a simple survival whistle.

We are fortunate to have such a rich native resource growing in our Southeastern woodlands. Efforts are being made to reestablish river cane on land once covered with native bamboo. Keep stewardship in mind when harvesting from canebrakes. Select only what you need without over-harvesting. Non-native bamboo can be substituted for many of these projects mentioned.

In what ways have you used cane for self-reliance?

Keep Doing the Stuff of Self-Reliance,

Todd

P.S. – You can also keep up with the Stuff we’re Doing on TwitterPinterestGoogle +, YouTube, Instagram, and Facebook… and over at the Doing the Stuff Network.

P.P.S – If you find value in our blog, Dirt Road Girl and I would appreciate your vote on Top Prepper Sites! You can vote daily by clicking here or on the image below. Check out all the other value-adding sites while you’re there… 

Thanks for Sharing the Stuff!

Copyright: Content on this site (unless the work of a third-party) may be shared freely in digital form, in part or whole, for non-commercial use with a link back to this site crediting the author. All links in articles must remain intact as originally posted in order to be republished. If you are interested a third-party article, please contact the author directly for republishing information.

Categories: Bushcraft, DIY Preparedness Projects, Doing the Stuff, Gardening, Homesteading, Lost Skills, Preparedness, Primal Skills, Self-reliance, Survival Skills | Tags: , , , , , , | 8 Comments

DTS Network Update: Dave’s Hugelkultur Bed Experiment

by Todd Walker

The cornerstone of our Doing the Stuff Network is trading theory for ACTION! 

DTS Network Project: A Hugelkultur Bed Experiment

As you may recall, we challenged each of you to learn at least one new skill in 4014 that builds self-reliance. Just pick a skill you’ve always wanted to learn or improve, set a time frame for completion, and share your progress with our community.

With his permission, we are spot lighting Dave DeWitt, a fellow DTS Networker, who has built an amazing hugelcultur raised bed this year. For those who may be unfamiliar with the term, hugelcultur is an old form of raised bed gardening that requires no tilling and little to no irrigation. This style of growing food has been used for years and is very popular with permiculture practitioners.

Hugelcultur beds have many benefits:

  • Grow food in inhospitable climates (drought) and terrain (rocky and hard clay)
  • Self watering – decaying wood acts like a sponge to hold and release moisture plants need
  • Decomposing wood releases heat to extend growing season in cold climates
  • Decaying wood prevents nutrients from being washed away into ground water
  • Air pockets are created in the raised bed to keep soil from becoming compacted
  • Creates a microbe rich environment for mycelium
  • Releases nitrogen which plants love
  • Makes good use of fallen trees and branches from storms that don’t make it into your supply of firewood
  • Works in deserts and backyards

Dave planted three typical raised beds last year and was inspired by his friend at Schooner Farms (Facebook page) to give hugelcultur a try. He converted one of his raised beds to a hugelcultur bed this year.

Here’s his photo tutorial of the stuff he’s doing…

One DTS Networker's Hugelkultur Bed ExperimentOne DTS Networker's Hugelkultur Bed Experiment

Removing one traditional raised bed

DTS Network Update: Dave's Hugelkultur Bed Experiment

Adding wood to the bed

DTS Network Update: Dave's Hugelkultur Bed Experiment

Wood chips topping the logs

DTS Network Update: Dave's Hugelkultur Bed Experiment

More organic material added… wet leaves from last fall

DTS Network Update: Dave's Hugelkultur Bed Experiment

Moldy straw left out over the winter was added next

DTS Network Update: Dave's Hugelkultur Bed Experiment

Cinder blocks and sticks were added to help maintain form – then another layer of old straw

DTS Network Update: Dave's Hugelkultur Bed Experiment

He added a few inches of 2-3 year old horse manure next

DTS Network Update: Dave's Hugelkultur Bed Experiment

Essential minerals, granite dust, calcium (saved our egg shells, dried in oven and ran through a coffee grinder), etc

DTS Network Update: Dave's Hugelkultur Bed Experiment

More decomposing wood chips added

DTS Network Update: Dave's Hugelkultur Bed Experiment

The final layer – 3 inches of top soil from the previous raised bed

The dimensions of Dave’s hugelcultur bed are 8′ x 24′ with a 34″ block wall. He wouldn’t recommend making beds this tall. He stands 6′-2″ and can barely reach the middle of the bed. Plan accordingly. Also, the cinder blocks were filled with top soil and compost for added growing space. This addition grows his garden from to just under 200 square feet of garden space.

With all the materials on hand, this could be a weekend project. Dave has about 14 hours in this project. Seems like a lot of work, but the upfront investment will pay off with less maintenance and time in the growing season in Ohio.

Nothing inspires like seeing people busy Doing the Stuff! This network of everyday people are not just talking theory, they are testing and experimenting with stuff in the many categories of self-reliance and self-sufficiency skills.

Your turn

If you’ve ever used hugelcultur beds, successfully or not, we’d like your feedback. Leave your thoughts in the comment section – or join the discussion on the Doing the Stuff Network and keep with all the updates from our members!

We want to thank Dave for his value-adding tutorial and inspiration!

Keep Doing the Stuff, friends!

Todd

P.S. – You can also keep up with the Stuff we’re Doing on TwitterPinterestGoogle +, and our Facebook page… and over on the Doing the Stuff Network on PinterestGoogle +, and Facebook.

P.P.S – If you find value in our blog, Dirt Road Girl and I would appreciate your vote on the Top Prepper Sites! You can vote daily by clicking here or on the image below. Check out all the other value-adding Prepper sites while you’re there…

Thanks for sharing the stuff!

Copyright Information: Content on this site (unless the work of a third-party) may be shared freely in digital form, in part or whole, for non-commercial use with a link back to this site crediting the author. All links in articles must remain intact as originally posted in order to be republished. If you are interested a rare third-party article, please contact the author directly for republishing information.


Categories: DIY Preparedness Projects, Doing the Stuff, Gardening, Homesteading | Tags: , , , | 4 Comments

Not Your Typical Recipe Book: Recipes and Tips for Sustainable Living

by Todd Walker

What I’m about to share is ‘Dirt Road Girl’ approved!

When Stacy Harris sent me her new book to review, Recipes and Tips for Sustainable Living, before I could get my hands on it, DRG snagged it and wouldn’t put it down. She immediately performed her sniff test ritual. She opened the book, plants her face between the pages, and inhales deeply. Congrats Stacy! Your book passed DRG’s sniff test with flying colors!

Image

Our first impressions of Stacy’s new book were high quality, glossy pages with excellent photos of food, recipes, family, and sustainable practices for self-sufficient living. It’s good that the pages are high gloss since I began drooling by just looking at the food photos and recipes.

Stacy’s passion for growing heirloom plants and animals that are natural, pesticide, hormone, genetically modified free is clear. And she’s able to cook for a family of 9 from her heirloom garden, pastured animals, and wild game. Very inspiring!

The tips for sustainable living are mixed in throughout the book. One of my favorites is on page 88 – The Perfect Boiled Egg.

“To determine the age of eggs, place eggs in about five inches of water. If the egg lays flat on the bottom it is very fresh and is good for baking and poaching; it the egg tilts on the bottom it is about 10 days old and is great for boiling; if it floats throw it out.”

There’s also tips on foraging wild foods, beekeeping, seed saving, and other self-reliant skills. The tips aren’t going to teach you everything you need to know about sustainable living, but they will motivate you on your journey.

Being an avid hunter and fisherman myself, I loved the ‘Woods and Water’ section of Stacy’s book! I’m always happy to try new recipes for venison, wild turkey, duck, quail, small game, and seafood and fish. Even if you don’t harvest wild fish and game, she provides a substitution page to incorporate domesticated animals for recipes to please everyone.

Not Your Typical Recipe Book: Recipes and Tips for Sustainable Living

10 slices of bacon on Stuffed Venison Meatloaf – perfect!

A note to my Primal/Paleo readers – a few of the baking recipes call for sugar and flour. You can easily substitute for these if you wish and still enjoy the goodness of these traditional home cooked recipes.

Reading Stacy’s story and new cookbook will inspire you to take your next step towards personal freedom and sustainable living. All while eating the best prepared foods on the planet!

You can also connect with Stacy on her blog, Game and Garden, Facebook, Twitter, and YouTube channel. Enjoy!

Special Announcement: Congratulations to Stephanie G. on winning an autographed copy of Recipes and Tips for Sustainable Living from our Reader Appreciation Fall Giveaway! We appreciate everyone’s continued support of our blog as we continue Doing the Stuff of self-sufficiency and preparedness together!

Keep doing the stuff!

Todd

P.S. ~ Thanks for sharing the stuff! You can connect with us on TwitterPinterest, and our new Facebook page

Copyright Information: Content on this site (unless the work of a third-party) may be shared freely in digital form, in part or whole, with a link back to this site crediting the author. If you are interested a third-party article, please contact the author directly for republishing information.


Categories: Gardening, Homesteading, Preparedness, Real Food, Resilience, Self-reliance, Wildcrafting | Tags: , , , | 6 Comments

Deer Proofing Your Garden Now and Post-SHTF

by Todd Walker

After the Reset, what’s your plan to keep deer from munching on all your food?

It only takes one cute Bambi to destroy what you had planned to feed your family in the winter.

Dirt Road Girl and I returned from a two-day getaway to find mostly stubs in our raised bed garden. What used to be peppers and okra looked like oversized match sticks pressed into the soil. We aren’t dependent on our garden to get us through to the next growing season – yet. We can ‘always’ run to the store to replace what the deer feasted on.

Our matchstick garden.

Our matchstick okra plant.

We still have other food options now.

After an event (collapse), running to the local supermarket won’t be an option to replace what was growing on those match sticks. YOYO – Your Own Your Own.

Let’s forget about having to deal with hungry zombie hoards for now. Zombies don’t eat from gardens, do they? Learning to repel destructive deer is purpose of this article.

An old-timer down the street told me to put up an electric fence with a single strand of wire 27 inches high (solar-powered fences are available). Our electric fence worked last year for our front yard garden. I got lax and didn’t put it back up this year. Now I’m raising match sticks that won’t light a fire! The fence is up now to salvage what’s left.

I know deer can jump higher than 27 inches. Heck, I can jump that high! For some reason, deer don’t, or didn’t last year, breach the fence. Maybe one or two got zapped in the chest and passed the word to go to lower hanging fruit – like my neighbor’s hosta beds. But word spread that the Walker’s have a free smorgasbord this year.

Tough lesson. But not devastating – in these ‘good’ times.

Another tip from guy at our local farmer’s market was to put up a baling twine fence. The orange twine used to bail pine straw worked for him. He strung three or four strands on electrical conduit poles with the top strand about 7 feet high.

The key to success of his deer fence is the top stand. He bent the conduit at the 5 foot mark to angle slightly away from the interior  of his garden. It resembles a chain link fence with barbed wire on top at a 30 degree angle. He’s been using this set up on his 1/4 acre garden for years and said it keeps the deer out. Not very expensive, either.

We don’t have larger big game animals like moose and elk to deal with in Georgia. And the above described fence won’t keep smaller critters out. But it may be an inexpensive way to keep the deer from feasting on your plants.

Keep in mind, any determined deer that’s left after a collapse will find a way to eat easy pickings in your garden.

Here are a few other deer deterrents you might want to consider in your plan. There are different categories: scents and plants, gadgets, dogs, and physical barriers. Unless you can afford an 8 foot deer fence, you may want to employ a combination of these strategies described below.

Scents and Plants

Many commercial scents are available. Then there are recipes for homemade scents that supposedly deter deer. I wouldn’t count on scents to deter determined deer. Now is the time to test them. Anyone ever tried rotten egg spray? Here’s a link to the recipe which I found and included below:

  • Rotten Egg Spray Recipe In a blender mix eggs and garlic. Add water and blend. Remove to a container with a lid and let sit outside for several days in the sun. Strain mixture with cheesecloth or coffee filter into a spray bottle and enjoy. (Don’t skip the straining part or your mixture will clog in the sprayer)
    6 -8 eggs
    6 gloves garlic (add more if you like)
    5 cups water
    2 squirts Elmer’s Glue
    2 squirts dish detergent (to help it stick on plants)

Commercial scents can be purchased that contain urine from predators that eat deer (coyote and wolf). Even scenting your garden perimeter with your own pee is an option. Gotta use stealth for exposed front yard gardens like mine. *kidding*

Seriously, collect your pee in private and apply. The drawback for our neighborhood, and possibly yours, is that the members of our deer herd are like neighborhood pets and some folks actually feed them for entertainment purposes – encouraging them to keep coming back for more.

There may come a time when you’ll want to feed (bait) deer to get a close, easy shot. But while rule of law exists, don’t feed the critters!

Other offensive, smelly stuff include: garlic, cat feces, bags of human hair, sewage sludge, and fermented blood. This stuff will even keep zombies and vampires away, so I’m told.

Plants: Raising plants that deer don’t like is another strategy. Again, I’ve seen hungry deer eat stuff that was not on their typical diet. Just like human animals, we’ll eat most anything when we’re hungry enough.

Plants should not be your only line of deer defense. They may help, but are not foolproof. If you go the plant route, cultivate plants with strong smells. Mint, sage, chives, lemon balm, purple cone flower, and bee balm are a few to consider.

Gadgets

My neighbor uses a motion activated sprinkler to keep his flowers and plants intact. They cost about 50 bucks and seem to work. He’s protecting hostas and flowers while the high-pressure water and electricity is still on.

For a grid-down situation, and just for the fun of it, here’s a rat trap rigged with fishing line that, when tripped, strike a percussion cap and alerts you of four-legged intruders. The warning shot could also alert unwanted two-legged animals.

Noise-makers with flashing lights can be purchased or made. Or you can build DiY gadgets. In urban/suburban settings, loud bangs and noises will only get you noticed by angry neighbors at 2:33 in the morning. Some people like to sleep.

Aluminum pie tins attached to string on the perimeter of your garden is another option. This strategy is best employed in rural setting. Here’s a thought. Build a solar-powered, mechanical scarecrow robot with motion detectors 😀 – Yea, that’ll work.

Dogs

Working dogs like the Great Pyrenees are great guardians of the garden, home, and homestead. A dog inside a fenced area will help deter deer and other pesky varmints. Dogs don’t have to be huge and ferocious to be effective on a homestead. Small yappers get the job done for alerting you to garden intruders.

abby

Abby has super hero powers. Her cheerleading shirt is to keep her from licking stitches in her shoulder. She usually wears a Wonder Dog cape.  

Combining any of these ploys to protect your survival garden will increase your chances of not becoming a matchstick farmer.

If I had to pick my best option for pre and post-SHTF deer deterrent, I’d choose…

A fence and a dog.

What has worked for you? Drop your ideas in the comment section to help us out!

Keep doing the stuff,

Todd

P.S.

Be a SmartPrepper and follow us here on our blog, TwitterPinterest, and ‘like’, comment, and share our Facebook page.

P.P.S.

Any information on this site may be shared freely, in part or whole, with a link back to this site crediting the author. Thanks for sharing the stuff!


Categories: Gardening, Preparedness, Self-reliance, SHTF, Survival | Tags: , , , , , | 2 Comments

Ollas: Ancient Low Tech and Low Cost Sub-Surface Irrigation System

by Todd Walker

I woke up with an Olla (pronounced “oy-yah”) in my inbox from John Robb of Resilient Communities.

What’s an Olla?

03-09-2009ollathumbs.jpg

Photo credit: Apartment Therapy

It’s a simple unglazed clay pot that is buried in the ground near plants with the neck of the pot above ground. They typically have a wide, bulb-like base with a narrow neck. The porous walls of the olla allow water to wick to the plants root zone.

I’ve looked at the 2 liter plastic soda bottles buried next to plants for irrigation. The problem with those are that there’s no way to regulate the flow of water to plants.

Ollas are different. They seep water when the plants and surrounding dirt need it. They acts as a moisture equalizer. The unglazed clay pots dispense water only when needed. Basic physics here.

After last year’s drought, we ramped up our rainwater collection system (just added two more in a tower) in our backyard pictured below, I’m thinking ollas would help conserve even more water in our garden.

Stacked rain barrel collection system

Two 55 gallon barrels stacked to give us more water and water pressure.

Here’s some benefits of using a ollas I’ve discovered and wanted to share with you.

  • They water the roots instead of the surface of your garden or raised bed preventing soil compaction
  • The dry surface of your garden deters weed growth
  • Run off and evaporation are eliminated giving 100% application efficiency
  • The clay pots only need to be filled 1 or 2 times per week depending on climate
  • Reduces water usage by 50 to 70% making your collected rain water last even longer
  • Cuts the amount of time needed for watering with conventional methods
  • Adding fertilizer to the olla will feed the plants as it waters

One company, Dripping Springs Ollas, was started in 2011 and makes and distributes ollas. Click here to find a Dripping Springs Ollas vendor near you. Their ollas sell for around $32 each. If you don’t want to invest the money for a commercially made olla, you can always go the DiY route.

DiY Ollas

Check out these links for tutorials on making your own ollas:

If you’ve ever used ollas, we’d like to hear your experience. Drop us a note in the comments or email us at survivalsherpa (at) gmail (dot) com.

Keep Doing the Stuff,

Todd

P.S. – You can also keep up with the Stuff we’re Doing on TwitterPinterestGoogle +, and our Facebook page… and over at the Doing the Stuff Network on PinterestGoogle +, and Facebook.

P.P.S – If you find value in our blog, Dirt Road Girl and I would appreciate your vote on Top Prepper Sites! You can vote daily by clicking here or on the image below. Check out all the other value-adding sites while you’re there…

Thanks for Sharing the Stuff!

Copyright: Content on this site (unless the work of a third-party) may be shared freely in digital form, in part or whole, for non-commercial use with a link back to this site crediting the author. All links in articles must remain intact as originally posted in order to be republished. If you are interested a third-party article, please contact the author directly for republishing information.

Categories: DIY Preparedness Projects, Gardening, Homesteading, Resilience | Tags: , , , , | 8 Comments

The Dirt on Moving Raised Beds to Full Sun

by Todd Walker

Last year we saw very little production from our backyard garden that only gets 3 to 4 hours of sun in the sunniest spot. I actually thought of making a raised bed on wheels. I’d call it The Sun Chaser. In my mind, it would resemble a covered wagon with hoops for winter gardening. Any of y’all have crazy ideas like this?

We decided to follow the sun to our front yard – without The Sun Chaser – for now.

Moose ready to help with the move

Moose is digging this project.

Here’s the challenge. Move the raised bed (pictured above) to the front yard.

This 4 x 8 foot raised bed was built from lumber from an old playscape I disassembled. I covered the pressure treated wood with black plastic to prevent chemicals from seeping into the soil. Two years ago we followed Mel’s soil mix from Square Foot Gardening: 1/3 blended compost, 1/3 peat moss, and 1/3 coarse vermiculite.

We put a lot of money into this raised bed and wanted to see the fruits of our labor. So we packed it up and moved it.

4 x 8 foot cube of soil left after lifting the frame.

4 x 8 foot cube of soil left after lifting the frame.

I moved the frame with my hand truck after taking the wire fence down leading to the front yard.

Being a math teacher and a little OCD when I build stuff, I wanted to make sure the frame formed 90 degree angles. I used Pythagorean’s Theorem to square all the corners. This is also called 3-4-5 method in carpentry. You make a 3′ mark on one leg, a 4′ mark on the other leg, and if the distance between the two marks (the hypotenuse) measures 5 feet, your corner is a perfect 90 degree angle.

Pythagorean theorem

See, math is fun and practical.

newspaper ground cloth

Newspaper from my in-laws put to use for a ground liner. You can buy ground cloth from the store, but newspaper is free and works too.

Now for the fun part – moving the soil mix.

I used a flat point shovel to cut the soil cube into manageable chunks and rolled them over with our wheelbarrow. The soil mix held together in cubes making the transfer easy.

Once all our soil was transferred, I chopped the cubes with the shovel. We amended the soil with compost by turning it with a pitchfork thoroughly. This also helped sift old root clumps. Added bonus: I unearthed two hidden sweet potatoes from last year’s plants.

soil mix amended and transfered to full sun

Soil mix transferred and amended with compost and ready to grow… in full sun.

We’ll give you updates on how this raised bed is doing in our full sun front yard. Our new rainwater barrel is 20 feet behind the raised bed. It’ll reach the plants in front of the house too.

Progress so far on our frontyard garden. There's a variety of tomatoes, peppers, herbs, and other plants along the front of the house in the background.

Progress so far on our front yard garden. There’s a variety of tomatoes, peppers, herbs, and other plants along the front of the house in the background.

We’re going rock hunting today (a great Primal workout) to finish our border which will reach around the raised bed. We plan to lay newspaper and pine straw inside the border of our front yard garden for two reasons – 1) aesthetics and 2) weed control.

Every step (however large or small) you take toward building resilience and self-sufficiency is a move in the right direction. MI Patriot sent me a photo of her DiY rainwater barrel made out of a trash can. It’s one more step that allows her and her family to bounce back from hard times.

DRG and I get inspired from emails and comments from you. Please let us know how you’re doing the stuff!

P.S.

Guys, if you perception of Pinterest is it’s all about girly stuff, you haven’t checked out all the ‘manly’ preparedness stuff being pinned on our boards. Check it out here.

Categories: DIY Preparedness Projects, Gardening, Real Food | 5 Comments

Email Re: Todd’s Tomato Ladders

[Editor’s Note: MI Patriot sent in a few pics of his version of our tomato ladders. Nicely done, MI Patriot! Appreciate you sharing with us.]

Hi Todd,

I am one of your followers Survival Sherpa. I wanted to post a couple of pictures of your ladders and what I did to take them one step further, but don’t know how to post pictures in the comments section.

We have a side garden with three 8′ x 4′ raised beds. Using lattice and furring strips, we’ve managed to plant quite a lot of stuff. The pictures that are attached are your ladders. The poles that are in the very back are our purple and green pole beans. The lattice way to the left is our crop of blackberries, and the wire fenced area is where the beans, peppers, and our cherry tomatoes are. We had to fence because the rabbits ate half my beans. Also in there is our herb garden and our bee balm in one of the other pictures.

If there is a secret to posting pictures in the comments section, I haven’t figured it out, so that is why I am sending you an email. [If any of you could help in matter, please let us know.]

I read about DRG and her cancer. I’m glad she’s come through it with flying colors. My mom got colon cancer when she was in her 70s and has been cancer free for the past 15 years. – MI Patriot

Todd's Tomato Ladders in primary colors

Primary colored tomato ladders


MI Patriot ladders

MI Patriot ladders 2


[If you’ve got DiY Preparedness Projects and/or pictures you’d like to share, please send them to me via email and we’ll try to get them posted. survivalsherpa (at) gmail (dot) com]


Categories: DIY Preparedness Projects, Gardening | Tags: , | 3 Comments

13 Simple Ways to Eat Your Yard and Build Food Security

by Todd Walker

In the March Against Monsanto, millions of people peacefully took to the streets in protest over our unhealthy (being kind here) Industrial Food Machine operated by the little man behind the curtain in the Wizard of Oz. The switches, pulleys, and levers are connected to BigFarma, BigPharma, corrupt politicians, main stream media, and our protected predator class.

Monsanto’s ‘man’ behind the curtain is busy pulling levers that rabidly promote the un-scientific fact that eating GMO’s has little ill effect on human health. What they’re really trying to say is you can pick up a turd by the clean end. Crass but true.

Genetically Modified Organisms should be avoided at all costs. But how can you ensure a safe food supply for your family? You don’t have 40 acres and a mule. You live in a neighborhood with quarter acre lots. You may have never grown a garden in your life. How in the world can you produce even a small amount of real food that’s safe to eat?

There’s a movement gaining momentum around the world. The idea is to make your home as resilient as possible. Having multiple backup systems gives you options when things go wrong. And things always go south with the fragile systems that run our houses. When the lights went out on our farm where I grew up, my daddy was famous for saying, “Bob’s dog must have peed on the power pole again.”

Our industrial food system is no different. Since the end of World War II, our system of food production shifted from small local farming outfits to mega farmzillas. We use to know where our food came from because we produced most of what we ate for ourselves. Following jobs into the city, producing our own food has become a lost skill.

Step by step, we’ve lost (or forgotten) our independent nature.

Building resilience into your food system may seem daunting. It’s not. You just have to start. Maybe you could start eating your yard.

Here are 13 ways to that you can grow food, not lawns.

Creative container gardening

EarthTainers, containers for growing tomatoes,

We grew peppers and tomatoes from four EarthTainers with great results

  • Five gallon buckets of low hanging fruit.
hanging bucket tomato plants, five gallon bucket planter

More tomatoes hanging around

  • You can also set these on the ground, wrap them in burlap, and make them easier on the eye in the front yard.
burlap wrapped bucket planters, 5 gallon bucket planter,

Plastic buckets are cheaper than pots. Dress them up for the front yard with burlap and twine.

  • Vertical gardens. There are many ways to get creative for space limited yards. Grow up if you can’t grow out. 

  • For more ideas on growing up, get your mind (and salad) in the gutter here
  • An innovative way to grow 50 plants + composting in four square feet!
  • The base of the garden tower below measures 27½ inches on each side. Four 63-inch long cedar boards are attached to a central six-foot cedar post to form the pyramidal framework.

Photo of strawberry tower

Grow food, not lawns

Foodscaping is landscaping with food. Are your boxwoods under the eve of your house edible? Didn’t think so.

I pruned our ornamental hedges yesterday to make room for plants DRG and I can eat.

Pruning this pile of un-edible plants to make room for yard food.

Pruning this pile of un-edible plants to make room for yard food.

  • In Bloom Where You’re Planted, I shared an amazing couple’s foodscaped front yard. Some of us can’t get away with this kind of ‘radical’ foodscaping. The time is coming when front yards will have to be utilized for food production. Might as well test your green thumb before you have to rely on your garden in bad times.
  • Worried about the food police and your nosy neighbor ratting you out. Give your front yard curb appeal by blending edibles into your front yard. Julie Chai’s article over at Sunset shows you how to make traditional backyard garden crops look good out front. Some of the favorites mentioned are:

    “Artichoke. ‘Violetto’―especially when interplanted with large pink cosmos.

    Basil. ‘Purple Ruffles’ and ‘Green Ruffles’ basil, with their unusual, frilly leaves.

    Chives. With thin, grasslike foliage and pink flowers, they look great in or out of bloom.

    Japanese red mustard. Large burgundy-colored leaves are very dramatic.

    Kale. ‘Russian Red’, for greenish purple color and oaklike leaves.

    Lettuce. ‘Black-Seeded Simpson’, ‘Red Oak Leaf’, and ‘Royal Oak Leaf’ lettuce.

    Peas. ‘Dwarf Gray Sugar’ is compact and has showy lavender and maroon flowers.

    Peppers. ‘Super Chili’ (peppers change from green to orange to red) and ‘Golden Bell’.

    Swiss chard. ‘Bright Lights’, for its many colors, including orange, pink, red, and yellow.”

Wild foods

Learn now how to utilize all those weeds growing in your yard and waste places. Be cautious and avoid weedy area that have been treated with pesticides and herbicides.

All these crops can be grown from heirloom seeds and plants and not genetically modified versions. I hope you see the merit in this approach.

What’s your thoughts on building food security? Do you have a hobby farm? We’d like to hear about it.

Keep doing the stuff!

Categories: Food Storage, Gardening, Permaculture, Real Food, Resilience, Wildcrafting | Tags: , , , , , | 17 Comments

Todd’s Tomato Ladders: No More Lame Cages

by Todd Walker

Dirt Road Girl wanted something substantial to cage her tomatoes in our front yard. She hates those flimsy wire cages. Our backyard is full shade. We followed the sun and started food-scaping the font yard. There’s sunshine 8 hours a day out front.

She wanted something functional, sturdy, and of course, homemade. I made rolled wire cages last year from fencing. One problem with these cages was that they blew over during summer storms – even after staking them down in the container. We needed something anchored into the ground.

We had an old wooden ladder by my shop. I suggested we use it as a ‘cage.’

“That’ll work!”

Here’s what she came up with… for me to do!

Tomato ladder

Todd’s Tomato Ladder is not your typical tomato cage.

After a quick search online, she drew inspiration from Mother Earth News – Woody’s Folding Tomato Cages.

Keep in mind that these tomato ladders are going in our front yard. I printed Woody’s plans, gather lumber, and set to building. He calls for using 8 foot 1×3 lumber for the legs. I go to work.

8 foot is 2 feet shy of a regulation basketball goal.

8 foot tomato ladders are 2 feet shy of a regulation basketball goal.

It never occurs to me that erecting two “twin tower” tomato ladders in our front yard might draw neighbor’s ire. We try to fly under the radar as much as possible in our front yard food-scaping. These 8 footers would work in the country or a backyard.

I quickly build two of these bad boys, set them over the containers, and think, “wow, those sure are high.”

Painting your house, Walker?

Painting your house, Walker?

They lasted about a week after we noticed neighbors walking by with thought bubbles over their heads…

“What are they up to this year!?!”

Back to the drawing board.

I needed to shrink Woody’s plans.

Here’s the plan if you want to build our 6 foot model.

Bill of Material

Use non-pressure treated lumber to keep chemicals from leaching into your plants.

Four 1 x 3 boards 8 feet long

Two 1 x 2 boards 8 feet long

10 1/2 inch piece of 2 x 4 lumber

About 40-50 1 5/8 inch screws (I use star drive decking screws. It’s my personal mission to convert everyone to superior star drive screws)

Four 3 inch decking screws (2 will be used to attach the 2 x 4 to the legs – 2 will be used to attach the base of the legs to ground stakes)

Tools List

Circular Saw – If you’ve got a miter saw, it makes quick work of the cutting chores. But a circular saw will do the job.

Drill/Impact Driver

Hammer (for driving anchor stakes in the ground)

1/8 inch drill bit

Tape measure

Pencil

Skill Level

Beginner

Time Needed

30 minutes per ladder (that’s a generous estimate)

Cut List

1. Cut four 1 x 3’s six-foot long.

2. Cut one piece of 2 x 4 scrap 10 1/2 inches long.

3. Cut the 1 x 2’s for the rungs of the inside legs – working from the bottom of the ladder to the top: 19 1/2 inches, 17 1//4 inches, 15 1/2 inches, 13 3/4 inches, and 12 1/4 inches.

4. Cut the 1 x 2’s for the rungs of the outside legs – working from the bottom to the top: 21 inches, 19 inches, 17 inches, 15 1/4, and 13 3/4.

5. Cut two 1 x 3’s twenty inches long (use the extra two feet cut from the leg pieces). These will be the cross braces on the legs.

Putting it all together

If you don’t want to cut all your material ahead of time, that’s perfectly fine. Pre-cutting will streamline your build and save time.

Step 1: Stack two of the 6 foot 1 x 3 inch legs with the ends flush. Drill a pilot hole through one end of the boards with  the 1/8th inch drill bit in the center of the 1 x 3 about 3/4 of an inch from the end of the board. This is where you will insert a 3 inch screw into the piece of the 2 x 4 in a moment. Repeat the process with the two remaining  6 foot 1 x 3 legs.

Step 2: With two of the legs stacked flush, screw a three-inch screw through the pilot hole into the end of the 10 1/2 inch piece 2 x 4 stock. The ends of the 1 x 3’s need to be flush and centered (meaning about 1/4 inch of 2 x 4 exposed on either side of the 1 x 3) on the end of the 2 x 4. Don’t over sink the screws or you’ll spit the wood. Then attach the other two legs to the other end of the 2 x 4. This will serve as the top of the ladder and pivot point for the legs.

Step 3: Go ahead and drill pilot holes in each end of the rungs. Attach the bottom rung (19 1/2 inches) with one 1 5/8 in. screw per side – one foot from the bottom on the inside legs. Continue attaching rungs – longest to shortest – up the ladder with one foot spacing. Now, flip the ladder over and repeat the process for the outside legs starting with the 21 inch rung.

Step 4: With the rungs attached evenly, open the ladder and stand it up. Connect the 20 inch braces to the sides of the ladder. I attached mine at the second rung from the bottom. You can adjust the width of the ladder by moving the braces up for a wider base or down to make the ladder more narrow.

Step 5: Place the tomato ladder over your tomato plant. Drive a pointed wooden stake in the ground beside two legs catty-corner style. Screw the legs into the stakes to anchor them securely.

After the growing season, simply take one screw out of each brace, unscrew the legs from the ground stakes, and fold the tomato ladders up for storage. Or move them into your greenhouse for the winter growing season.

Note: I cut two feet off the top of our original “twin tower” tomato ladders to keep neighborly busy-bodying to a minimum. Here’s the finished product.

Todd's Tomato Ladders

Four of Todd’s Tomato Ladders anchored and ready with an old wooden ladder on the far left.

Friends don’t let friends use lame tomato cages! What’s your best method of caging tomatoes?

Here’s a non-related byproduct of building these tomato ladders…

3 pound bass

My fly rod and this largemouth bass ended my Saturday on a great note!

Keep Doing the Stuff,

Todd

P.S. – You can also keep up with the Stuff we’re Doing on TwitterPinterestGoogle +, YouTube and our Facebook page… and over at the Doing the Stuff Network on PinterestGoogle +, and Facebook.

P.P.S – If you find value in our blog, Dirt Road Girl and I would appreciate your vote on Top Prepper Sites! You can vote daily by clicking here or on the image below. Check out all the other value-adding sites while you’re there…

Thanks for Sharing the Stuff!

Copyright © by Survival Sherpa: In light of the recent theft of all my content by a pirate site, my sharing policy has changed. I do not permit the re-posting of entire articles from my site without express written consent by me. My content on this site may be shared in digital form (200 words or less) for non-commercial use with a link back (without no-follow attribute) to the original article crediting the author. All photos, drawings, and articles are copyrighted by and the property of Survival Sherpa. You are more than welcome to share our photos and articles on social media for educational purposes as long as you link back to the original article/photo with credit to the author.

Categories: DIY Preparedness Projects, Gardening, Homesteading | Tags: , , | 22 Comments

10 Ways to Sow Revolution in Your Back Yard

[Editor’s Note] This was originally published by Daisy Luther on her site The Organic Prepper. Daisy has been a friend to our site and offered lots of valuable advice and articles over the past year. She knocks another one out of the park here. Please share it with family and friends. Check out her bio at the end of this article.


Our Sherpa garden

Our Sherpa garden

Garden Rebels: 10 Ways to Sow Revolution in Your Back Yard

Sometimes I think that the next Revolutionary War will take place in a vegetable garden.

Instead of bullets, there will be seeds.  Instead of chemical warfare, there will be rainwater, carefully collected from the gutters of the house. Instead of soldiers in body armor and helmets, there will be back yard rebels, with bare feet, cut-off jean shorts, and wide-brimmed hats.  Instead of death, there will be life, sustained by a harvest of home-grown produce.  Children will be witness to these battles, but instead of being traumatized, they will be happy, grimy, and healthy, as they learn about the miracles that take place in a little plot of land or pot of dirt.

Every day, the United Nations and the Powers That Be take steps towards food totalitarianism.  They do so flying a standard of “sustainability” but what they are actually trying to sustain is NOT our natural resources, but their control.

This morning I came across one of the most inspiring, beautifully written articles that I’ve had the pleasure of reading in a long time.  Julian Rose, a farmer, actor, activist, and writer, wrote an article called Civil Disobedience or Death by Design and it is a “must read” for anyone who believes in the importance of natural food sources:

“From now on, unless we cut free of obeisance to the centralised, totalitarian regimes whose takeover of our planet is almost complete, we will have only ourselves to blame. For we are complicit in allowing ourselves to become slaves of the Corporate State and its cyborg enforcement army. That is, if we continue to remain hypnotized by their antics instead of taking our destinies into our own hands and blocking or refusing to comply with their death warrants. This ‘refusal’ is possible. But it will only have the desired effect when, and if, it is contemporaneous with the birthing of the Divine warrior who sleeps in us all. The warrior who sleeps-on, like the besotted Rip Van Winkle in the Catskill mountains.”

Does it sound dramatic to state that if things continue on their current path of “sustainability” that we are all going to die?  If you think I’m overstating this, read on.  The case is clear that we are going to soon be “sustained” right into starvation via Agenda 21.

  • The European Union is in the process of criminalizing all seeds that are not “registered”.  This means that the centuries-old practice of saving seeds from one year to the next may soon be illegal.
  • Collecting rainwater is illegal in many states, and regulated in other states.  The United Nations, waving their overworked banner of “sustainability” is scheming to take over control of every drop of water on the globe.  In some countries people who own wells are now being taxed and billed on the water coming from those sources.  Nestle has admitted that they believe all water should be privatized so that everyone has to pay for the life-giving liquid.
  •  Codex Alimentarius (Latin for “food code”) is a global set of standards created by the CA Commission, a body established by a branch or the United Nations back in 1963. As with all globally stated agendas, however, CA’s darker purpose is shielded by the feel-good words.  As the US begins to fall in line with the “standards” laid out by CA, healthful, nutritious food will be something that can only be purchased via some kind of black market of organically produced food.
  • Regulations abound in the 1200 page Food Safety Modernization Act that will put many small farmers out of business, while leaving us reliant on irradiated, chemically treated, genetically-modified “food”.

In the face of this attack on the agrarian way of life, the single, most meaningful act of resistance that any individual can perform is to use the old methods and grow his or her own food.

Growing your own food wields many weapons.

  • You are preserving your intelligence by refusing to ingest toxic ingredients.  Many of these ingredients (and the pesticides sprayed on them) have been proven to lop off IQ points.
  • You are nourishing your body by feeding yourself real food.  Real food, unpasteurized, un-irradiated, with all of the nutrients intact, will provide you with a strong immune system and lower your risk of many chronic diseases.  As well, you won’t be eating the toxic additives that affect your body detrimentally.
  • You are not participating in funding Big Food, Big Agri, and Big Pharma when you grow your own food.  Every bite of food that is NOT purchased via the grocery store is representative of money that does NOT go into the pockets of these companies who are interested only in their bottom lines.  Those industries would be delighted if everyone was completely reliant on them.
  • You are not susceptible to the control mechanisms and threats.  If you are able to provide for yourself, you need give no quarter to those who would hold the specter of hunger over your head.  You don’t have to rely on anyone else to feed your family.

Consider every bite of food that you grow for your family to be an act of rebellion.

  1. If you live in the suburbs, plant every square inch of your yard.  Grow things vertically.  Use square foot gardening methods.  Make lovely beds of vegetables in the front yard.  Extend your growing seasons by using greenhouses and coldframes.  This way you can grow more than one crop per year in a limited amount of space.   Use raised bed gardening techniques like lasagna gardening to create rich soil.  If you have problems with your local government or HOA, go to the alternative media and plead your case in front of millions of readers.  We’ve got your back!
  2. If you live in the city or in an apartment, look into ways to adapt to your situation.  Grow a container garden on a sunny balcony, and don’t forget hanging baskets.  Grow herbs and lettuce in a bright window.  Set up a hydroponics system in a spare room (but look out for the SWAT team – they like to come after indoor tomato growers!)  Go even further and look into aquaponics. Create a little greenhouse with a grow light for year round veggies.  Sprout seeds and legumes for a healthy addition to salads.
  3. If you live in the country, go crazy.  Don’t just plant a garden – plant fields!  Grow vegetables and grains.  Grow herbs, both culinary and medicinal.  Learn to forage if you have forests nearby.  Learn to use old-fashioned methods of composting, cover crops and natural amendments to create a thriving system.
  4. Raise micro-livestock.  This option may not work for everyone, but if you can, provide for some of your protein needs this way.  Raise chickens, small goats, and rabbits, for meat, eggs and dairy.  If you are not a vegetarian, this is one of the most humane and ethical ways to provide these things for your family.  Be sure to care well for your animals and allow them freedom and natural food sources – this is far better than the horrible, nightmare-inducing lives that they live on factory farms.
  5. Save your seeds.  Learn the art of saving seeds from one season to the next.  Different seeds have different harvesting and storage requirements.
  6. Go organic.  Learn to use natural soil enhancers and non-toxic methods of getting rid of pests.  Plan it so that your garden is inviting to natural pollinators like bees and butterflies.  If you wouldn’t apply poison to your food while cooking it, don’t apply it to your food while growing it.
  7. Be prepared for backlash.  The day may come when you face some issues from your municipal government.  Be prepared for this by understanding your local laws and doing your best to work within that framework. If you cannot work within the framework, know what your rights are and refuse to be bullied.  Call up on those in the alternative media who will sound the alarm.  Every single garden that comes under siege is worth defending.
  8. Learn about permaculture.  Instead of buying pretty flowering plants for your yard, landscape with fruit trees (espalliering is a technique that works will in small spaces), berry bushes, and nut trees.  These can provide long-term food sources for your family.
  9. For the things you can’t grow yourself, buy local.  Especially if space is limited, you may not be able to grow every bite you eat by yourself.  For everything else, buy local!  Buy shares in a local CSA (Community Supported Agriculture). Visit your farmer’s market.  Shop at roadside stands.  Join a farming co-op.  Support the agriculture in your region to help keep local farms in business.  (One note about farmer’s markets:  Some farmers markets allow people to sell produce that originates at the same wholesalers from which the grocery stores buy their produce.  I always try to develop a relationship with the farmers from whom I buy, and I like to know that what I’m buying actually came from their fields and not a warehouse.)  Find a local market or farm HERE.
  10. Learn to preserve your food.  Again, go back to the old ways and learn to save your harvest for the winter.  Water bath canningpressure canningdehydrating, and root cellaring are all low-tech methods of feeding your family year round. Not only can you preserve your own harvest, but you can buy bushels of produce at the farmer’s market for a reduced price and preserve that too.

There is a food revolution brewing.  People who are educating themselves about Big Food, Big Agri, and the food safety sell-outs at the FDA are disgusted by what is going on. We are refusing to tolerate these attacks on our health and our lifestyles. We are refusing to be held subect to Agenda 21′s version of “sustainability”.

Firing a volley in this war doesn’t have to be bloody.  Resistance can begin as easily a planting one seed in a pot.

tomatoes growing


Arthor bio: Daisy Luther is a freelance writer and editor.  Her website, The Organic Prepper, offers information on healthy prepping, including premium nutritional choices, general wellness and non-tech solutions. You can follow Daisy on Facebook and Twitter, and you can email her at daisy@theorganicprepper.ca – See more at: http://www.theorganicprepper.ca/garden-rebels-10-ways-to-sow-revolution-in-your-back-yard-05072013#sthash.4C5R1Lux.dpuf


Categories: Gardening, Preparedness | Tags: , , , | 8 Comments

Blog at WordPress.com.