
by Todd Walker
Forgive me for butchering the pronunciation of tonteldoos in my video below. No matter how it’s spoken in Afrikaans, this portable tinderbox just became my favorite fire-starter for spark ignition fires. Simple, yet effective!
Tonteldoos is a small town in South Africa who’s name actually means tinderbox. Information on the traditional tinderbox itself was a bit scarce as I researched. I was fortunate enough to find a description of a tonteldoos in a Facebook learning group shared by a gentleman (Eben) raised in South Africa. I built mine based on his helpful instructions.
Thank you, Eben, for sharing some history and the idea of making this pocket tinderbox!
Tonteldoos History
The tonteldoos was introduced in South Africa by European settlers in the 17th century. The tinderbox was an effective and portable method of creating fire up until the introduction of stick matches in the mid 1800’s. As wars tend to do, the Anglo-Boer war (1899-1902) created a scarcity of stick matches causing people to revert back to the traditional tonteldoos to start fires in homes and afield.
Even after the war ended and matches became widely available, the use of this traditional tinderbox continued through to the mid 20th century. Testing my pocket tonteldoos, I can certainly see why. It’s easy to make, easy to use, and employs one of man’s time-tested ignition sources – flint and steel.
Tonteldoos Testing
Consistent ignition with flint and steel requires a dry source of charred material. Once the material catches a spark, the glowing ember is placed in a tinder bundle and blown into flame. With marginal or damp tinder, I’ve gone through several pieces of char from my fire kit before reaching ignition temperature.
This pocket tinderbox offers a controlled solution to eating up all your charred material. Here’s how…
With the tonteldoos, the only material consumed is at the end of the tube. The remaining un-charred material is preserved within the cylinder. Saving this valuable next-fire resource is the smart move.
I tested two methods…
- Char all the cotton material before inserting in the tube
- Char only the cotton material protruding from the end of the tube
By far, the best results came from charring the end of the material (method #2).This is the traditional method used for tonteldoos.
Method #1 failed, as I suspected, due to the fragile nature of charred material. It’s difficult to push crumbly material through a tube without turning it to dust. The charred rope provided an awesome glow but was consumed too quickly.
If it ain’t broke, don’t fix it.
Make Your Own
After reading Eben’s description, my possum mentality kicked in as I walked to my shop. I needed a metal tube and cotton material. I considered using a small, gutted Maglite but the diameter would not allow me to push the material up with my finger. The same goes for 1/2 inch copper pipe unless you’ve got really skinny fingers.
I dove into my scrap copper from previous plumbing jobs. If you don’t have copper lying around, home improvement stores sell all you need.
Here’s what I came up with for my tonteldoos…
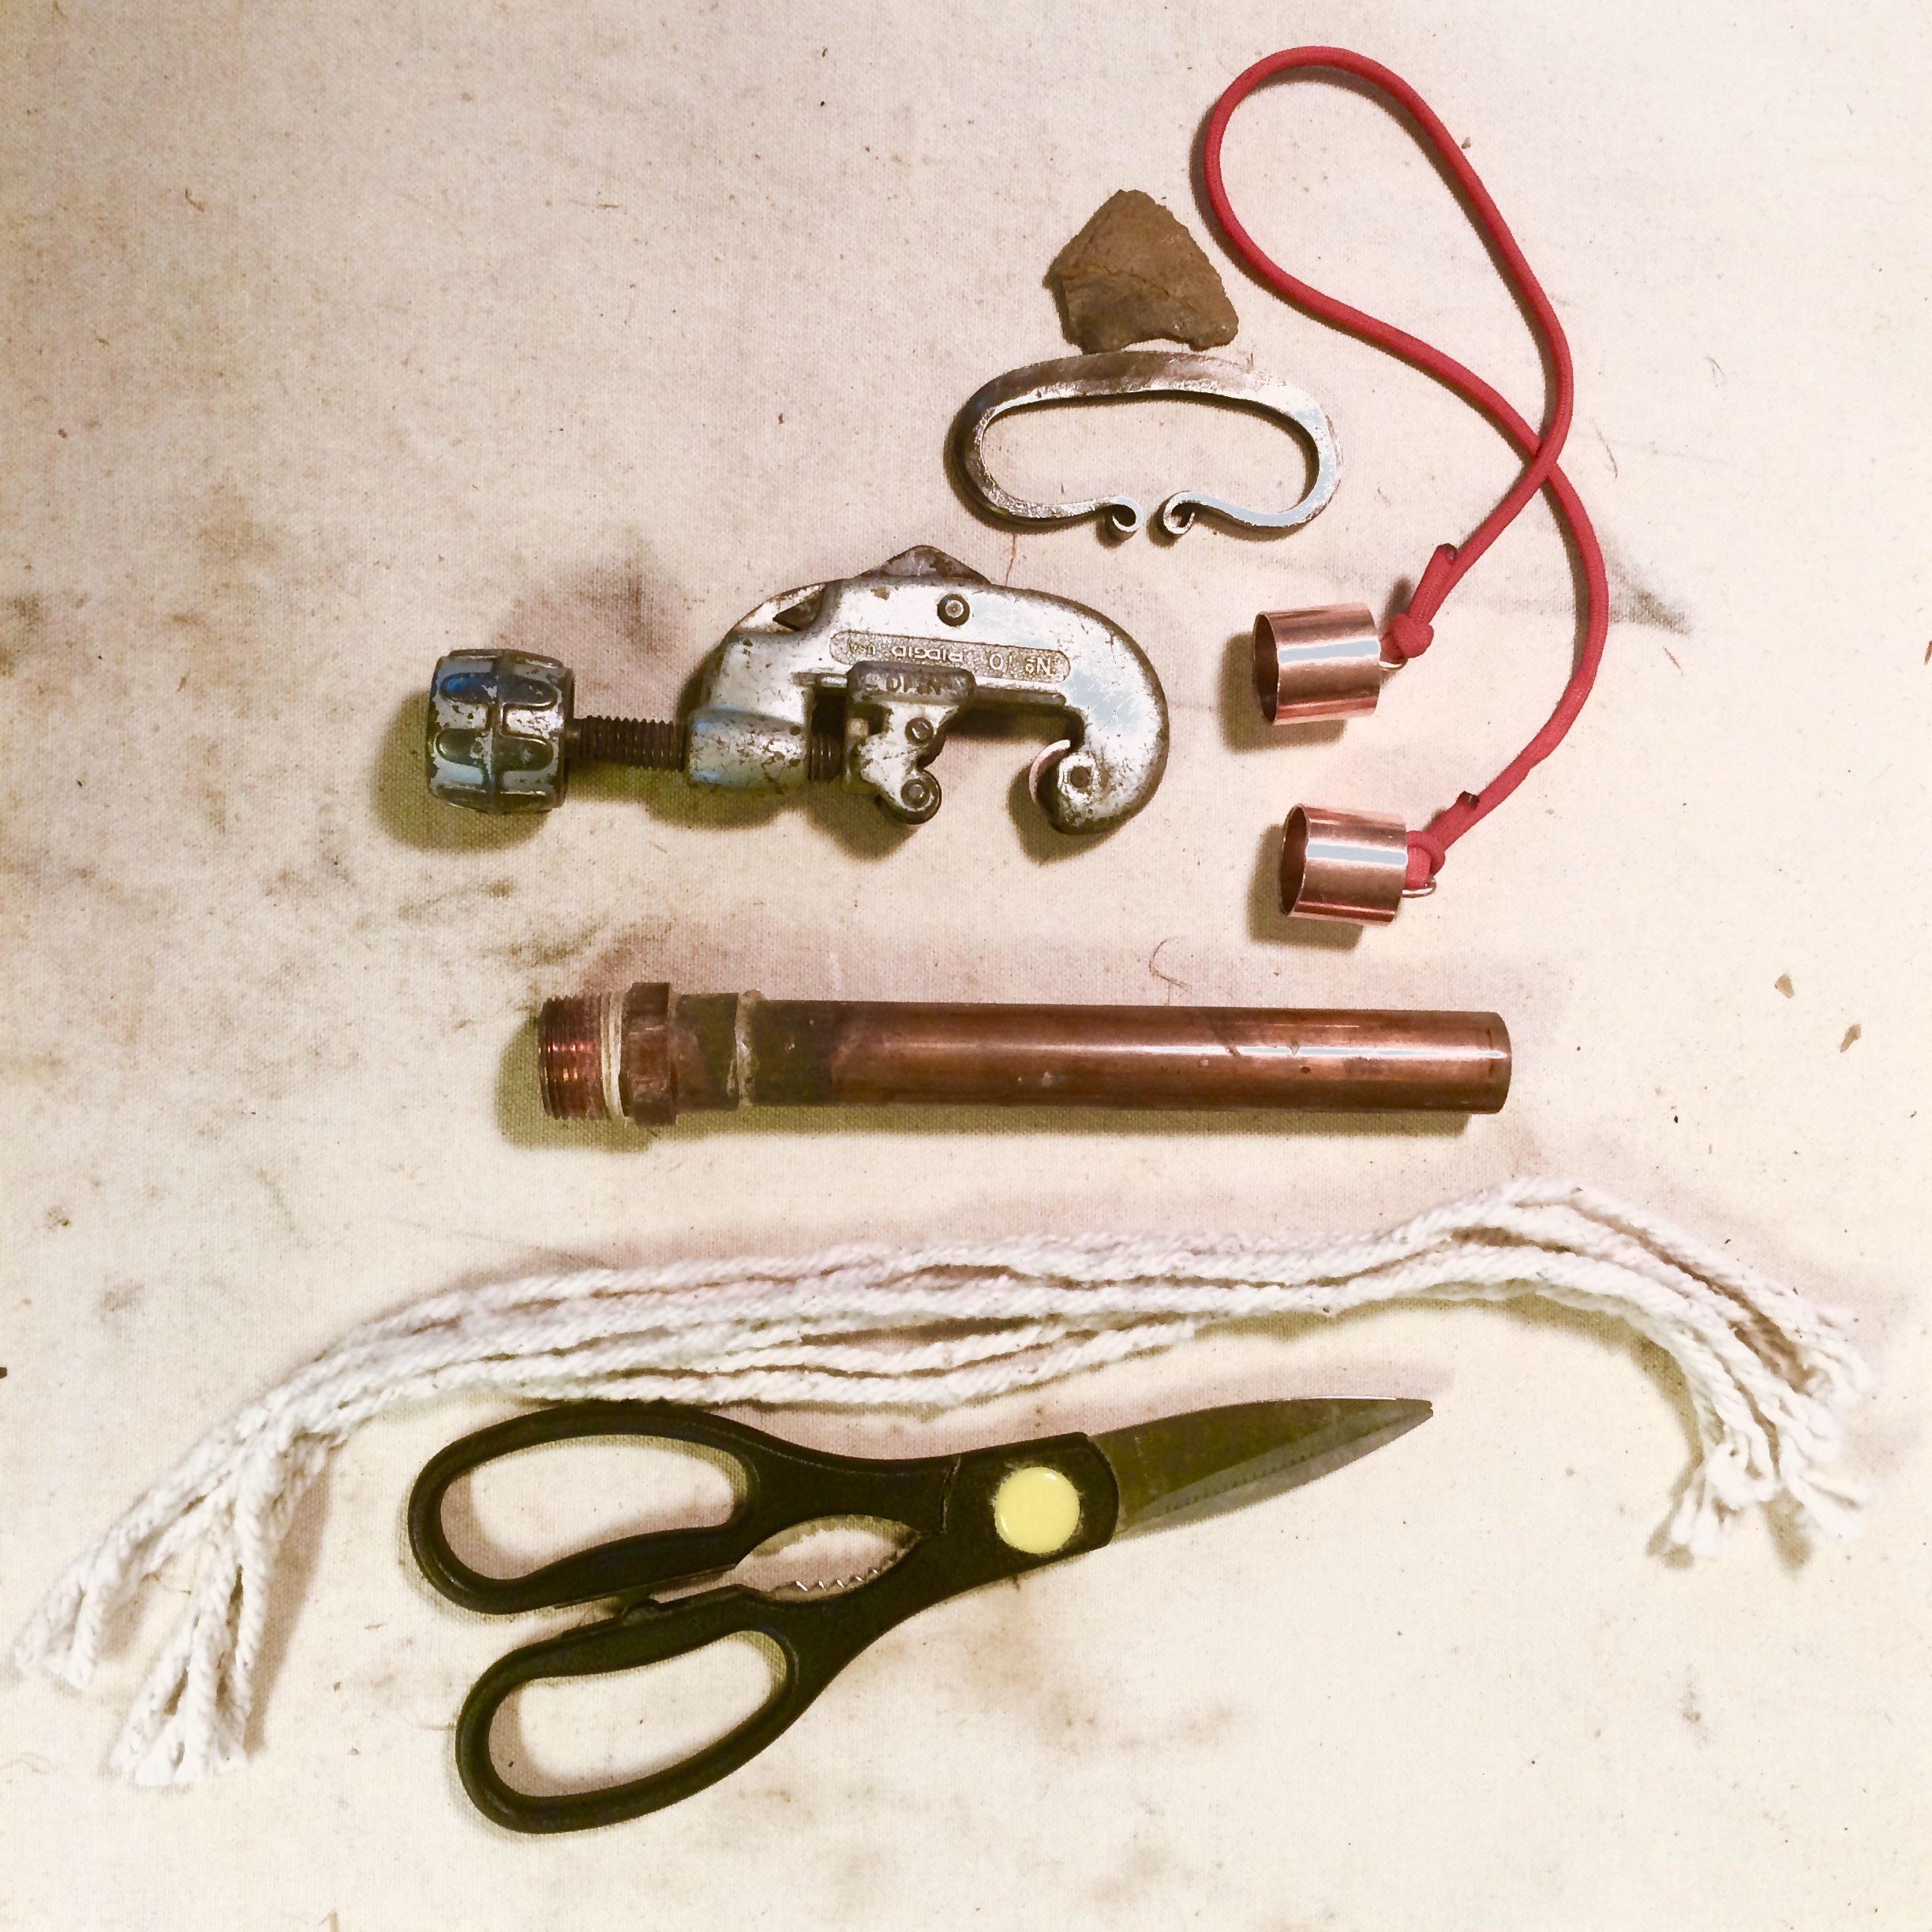
Stuff you’ll need
Material and Tools
- 3/4 inch copper pipe about 4 inches in length
- Two 3/4 inch copper caps – bought new for about $1.50 each
- 100% cotton material – several strands from a mop head works well
- Cordage is totally optional
- Scissors or sharp knife
- Copper wire if you make a loop through the end caps like mine
- Drill and drill bit the diameter of the wire used to make the loop
- Pipe cutter
- Flint and steel
Step 1: Cut Pipe
Cut a 4 inch section of 3/4 inch pipe. Ream each end of the pipe with the attachment on the pipe cutter – or use a file. This removes burrs from snagging the cotton material as it passes through the pipe.

Pipe reamer attachment
Step 2: Pack the Pipe
Any 100% cotton material would probably work. I had a new industrial mop head lying around I had intended to use as char rope. Perfect!
Cut several strands off a mop head and feed them through the pipe with a twisting motion until 1/4 inch of material is sticking out of the top end of your cylinder. Let the bottom end run wild. You can remove the excess later.

Char the 1/4 inch of material with an open flame. I used my new Mullein Slush Lamp… just because! Any open flame will do.

Charring the cotton mop head strands
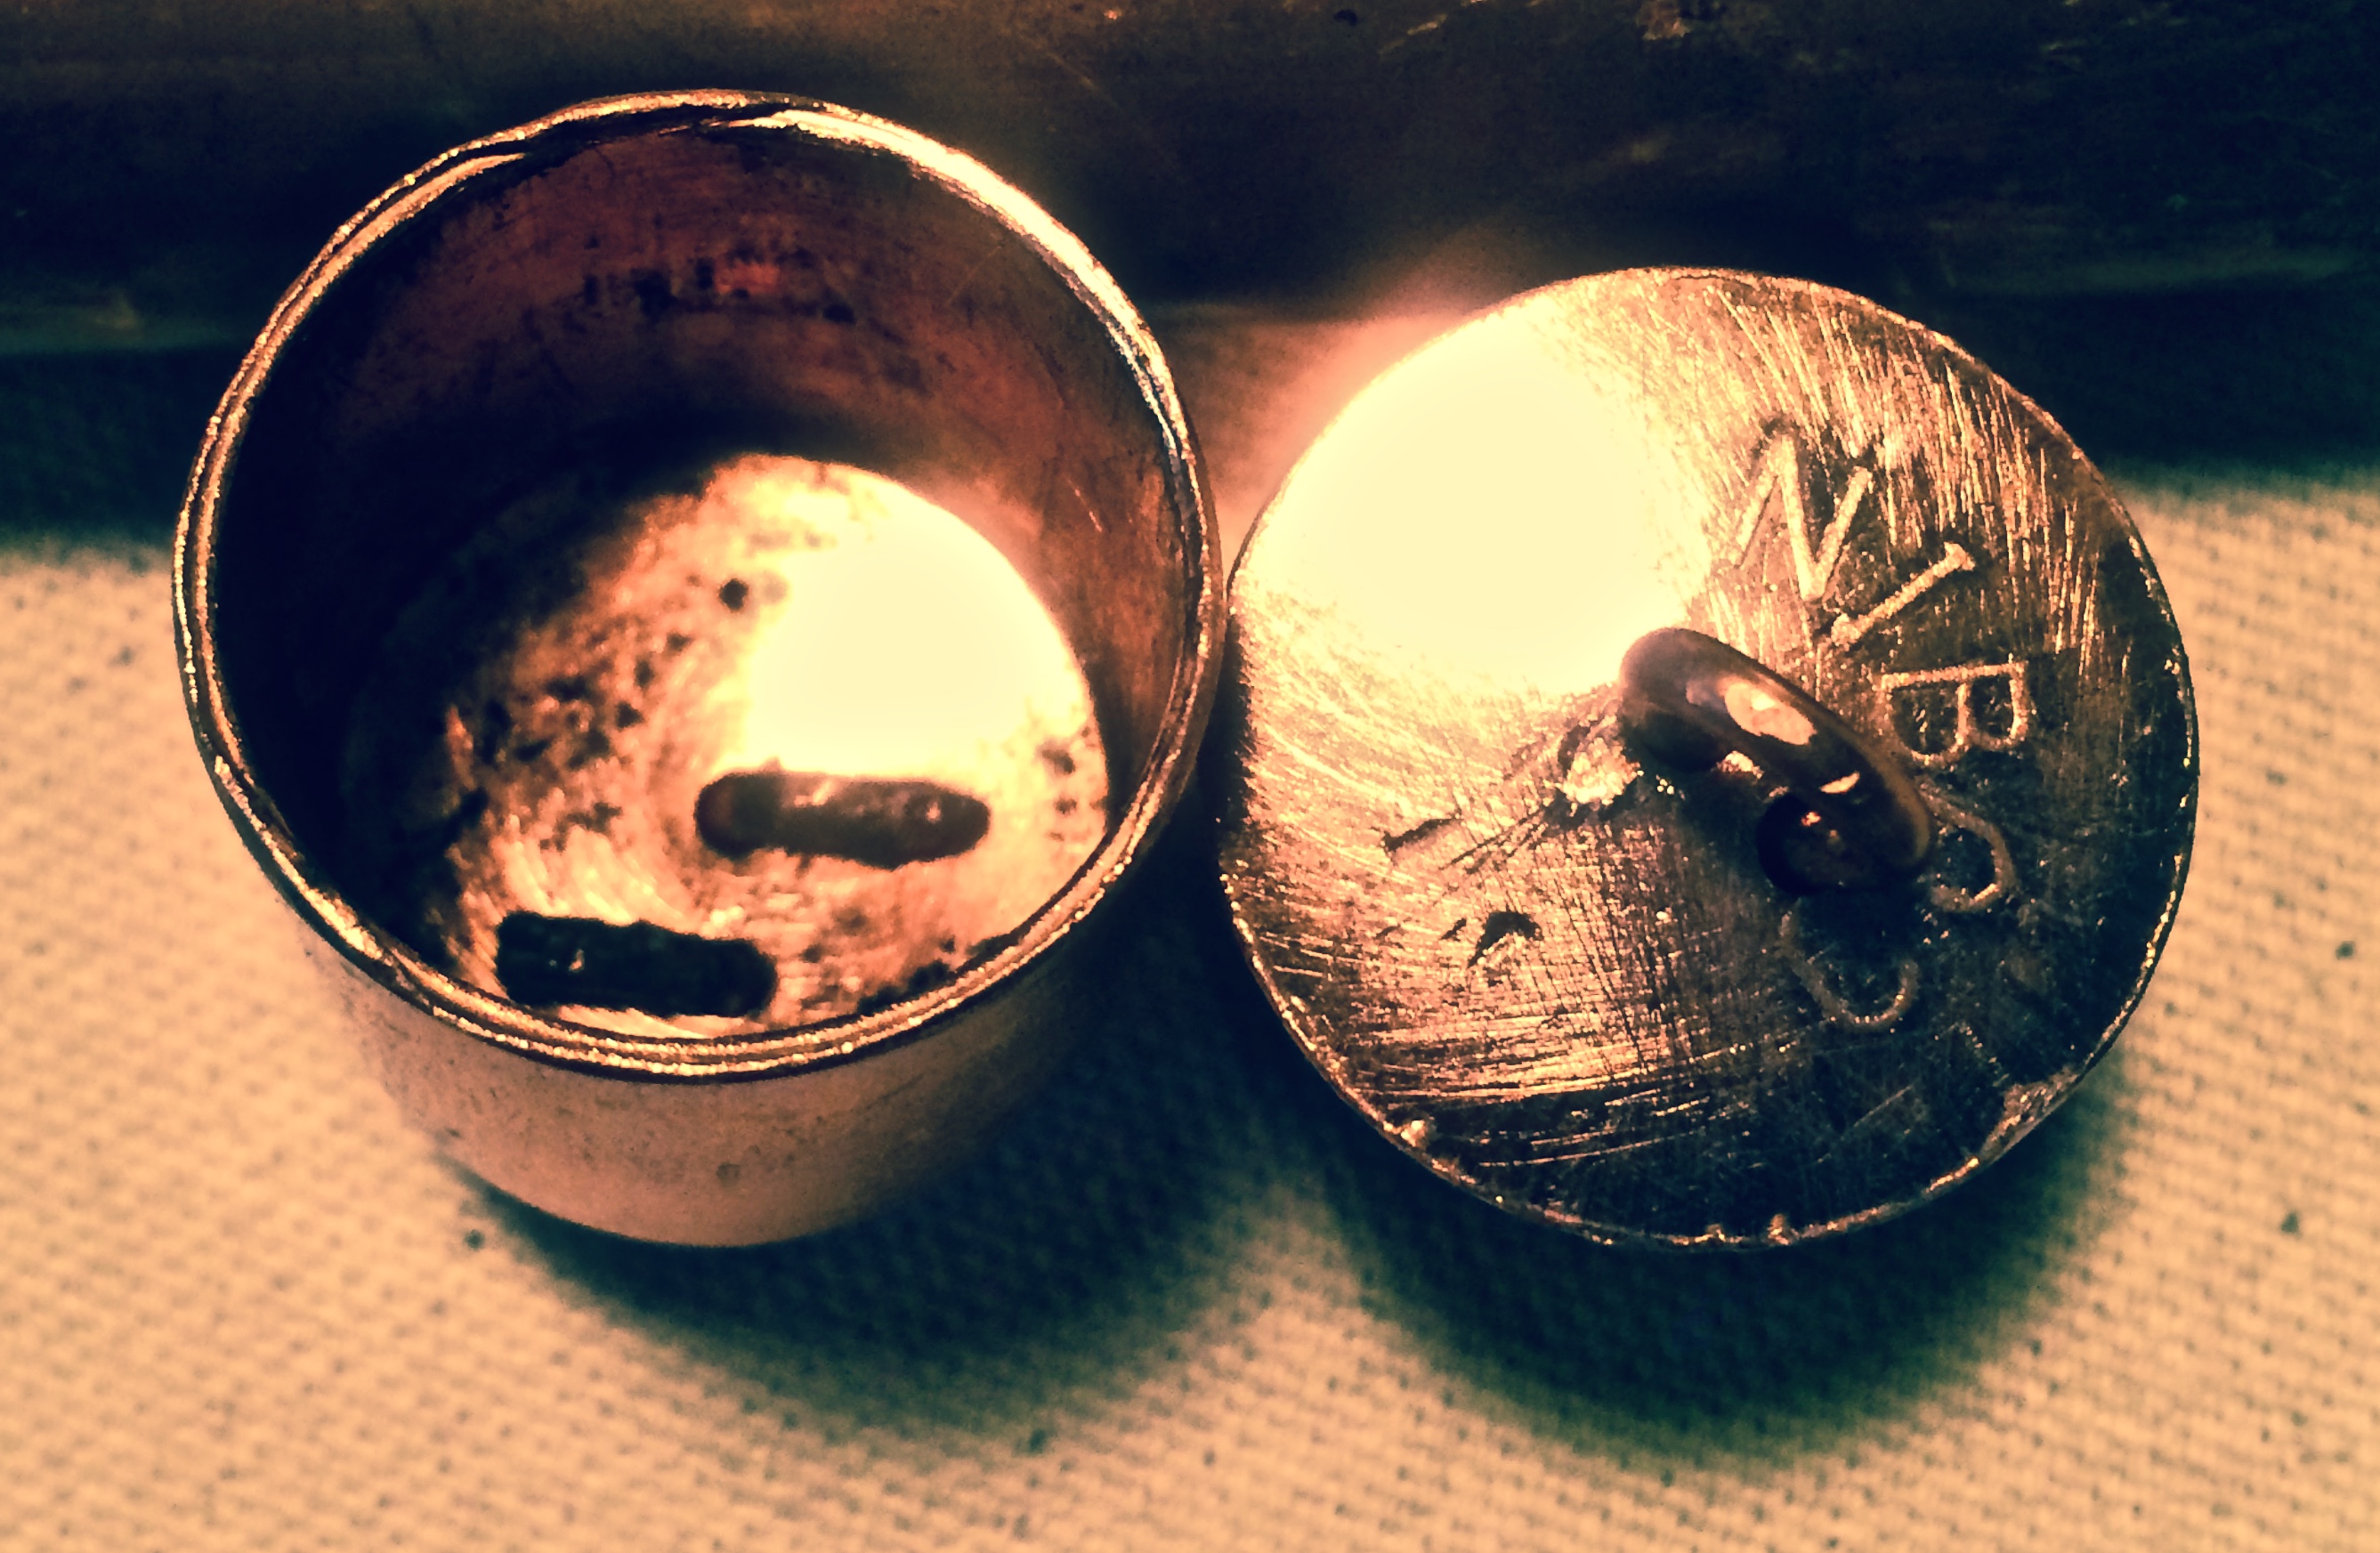
Once the end is charred, pull the wick down from the bottom end so the charred end is even with the top of the pipe. Place the cap on the smoldering end to extinguish the embers. Now cut the excess material from the bottom end of the tinderbox.

Step 3: Attach Wire Loops to Caps
This is completely optional. I added loops to my caps for three reasons…
- Tying cordage to connect the two loops may aid in keeping the caps found in the field.
- A steel striker can be attached to the cordage.
- Cordage can be tied to keep the end caps secured if you actually carry your tonteldoos in your pocket while tramping through the woods.
If the end caps fit loosely, tweak the pipe ends by lightly tapping them with a hammer to take them out of round. Not too much or your cap won’t fit (square peg in a round hole). Another way to tighten the cap connection is to solder the caps on and then remove them. The layer of solder would make the caps fit tightly once cooled.

The blood knot before tightening

Blood knot tightened to secure caps
Or just tie them securely with a blood knot (how to tie a blood knot video here) as mentioned in #3. For this part, you’ll need a loop on each end cap…
Drill two holes in each cap the diameter of a piece of copper wire. I stripped a section of scrap 12 gauge wire to form my loops. Needle-nose pliers are most helpful for this task. I opted not to solder the wire inside the cap since bending them down inside each cap held the loops in place securely.
Copper wire bent in the bottom of the cap
How to Use Your Tonteldoos
As with any charred “next-fire” material, keep the tonteldoos in a dry place in your haversack or fire kit. I keep a couple of pieces of chert/flint inside my square tinderbox (pictured below) with other charred material and finely processed tinder material. The tonteldoos fits perfectly inside this large tinderbox.
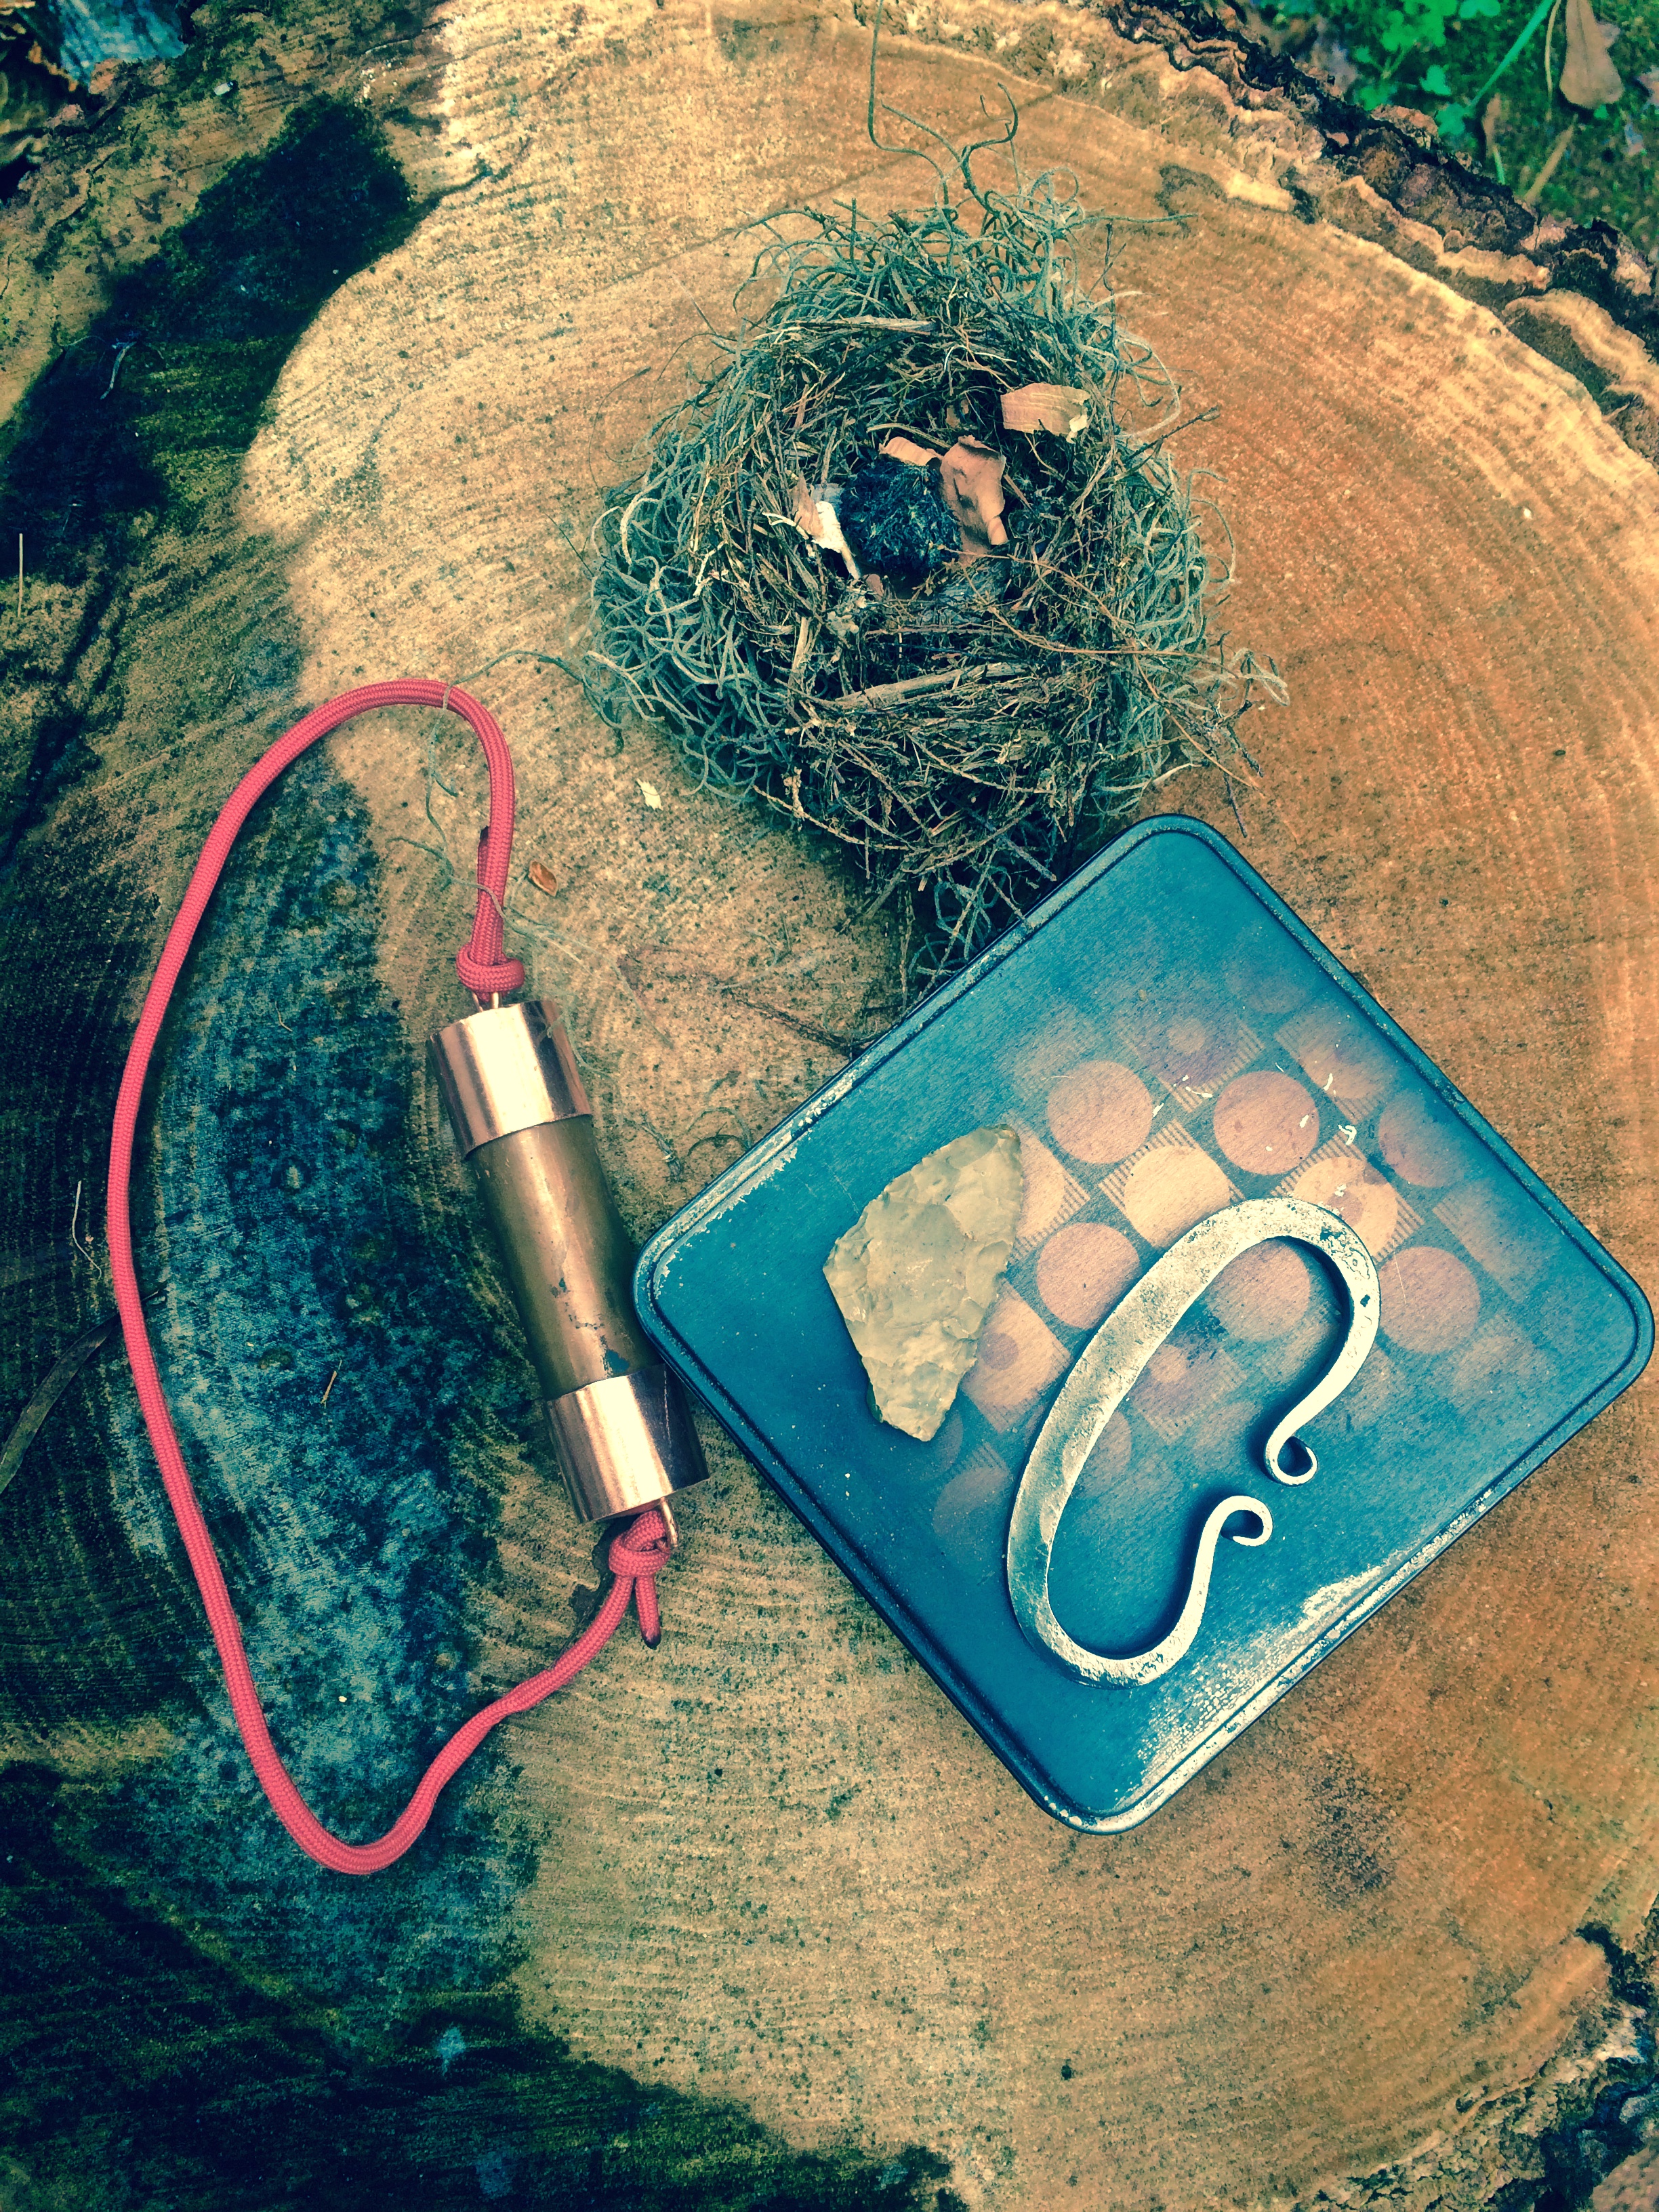
Every thing fits in the tinderbox
To ignite the charred end of the tonteldoos, push the wick from the tube bottom with your finder so that 1/8th inch of the charred wick is exposed. Hold the cylinder in your non-dominant hand with your pinky and ring finger. Hold a sharp piece of chert/flint between your thumb and pointing finger. The tinderbox should be below the flint so the sparks have a better chance of landing on the wick – unlike the photo below.
Dirty hands and dirt time!
Strike down lightly and repeatedly over the edge of the sharp stone so that sparks are produced and hopefully land on the charred end. The tiny shards of metal oxidize and spontaneous combust to produce 800 degree sparks hot enough to create a glowing ember on the charred wick.

Flint and steel showering sparks on the tonteldoos
Once a spark finds its mark, a glowing ember appears. Blow the ember to spread the glow over the end of the wick.

Should look like a lit cigar when ready
Of course, you’ve prepared fine to course tinder material beforehand and shaped a stellar tinder bundle (a.k.a. – birds nest). I use two methods to ignite tinder bundles with my pocket tondeldoos.
First, place the glowing end of the wick directly into the finest part of your tinder material and blow to ignition. Be sure to push the wick out of the tube a bit so as to make good contact with the fine tinder.
The other method is to use the glowing end of the tonteldoos to ignite a fire extender like punk wood, black sooty mold, etc., etc. Then place the fire extender in your bird’s nest and blow it to flame.
Here’s our video demonstrating my DiY tonteldoos…
If you want a portable, long-lasting, reliable source of char for flint and steel ignition, give the tonteldoos a try. I think you’ll be pleased.
Be sure to let us know your results and any other creative ideas to build one.
Keep Doing the Stuff of Self-Reliance,
Todd
P.S. – You can also keep up with the Stuff we’re Doing on Twitter, Pinterest, Google +, YouTube, Instagram, and Facebook… and over at the Doing the Stuff Network.
P.P.S – If you find value in our blog, Dirt Road Girl and I would appreciate your vote on Top Prepper Sites! You can vote daily by clicking here or on the image below. Check out all the other value-adding sites while you’re there… 
Thanks for Sharing the Stuff!
Copyright: Content on this site (unless the work of a third-party) may be shared freely in digital form, in part or whole, for non-commercial use with a link back to this site crediting the author. All links in articles must remain intact as originally posted in order to be republished. If you are interested a third-party article, please contact the author directly for republishing information.


Pingback: How to Make a Pocket Tonteldoos (Tinderbox) for Flint and Steel Fires - Survivalot
Great how good ideas prosper – a book of the frontier in the USA – Wah to Yah – early mtn men to New Mexiso 1840s mention the exact construct for fire starting – brass tube – but other wise the same. Local cotton fibers and worked the same. Don Simmons
LikeLiked by 1 person
This tinderbox idea came from Europe and spread west. Good piece of history to know, Donald. Thanks for sharing!
LikeLike
Pingback: Prepper News Watch for October 6, 2015 | The Preparedness Podcast
Awesome project my friend! I want to make my pocket tonteldoos! It look like an upgraded version of ‘tinder tube’, I’ve read a post about it on bushcraftuk. What do you think, if I try to make one with a small hydraulic threaded tube?
LikeLike
Thanks, buddy! Any cylinder would work as long as it is larger than your finger. I thought about using a threaded pipe but opted to use copper to save weight.
Look forward to seeing your project!
LikeLiked by 1 person
Right, these kind of tubes are a little heavy … I’ve to look for something more light in the store. Ciao!
LikeLike
Really cool idea! What a good backup in case of an emergency.
LikeLike
Very dependable. Thanks, Andy!
LikeLike
I carry a jute bundle for tinder and char cloth in the patch box of my flintlock rifle. Don’t know if the “Middle Ground” longhunters did this, but I do. When i want to start a fire, I take a postage stamp size piece of char cloth and place it in the pan of the flintlock and snap the lock. All that’s needed! Never fails to catch a spark with a sharp, fresh flint and I don’t cut my fingers against a sharp piece of flint using the flint & steel method.
LikeLike
A couple thoughts.
1.) Soldering your loops to the cap would seal the holes you drilled removing two ingress paths for moisture.
2.) If you think that the caps might allow moisture in you could possibly put on a section of rubber tubing that could be peeled back to install the cap and then peeled forward over the edge of the cap to water proof it.
LikeLike
Good points on the mods, brother! Thanks again for sharing from your engineering mind 🙂
LikeLike
I agree. One of my hobbies is sailing, and I know from experience that “water always finds a way”. If there is even the smallest crack in the deck, rainwater will discover its whereabouts and get inside. As tinder needs to be as dry as possible, care should be taken to ensure the casing is as watertight as possible.
Todd, now that you’ve built your own “Tonteldoos” have you given any thought to improving on the design? It would be great to see the flint and steel incorporated into the casing somehow. My thoughts:
1) Replace the copper end caps with steel so that it can do double duty as the striker. Or can someone weld a square piece of steel to the side of an end cap to provide a flat surface for striking?
2) Sacrifice a bit of space at the bottom of the pipe to store a piece of flint. Is it possible to obtain flint (or ferrocerium rod material) in the shape of a thick disc that can fit in that small space?
3) Substitute an aluminum pipe to cut down on weight. Perhaps even use a much smaller diameter and just use an available stick to push the tinder through.
I also have a fondness for fire making skills, particularly when it comes to rediscovering vintage technology such as fire pistons. By far, flint and steel is still the simplest and most reliable method. The old ways are still the best ways! 🙂
Chris
LikeLike
Or a 3/4 inch ‘O’ ring inside each cap
LikeLike
Two pieces of ranger band (bicycle inner tube) around the ends take care of that.
LikeLike
Thanks for the tutorial. I made one with some minor differences and after I got the right tinder in it works great. I searched images of the originals and made mine with a cap on one end and a plug in the other by using a fender washer. I like it but still want to revise it because the washer doesn’t fit as well as I would like.
LikeLike
Right on, Joe! Thanks for sharing and the support. I’d love to see what you made if you could send me a pic.
LikeLike
Actually your pronunciation wasn’t bad at all! (I should know, South African born and raised.) Great post!
LikeLike
Thanks, Ros, for the feedback. Glad to hear I didn’t butcher it too badly!
LikeLike
As a Afrikaans speaking South African still living in South Africa I agree, your pronunciation is not bad at all.
I have one of a “tonteldoos” and I must admit I have not put it to the test, as flint is hard to come by here.
I was told the they used “vuurklip” with it which is basically a type of quartz..
I will have do some test.
LikeLike
Quartz works with mine too. Glad to hear I kind of passed the test 😜
LikeLike
You might want to have a look at this page.
Click to access Dr%20WL%20Vosloo%20African%20Archer%20and%20Adventuruer%2004.pdf
LikeLike
Good stuff! Thanks for sharing.
LikeLike
Pingback: Make a Pocket Tinderbox for Flint and Steel Fires
“Dankie vir n interessante artikel.”
Thank you for an intereting article.
Todd, your website is one of the most valueable one’s around and very usefull to those of us who are living in a fast descending TEOTWAKI country.
LikeLike
Thank you for reading and your support, Aves!
LikeLike
Brilliant! What a great project
Thanks very much.
LikeLike
Glad you liked the project! Thank you for the support.
LikeLike
Reminiscent of WW1 Rope Lighter
LikeLike
Pingback: The Number One Knife Skill for Wilderness Survival and Self-Reliance | Survival Sherpa
Pingback: The Number One Knife Skill for Wilderness Survival and Self-Reliance | TheSurvivalPlaceBlog
Pingback: Backcountry Belt Kit: Essential Tools to Carry Around Your Waist | Survival Sherpa
Awesome project. I really enjoyed this. Something different for a change. Definitely on my list to do with my son as soon as I get back home. Thanks for sharing
LikeLike
You and your boy will enjoy making this I hope, Sean. Take care and let us know how it turns out. Thanks so much for stopping by!
LikeLike
Pingback: Campfires From Scratch: No Boy Scout Juice Required | Survival Sherpa
Pingback: The Caveman Catalyst in Your Tinderbox | Survival Sherpa
😎< VERRRY COOL. . . .!!!
Great & fun item to for camp’n, or a day in the woods. Will be making a couple of these gems.
Thanks For The Video, Sir. . .
LikeLike
Would love to hear how your project goes. Thanks, Randell.
LikeLike
Excellent article, thank you
where to find Two 3/4 inch copper caps ?
faolou@gmail.com
LikeLike
Thanks Dan. Any decent hardware store will have these caps.
LikeLike
Pingback: The Caveman Catalyst in Your Tinderbox – Smokey Bottom