Camping

Introducing the Survival Sherpa School

Survival Sherpa School Logo - Black

Retirement (June 2022) has me reflecting on my lifework. The dust-covered rocking chair overlooking the pond tells me that it ain’t over. In between working on my new log cabin, I’ve been building my next adventure, the Survival Sherpa School!

Often when you think you’re at the end of something, you’re at the beginning of something else.

~ Fred Rogers

December 2022 marks the 11th birthday of this blog. While writing over 600 articles here, I’ve never made a dime from the blog. I’m not more virtuous than others by offer all this free information over the years. I don’t hate money, it’s just the model I chose from the beginning.

However, the Survival Sherpa School is a separate site with a mission to offer hands-on classes to help you learn, prepare, and survive. With the help of my good friend, Melonie of Mel of the Mountains, we now offer a variety of classes on many primitive and traditional skills from bark baskets to hide tanning. I’ll be adding more class content in the near future.

Do me a favor and go check out the site to see what may interest you or someone you know.

While you’re visiting the Survival Sherpa School, hit that Subscribe button to join our community. You’ll be the first to be notified of upcoming classes, events, and exclusive content you won’t see on this blog, YouTube channel, or social media.

Some of our followers have been here from the very start and I can’t thank you enough for all your faithful support! We’ve learned a lot together through the magic of the internet. I’ll continue to post value-added content here, don’t worry.

After our Appalachian Bark Basket class at Little Rose Nature Adventures, we’ve taught three more classes in two states (GA and NC)! Below are some highlights of the experiential learning going on.

Appalachian Bark Baskets

UNADJUSTEDNONRAW_thumb_149

More than an arts and crafts class, these eager students learned the context of making natural containers which their ancestors used many years ago.

6E835E75-2A7F-445E-AA88-409F8A9C8D15

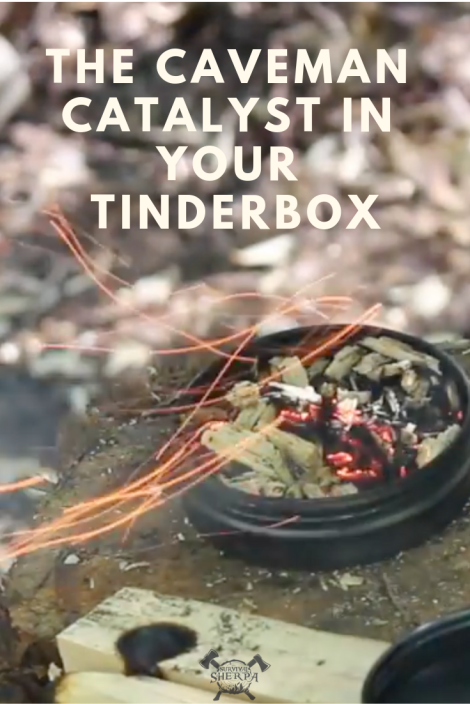
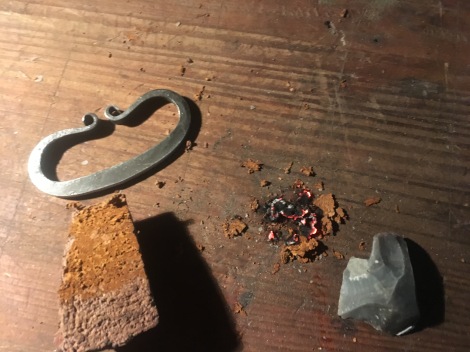
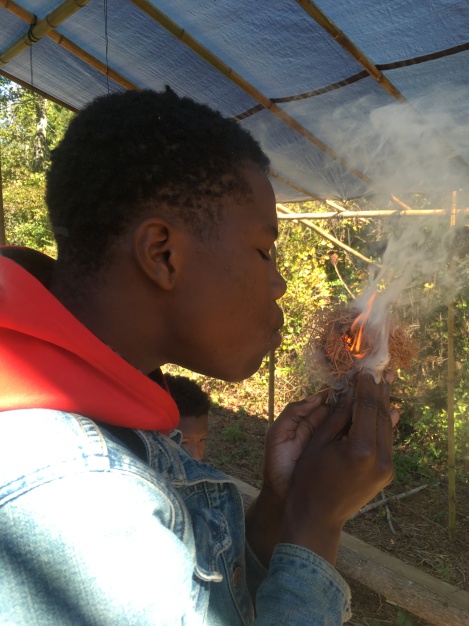
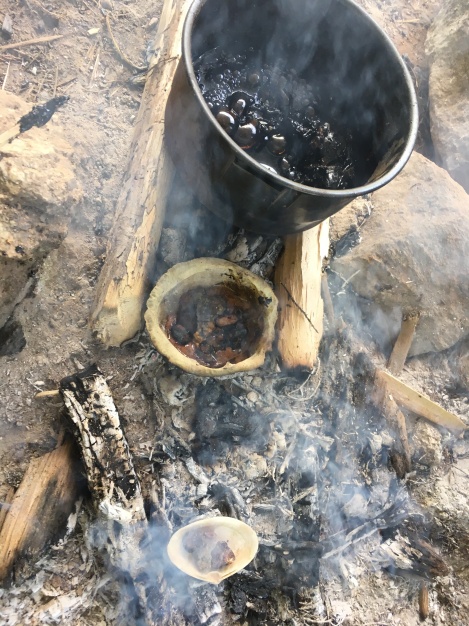
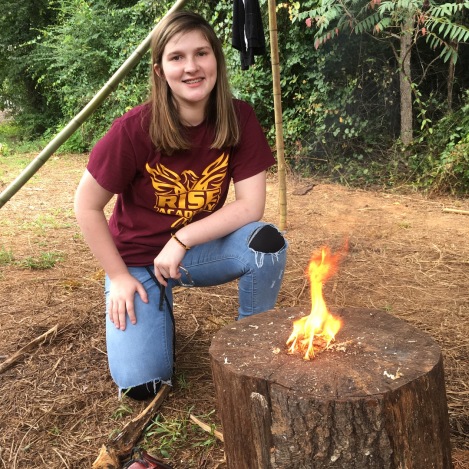
Firecraft Essentials

IMG_1537

Fire is life and learning many methods to achieve a sustainable fire is essential.  IMG_1525

Modern ferrocerium rod in action.

IMG_1832

Although we teach primitive and modern techniques, we stress that your fire kit should be simple enough that a five-year-old can use it.

Homeschool Co-op Demo in North Carolina

IMG_1612

Melonie demonstrating the utility of turning raw animal hides into useful material for clothing and gear.
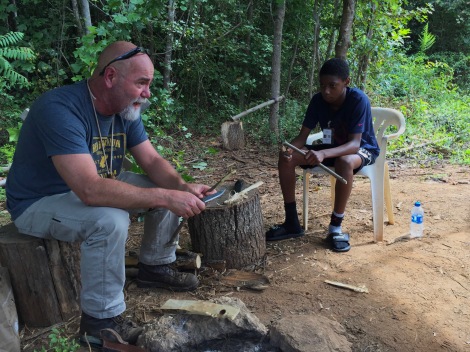
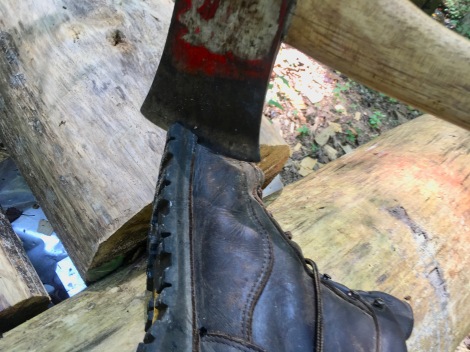
IMG_1613

IMG_1633

Axmanship 101

IMG_1599

IMG_1650

Students discovered and practiced hands-on techniques to safely fell, limb, buck, and split wood with their ax only. Thanks to Georgia Bushcraft, LLC for hosting this class.

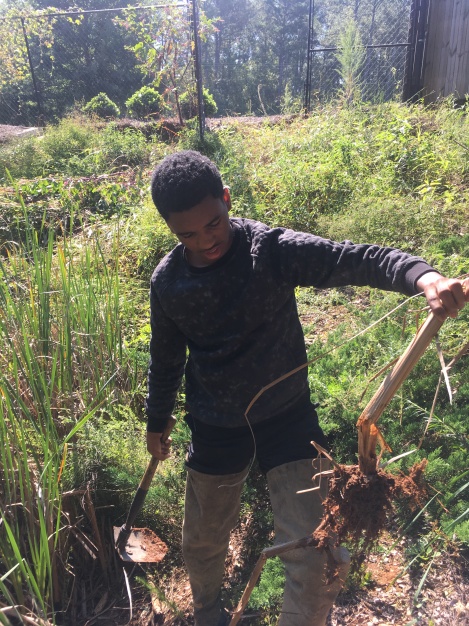
Georgia Bushcraft Fall Gathering

A few of the classes we taught at this years fall gathering. Mel of the Mountains showing students how to make their own buckskin medicine pouches.

IMG_1835

IMG_1834

Two ladies getting their hands dirty practicing the Flip-Flop Winch.

IMG_1833

As you can see, we’ve had a busy schedule recently! If you’d like to stay up to date on future classes and content, be sure to subscribe to our email list here. By the way, we will travel to you or your group’s location for classes and personal instruction.

I’d also like to thank my long-time blogging friend, Patrick Blair of NinjaWolf Studios, for his expert work in building the new Survival Sherpa School website! Be sure to check out Southern Dreams Homestead where he and Jessie are building a self-reliant urban homestead right here in Georgia.

Keep Doing the Stuff of Self-Reliance,

~ Todd

P.S. – You can also keep up with the Stuff we’re Doing on TwitterPinterestYouTubeInstagram, and Facebook… and over at our Doing the Stuff Network.

P.P.S – If you find value in the blog, I would appreciate your vote on Top Prepper Sites! You can vote daily by clicking here or on the image below. Check out all the other value-adding sites while you’re there…

Thanks for Sharing the Stuff!

Copyright © by Survival Sherpa: Content on this site (unless the work of a third-party) may be shared freely in digital form, in part or whole, for non-commercial use with a link back to this site crediting the author. All links in articles must remain intact as originally posted in order to be republished. If you are interested a third-party article, please contact the author directly for republishing information.

Categories: Bushcraft, Camping, Doing the Stuff, Homesteading, Lost Skills, Preparedness, Self-reliance, Survival, Survival Education, Survival Skills | Tags: , , | Leave a comment

How to Build a Rustic Outdoor Swing Bed

by Todd Walker

How to Build a Rustic Outdoor Swing Bed - thesurvivalsherpa.com

This rustic swing bed provides mind-blowing naps! A swing bed is typically hung under a large porch or other roofed structure. Since I have neither of these structures, I decided to build one from rot-resistant Eastern Red Cedar (Juniperus virginiana) and hang it under the trees at the log cabin.

Here are the materials and tools I used.

Material List

  • Rot-resistant lumber milled or purchased. Pressure treated dimensional lumber could be used but will not offer the rustic feel I was going for. My main frame was approximately 4×4’s with live edges.
  • 1x? boards for slats. Limbs used for footboard spindles.
  • Rope or chain. For hanging my bed from two trees, I chose 5/8 inch poly rope I already had for my log cabin projects.
  • Screws. Trim screws, 3 inch deck screws, and 6 inch TimberLoc screws.
  • Polyurethane to help preserve the wood and color of the red cedar.
  • 2 – Two inch wide auto tow straps.

Tools

  • Chainsaw mill. My Alaskan chainsaw mill has provided lots of lumber for several projects over the years. See DRG’s dining room table.

How to Build a Rustic Outdoor Swing Bed - thesurvivalsherpa.com

  • Impact driver and drill… for driving screws and drilling pilot holes and rope/chain holes. Use appropriate sized drill bits as needed.

Size It Up

When this project came to mind, I had no real idea how large a frame I needed. Then I remembered DRG’s air mattress she bought for her tent but never got to use. The queen air mattress measured about four inches short on length than a typical queen mattress (60×80 inches). And since the swing would be under trees (no roof), the air mattress is waterproof and the best choice.

Size Dimensions
Twin 39″ X 75″
Twin XL 39″ X 80″
Full 54″ X 75″
Qu 60″ X 80″
King 75″ X 80″
California King 72″ X 84″

Chart courtesy of American Mattress.

I built the frame to handle the 60×80 inch queen mattress if I ever move the swing under a roof. On the frame, I added 5 inches to the queen width and about 15 inches to the length to accommodate the mattress and give enough room for corner holes for hanging the bed.

How to Build a Rustic Outdoor Swing Bed - thesurvivalsherpa.com

These milled pieces have live edges.

Live edges had to be shimmed to make a flush top surface for the frame. I drilled pilot holes and ran the 6 inch screws in to secure all corners.

How to Build a Rustic Outdoor Swing Bed - thesurvivalsherpa.com

As you can see above, two of the three sides are taller. This is to provide a headboard of sorts for the top and side of the bed. The shorter side would of course be the footboard. The short side is about 16 inches tall with the others being about 24 inches.

I used the toenail method to screw the four corner posts to the frame. I used both deck and TimberLok screws. I was pleased with how sturdy it turned out.

I ran a 2×3 down the middle of the frame lengthwise to help support the bed slats. Since I didn’t want to mill one inch boards, I used 1×6 cedar boards from a box store. Trim screws secured the slats to the frame.

How to Build a Rustic Outdoor Swing Bed - thesurvivalsherpa.com

Corner posts and slats installed. A ledger board was screwed to the frame to give the ends of the slats a resting place.

How to Build a Rustic Outdoor Swing Bed - thesurvivalsherpa.com

Vertical spindles installed the two tall sides.

How to Build a Rustic Outdoor Swing Bed - thesurvivalsherpa.com

Red cedar limbs made the footboard spindles.

I attached the footboard spindles with trim screws. If you’ve ever cut down a red cedar tree, you know how many limbs become available to you for other projects.

Choosing non-natural rope will give your swinging bed longer life. Natural fiber rope tend to degrade in weather sooner.

How to Build a Rustic Outdoor Swing Bed - thesurvivalsherpa.com

Drilling 3/4 inch holes in the four corner beams to accept the 5/8 inch rope. Tip: tape the end of the rope tightly to form a sharpened pencil point to insert into the hole. You’ll thank me later.

How to Build a Rustic Outdoor Swing Bed - thesurvivalsherpa.com

A simple overhand knot holds the rope secure.

How to Build a Rustic Outdoor Swing Bed - thesurvivalsherpa.com

Applying an exterior polyurethane to highlight and protect the beautiful color of red cedar.

With a two-point connection, the bed is less stable getting in and out than if you had a four-point connection. I used two towing straps with hooks wrapped around two trees near my log cabin.

How to Build a Rustic Outdoor Swing Bed - thesurvivalsherpa.com

Philip giving it a test run after helping me hang the bed.

How to Build a Rustic Outdoor Swing Bed - thesurvivalsherpa.com

The air mattress is 18 inches high, too high really for this swing bed.

Bug proofing is handy here in the south. I bought two of the bug nets pictured below. One of these nets is intended for a twin size cot or mattress. I figured two sewn together would cover a queen size mattress. I was right. Melonie, who helped install the log cabin subfloor and porch deck, was nice enough to cut, design, and sew these two together in her “spare” time.

How to Build a Rustic Outdoor Swing Bed - thesurvivalsherpa.com

I bought two mosquito nets, which when sewn together, made a full-coverage net for the bed.

How to Build a Rustic Outdoor Swing Bed - thesurvivalsherpa.com

Queen size bug net hung with bamboo frame.

I enjoy cooler evening temperatures in the swinging bed at the log cabin. The whippoorwills serenade and I usually nap. It’s a peaceful place indeed!

Keep Doing the Stuff of Self-Reliance,

~ Todd

P.S. – You can also keep up with the Stuff we’re Doing on TwitterPinterestYouTubeInstagram, and Facebook… and over at our Doing the Stuff Network.

P.P.S – If you find value in our blog, I would appreciate your vote on Top Prepper Sites! You can vote daily by clicking here or on the image below. Check out all the other value-adding sites while you’re there…

Thanks for Sharing the Stuff!

Copyright © by Survival Sherpa: Content on this site (unless the work of a third-party) may be shared freely in digital form, in part or whole, for non-commercial use with a link back to this site crediting the author. All links in articles must remain intact as originally posted in order to be republished. If you are interested a third-party article, please contact the author directly for republishing information.

Categories: Camping, DIY Preparedness Projects, Doing the Stuff, Homesteading, Log Cabin, Self-reliance | Tags: , , , , , | 5 Comments

The Caveman Catalyst in Your Tinderbox

by Todd Walker

The Caveman Catalyst in Your Tinderbox - TheSurvivalSherpa.com

The human love affair with fire is intimate and ancient. Over the flames we cook, celebrate, spin tales, dream, and muse in the swirls of wood smoke. Fire is life. Its warming glow draws us like moths to a flame.

It’s not a stretch to believe that a Stone Age chemist recognized the idea of using carbon for future fires. Disturbing the leftover carbon ashes from the night fire, she stares at sparkles of light glowing like the pre-dawn stars above. She carefully nurses a baby “star” back to life to warm her hearth and home.

It ain’t rocket surgery. Even cavemen knew the importance of the sixth most abundant element in the universe.

Carbon and Future Fires

The game of chasing lightning strikes for each fire was no longer required. This unreliable practice was abandoned for twirling sticks together to create enough heat to initiate the combustion of blackish, carbonized dust. Even with a dependable friction fire apparatus, a more elemental plan was stumbled upon for their next fire. Carbon was the caveman catalyst for future fires.

The Caveman Catalyst in Your Tinderbox - TheSurvivalSherpa.com

Carbonized dust glowing from friction.

Charcoal speeds up that wonderful exothermic reaction of combustion. Align a convex lens perpendicular to full sun on different non-charred tinder material. Smoke will rise in a minute. Do the same with charred material and a glowing ember is birthed in seconds. Weak flint and steel sparks produce the same glow.

When material containing carbon is heated without enough oxygen, charred material is the result. We teach our students to make char cloth at school. One side of the Fire Triangle is neglected by heating material in a closed chamber (Altoids tin). [I have a class set of Altoids tins stored in an old cassette tape container. Only a few students have ever heard of these “ancient” musical devices.] The lid hinge vents the volatile gases as the material is heated. When baked, the black charred material takes a spark from flint and steel.

Un-Burned Carbon in Ashes

Over the years, David West sparked my interest in the role of wood ash impregnated in tinder through his experiments on his channel. View his entire Ashed Tinder Playlist here. This, my pyro friends, has been a game-changer for me. Rubbing wood ash on any tinder material accelerates the combustion process.

Saving wood ash from previous fires has become an important part of my fire kit. A few years ago at a Georgia Bushcraft Gathering, I had a young kid ask during a Rudiger Roll (fire roll) demonstration why I added ashes to the cotton ball before rolling between the two boards. I had no real scientific explanation. I just did what I saw David West do.

Here’s my theory. Though wood ash looks nothing like charcoal, enough non-burned carbon remains in ash to significantly lower the temperature required to ignite tinder. Saturating any un-charred tinder (inner bark, jute twine, plant fiber, cotton material) with wood ash provides an excellent fire extender. In the video below, David shows a 4 foot strip of ashed denim burning/smoldering for 3 hours in time-lapse.

Following the lead of Stone Age chemists, making plans for future fires was smart. The thumb drill (lighter) was several millennials away from store shelves. Fire was not automatic. I make it a habit of separating burning logs in the fire pit at the end of each class at school. These partially charred sticks of cellulose are the stepping stone for the next morning’s fire lay. No need to start from scratch each day when charcoal is plentiful in the fire pit.

Carbon Steel and Rock

Flint and Steel was the most popular fire-making method up until matches and lighters lit up our world. Even without iron strikers, sparks could be delivered to charred material using the right combination of stones. The common catalyst in all primitive fire methods is carbon.

Modern re-enactors and nostalgic woodsmen continue to use flint and steel as fire starters. The method takes less energy and practice than fire by friction. The typical flint and steel kit consist of a high-carbon steel striker, a sharp rock (doesn’t have to be flint – any hard, silica based rock will work), and char cloth in a metal container.

However, cotton cloth does not grow in the woods. For a flint and steel kit to be sustainable long-term, natural materials can be carbonized.

My best experiences using charred natural material include:

  • Punky wood – Decaying wood which is spongy when squeezed between thumb and finger. My favorite is the sap wood of Eastern Red Cedar (Juniperus virginiana). I’ve had good luck finding it on the underside of blown down cedars in the right stage of decay.
The Caveman Catalyst in Your Tinderbox - TheSurvivalSherpa.com

Punky cedar sap wood has a stringy consistency which makes great char material.

  • Pithy weed stalks – Crack open the woody stalk of dead Mullein (Verbascum) and remove the spongy pith. Cook it in a container like char cloth for an excellent F&S spark-catcher.
  • Natural tinder/cordage – Tulip Tree (Liriodendron tulipifera) twisted cordage has worked but not as well as the previously mentioned materials. Yucca (Asparagaceae) cordage works as well.

The only non-charred natural material I’ve found to consistently take a weak spark from F&S is:

  • Chaga (Inonotus obliquus) – This fungus grows on birch trees in higher altitudes. It is called True Tinder Fungus as it will catch a spark from F&S. It also will smolder for a long time for a fire extender.
The Caveman Catalyst in Your Tinderbox - TheSurvivalSherpa.com

Thin slices of chaga ignited with flint and steel sparks.

I have friends who have achieved F&S embers using other non-charred material. Phillip Liebel, instructor at Flint and Steel Critical Skills Group, discovered that the inner lining of gourds will take a spark from F&S. It’s a very fine, papery material which burns rapidly. Joshua Enyart, founder of Flint and Steel Critical Skills Group, has used the Milkweed (Asclepias) pod to make fire with F&S. I’m sure there are other non-charred natural material out there that will work. Just recently I attempted the following with no success…

  • Dog hair – Moose, our oldest rescue dog, sheds fine clumps of hair. A few sparks landed and fizzed out without catching. Looked promising.
  • Cattail duff – White fluffy stuff is always worth trying. Still a no-go for me.
  • Mullein pith – Did not work. I sliced some to form a fine, triangular edge. Sparks landed on the edge with no glow.

The above works well when carbonized, except dog hair. In my experience, any natural tinder material you’d normally use to build a tinder bundle will take a spark from F&S when charred. The exception to this is fat lighter’d (aka – fatwood). Don’t char fat lighter’d in a tin. You’ll end up with resin coating the bottom of your container.

Non-charred and Un-natural F&S Ignition 

Good luck finding the elusive steel wool tree in the wilderness. I keep a pad of 0000 steel wool in my pack for cleaning axes and tools in the field. For stubborn tinder, add a pinch of steel wool and strike it with F&S. Once the spark catches and begins to spread like tiny dynamite fuses, the tinder becomes super-heated from rapid oxidation.

Gun powder will also ignite with F&S sparks. Flintlock rifles utilized this technology to explode powder and launch projectiles down range. A modern woodsman will likely have a cartridge of some kind which contains gun powder. Carefully remove the bullet from the brass cartridge and pour out a small amount of powder charge. Be ready to transfer the heat from the lit powder to your tinder material. It goes up in a flash.

Carbon Ash Experiments Coming

The South African tonteldoos pocket tinderbox I made rides in my F&S kit. It works well as long as the charred surface is charred well. With sporadic use, the dark char turns brownish from knocking around in my kit. In a future post, I plan to experiment with the mop head strands to see if impregnating them with wood ash will aid in ignition on brownish charred ends. This should be interesting.

The Caveman Catalyst in Your Tinderbox - TheSurvivalSherpa.com

A student achieving ignition with the Tonteldoos.

We’re also planning a post on making charred material without the typical metal container. Stay tuned.

Keep Doing the Stuff of Self-Reliance,

~ Todd

P.S. – You can also keep up with the Stuff we’re Doing on TwitterPinterestYouTubeInstagram, and Facebook… and over at our Doing the Stuff Network.

P.P.S – If you find value in our blog, Dirt Road Girl and I would appreciate your vote on Top Prepper Sites! You can vote daily by clicking here or on the image below. Check out all the other value-adding sites while you’re there…

Thanks for Sharing the Stuff!

Copyright © by Survival Sherpa: Content on this site (unless the work of a third-party) may be shared freely in digital form, in part or whole, for non-commercial use with a link back to this site crediting the author. All links in articles must remain intact as originally posted in order to be republished. If you are interested a third-party article, please contact the author directly for republishing information.


Categories: Bushcraft, Camping, Doing the Stuff, Primal Skills, Self-reliance, Survival Skills | Tags: , , , | 13 Comments

How Danner Boots Screwed the Laws of Physics

by Todd Walker

How Danner Boots Screwed the Laws of Physics - TheSurvivalSherpa.com

A boot full of blood. Tenons and bones severed. A tourniquet to stop arterial bleeding.

After watching the video footage of the ax striking my foot, all of the above should have happened but didn’t. I kept working on the log cabin. In fact, a whole month passed before a coworker noticed and asked how I sliced my boot.

“Huh?”

“Your boot. How’d you cut it?”

How Danner Boots Screwed the Laws of Physics - TheSurvivalSherpa.com

Inspection at school.

How Danner Boots Screwed the Laws of Physics - TheSurvivalSherpa.com

I really had no idea. I would have remembered almost lopping my foot off. No recollection of me bent down like a toddler filling his diaper, mouth gaping in terror, in search of blood. I racked my memory.

An axman should remember and learn from close calls. I dug into old video footage and found the ax-boot encounter.

In all my years of swinging axes, I’ve never been bit seriously. Blood has dripped from minor nicks while handling an ax or in the sharpening process. But never in full swing.

At the 1:22 mark in the video below, you’ll see how I violated the Frontal Zone Rule by dangling my foot over the log like bait over the rail of a deep-sea fishing boat.

Did Danner Defy Physics? 

Newton’s Third Law of Motion states that for every action, there is an equal and opposite reaction. Forces occur in pairs. Each force is of equal strength but in opposite direction. Even though the two forces are equal, this does not mean that they will cancel each other and stop movement.

Nothing defies the physical laws of nature except comic book superheroes. My Explorer boots reached Superman status after stopping a speeding ax.

Dan, a buddy of mine, said I should bronze the boots and place them on my mantle as a family heirloom. He has a good point. Even with the ax gash, I still wear them to school everyday to teach traditional outdoor skills. On weekends building my log cabin, they remain watertight and too comfortable not to wear.

How Danner Boots Screwed the Laws of Physics - TheSurvivalSherpa.com

Boots still on the ground in our outdoor classroom.

American Made Craftsmanship

I keep my working axes honed and shaving-sharp. The ax strike separated the inside edge of my boot sole, surgically splitting one stitch, and slicing the leather upper. I really expected the adjacent stitching to begin to fail. Two and a half months of daily wear since the ax-ident and not a stitch has unravelled. These Superman boots are built to last. Thanks to Danner’s superior, Made in America craftsmanship, my foot is not a nub!

How Danner Boots Screwed the Laws of Physics - TheSurvivalSherpa.com

Thank you, Danner!

Buy Once, Cry Once

“Price is what you pay and value is what you get.”

~ Warren Buffet

Buying high quality boots is like old-fashioned window shopping. The item catches your eye. You really want it. Then you see the price tag. There’s no way you can pay that price. But you still go out of your way to walk past that window daily to get another look and dream of owning the thing.

Your desire hasn’t changed, you’re just not willing to pay the price.

Price is painful once but value lasts long-term. You see, I wanted a pair of high-quality, American-made boots, that could be resoled after many years of tramping in the woods. Even after the ax sliced my boot, not one tear rolled down my face. My foot is worth more than the price of these fine boots! I’m a lifetime customer now. If Danner can’t re-craft the sliced leather upper, I’ll continue to wear them as a sober reminder while swinging axes.

Fit, Finish, Break-In

Opening the box and holding these brand new boots made me smile. The seams were double-stitched with precision. One feature I like about these Explorers is the minimum amount of seams in the boot. This can only reduce the chances of leakage or snags when tramping through rough terrain and bogs. Even the laces are made of quality material.

The Vibram sole grips wet and dry soil like a mama hugging her son returning from war. The wide rubber sole adds stability and amazing traction. I typically trim pine bark off the top of logs where I’ll place my feet when under bucking with my double bit ax. This step is not needed since I bought the Explorers. The aggressive treads hold my feet in place securely on the bark. The only surface I’ve found they don’t grip is freshly peeled inner pine bark (see above blooper video). A man would need hobnail boots to stand on this slick stuff!

How Danner Boots Screwed the Laws of Physics - TheSurvivalSherpa.com

Nature’s slippy slide

I kept an old pair of boots in my truck the first week I wore my Explorers. Never needed to use the spares. No hot spots on my heels or other suspected pressure points I would normally feel from snug fitting leather boots. I played around with the lacing to fine tune the fit over that first week. The full-grain leather upper began mating to my feet like the soft breath of wool socks on a winter day. These rugged boots love my feet and punish rocks and roots – even axes.

If you want a boot that can handle the rigors of building an off-grid log cabin, rugged backwoods adventures, and still look good at the office, pay the price and get yourself a pair of Explorers. If you want lightweight, synthetic, Vegan friendly, foreign-made footwear, look elsewhere. Danner Explorer full-grain leather boots are handcrafted from top to bottom in Portland, Oregon (Made in USA).

One of my grandsons will receive my Superman boots when I’m gone with the story of how they saved my foot that hot July day in Georgia.

Keep Doing the Stuff of Self-Reliance,

~ Todd

P.S. – You can also keep up with the Stuff we’re Doing on TwitterPinterestYouTubeInstagram, and Facebook… and over at our Doing the Stuff Network.

P.P.S – If you find value in our blog, Dirt Road Girl and I would appreciate your vote on Top Prepper Sites! You can vote daily by clicking here or on the image below. Check out all the other value-adding sites while you’re there…

Thanks for Sharing the Stuff!

Copyright © by Survival Sherpa: Content on this site (unless the work of a third-party) may be shared freely in digital form, in part or whole, for non-commercial use with a link back to this site crediting the author. All links in articles must remain intact as originally posted in order to be republished. If you are interested a third-party article, please contact the author directly for republishing information.

Categories: Bushcraft, Camping, Doing the Stuff, Log Cabin, Self-reliance | Tags: , , , , | 2 Comments

Our First Year of Building Self-Reliance Skills at RISE Academy

by Todd Walker

Our First Year of Building Self-Reliance Skills at RISE Academy ~ TheSurvivalSherpa.com

School is out for summer. Here’s a look in the rear view mirror at our first year of Project Based Learning at RISE Academy.

Our students and staff wish to thank each of you for the encouraging words, moral support, and following our journey of Doing the Stuff of Self-Reliance! Below is a pictorial recap (picture-heavy) of the skills, projects, and links to more in-depth posts for those interested in learning these skills.

Cutting Tool Safety and Use

Our First Year of Building Self-Reliance Skills at RISE Academy ~ TheSurvivalSherpa.com

Carving tent stakes.

Our First Year of Building Self-Reliance Skills at RISE Academy ~ TheSurvivalSherpa.com

Aware of his “blood circle”

Our First Year of Building Self-Reliance Skills at RISE Academy ~ TheSurvivalSherpa.com

How to safely chop kindling.

Our First Year of Building Self-Reliance Skills at RISE Academy ~ TheSurvivalSherpa.com

The draw knife was a hit with the students.

Our First Year of Building Self-Reliance Skills at RISE Academy ~ TheSurvivalSherpa.com

Cutting rounds for “burn and scrape” spoons and bowls.

Related Links:

Outdoor Classroom Construction

Early in the school year, we decided to build an outdoor classroom. Nothing too fancy but functional for our needs. Students used math skills to square corners, learned to read a tape measure (fractions), and lashed the bamboo structure together. Their lashings held fast even through Hurricane Irma.

Our First Year of Building Self-Reliance Skills at RISE Academy ~ TheSurvivalSherpa.com

A lot of square lashings were tied.

Our First Year of Building Self-Reliance Skills at RISE Academy ~ TheSurvivalSherpa.com

A few of the crew.

Our First Year of Building Self-Reliance Skills at RISE Academy ~ TheSurvivalSherpa.com

Raising the roof

Our First Year of Building Self-Reliance Skills at RISE Academy ~ TheSurvivalSherpa.com

The roof secured

Related Links:

The Science of Fire

We have a joke around school when I’m asked, “What are we doing today?” My typical response is, “Cutting and burning stuff.” You may not get it, but fire takes center stage in the life of our outdoor classroom. Learning to use fire as a tool is paramount for outdoor living and education.

Fire by Friction

Our First Year of Building Self-Reliance Skills at RISE Academy ~ TheSurvivalSherpa.com

Double teaming the bow drill.

Our First Year of Building Self-Reliance Skills at RISE Academy ~ TheSurvivalSherpa.com

A hand drill coal blown into flame.

Related Links: 

Fire by Spark Ignition

Our First Year of Building Self-Reliance Skills at RISE Academy ~ TheSurvivalSherpa.com

Birthing fire from flint and steel

Our First Year of Building Self-Reliance Skills at RISE Academy ~ TheSurvivalSherpa.com

Practicing flint and steel ignition under an emergency tarp.

Our First Year of Building Self-Reliance Skills at RISE Academy ~ TheSurvivalSherpa.com

Ferro rod fire in the rain

Related Link: 

Fire by Solar Ignition

Our First Year of Building Self-Reliance Skills at RISE Academy ~ TheSurvivalSherpa.com

Mr. Andrews demonstrating solar ignition

Practical Tools and Crafts

Burn and Scrape Containers

This may be the most mesmerizing of all the skills students learned.

Our First Year of Building Self-Reliance Skills at RISE Academy ~ TheSurvivalSherpa.com

Showing off burned bowls.

Bark Containers

Students used Tulip Poplar (Liriodendron tulipifera) bark to craft traditional containers.

Our First Year of Building Self-Reliance Skills at RISE Academy ~ TheSurvivalSherpa.com

Stitching sides with artificial sinew.

Our First Year of Building Self-Reliance Skills at RISE Academy ~ TheSurvivalSherpa.com

A grape-vine was used as the rim on this basket.

Related Link:

Hoko Knife

A simple way to introduce primitive technology to students is to make a Hoko knife. This stone cutting tool was discovered on the Hoko River archeological site in Washington State. A landslide destroyed the native fishing village about 2,700 years ago preserving artifacts of their material culture.

Our First Year of Building Self-Reliance Skills at RISE Academy ~ TheSurvivalSherpa.com

The flint flake compressed in a split stick with natural cordage.

Our First Year of Building Self-Reliance Skills at RISE Academy ~ TheSurvivalSherpa.com

Some were wrapped with modern cordage (tarred mariner’s line).

Related Link:

Pine Pitch Glue

Our First Year of Building Self-Reliance Skills at RISE Academy ~ TheSurvivalSherpa.com

Pine pitch, charcoal, and a variety of containers to hold the glue.

Our First Year of Building Self-Reliance Skills at RISE Academy ~ TheSurvivalSherpa.com

Crushed charcoal added to the mix.

Our First Year of Building Self-Reliance Skills at RISE Academy ~ TheSurvivalSherpa.com

Heating the pitch glue low and slow.

Related Link: 

Natural Cordage

Our First Year of Building Self-Reliance Skills at RISE Academy ~ TheSurvivalSherpa.com

Reverse twist cordage from cattail leaves.

Our First Year of Building Self-Reliance Skills at RISE Academy ~ TheSurvivalSherpa.com

Cordage made from a variety of natural materials.

Related Link:

Atlatl

What’s an atlatl?

A simple dart-throwing stick with a handle on one end and spur (male end) or socket (female end) on the other end. The dart, a flexible spear, mates with the spur/socket when thrown. Typically about two feet long, an atlatl employs leverage to extend the arm’s length to propel a dart further and with more velocity than when thrown using only the arm.

Our First Year of Building Self-Reliance Skills at RISE Academy ~ TheSurvivalSherpa.com

Notice the bend in the dart shaft when thrown.

Our First Year of Building Self-Reliance Skills at RISE Academy ~ TheSurvivalSherpa.com

She was proud of her accurate throws.

Related Links:

Campfire Cooking

Our First Year of Building Self-Reliance Skills at RISE Academy ~ TheSurvivalSherpa.com

Cooking over an open fire.

Our First Year of Building Self-Reliance Skills at RISE Academy ~ TheSurvivalSherpa.com

Ms. Byrd enjoying s’mores before Christmas break.

Related Link:

I’ve also created a RISE Academy Playlist on our YouTube channel. if you’d like to see our students Doing the Stuff, click on the video link below:

Many Thanks!

The things we have to learn before we do them, we learn by doing them.

~ Aristotle

We cannot thank you enough for all the support and encouragement you’ve given our students whom you’ve never met! The full impact of this journey in experiential education may never be known. It’s difficult to quantify. But you can see it in their eyes and hear it in their voice.

Some of you have asked how you might help in more tangible ways. Stay tuned for updates on becoming a partner/sponsor with RISE Academy. Until then…

Keep Doing the Stuff of Self-Reliance,

~ Todd

P.S. – You can also keep up with the Stuff we’re Doing on TwitterPinterestYouTubeInstagram, and Facebook… and over at our Doing the Stuff Network.

P.P.S – If you find value in our blog, Dirt Road Girl and I would appreciate your vote on Top Prepper Sites! You can vote daily by clicking here or on the image below. Check out all the other value-adding sites while you’re there…

Thanks for Sharing the Stuff!

Copyright © by Survival Sherpa: Content on this site (unless the work of a third-party) may be shared freely in digital form, in part or whole, for non-commercial use with a link back to this site crediting the author. All links in articles must remain intact as originally posted in order to be republished. If you are interested a third-party article, please contact the author directly for republishing information.

Photo and Video Credits: Many of the photos were taken by Mr. Chris Andrews (teacher) and various RISE students. Video footage was shot mainly by students and guided by Mr. Michael Chapman (teacher).

Categories: Bushcraft, Camping, Doing the Stuff, RISE Academy, Self-reliance | Tags: , , , | 1 Comment

Which Camp Kool-Aid Do You Drink? Kit Dogma or Skill Cult?

by Todd WalkerWhich Camp Kool-Aid Do You Drink_ Kit Dogma or Skill Cult_ - TheSurvivalSherpa.com

Snap! My ax handle was in two pieces. Now what? Would I sink or rise above a tool failure?

The good news is that my truck was a short walk from fixed camp. I crossed the creek, pulled a hill, and grabbed another ax from my truck. The day was saved.

Could I have made a stone ax? That’s a ridiculous notion seeing as how I was cutting a cord of firewood with an ax.

Every outing is different. People have different styles and tastes. Skill sets vary. I’m now knee-deep into building a log cabin in the woods with hand tools. You better believe I carry more than a knife and belt ax to the project. I bring what I need to make the job easier. Here are the most used tools at this stage of felling, bucking, and debarking logs…

  • Axes
  • Bark Spud
  • LogRite Jr. Arch
  • Cant Hook

Once the walls begin to be laid, my tool box will expand considerably. This cabin project isn’t a camping trip. An ax is the only tool from the above list that goes camping with me. Tools in your kit should be able to multitask but some are trip or mission specific. I have different kits depending on how I want to play in the woods.

The internet is full of proselytizers. One denomination promotes Kit Dogma. Others preach from the Skill Cult pulpit. If you don’t convert to one side or the other, you’ll be damned to hell if you’re ever in that dreaded “survival situation.” Can I get a witness!?

Note: When using the term “Skill Cult,” I’m not referring to Steven Edholm’s excellent YouTube channel and blog. While I can’t speak for Steven personally, I think he’d agree with me on the point I’m about to make. He uses and makes a variety of tools coupled with self-reliant skills for the stuff he’s doing. I highly recommend checking out his content if you haven’t already!

Kit Dogma vs Skill Cult

Believe it or not, grown men get their under britches in a wad over kit and skills. Virtual fist fights break out about the best knife, ax, saw, and get this, which trousers are best. The same is true if you ask which skill is most important to a woodsman. It’s a symphony of swollen egos chanting, “We’re NUMBER 1! We’re NUMBER 1!”

At what?

The internet has done us no favors in this department. New pilgrims see all this and think they have to pick sides. Failing to question the nonsense, they’re lured into the trap of conformity. And lists. And rules. And hero-worship.

The truth, however, will set you free!

Here’s the truth…

You need both kit and skill.

The pesky part of this truth is you must have a deep desire to learn how to use your kit to improve your skills through your experiences. This truth is the hardest for most of us to wrap our heart and hands around.

Kit Dogma

Dogmatic attitudes are displayed in more than just religion and politics. Beware of kit evangelists who aggressively enforce sacred cow gear.

Which kit items are essential? This begs another question… for what? What ya doing in the woods? Car camping, hiking, canoeing, backpacking, hunting, tramping, photography, fishing, primitive camping, foraging, Classic Camping, building shelter, etc., etc., … you get the picture.

Members of the ACORN Patrol at the 2017 Kephart Days. These folks know a thing or two about camp comforts.

Here’s a thought…

Bring what you need to the woods. No shame in packing the gear you need to match your skill level. Camp comfortably, no matter how many sacks of stuff it takes. This ain’t a competition. Play by your rules on your home field. With each trip to the field, you’ll figure out what to leave home or add on your next outing.

Marketers teach us, the consumer, why we should choose one product or service over competitors. I’ve heard some disgruntled woodsmen complain that Madison Avenue has set up shop in the woods. There’s nothing new about this trend. At the height of the Golden Age of Camping (1880-1930), Henry Ford, Abercrombie & Fitch, Duluth Pack, Pendleton, and others made lots of money selling sporting goods to outdoorsmen. Young’uns are shocked when I point out the history behind the expensive “A&F” logo on their apparel.

Let’s be honest, we’re all gear junkies to some extent. It’s easy to miss the point of kit collections. All this stuff is just shiny gadgetry unless we anchor them to the landscape with skills. Our lineage always leads us back to the land.

Through years of camping, my constant companions have been my ax and knife. There aren’t many tools which have enhanced my comfort around the campfire more than these. Of course, my trusty thumb drill (Bic lighter) is always in my pocket. No, I don’t always use primitive friction fire methods. Yes, I have backup fire-makers depending on my intentions. Some hardcore folk may frown upon this dependable open flame, but, again, match your kit with your skill level.

Here’s something else to keep in mind concerning kit selection. A YouTuber unboxes a tool and talks fit and finish. Don’t bristle, it’s just that I’ve never found “shiny object” reviews to provide practical help. Videos of someone actually using the tool in the field is better, but not enough. I need to wrap my hands around it and see how it fits my needs.

Skill Cult

My interests range from Stone Age technology to modern camping. And I have kits to fit this wide spectrum.

I’ll confess that I lean heavily toward skill cult. This doesn’t discount the need for quality gear in my journey. I’m all about buying/making dependable gear that fits me and suits the stuff I’m doing.

My blue-collar overland rig is a roof top tent atop a homemade utility truck body. One of the reasons I love this trailer is that it reminds me of Daddy’s old 1970 model GMC plumbing/welding truck. With calloused hands, he taught me the lessons of his trade, work ethic, and the value of a hard days work.

Set up at the Georgia Bushcraft Spring Gathering.

My working-man upbringing translates well into outdoor living skills. It takes hard work and patience to not only develop these skills, but keep them in proper context.

I’ve found in my experience that when skills grow, kits shrink. Practicing primitive skills may seem silly to modern campers. However, these primal first skills are the common denominator linking us to our past and the land. Making fire by twirling sticks together, for instance, takes careful attention to detail on every step of the fire-making process. That’s the practical part of primitive fire. The priceless piece is the flame lit in my soul.

An Emergency Slush Lamp Hack Using a Torch Plant Leaf - TheSurvivalSherpa.com

Mullein on mullein hand drill coal

Which skills are essential for your camp? However you answer, the essence of our discussion here is the context of how these skills (and kits) relate to you and your wilderness.

These are my baseline recommendations. Your camping style may differ…

A chuck box passed down to one of our Scouts from his grandfather.

On your journey from tenderfoot to thoroughbred camper, remember, don’t drink the proverbial Kool-Aid. Discover your essential kit items, through actual experience, which will enhance the skills necessary to sleep at night in your wild places.

Keep Doing the Stuff of Self-Reliance,

~ Todd

P.S. – You can also keep up with the Stuff we’re Doing on TwitterPinterestYouTubeInstagram, and Facebook… and over at our Doing the Stuff Network.

P.P.S – If you find value in our blog, Dirt Road Girl and I would appreciate your vote on Top Prepper Sites! You can vote daily by clicking here or on the image below. Check out all the other value-adding sites while you’re there…

Thanks for Sharing the Stuff!

Copyright © by Survival Sherpa: Content on this site (unless the work of a third-party) may be shared freely in digital form, in part or whole, for non-commercial use with a link back to this site crediting the author. All links in articles must remain intact as originally posted in order to be republished. If you are interested a third-party article, please contact the author directly for republishing information.

Categories: Bushcraft, Camping, Doing the Stuff, equipment, Self-reliance | Tags: , , | 17 Comments

Campfire Cookery: How to Cook Tasty Meals Over an Open Fire

by Todd Walker

Campfire Cookery - How to Cook Tasty Meals Over an Open Fire ~ TheSurvivalSherpa.com

Prepping a cook fire depends on what type of cookin’ you’ll be doing and the fuel available. In my area of Georgia, we have an abundance of hardwood to choose from. I’ll describe my experience with wood we burn. Not every area is as fortunate. That doesn’t mean you can’t cook up goodness over a campfire. Use the resources available in your woods.

The problem with campfires is they don’t have a knob to dial the heat up or down like a kitchen stove. Learning to managing your cook fire for what you’re cooking is key. If all you’re having is ramen noodles and hot cocoa, a hot burning twig fire will get the job done. Cast iron cooking needs a whole new arrangement of hot coals. Baking biscuits in a reflector oven requires radiant heat from flames.

This is not a comprehensive guide to open-fire cookery. I’ll give you basic guidelines that have worked for me when baking and cooking at fixed camp. If you cook in your kitchen, you can cook over a campfire.

Cooking at a permanent or semi-permanent fixed camp is different than when sauntering from one camp location to the next. This article won’t apply to the ultralight hiker cooking freeze-dried meals with a cup of boiling water. Weight is not as big of an issue if you’re canoe or car camping. So load the equipment you need to whip up stick-to-your-ribs food and take to the woods and streams.

Wood Processing Tools

Charcoal briquette don’t grow on trees. You’ll have to collect wood and make your own coals. An ax and saw are tools you’ll find useful. We have two pages on our blog if you need to hone your ax skills: Ax Cordwood Challenge and The Ax-Manship Series. Our YouTube channel also has instructional videos in a few playlists you may find helpful: The Axe Cordwood Challenge and Ax-Manship.

You need dry/seasoned wood for your cook fire. Look for standing dead trees since you don’t want to wait six to nine months to season your wood. Tulip Poplar (Liriodendron tulipifera) is a good choice for dry kindling in my area. Red cedar works as well. Both burn fast and hot but won’t produce the hot bed of coals you’ll need for grilling. Add hardwoods like oak, hickory, and beech for long burning coals. Can’t always be choosy so use what you have available.

Campfire Cookware

Improvising in the woods is often what happens to get food cooked. No need to if you bring the cookware needed for meals. Keep in mind that we’ve got a way to tote this stuff; car, canoe, mule, etc., etc.

My load of cooking stuff is in a constant state of evolution. But I think I’ve settled on a system. Tim Smith of Jack Mountain Bushcraft introduced me to stainless steel milk pails a few years ago in his book, The Woods Cook. As a Master Maine Guide, Tim has been feeding folks professionally over an open fire since 1999.

Below are a few items I use to cook at fixed camp and our outdoor classroom at RISE Academy…

  • Cast Iron skillet
  • Steel Fry Pan: Lighter than cast but doesn’t cook as evenly
  • Stainless Steel Pails: 2 quart with six-inch rim (6 inch pie tin for lids), and a 9 quart with a nine-inch rim (9 inch pie tin for lid)
  • Pot/Lid Lifter makes it easy to handle pails and lids when hot
  • Cast Iron Dutch Oven: 10.5 inch with a flanged lid and three legs
  • Improvised Reflector Oven: Stainless steel drywall mud pan is large enough to bake a few muffins/biscuits/cookies at a time
  • Heavy Duty Aluminum Foil: Great for hobo meals
Campfire Cookery - How to Cook Tasty Meals Over an Open Fire ~ TheSurvivalSherpa.com

Top row left to right: 9 quart SS pail with pie pan lid, 2-two quart pails with pie pan lids, coffee tin. 2nd Row: cold handle steel skillet, square cast iron skillet, dry wall mud pan. Bottom: 10.5 inch dutch oven in a box with lid lifter.

Most folks I know take only one pot to save pack space when camping on foot. Having two or more pots is a game changer around the campfire. The beauty of these milk pails is that they nest together decreasing the footprint when compared to the several cylindrical cook pots. This is a space-saving advantage if you’re traveling on foot or any other means of transportation. The pie pan lids also double as plates when you’re ready to eat.

Campfire Cookery - How to Cook Tasty Meals Over an Open Fire ~ TheSurvivalSherpa.com

Both 2 quart pails nest inside each other and fit in the 9 quart pail with room for other items if necessary.

Campfire Cookery - How to Cook Tasty Meals Over an Open Fire ~ TheSurvivalSherpa.com

The end result of nesting.

Managing Cooking Fires

You’d best process or collect enough kindling-size wood to keep your heat steady. Once lit, keep adding kindling sticks to maintain a robust fire that eats through the top of your fire lay. Take advantage of these hot flames by hanging a pot of water from a cooking tripod for coffee, tea, or cocoa. A second pot can be added to disinfect drinking water.

Campfire Cookery - How to Cook Tasty Meals Over an Open Fire ~ TheSurvivalSherpa.com

Cowboy coffee on.

Once your fuel has burned long enough to produce a nice bed of coals, drag or scoop a pile of hot coals from main fire. When grilling meat at fixed camp, I’ll use two green wrist-size sticks (if I can’t find my metal pipe) to support a grill grate over the coals. Adjust the height of your grate up or down for temperature control. No grate available? Lay the steak directly on the hot coals. Sounds unsanitary but I end up eating a little ash in most of my camp meals anyway.

Campfire Cookery - How to Cook Tasty Meals Over an Open Fire ~ TheSurvivalSherpa.com

I keep a grill grate at fixed camp for times such as these. Bacon wrapped filets!

For a camp dutch oven with three legs on the bottom, sprinkle coals on top of the flanged lid and around the perimeter at the bottom of the oven. With experience, you’ll learn to adjust the amount of coals to control the temperature of whatever you’re cooking. You can’t count wild coals like store-bought briquettes.

Campfire Cookery - How to Cook Tasty Meals Over an Open Fire ~ TheSurvivalSherpa.com

At a recent Georgia Bushcraft work weekend, Jeff and Melonie cooked two delicious dutch oven cobblers and shared with the cold, hungry crew!

To bake small servings of baked goods, I found that a stainless steel drywall mud pan does the trick. Place the reflector oven on the ground level with your fire. The drywall pan isn’t really large enough for a baking rack. You need radiant heat from flames for baking. Stoke the fire with your driest kindling sticks so that the flames cover the opening of your reflector oven throughout the baking process.

Campfire Cookery - How to Cook Tasty Meals Over an Open Fire ~ TheSurvivalSherpa.com

DRG and I baking cookies on our date night in the woods.

To gauge the heat entering your reflector oven, place you palm just in front of the oven and count to 5 quickly. If you reach 5 before nerves in the back of your hand tell your brain to jerk out of the heat, you’re at a good baking temperature (around 350 F). Any lower in the 5-count and the temperature in your oven is above baking temperature.

I fill cupcake liners with cornbread mix and place them directly on the bottom of the pan. Rotate the muffin tins as needed to brown and cook evenly. This diy oven has no handles so be careful when lifting it from the fire’s edge. Thick leather gloves or a pot/lid lifter, described above, are recommended.

Hanging Pots

At my fixed camp, I prefer a bipod system instead of a tripod for hanging pots over the fire. Two sturdy poles are lashed together with a long pole (waugan stick) laid in the top of the crotch. The other end of the waugan is lashed (loosely) to a tree opposite my fire pit. Minor height adjustments can be made to the waugan by spreading or closing the bipod. You can also swing the entire system off the fire safely by lifting and moving the bipod while the opposite end of the waugan pivots around the tree.

Of course, if you don’t have a tree near your fire pit, a tripod system may be your best option. Add a crossbar to the tripod to suspend more pots.

If you favor traditional woodcraft style, here’s our article on carving several useful pot hooks. I use carved pot hooks and modern chain to hang pots from my pot suspension system. Carving your own pot hooks boosts your knife skills considerably. Use whatever suits you.

Plate and Enjoy

The entire experience of cooking over an open fire, collecting firewood, starting your fire, managing the flames, and timing the meal is a celebration of sorts. Everything doesn’t always go as planned, but that happens in the kitchen, too. I’ve had some major flops in camp cooking. In the end though, and you’ve probably heard it said, food tastes better flavored with woodsmoke from campfires.

Campfire Cookery - How to Cook Tasty Meals Over an Open Fire ~ TheSurvivalSherpa.com

Hobo packet of potatoes and onions with filets.

Serve your food up on warm plates. I lay my 9 inch pie tins on coals or propped up near flickering flames just before the last recipe is done. Nothing disappoints like what used to be hot cheese eggs on a cold plate. My daddy always said, “It just ain’t right! Ya gotta eat ’em hot.”

Keep Doing the Stuff of Self-Reliance,

Todd

P.S. – You can also keep up with the Stuff we’re Doing on TwitterPinterestGoogle +YouTubeInstagram, and Facebook… and over at our Doing the Stuff Network.

P.P.S – If you find value in our blog, Dirt Road Girl and I would appreciate your vote on Top Prepper Sites! You can vote daily by clicking here or on the image below. Check out all the other value-adding sites while you’re there…

Thanks for Sharing the Stuff!

Copyright © by Survival Sherpa: In light of the recent theft of all my content by a pirate site, my sharing policy has changed. I do not permit the re-posting of entire articles from my site without express written consent by me. My content on this site may be shared in digital form (200 words or less) for non-commercial use with a link back (without no-follow attribute) to the original article crediting the author. All photos, drawings, and articles are copyrighted by and the property of Survival Sherpa. You are more than welcome to share our photos and articles on social media for educational purposes as long as you link back to the original article/photo with credit to the author.

Categories: Bushcraft, Camping, Doing the Stuff, Real Food, Self-reliance | Tags: , , , , | 10 Comments

Off Grid Medic: Surviving Wilderness Emergencies When Definitive Care is Miles Away

by Todd Walker

Off Grid Medic: Surviving Wilderness Emergencies When Definitive Care is Miles Away ~ TheSurvivalSherpa.com

More and more people are getting back to nature to enjoy its beauty and benefits. The list of outdoor activities seems endless. With these pursuits comes risk of injury. Common injuries like scrapes, sprains, burns, bites, and blisters can turn serious in remote locations. I’ve had my share of bumps, bruises, stings, and close calls. Thankfully, none were life threatening… but could have turned sideways quickly.

Note: All injuries depicted look real but are not. If you’re queasy about blood and guts, you may want to reconsider reading the rest of this article.

A skill set I’ve neglected for years is wilderness first aid. Teaching students outdoor self-reliance skills at RISE spurred me on to train with one of the best Wilderness Emergency Care instructors available, Mark DeJong, owner of Off Grid Medic. We were also fortunate to have Michelle Pugh, an accomplished long distance hiker, author of two books of her adventures, and Off Grid Medic staff instructor teaching our class. Their style of teaching fits perfectly in my “Doing the Stuff” wheelhouse. You won’t sit and watch boring power points in a sterile environment. Courses are held where outdoor enthusiasts roam – the woods. Our class was hosted by Georgia Bushcraft, LLC.

Besides imparting real-world knowledge, Mark works his magical moulage abilities by transforming last night’s rib eye bone into a patient’s open fracture. These realistic injuries aren’t for shock value but to help students “train like you fight.” Discovering a bone protruding from the skin or an impalement in a training exercise will give you a clue as to how you’d respond in a real wilderness emergency.

Off Grid Medic: Surviving Wilderness Emergencies When Definitive Care is Miles Away ~ TheSurvivalSherpa.com

See what I mean? Some of Mark’s handiwork on “Dutch Oven” Bill.

Wilderness First Aid

Urban first responders are equipped with tools and reinforcements to get patients to definitive care within minutes typically. For wilderness rescuers, hospitals and doctors might be hours or days away. Environmental stressors, evacuation over rugged terrain, limited medical resources, and other unknown variables present unique challenges for patient care and treatment.

If you interested in professional training in wilderness emergencies, contact Off Grid Medic. Below are a few things to consider if you’re ever in the role of wilderness rescuer.

You’re Number One

You can’t rescue a victim if you step into a dangerous situation and become one yourself. Before rushing in, assess the situation, location of patient, and possible hazards; dead tree limbs overhead, steep/loose ground, freezing water, etc., etc. Take care of yourself and team before providing care.

As an example, use the Reach, Throw, Row, Go steps to protect yourself in an open water rescue.

  • Reach: Use when victim is close to shore line and can be reached with by hand, pole, paddle, etc. without having to enter the water.
  • Throw: Victim is too far away to be reached, throw a line, rope, PFD attached to rope, if the victim is conscious and able to grab the rope.
  • Row: Rescuers will use a boat/canoe/kayak if Reach and Throw isn’t an option. Get close enough to use Reach, Throw, or lift the victim into the craft.
  • Go: This is the last and least safe option for rescuers. It may be necessary due to the victim being unconscious or unable to grab a rope.

McGyver Mentality

Even if you are a medical professional, the wilderness changes the game. After your initial patient assessment, a typical first aid kit may not contain every item you’ll need in remote emergencies. Be prepared to improvise… a lot.

Off Grid Medic: Surviving Wilderness Emergencies When Definitive Care is Miles Away ~ TheSurvivalSherpa.com

Space blankets come in many styles. Buy good quality, sturdy blankets.

For a few more ideas on outside-the-box first aid items, this article of ours may help.

Besides a first aid kit, I’ll wager that you probably have the following items in your supplies. If not, consider adding them.

  • Emergency Shelter: Start with proper clothing for the rescuer, space blanket (not the cheap mylar sheets), control body temperature, body wrap for victim, shield from elements, signaling device (orange), etc.
  • Duct Tape: Wound closure (butterfly stitches), splints/wraps, slings, neck/head immobilization, fire starter, and uses too long to list here.
  • Ziplock Baggies: Exam gloves, wound irrigation, occlusive dressing for large burns, sucking chest wound taped on three sides, and more.
  • Rope/String: Splinting, litter bed, lashing a litter together, emergency shelter, etc.
  • Bandana/Cotton Material: Bandages, sling, splint padding, dressing, wet dressing, etc.
  • Metal Container: Disinfect water for hydration via boiling, cooking, warm liquids, hot/cold pack, etc.
  • Fire Kit: Emergency tinder, lighter, road flare (not joking), signaling, warm patient and rescuers, comfort, cooking (unexpected stay), water disinfection, etc.
  • Knife/Saw/Ax:  Tools to make other items for rescue (litter, fire, etc.), remove insect stinger, collecting firewood, etc.
  • Head Lamp: You’ll need your hands free to attend to a patient in dark conditions.
  • Compass: Preferable one with a mirror and magnifying lens – all kinds of uses beside navigation.

To Splint or Not to Splint

Sprains, strains, and closed fractures are not always distinguishable. Open fractures are easier to diagnose since the bone protrudes from the skin. A closed fracture may not show deformity in a limb. The rule of thumb is to splint if a limb is painful, swollen, or deformed – this applies to sprains and strains. Immobilize the limb(s) before the patient is evacuated.

Off Grid Medic: Surviving Wilderness Emergencies When Definitive Care is Miles Away ~ TheSurvivalSherpa.com

Makeshift splint by Mike and Jessica. Interesting note: I taught Mike middle school P.E. in 1985. Man, I’m old!

We learned to splint limbs with resources on hand and materials from the wilderness. Without a modern SAM Splint, you’ll have to get creative. Two sticks, cordage, and a shirt stuffed with leaves will pad and immobilize an arm or leg.

Off Grid Medic: Surviving Wilderness Emergencies When Definitive Care is Miles Away ~ TheSurvivalSherpa.com

SAM Splints are great to have in your pack.

Off Grid Medic: Surviving Wilderness Emergencies When Definitive Care is Miles Away ~ TheSurvivalSherpa.com

Mark demonstrating the B.U.F.F. splint – Big, Ugly, Fat, Fluffy – on Michelle.

Slings for an arm/shoulder/collar-bone injure have to offer support and keep the limb secured to the body. Through hands-on experimentation, my partner and I found that zipping her arm inside her light jacket created a snug fitting sling which was comfortable and warm. There’s more than one way to sling a limb.

Off Grid Medic: Surviving Wilderness Emergencies When Definitive Care is Miles Away ~ TheSurvivalSherpa.com

Another diy sling.

Transporting the Victim

Depending on location and terrain, rescue reinforcements may be far way or unable to respond in remote areas. You’re injured friend will have to be carried out. A makeshift litter can be made from poles and string.

Off Grid Medic: Surviving Wilderness Emergencies When Definitive Care is Miles Away ~ TheSurvivalSherpa.com

Happy people carrying a litter full of Casey.

Two Litter Options: 

  1. Large group of 6-8 people
  2. Small group with as few as 3 people with backpacks

Large Group: Cut two saplings about 8 feet long and sturdy enough to carry weight. Cut 5-6 sturdy cross pieces about 5 feet long. Position the two long poles parallel next to the victim. Place the cross poles under the long poles at intervals which support the head, mid back, hips, knees, and feet. Lash the poles together using square lashing or any knots to secure them in place. If time is an issue, or cordage is sparse, use a jam knot with two short pieces of bank line or paracord.

Off Grid Medic: Surviving Wilderness Emergencies When Definitive Care is Miles Away ~ TheSurvivalSherpa.com

Demonstrating square lashing and jam knot techniques.

Transfer the patient to the litter. Team members lift at the extended cross poles and walk.

Small Group: Use two saplings as above. If sturdy rope is available, wrap the rope around the poles to create a bed. The pole ends are tucked into the lower part of the shoulder straps of two backpacks. This allows two people, with proper fitted backpacks, to transport a victim.

Off Grid Medic: Surviving Wilderness Emergencies When Definitive Care is Miles Away ~ TheSurvivalSherpa.com

Two poles inserted in the backpacks straps to carry our patient on a rope litter. Obviously, they wouldn’t be facing each other if not in the class.

The culmination of our three-day, 20 hour training was a nighttime rescue. I mentioned that Off Grid Medic likes to keep it real for “train like you fight” scenarios. Mark and Michelle didn’t let up and provided excellent, realistic, hands-on training the entire weekend!

If you’re a camper, hiker, woodsman, or Scout leader, consider learning wilderness first aid. This is an entry-level course into the world of wilderness emergency care. Contact Mark for next-level courses and continuing education. I offer my highest recommendation to the Off Grid Medic team for their professionalism, knowledge, and real-world training.

Keep Doing the Stuff of Self-Reliance,

Todd

P.S. – You can also keep up with the Stuff we’re Doing on TwitterPinterestGoogle +YouTubeInstagram, and Facebook… and over at our Doing the Stuff Network.

P.P.S – If you find value in our blog, Dirt Road Girl and I would appreciate your vote on Top Prepper Sites! You can vote daily by clicking here or on the image below. Check out all the other value-adding sites while you’re there…

Thanks for Sharing the Stuff!

Copyright © by Survival Sherpa: In light of the recent theft of all my content by a pirate site, my sharing policy has changed. I do not permit the re-posting of entire articles from my site without express written consent by me. My content on this site may be shared in digital form (200 words or less) for non-commercial use with a link back (without no-follow attribute) to the original article crediting the author. All photos, drawings, and articles are copyrighted by and the property of Survival Sherpa. You are more than welcome to share our photos and articles on social media for educational purposes as long as you link back to the original article/photo with credit to the author.

Categories: Bushcraft, Camping, Doing the Stuff, First Aid, Medical, Preparedness, Self-reliance, Survival Skills | Tags: , , , | 1 Comment

How to Make and Use a Long Lever Bow Drill Set

by Todd Walker

The Bushcraft Journal, a free online magazine, has a wealth of articles dealing with outdoor self-reliance. This post is based on a recent article by Gary Johnston of Jack Raven Bushcraft.

How to Make and Use a Long Lever Bow Drill Set - TheSurvivalSherpa.com

As Gary mentions in his article, many people would like to learn to make fire by friction with a bow and drill but many not have the physical stamina to twirl up an ember. Others may have bad knees or other injures which prevent them from ever attempting fire by friction. This method alleviates knee pain and weak wrists.

Here are the steps our students at RISE Academy used to make fire using this method…

Long Lever Bow Drill Set

Step 1: Gather the Stuff

  • Bearing block: About a yard long log and 3-4 inches in diameter
  • A platform like a firewood round knee-high
  • Long bow about chest high for multiple bowers
  • String for bow and normal stuff you’d use for regular bow drill fire – tinder, welcome mat, etc.

Cut a 36 inch long, 3-4 inch diameter, tree to be used as the bearing block. Flatten the underside on one end of the log. Carve a pivot hole about 3 to 5 inches in from one end of the long bearing block. We found a wide pivot hole about 1/4 inch deep to be about right. We used a hearth and spindle (cedar on cedar) which the students found produced embers in the traditional bow drill set.

In the video below, we show two separate groups of students successfully using this long lever bow drill set. It makes for a great team building or family project.

Step 2: Attach Bearing Block to Tree/Pole

How to Make and Use a Long Lever Bow Drill Set - TheSurvivalSherpa.com

The bearing block attached to a bamboo riser on the student-built outdoor classroom.

Lash the other end of the long lever to a tree or pole. Use a square lashing or tie knots until it holds to the anchor point level with the top of the spindle. The long lever bearing block takes advantage of mass and mechanical advantage to easily apply downward pressure on the spindle during bowing. In fact, I applied too much pressure in the beginning which caused problems.

Step 3: The Longer Bow

How to Make and Use a Long Lever Bow Drill Set - TheSurvivalSherpa.com

Sixth graders using the longer bow.

For two or more people doing the bowing, use a longer bow to achieve more spindle rotations per stroke. By yourself, stick to a normal arm-length bow. And yes, this method works well if you’re spinning solo. The anchored bearing block steadies the point of contact against my shin – which is one of the struggles I see a lot with first-time friction fire makers.

Load the spindle into the long bow, place the spindle into the hearth board divot, and mate the top of the spindle to the long lever bearing block. The person “driving” the bearing block will place his/her foot on the hearth board resting on the stump. Steady the bearing block against the shin with two hands.

How to Make and Use a Long Lever Bow Drill Set - TheSurvivalSherpa.com

Extra length at the end of the lever bearing block give ample room to connect with the shin.

You can also set this entire rig up without elevating the hearth board. It’s certainly kinder on the knees when elevated.

Step 4: Twirl an Ember

For a group effort, have two bowers hold opposite ends of the loaded long bow. Oh, have them stand offset to the plane of the bow so nobody gets a stick in the gut. Start the pull/push slowly to gain a rhythm like a lumberjack crosscut saw competition. As the charred dust builds into the hearth board notch, pick up the speed in bowing.

How to Make and Use a Long Lever Bow Drill Set - TheSurvivalSherpa.com

Getting into a rhythm

If the first two bowers tire, and you have alternates waiting, the bearing block “driver” gives the command to switch. Including all the hands builds teamwork and ownership to the effort. While the switch takes place, check the condition of the char dust in the notch. Even if it is smoking on its own, allow the other bowers a turn in spinning.

Step 5: Blow the Ember into Flame 

Celebrate your creation of a fire egg (ember) and allow it to grow by fanning it with your hand. High-fives all around! No need to hurry as you will likely produce a larger-than-normal amount of char dust in the hearth board notch.

How to Make and Use a Long Lever Bow Drill Set - TheSurvivalSherpa.com

A nice pile of smoldering char dust!

Once the fire egg is resting in its nest of tinder material, have each team member take a turn blowing the ember into flame. At that moment when heavy, white smoke billows from the nest, get your camera ready to capture the magic of fire from scratch!

How to Make and Use a Long Lever Bow Drill Set - TheSurvivalSherpa.com

Road-kill pine straw and cattail fluff for the win!

How to Make and Use a Long Lever Bow Drill Set - TheSurvivalSherpa.com

Almost there.

Place the burning nest in the fire pit and add prepared kindling for the fire to eat. Let the high-fives and fist-bumps begin! Your team has just created fire by friction and welded bonds of friendship never to be forgotten!

Keep Doing the Stuff of Self-Reliance,

Todd

P.S. – You can also keep up with the Stuff we’re Doing on TwitterPinterestGoogle +YouTubeInstagram, and Facebook… and over at our Doing the Stuff Network.

P.P.S – If you find value in our blog, Dirt Road Girl and I would appreciate your vote on Top Prepper Sites! You can vote daily by clicking here or on the image below. Check out all the other value-adding sites while you’re there…

Thanks for Sharing the Stuff!

Copyright © by Survival Sherpa: In light of the recent theft of all my content by a pirate site, my sharing policy has changed. I do not permit the re-posting of entire articles from my site without express written consent by me. My content on this site may be shared in digital form (200 words or less) for non-commercial use with a link back (without no-follow attribute) to the original article crediting the author. All photos, drawings, and articles are copyrighted by and the property of Survival Sherpa. You are more than welcome to share our photos and articles on social media for educational purposes as long as you link back to the original article/photo with credit to the author.

Categories: Bushcraft, Camping, Doing the Stuff, Primal Skills, Self-reliance | Tags: , , , | 8 Comments

Self-Reliance Skills on a Sewer Line and Secondhand Beaver Pond

by Todd Walker

“Earth and sky, woods and fields, lakes and rivers, the mountain and the sea, are excellent schoolmasters, and teach some of us more than we can ever learn from books.”

~ John Lubbock

Self-Reliance Skills on a Sewer Line and Secondhand Beaver Pond - TheSurvivalSherpa.com

Far from “wilderness”, an outdoor classroom sits atop an underground sewer line. When choices are slim to none, one takes what Nature provides. A concrete retaining wall manages storm-water from the school’s asphalt parking lot.

The black chain fence on top of the concrete wall, a legal requirement to keep kids out, is easily breached. Inside the “concrete pond,” a wetland ecosystem invites exploration. Cattails, a willow tree, and unidentified flora thrive in the “secondhand beaver pond,” less North America’s largest rodent. From the adjacent paved paradise, an uneducated eye would miss all the Nature possibilities.

At RISE Academy, our motto is “Second Chances ~ New Beginnings.” Our student’s have given the sewer line a second chance. The once weedy, vine infested location is now home to an outdoor classroom built by their own hands. In turn, their new beginnings are real and tangible. Math shifts from theoretical to the real-world as they determine angles, read a tape measure, and problem-solve structural design. Then there’s the reading, writing, science, and history to keep it all in context. Oh, and the physical skills of connecting bamboo securely. I’m happy to report that their construction stood up to Irma’s recent storms.

Our journey to self-reliance has begun on a pristine waste place beside a retention pond… our Nature. Even though our place may earn the top spot on the un-wilderness scale, the benefits of being out there are priceless. Interactive and authentic learning happens in our Nature. If nothing else, the lingering scent of woodsmoke in hair and clothing will hopefully remind them of the importance of surface-area-to-volume ratio and the science of fire.

Self-Reliance Skills on a Sewer Line and Secondhand Beaver Pond - TheSurvivalSherpa.com

She was so proud of her first fire with spark ignition.

Self-Reliance Skills on a Sewer Line and Secondhand Beaver Pond - TheSurvivalSherpa.com

Students scraping tinder material off bamboo to create a high surface-area-to-volume ratio.

Another benefit of being out there is becoming attached to the land. A mom told us that her son wants to bring a rake to clear vines and roots from his outdoor classroom. He recently commented on the bamboo structure, “I can’t believe we built this!”

Appreciation for our Nature doesn’t happen until we get kids outside to connect to all its gifts. Twigs, sticks, and rocks become personal. The tinder cattail shoots, once tasted, expands their notion of food and Nature being a grocery store. Dirt under their nails connect hands and hearts to their habitat.


Self-Reliance Skills on a Sewer Line and Secondhand Beaver Pond - TheSurvivalSherpa.com

Students and hip waders go well together.

Self-Reliance Skills on a Sewer Line and Secondhand Beaver Pond - TheSurvivalSherpa.com

Digging cattails for food, craft, and fire resources.

Studies show promising results for connecting kids to nature.

Our spot may not look like “virgin” wilderness, but it ours to curiously wander.

Designed for Doing

The things we have to learn before we do them, we learn by doing them.

~ Aristotle

The real world can’t be experienced on smart phones. Self-reliance is about doing the stuff, dirty hands, employing our senses, and discovering our potential. The first step is engineering an environment designed for doing.

All the math, science, history, reading, and writing typically shoveled into young brains is hardly ever retained. It’s a horrible strategy that keeps kids tied in knots of anxiety over test scores. Once they regurgitate facts floating in their head, the purge cycle begins to make room for the next test.

Here’s a thought…

Deep learning takes place by untying the tangled web of schooled knots. Instead of telling students what we, or the state, think they need to know, allow them to experience their interests.

But what about the curriculum and those dreaded high-stakes tests?

Remember we’re talking about deep learning not rote memorization of facts.

This little blog is an example of the importance of following one’s interest…

I never had an interest in writing. After my first 12 years of schooling, two college degrees, low C’s in every college English class, and over 500 blog posts, I still can’t dissect a sentence properly, not even if my life depended on it. I found that mastering parts of speech is not a prerequisite to writing. I’d bet my best double bit ax that most writers don’t think about this stuff either. They simply write.

Tim Smith’s blurb on his Jack Mountain Bushcraft blog concerning grammatical errors sums up my attitude as well, “Anything that appears to be an error in spelling or grammar is actually the author’s clever use of the vernacular, and as such is not an error, but rather a carefully placed literary device that demonstrates his writing prowess.”

Who really needs to know all the details of the English language? English teachers.

Being writing-challenged was no fault of my teachers. They tried. I simply wasn’t interested… except for that awakening in sixth grade. Our English teacher (Aunt Cindy) turned us loose in the school yard to sit under trees and get creative. Our class wrote and illustrated two books of poetry and short stories.

Unfortunately, that window of feral writing slammed shut in 1973 when I was thrown back into the cage of participles and prepositions. The point I’m making is simple – find what interests you and pursue it with passion. For someone who hated writing, I’ve penned over 600,000 words (conservative estimate) about Doing the Stuff of Self-Reliance. Following my interest has taught me more useful stuff than any classroom or textbook.

Teach Only When Cornered

The biggest challenge now is to facilitate this interest-led, experiential learning style for our RISE students.

Teach only when cornered, otherwise let the people learn.
– Keith King

What little I know, or thought I knew about teaching, has disappeared like the smoke of our fire ring. And rightly so. Our students are teaching me more about what matters in their lives than any college professor could ever hope to share. Their curiosity and enthusiasm for hands-on learning experiences keeps me scrambling to stay one step ahead of their hunger to figure out how this world works.

There are more questions than answers.

My best teacher response is, “I don’t know. Let’s figure it out.” And we continue our journey together.

Keep Doing the Stuff of Self-Reliance,

Todd

P.S. – You can also keep up with the Stuff we’re Doing on TwitterPinterestGoogle +YouTubeInstagram, and Facebook… and over at our Doing the Stuff Network.

P.P.S – If you find value in our blog, Dirt Road Girl and I would appreciate your vote on Top Prepper Sites! You can vote daily by clicking here or on the image below. Check out all the other value-adding sites while you’re there…

Thanks for Sharing the Stuff!

Copyright © by Survival Sherpa: In light of the recent theft of all my content by a pirate site, my sharing policy has changed. I do not permit the re-posting of entire articles from my site without express written consent by me. My content on this site may be shared in digital form (200 words or less) for non-commercial use with a link back (without no-follow attribute) to the original article crediting the author. All photos, drawings, and articles are copyrighted by and the property of Survival Sherpa. You are more than welcome to share our photos and articles on social media for educational purposes as long as you link back to the original article/photo with credit to the author.

Categories: Bushcraft, Camping, Doing the Stuff, Government "Education", Self-reliance | Tags: , , , | 6 Comments

Blog at WordPress.com.