Wildcrafting

Wild Resources: Only a Fool Comes Home Empty Handed!

by Todd Walker

Wild Resources: Only a Fool Comes Home Empty Handed ~ TheSurvivalSherpa.com

I recently took three of my students on a scout through a patch of woods surrounding our school to select a route to simulate the Trail of Tears they were studying. This was nothing close to the tragic event of the Cherokee people being rounded up and forcibly removed from tribal homelands. For our students, a short walk in the woods was better than sitting in a cramped desk reading about this dark time in our country’s history.

Students hit the trail with their belongings; books, book bags, and whatever they wore to school. Many were ill prepared for the mid-30 degree weather. Our first stop was a persimmon tree with fruit in different stages of ripeness. The bravest students shared in the bounty with me.

There is no way to carry enough provisions to sustain you on a grueling 800 mile journey. Foraging was essential. The inner layer of bark from a pine tree was also sampled. A few of the students chewed the uncooked phloem (inner bark) like chewing gum. When cooked over a fire, this layer of bark provides food filled with nutrients and vitamins. Adding a cup of pine needle tea from said tree will boost vitamin intake.

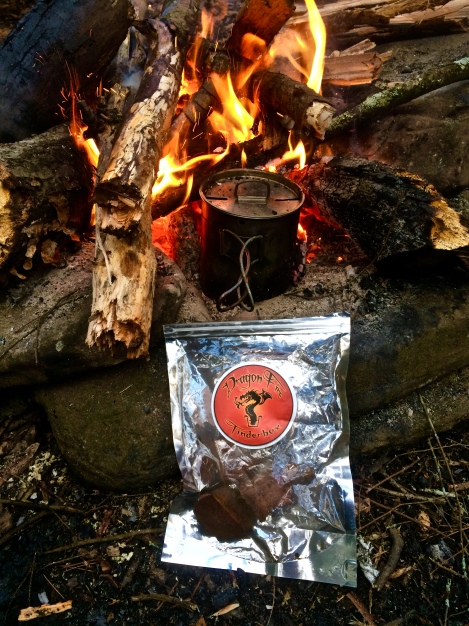
A quick demonstration of the essential tool of humanity, fire, came at the end of our simulation. Flint and pyrites were the precursor to modern flint and steel which the Cherokee obtained through trade. Further in the past, friction methods would have provided fire.

There were no convenience stores or outfitter shops along the way to Indian Territory. The logistics of moving groups of a thousand or more souls (new born to elders) through a rugged landscape in modern times would be a nightmare. We can only imagine the horrible conditions encountered in 1838. While some were fortunate to have a horse or wagon for conveyance, the majority carried their burdens on foot.

We can only imagine the hardships faced during their forced removal. Our brief exercise was instructive. Many questions came throughout the walk. Collecting resources for food, clothing, and shelter to sustain one family, much less groups of 1,000, would take extensive knowledge and experience which Native Americans had used for thousands of years.

Only a Fool Comes Home Empty Handed!

In Postcards from the Past, Scott Jones, my friend and prehistory mentor, offers the perfect quote describing me in this Eskimo saying, “… only a fool comes home empty handed!

Rock On

When Primitive Skills and Prepping Have Sex | www.TheSurvivalSherpa.com

Making expedient cobble stone tools using bipolar percussion at one of Scott Jones’ workshops.


In the view of a tenderfoot, the basketball-sized rock we spotted on our initial scout trip was nothing special. It was just a heavy rock. All three of the young men looked at me like I was crazy as I hoisted it to my shoulder and continued walking. Midway back I passed my burden to one of them. One doesn’t simply walk past a piece of chert that size. One either carries it home or remembers the location for later retrieval.

Below is a 34 second video I shot using the rock to start a fire…

Chert, a sedimentary rock, was a favorite stone for prehistory tool makers. Today its curvy conchoidal fracture and hardness allows modern flint-knappers to shape primitive projectile points and cutting tools. Chert can be found in earthy colors ranging from white to black with a waxy, smooth luster when fractured. Quartz and quartzite are rocks I carry home often.

Sticks and Bones

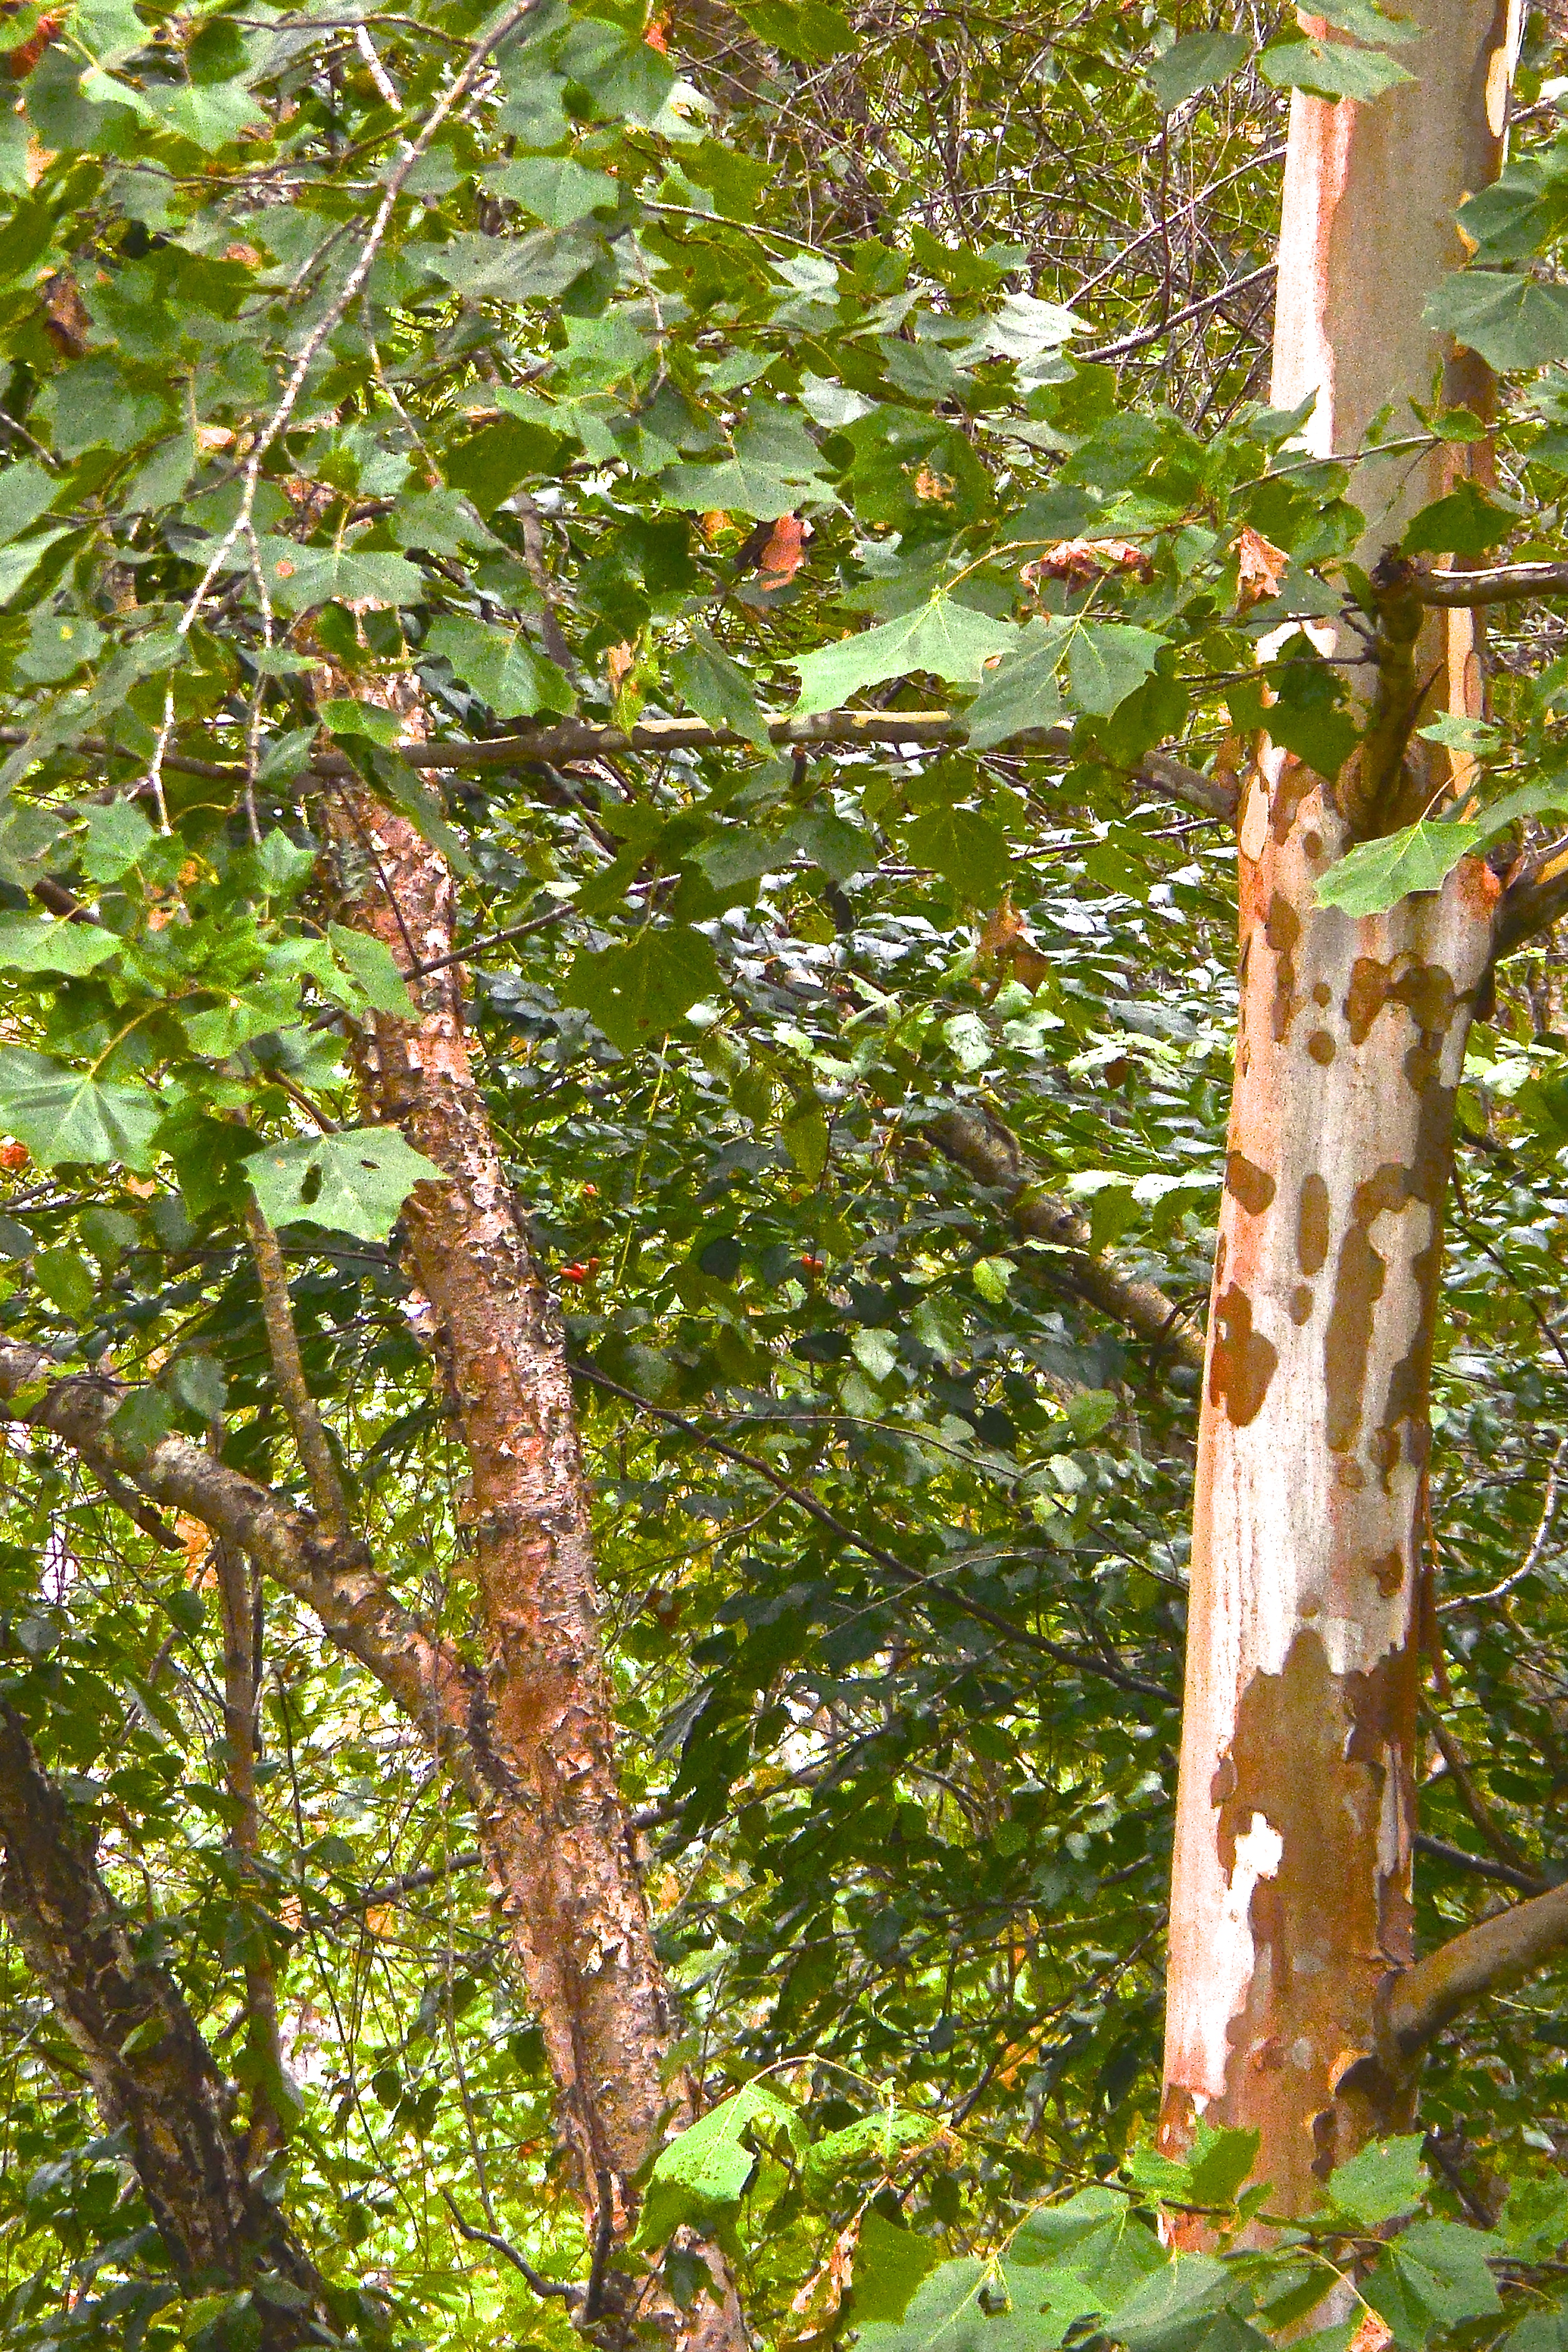
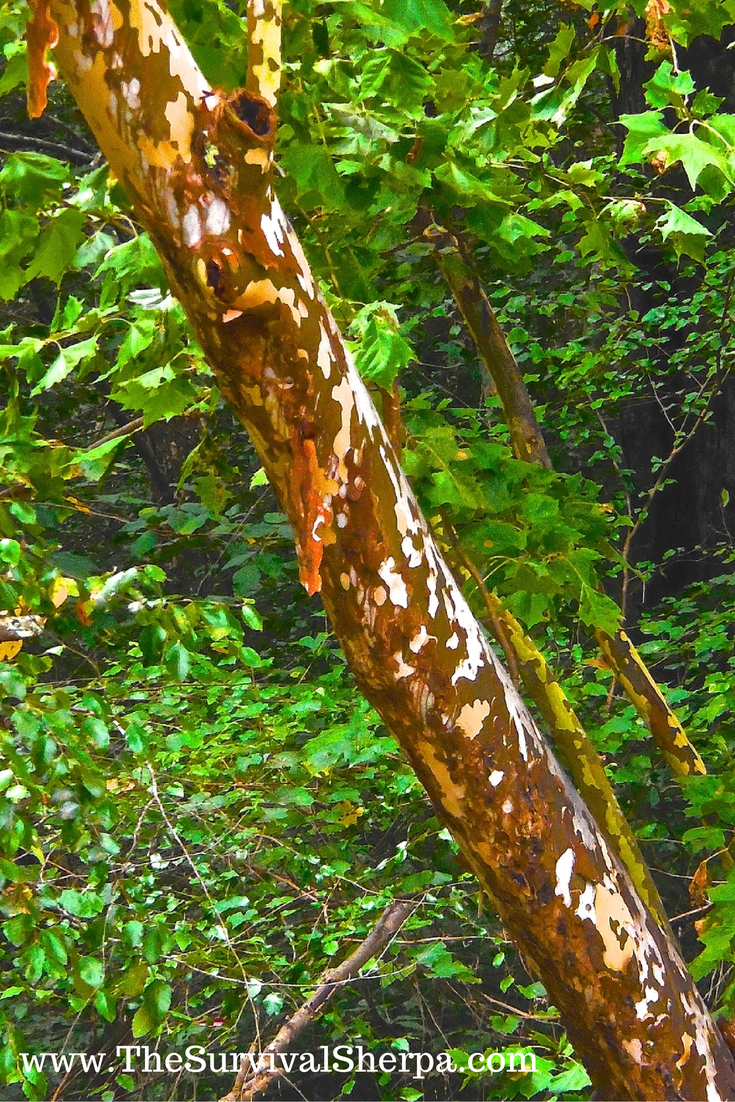
My favorite wood types are those who swallowed fire, as Mark Warren says. Fast-growing soft woods such as cedar, tulip poplar, basswood, sassafras, white pine, willow, and mimosa to name a few, are more porous. When rubbed together skillfully, they readily give up the fire they swallowed.

More info on some of my favorite trees can be found here.

My tree collection, much to Dirt Road Girl’s chagrin, takes up a sizable portion of our backyard. Lots of Eastern Red Cedar continues to be added for benches and furniture… which makes DRG smile.

Wild Resources: Only a Fool Comes Home Empty Handed ~ TheSurvivalSherpa.com

Black Walnut split and ready for carving.

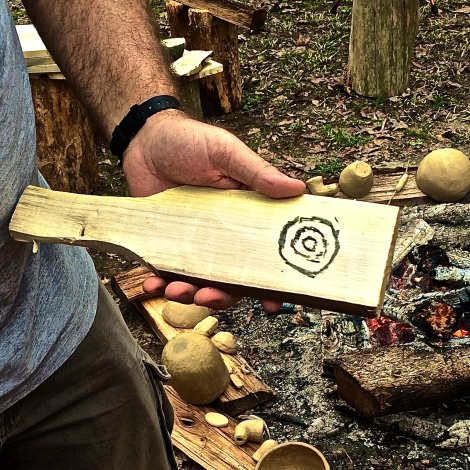
Wooden utensils such as spoons, bowls, cutting boards, and kuksas are waiting inside my woodpile. Wood plays a vital role for camp comforts… and not just as firewood. The following wood projects made from trees and other woody plants may help channel your inner woodsman…

Wild Resources: Only a Fool Comes Home Empty Handed ~ TheSurvivalSherpa.com

A load of resources!

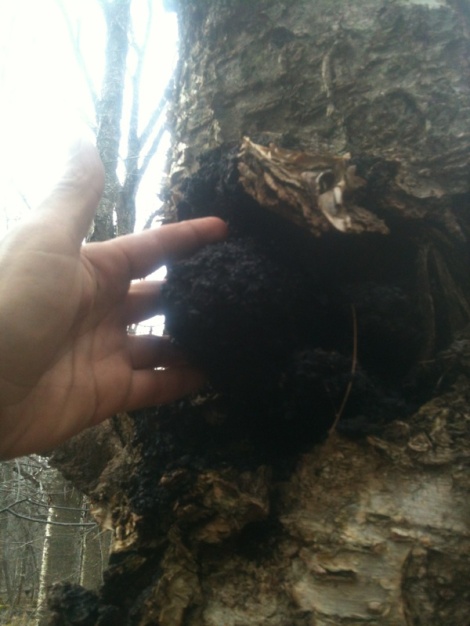
Bones are a useful resource I run across from time to time in my woods tramping. A five gallon bucket in my shop contains remains of different woodland critters. Antlers make wonderful tools and functional accents for my leather work. I’m certainly not opposed to pulling to the curb to collect road kill. Some of my most prized roadside finds include beaver, bobcat, and deer.

Wild Pantry  

Wild Resources: Only a Fool Comes Home Empty Handed ~ TheSurvivalSherpa.com

Chanterelles foraged this past spring at base camp.

As noted above, collecting wild food on hikes is a fun way to supplement your food cache. Just remember that every plant is edible… ONCE. This statement isn’t about foraging fear-mongering, of course there are poisonous plants in the wilderness. But with proper guidance from an experienced foragers, anyone can enjoy wildcrafting.

Check out this page on our blog for further reading.

Feral Pharmacy

I’m not a herbalist but have found this pursuit a healing hobby. For professional training in the southeastern U.S., I recommend Daryl Patton, The Southern Herbalist and Mark Warren of Medicine Bow.

Weeds, plants, clay, and trees were all used before modern medicine for the purpose of healing and preventive health maintenance. Documentation shows that the 19th century Cherokee people used about one-third of the 2,400 species of plants available to them in southern Appalachia for food and medicine.

Below are a few links to articles we’ve written which may help you broaden your view on useful plants for your medicine cabinet:

Trail of Tears Remembered

Wild Resources: Only a Fool Comes Home Empty Handed ~ TheSurvivalSherpa.com

A short walk of remembrance.

Our short simulation was simply an attempt to open student’s eyes to life and death on the Trail of Tears. An estimated 15,000 to 16,000 Cherokee started this journey. Even with their extensive foraging knowledge, over 3,000 lives were lost to disease, exposure, and starvation along the way.

It is my hope that our simulation gave our students a small glimpse of this historic tragedy. May we all remember.

Keep Doing the Stuff of Self-Reliance,

Todd

P.S. – You can also keep up with the Stuff we’re Doing on TwitterPinterestGoogle +, YouTube, Instagram, and Facebook… and over at our Doing the Stuff Network.

P.P.S – If you find value in our blog, Dirt Road Girl and I would appreciate your vote on Top Prepper Sites! You can vote daily by clicking here or on the image below. Check out all the other value-adding sites while you’re there…

Thanks for Sharing the Stuff!

Copyright © by Survival Sherpa: In light of the recent theft of all my content by a pirate site, my sharing policy has changed. I do not permit the re-posting of entire articles from my site without express written consent by me. My content on this site may be shared in digital form (200 words or less) for non-commercial use with a link back (without no-follow attribute) to the original article crediting the author. All photos, drawings, and articles are copyrighted by and the property of Survival Sherpa. You are more than welcome to share our photos and articles on social media for educational purposes as long as you link back to the original article/photo with credit to the author.

Categories: Bushcraft, Camping, Doing the Stuff, Herbal Remedies, Preparedness, Self-reliance, Wildcrafting | Tags: , , , , | 9 Comments

How to Harvest, Prepare, and Use Yellow Dock Root Medicinally

by Todd Walker

How to Harvest, Prepare, and Use Yellow Dock Root for Medicine - TheSurvivalSherpa.com

My neighbor hired a gentleman to pour a foundation and do the block work for an addition on their house. DRG and I stepped over to see the progress. A distinguished looking gentleman turned around as I admired his work. We shook hands and he introduced himself. “I’m Albert Floyd,” he said.

Sometime you meet a kindred spirit and a spiritual connection happens.

How to Harvest, Prepare, and Use Yellow Dock Root for Medicine - TheSurvivalSherpa.com

Albert and me after a morning of digging and cleaning dock roots


Albert and I began a conversation about his horse, Tiger, he taught to count, add, and subtract. Somewhere in our twenty-minute conversation I mentioned that my wife has been fighting cancer for the past five years. Albert told me he has been using yellow dock for many of his 76 years of life as a natural medicine. I knew of the plant but had never harvested any for use.

How to Harvest, Prepare, and Use Yellow Dock Root for Medicine - TheSurvivalSherpa.com

Tiger getting ready to count for me. Albert is a man of outstanding character by the way he treats all his animals.

Albert invited me to go dig yellow dock root the next morning. I love the medicinal properties of wild plants and trees. I happily agreed to get dirty digging this “weed.”

Yellow Dock (Rumex crispus)

Most fields, waste places, roadsides, and weedy yards are good locations to find yellow dock (aka ~ curly dock, sour dock, narrow dock, garden patience and curled dock. Roadside weeds are typically sprayed with herbicides and should be avoided. It is easy to spot and identify in the second year of growth. You’ll see the rusty-brown flower stalk loaded with seeds in mid-summer to late fall. First year plants grow in a basal rosette similar to Common Mullein. In our area, this weed is a perennial it seems. Some botanists say they are biennial. Leaves are lance-like with curled edges and can grow over one foot in length and three inches across.

How to Harvest, Prepare, and Use Yellow Dock Root for Medicine - TheSurvivalSherpa.com

Lance shaped leaves with curly edges

Medicinal Benefits

Remember, medical information on wild plants is for informational purposes only. Do your own due diligence on herbal medicine.

With that being said, my research found that yellow dock roots contain anthraquinones and tannin indicating use as mild laxative and astringent. Anthraquinones are commonly extracted from the Polygonaceae, or buckwheat family of plants. Some of the major chemical components of anthraquinone and its derivatives have demonstrated potential anticancer properties. (Source) This is the main reason we are experimenting with yellow dock.

However, yellow dock root has also been reported to be beneficial in the following ways:

  • Blood purifier
  • General detoxifier
  • Reduces oxidative stress and the effect of free radicals (Source)
  • Strengthens liver and gall bladder function
  • Mild laxative to stimulate removal of stubborn waste in the intestinal tract
  • Chronic skin conditions
  • Emphysema
  • Anticancer properties
  • Treatment for venereal disease
  • Boosts immune system
  • Enhances digestion

Harvesting Roots

Albert drove me out to a pasture he sharecropped as a young man. The property owner gave him permission to harvest all the invasive dock he could ever hope to use. Armed with a pickaxe, trenching shovel, and two empty feed bags, we waded through the rusty-brown stalks until we reached “the spot” where rings of freshly turned soil gave away Albert’s previous foraging trips.

How to Harvest, Prepare, and Use Yellow Dock Root for Medicine - TheSurvivalSherpa.com

Albert getting to the root of the plant with his pickaxe

Before digging in, use the pickaxe to chop off the flower stem above ground. This clears the way for you to swing freely around the root. I used the trenching shovel like an ax to remove the plant tops. If you have a group of foragers along, make sure folks are a safe distance away before swinging.

This isn’t rocket science. Dig around the outskirts of the root ball and begin prying the plant out of the ground. I found that I could extract the long tap roots intact using the trenching shovel verses the pickaxe.

Once the root is free, tap it on the ground or digging tool to remove the soil from the root ball. Be a good steward and rake the excavated soil back in the hole – especially if livestock use the field. Gather up the dead flower stalks and remove them from the pasture as well. If you want to start your own dock garden, collect and sow a handful of seeds from the stalk.

How to Harvest, Prepare, and Use Yellow Dock Root for Medicine - TheSurvivalSherpa.com

Curly dock seeds

Wash the root ball with a high pressure hose to remove the remaining soil. Discard any root that shows sign of rot or damage. The root has a brown woody sheath with a yellow center. The more yellow the center, the more concentrated the good stuff becomes.

Making a Root Decoction 

Albert’s instructions for making his decoction (tea) is simple. Place the roots in a pot, cover with water, and boil. You want to bring the pot to a boil and then reduce the heat to a simmer for about 30 minutes in a covered pot. A decoction usually requires that you boil the liquid down to concentrated levels. Not so with this method. Simmering for only 30 minutes and removing from heat will prevent most of the liquid from evaporating.

I used my outside kitchen for this process. I wasn’t sure if there would be a lingering scent in DRG’s kitchen during the processing. The root has an earthy smell which was not offensive to me when boiled.

How to Harvest, Prepare, and Use Yellow Dock Root for Medicine - TheSurvivalSherpa.com

The roots were mushy after 30 minutes. You may notice the brown outer sheath split revealing the stringy root fibers on the far left.

The consistency of the root will turn mushy and stringy like a baked sweet potato after 30 minutes of simmering. Remove from heat and allow the covered decoction to steep for several hours. I went about my day and returned after 8 hours.

Remove the large mushy roots and strain the remaining liquid through cheese cloth to collect the smaller bits. Pour into covered containers which will fit into your refrigerator to reduce the chance of spoilage.

You may want to add honey to sweeten your tea. As Albert told me, “It ain’t gonna taste good, but it’s good for you.” He was certainly right about the taste!

Making a Root Tincture

How to Harvest, Prepare, and Use Yellow Dock Root for Medicine - TheSurvivalSherpa.com

Thinly slice or grate enough root to create a 1:2 ratio of root to grain alcohol. I used a scale to keep the proportions even by weight. I ended up with 3.1 ounces of root to just over 6 ounces of alcohol. Vinegar can be substituted for alcohol.

Place the root material in a mason jar and pour the liquid over. Seal the jar and store it in a cool location. My jar is on the kitchen counter to remind me to shake it daily on the 6 to 8 week period to becoming a medicinal tincture. Label the jar with the date of production, the ratio used, and the type of tincture.

Dosage from respected herbalist recommend 5-20 drops once or twice a day. Do your own due diligence.

Below are some of the more helpful articles I read in my research:

Keep Doing the Stuff of Self-Reliance,

Todd

P.S. – You can also keep up with the Stuff we’re Doing on TwitterPinterestGoogle +, YouTube, Instagram, and Facebook… and over at the Doing the Stuff Network.

P.P.S – If you find value in our blog, Dirt Road Girl and I would appreciate your vote on Top Prepper Sites! You can vote daily by clicking here or on the image below. Check out all the other value-adding sites while you’re there…

Thanks for Sharing the Stuff!

Copyright: Content on this site (unless the work of a third-party) may be shared freely in digital form, in part or whole, for non-commercial use with a link back to this site crediting the author. All links in articles must remain intact as originally posted in order to be republished. If you are interested a third-party article, please contact the author directly for republishing information.

Categories: Doing the Stuff, Herbal Remedies, Homeopathy, Natural Health, Self-reliance, Wildcrafting | Tags: , , , , | 11 Comments

How Cherokees Used Trees of Southern Appalachia for Food, Medicine, and Craft

by Todd Walker

How Cherokees Used Trees of Southern Appalachia for Food, Medicine, and Craft - TheSurvivalSherpa.com

Foraging wild food requires practice, knowledge, and experience on your landscape. Notice I used the word your land. What you’ve read in books and watched on YouTube may not apply to your locale. While survival principles may never change, self-reliance is local.

Many of us are self-taught in skills of wilderness living. However, one way to shorten your learning curve is to find an experienced skills practitioner in your area who is actually Doing the Stuff. After receiving instruction, you gain knowledge. Knowledge weighs nothing but is not enough. You make knowledge applicable through time and experience and context. There is no substitute for time in your woods.

I had the recent pleasure of attending my third class at Medicine Bow, A Primitive School of Earthlore in the North Georgia Mountains. If you look up Renaissance Man in the dictionary, Mark Warren’s bio should appear, but won’t. He’s not only a walking encyclopedia of woods-lore, he won the U.S.National Champion in Slalom/Downriver combined and the World Championship Longbow Tournament in 1999. On top of his wealth of outdoor knowledge, he is also a musical composer and published author.

Mark’s knowledge of the Cherokee uses of plants and trees is the foundation for anyone interested in wilderness living and self-reliance. I wrote him an email after the class asking assistance on a question for this article. I wanted to know the degree to which Cherokees depended on domesticated crops verses wild foods.

Mark’s response:

“Everyone knows about Cherokee farming and the 3 sisters (corn, squash, and beans), but the wild growth of forest and field was actually “farmed” too, by pruning or clearing for light. For example, swamp dogwoods were pruned to encourage survival shoots for basketry and arrow shafts. Large areas along flood plains were burned to help create a monopoly of river cane (for the same two crafts). A lot of those “brakes” can still be seen. The same is true of foods. I have a sense of why Amicalola was sacred to the Cherokee. I suspect it was for the prolific sochani that grows there. It’s also called green-headed coneflower. Cherokee women in NC still harvest it in spring and freeze for the year.”

Click here for more information on Sochani (Green-Headed Coneflower).

Think about this astounding bit of research…
“The Cherokees of the 19th century are listed as having around 800 plants in their repertoire (Mooney, 1992). This from a pool of about 2,400 species of plants to work from or about a third!” ~ Source

Every year I add more plants and trees to my food-medicine-craft list. But 800! I’ve got a lot to learn and experience.

“In the school of the woods, there is no graduation day.” 

~ Horace Kephart

Trees of Southern Appalachia

Wild plant foragers get excited this time of the year. Green shoots make their way through the soil for another growing season. Autumn turns to winter and the smorgasbord disappears. But trees, they stand ready to share their resources year-round.

Winter tree identification would not be challenging if trees would stop dropping their leaves. Mark taught winter botany lessons which I had never been exposed to. Sharing all I learned would take several articles. For our purposes today, we will explore 3 of my favorite trees in my woods and how the Cherokee and settlers used them for food, medicine, and craft resources.

Tulip Tree

Tulip Poplar (Liriodendron tulipifera) it is not a poplar at all. It is actually in the Magnolia ((Magnoliaceae)) family of flowering trees. There are many common names for Liriodendron tulipifera besides Tulip Poplar… Yellow Poplar, Canoe Wood, Yellow Wood, and Tulip Tree. That is one reason it is important to use scientific names of plants and trees… if you can manage to pronounce them. This will remove any confusion over common names.

Related Resource: Trees for Self-Reliance

Food

The Tulip Tree, while not a nutritional powerhouse, is a favorite of mine mainly for craft and outdoor self-reliance. Tulip Tree blooms are a main source of nectar for honey bees which produces a dark, amber honey loaded with antioxidants.

  • The only part of a Tulip Tree that I know is edible is the nectar in the flowering blooms.
  • Edit: Darryl Patton, The Southern Herbalist, sent me a message saying he collects, dries, and pounds the inner bark into flour for baking in his spring classes. Thank you, Darryl.

Medicine

Tulip Tree’s inner bark and leaves were used medicinally by the Cherokee and settlers in Appalachia for treating…

  • Poultice from leaves for inflammation and sores.
  • Inner bark tea for periodic fevers, diarrhea, pinworms, as a digestive aid and for rheumatic pain.
  • Supposedly, inner bark was chewed as an aphrodisiac.
  • The bark could also serve as a substitute for quinine in treating malaria.
  • Tooth aches.
  • Used as a tonic to induce perspiration to treat fevers.
  • Root bark and seeds useful as a wormer for the body.
  • Cough syrup from bark.

Craft

  • Fire Craft ~ Wood for friction fire, inner bark for tinder, hot, quick burning firewood which does not produce long-lasting coals like other hardwoods.
  • Cordage ~ Inner bark fibers can be processed into cordage and rope.
When Primitive Skills and Prepping Have Sex | www.TheSurvivalSherpa.com

Indigenous cordage: Clockwise from 12:00 ~ Dogbane; Tulip Tree; Okra, and Yucca.

  • Containers ~ Outer bark crafted into berry baskets, arrow quivers, and larger pack baskets.
  • Carving ~ The soft hardwood lends itself to easy carving of spoons, bowls, pottery paddles, canoe paddles, and even the canoe itself. One common name of this tree is Canoe Wood.
This design will be carved into the Tulip Tree and used to imprint designs on primitive process pottery.

This design will be carved into the Tulip Tree paddle and used to imprint designs on primitive process pottery.

  • Insulation ~ Shredded inner bark can be stuffed between layers of clothing to create dead air space to retain body heat in a survival situation.
  • Roofing/Siding ~ Outer bark slabs used for shingles and siding on shelters.

Hickory

Hickories make excellent wildlife resource as squirrels and feral pigs love to eat their nut meat. Pignut (Carya glabra), Mockernut (Carya tomentosa), and Shagbark (Carya ovata) are the three hickories I’m most familiar with in Georgia, Mockernut being the most common.

Food

  • Sap ~ Sap water from hickories can be consumed without treatment.
  • Nuts ~ Contains fats (18g/serving), protein (3.6g/serving), and carbohydrates (5 g/serving) – Serving size = 1 oz.
  • Hickory syrup from crushed and processed nuts.
  • Cooking oil from nuts.
  • Kunuche (ku-nu-che) ~ A traditional Cherokee hickory nut soup.
  • Nuts with exterior husks are useful as charcoal for cooking food.
Scott Jones using hickory nuts as charcoal

Scott Jones (Media Prehistoria) using hickory nuts as charcoal.

  • Hickory Milk ~ “They pound them to pieces, and then cast them into boiling water, which, after passing through fine strainers, preserves the most oily part of the liquid; this they call by a name which signifies hiccory milk; it is as sweet and rich as fresh cream, and is an ingredient in most of their cookery, especially homony and corn cakes.” – Source

Medicine

  • Infusion of boiled bark for arthritis pain.
  • Inhaling fumes of young shoots on hot rocks as a treatment for convulsions.
  • Cold remedy
  • Liver aid
  • Gynecological aid
  • Dermatological issues

Craft

How to Handcraft a Custom Ax Handle from a Tree - TheSurvivalSherpa.com

This ax handle started out as the hickory tree pictured in the background

Hickory was used by the Cherokee’s for…

  • Stickball sticks
  • Crafting bows
  • Handles – (Here’s my tutorial on carving an ax handle from hickory)
  • Firewood
  • Smoking meats
  • Furniture
  • Inner bark of Mockernut and Shellbark Hickory used to finish baskets
  • Ashes from hickory were used by settlers to make quality lye for soap.
  • Inner bark used for cordage. Mark described a method of slicing down a hickory limb to remove the bark and twisting it to make a strong rope. I’ll explore that method in a later post.
  • Green nut husks used as dye – (My bed sheet tarp was dyed with hickory and black walnut dye)
  • Nut oil mixed with bear fat as an insect repellent.

Pine

There are 36 pines in North America to choose from. These evergreens are easy to spot for anyone. To narrow down the species, count the needles. The Eastern White Pine (Pinus strobus) is the only species in Eastern North America with 5 needles in the fascicle sheath (the paper-like sheath surrounding the base of the needles).

How Cherokees Used Trees of Southern Appalachia for Food, Medicine, and Craft - TheSurvivalSherpa.com

Hemlock is a part of the pine family and grows in southern Appalachia. Like other pines in our region, the inner bark is edible.

Food

  • Pine nuts are edible and tasty.
  • Inner bark was eaten when other foods were scarce. Should be boiled/cooked since it is high in turpenes. Can also be dried and ground into a flour.
  • Pine pollen can be collected and is edible and used like flour.
  • Long strips of inner bark can be boiled to make pine noodles.

Medicine

  • Pine needle tea has the following medicinal properties: antiseptic, astringent, inflammatory, antioxidant, expectoranthigh in Vitamin C for colds – flu – coughs, congestion, and even scurvy.
  • Shikimic acid, the main ingredient in Tamiflu, is harvested from pine needles in Asia.
  • Pine resin applied to skin conditions.
  • Arthur Haines describes on his YouTube channel how pine pollen provides multiple avenues of protection against radioactive cesium.
  • Warm poultice of pine resin will draw splinters and foreign matter from skin.
  • The inner bark can be fashioned as an antiseptic Band Aid for cuts and scraps
  • Chew softer sap straight off the tree like a gum for sore throats and colds. You could pre-make “gum” with these ingredients: bees-wax, pine sap, and honey.

Craft

See more useful fire craft articles on our Bombproof Fire Craft page.

  • Wood for shelters and bows for bedding.
  • Rescue Signals ~ A pre-made signal fire built with green pine boughs on top will generate enough white smoke to be seen for miles.
  • Pine needles were used to make baskets and resin was used as a sealer.
  • Logs were used in home building.
  • White pine and hemlock are both good wood for friction fire.
  • Dried and ground hemlock inner bark used as flour.
  • Dried pine “flour” is useful when rubbed on the body to cover human scent while hunting.

Mark says that Cherokees called trees “The Standing People.” Trees do not walk to new locations like animals in search of food. They are always in the same spot. Learning to identify trees and their resources will put you in a better position of appreciation and stewardship of your natural environment.

To mention all the trees used by the Cherokee would be better addressed in book form. In this article, we’ve highlighted three of my favorite trees in our woodlands. I’ll write future blogs covering more. Here’s a teaser on future posts… Dogwood, Sourwood, Basswood, Black Walnut, Persimmon, Beech, Black Cherry, and the list continues.

Keep Doing the Stuff of Self-Reliance,

Todd

P.S. – You can also keep up with the Stuff we’re Doing on TwitterPinterestGoogle +, YouTube, Instagram, and Facebook… and over at our Doing the Stuff Network.

P.P.S – If you find value in our blog, Dirt Road Girl and I would appreciate your vote on Top Prepper Sites! You can vote daily by clicking here or on the image below. Check out all the other value-adding sites while you’re there…

Thanks for Sharing the Stuff!

Copyright © by Survival Sherpa: In light of the recent theft of all my content by a pirate site, my sharing policy has changed. I do not permit the re-posting of entire articles from my site without express written consent by me. My content on this site may be shared in digital form (200 words or less) for non-commercial use with a link back (without no-follow attribute) to the original article crediting the author. All photos, drawings, and articles are copyrighted by and the property of Survival Sherpa. You are more than welcome to share our photos and articles on social media for educational purposes as long as you link back to the original article/photo with credit to the author.


Categories: Bushcraft, Camping, DIY Preparedness Projects, Doing the Stuff, Herbal Remedies, Lost Skills, Medical, Natural Health, Preparedness, Real Food, Self-reliance, Survival Skills, Wildcrafting | Tags: , , , , , , , , | 46 Comments

Chaga Mushroom: Tinder Fungus and Pharmacy Growing on a Tree

by Todd Walker

Chaga Mushroom- Tinder Fungus and Pharmacy Growing on a Tree - TheSurvivalSherpa.com

On a warm July day in 1993, my interpreter and I took a stroll in a beautiful white birch forest outside our youth camp in Siberia. Papery tree trunks erupted from the landscape as far as the eye could see. I’d once drawn a forest scene like this in sixth grade but had never touched, smelled, and listened to such picturesque trees growing east of the Ural Mountains.

As we walked, Sergei stopped and pointed out a black mass growing on the side of a tree. Little did I know how important this crusty, charcoal looking fungus called Chaga (Inonotus obliquus) was to the people of Siberia. Twenty-plus years later, I’m just discovering why this wild mushroom is called a…

“Gift from God”

We humans have been using the wild plant world to heal and nourish since our beginnings. Oftentimes we walk past nature’s medicine cabinet unaware of its beneficial properties underfoot and overhead.

I’m always cautious about harvesting wild mushrooms. However, Chaga mushrooms look nothing like a typical story book mushroom with gills, domed cap, and a fairy sitting underneath. This multicellular fungi consists of spores and grows for twenty years on birch trees in northern latitudes. The blackish outside reminds me of charred wood. Beneath the blackish crust (called the sclerotium) is a rusty orange/brown interior resembling a wine cork but as hard as the wood on which it grows when dried.

Photo credit: Daryl Halseth

Photo credit: Daryl Halseth

Obviously, Chaga doesn’t grow here in our Georgia climate. This doesn’t mean we can’t tap into its benefits down south.

Chaga and Cancer

For those who have followed our journey on this blog, you may recall that in January of 2012, my wife, Dirt Road Girl, was diagnosed with stage-4 cancer. The chemo and radiation treatments almost killed her. The side effects of the aggressive drugs have wreaked havoc on her body.

Don’t get me wrong, we are so thankful we have the chance to spoil our three grandsons together! Her last scan (December 2015) showed no growth! But it’s all the side effects of her daily chemo pill that we hate. During our fight to beat this disease, we’ve sought alternative methods to restore her health. Our latest research points to the potential anti-cancer benefits of this wild mushroom.

Below are few of the things we’ve discovered about Chaga and cancer. This information is shared with you for educational purposes only. It is not meant to be medical advice. We are not medical professionals. Do your own due diligence and research. We’re just two individuals on a quest to live life and regain health.

Health and Healing Claims of Chaga

We’ve just begun using Chaga so our personal results are limited. My research of scientific studies and anecdotal evidence points us to the following health benefits…

  • Natural energy booster and hunger suppressant
  • Melanin found in the black crust (sclerotium) is high in antioxidants
  • Anti-bacterial
  • Anti-inflammatory
  • Anti-cancer due to phyto-sterols
  • Aids in the side effects of chemo/radiation treatments without harming healthy cells
  • Anti-viral
  • Anti-parasitic (rid intestinal parasites)
  • Anti-allergic
  • Antioxidant properties
  • Topical treatment for skin conditions (psoriasis, eczema, dermatitis, etc.)
  • Blood sugar regulator
  • Liver protection and detox of the body
  • Immune system enhancer and modulator (claims to help with auto-immune diseases such as lupus and psoriasis)
  • Increased T-cell activity due to beta glucans present in the mushroom

Technical Jargon

Without getting too technical, antioxidant foods are measured in what the USDA calls Oxygen Radical Absorbance Capacity, or ORAC scale. The higher the ORAC score, the more antioxidants are present.

Then the SOD acronym pops up – Superoxide Dismutase. Our bodies produce this enzyme to counteract harmful oxidation in cells. Chaga extract is said to stimulate the production of SOD.

Studies show Chaga to be high in ORAC and SOD.

Extraction Methods

To get to the good stuff in Chaga, the most common method is hot water extraction. Advice on this process varies. Some avid tea drinkers advise to not heat Chaga above 125º F for fear of destroying its beneficial properties. Others boil the conks for several minutes or simply steep as one would any tea.

Chaga Mushroom- Tinder Fungus and Pharmacy Growing on a Tree - TheSurvivalSherpa.com

Chaga tea at camp. Thanks Daryl and Kristina!


Joel Bragg, a Pathfinder buddy, sent me several pieces of Chaga in a trade. I simply boil a few until the water turns a dark color, usually about 5-10 minutes. Strain and drink. I use the same pieces over and over until the tea isn’t dark. Don’t discard used Chaga. Use the tincture recipe below to extract non-water soluble goodness. Once all the medicinal components have been extracted, Chaga can be burned like incense. I’ve not seen any studies of the usefulness of burning Chaga but it has a pleasant smell to me. It makes a great addition to your fire kit, as well.

Chaga Mushroom- Tinder Fungus and Pharmacy Growing on a Tree - TheSurvivalSherpa.com

Photo taken by Bill Reese of Instinct Survivalist on our recent camping trip to Raven Cliffs. Enjoying a cup of chaga tea.


I’ve also ground Chaga chunks into a fine powder with our VitaMix. It’s a dusty affair. Steep a spoon of powder in hot water and strain through a filter. DRG wants to try the crock pot method for larger batches of tea extract.

I enjoy my Chaga tea straight (no additives). I add coconut oil occasionally, not for flavor, but for the added health benefits. DRG flavors her tea with a few spices – cardamon, cinnamon, and/or ginger.


Hot water doesn’t extract all the good stuff, though. Other bioactive ingredients are non-water soluble and accessible through alcohol extraction. Add three table spoons of ground Chaga to one pint of vodka. After two weeks in a cool, dark place, filter the tincture and take 2-3 table spoons 3-6 times daily. This recipe and others can be found here.

A combination of both water and alcohol extraction can be used for full benefit.

Where to Buy/Find Chaga

As mentioned previously, I’ve collected a good supply from a few of my bushcraft buddies. Thanks guys! If you can’t harvest wild Chaga, ordering is an option. Not all Chaga is created equal. There’s cultivated versions, lab-grown, and wild Chaga. You want conks that naturally grow on birch trees.

If you live in an area like me, there are no Chaga mushrooms growing in my Georgia forests. I don’t always buy Chaga, but when I do, I buy from Dragon Fire Tinderbox…

I highly recommend this small, family owned and operated business. I know and trust Dragon Fire Tinderbox. My review of their tinder material is here. Daryl and Kristina also hand-harvest Chaga using ethical practices and respect for the wilderness.

Being relatively new to the medicinal benefits of Chaga fungus, Daryl has been very helpful in pointing me to research. He even has a Facebook group dedicated to the benefits of Chaga.

Chaga and Fire

Chaga’s ability to ignite from a relatively weak spark off flint and steel is how it earned the name True Tinder Fungus. I’ve experimented with other tinder fungi and have only achieved flint and steel ignition on Chaga. You must create surface area by scrapping or shaving the inner portion into a pile in order to catch the spark.

IMG_4507

Before modern ignition sources like lighters and matches, a smoldering chunk of tinder fungus allowed one to carry fire over distance. Dried tinder fungi are great coal extenders and hearth boards when practicing primitive with your bow or hand drill.

Research Sources:

Do your own research before taking natural supplements. I plan to keep everyone updated on our Chaga journey. If you’ve had experience with Chaga, good or bad, we’d love to hear from you.

Keep Doing the Stuff of Self-Reliance,

Todd

P.S. – You can also keep up with the Stuff we’re Doing on TwitterPinterestGoogle +, YouTube, Instagram, and Facebook… and over at the Doing the Stuff Network.

P.P.S – If you find value in our blog, Dirt Road Girl and I would appreciate your vote on Top Prepper Sites! You can vote daily by clicking here or on the image below. Check out all the other value-adding sites while you’re there… 

Thanks for Sharing the Stuff!

Copyright: Content on this site (unless the work of a third-party) may be shared freely in digital form, in part or whole, for non-commercial use with a link back to this site crediting the author. All links in articles must remain intact as originally posted in order to be republished. If you are interested a third-party article, please contact the author directly for republishing information.

Categories: Herbal Remedies, Homeopathy, Natural Health, Self-reliance, Wildcrafting | Tags: , , , , , , , | 15 Comments

39 Manly Uses for Coconut Oil in Your Bushcraft Kit

by Todd Walker

39 Manly Uses for Coconut Oil in Your Bushcraft - TheSurvivalSherpa.com

When it comes to packing for an outdoor adventure, leave the single-purpose items at home unless you have a pack mule to carry it all. Each item in your camping/bushcraft/survival kit should be able to perform at least three different tasks beyond its intended purpose.

Manly woodsmen, listen up. The women folk are more aware of the benefits and well ahead of us in using this stuff. Time to catch up!

It may not be as sexy as an ax or knife, but smart woodsmen should pack this non-sexy stuff in all their kits – bushcraft, EDC, Get Home Bag, camping, etc. I rarely go to the woods without it. As a utilitarian resource, I also keep a small container in my shop, bathroom, kitchen, school desk, and truck.

Here’s your multi-tasking resource…

Coconut Oil (CO)

There’s more to this tropical oil than its many health benefits. The saturated fat (medium-chain triglycerides) in CO burns quicker in your body than other fats boosting your metabolic rate and energy level. Don’t fall for the Big Fat Lie and fears of high cholesterol. The healthy fats in CO have been found to raise HDL (good) cholesterol and lower the ratio of LDL to HLD.

The eastern woodlands is not a tropical paradise. You won’t find coconut trees growing along the banks of the Chattahoochee. Still, CO is inexpensive and readily available. For the best health benefits, stock up on expeller pressed, organic, unrefined virgin coconut oil (industry experts label extra-virgin as a marketing ploy). This type of CO has a stable shelf life of 2 to 5 years.

how-to-make-lucky-sherpa-plantain-salve

An eclectic mix of containers for my Lucky Sherpa Salve… main ingredient is CO.

Repack the CO in smaller containers and add them to your survival kits. The anti-bad-stuff properties alone make CO an essential resource to carry on your next wilderness adventure.

  • Anti-bacterial – treats skin infections and kills bacteria
  • Anti-viral – kills many common viruses
  • Anti-fungal – effective on Candida; yeast infections, diaper rash, and lady-parts infections
  • Anti-inflammatory – suppresses inflammation and helps repair tissue
  • Anti-parasitic – helps rid your body of pesky parasites like tapeworm and lice
  • Anti-microbial – fights infection from bacteria, viruses, yeast, and fungi without harming beneficial gut bacteria
  • Anti-protozoa – kills giardia, a common protozoan infection from drinking untreated water
  • Anti-pyretic – reduces fever

Coconut Oil Uses in Bushcraft

There are 4 categories below where coconut oil is your pursuit of bushcraft skills.

Self-Aid

If natural plant-based remedies are not available, CO is an excellent option for the most common injuries you’ll experience in the woods – cuts, scrapes, bruises, burns, sprains, bites and stings.

  1. Cuts and scrapes: a thin layer applied forms a protective barrier against bacteria and foreign matter.
  2. Bruises: speeds up healing by repairing tissue.
  3. Burns: apply immediately to affected area and repeat as necessary
  4. Bites and stings: relieves itching and stinging. Better yet, make your own Plantain Salve with 3/4 cups of CO using this recipe.
  5. Chapped lips and skin: softens and moisturizes cracked, dry lips and relieves psoriasis and other skin conditions.
  6. Sunburn: relieves the burn and heals the affected skin.
  7. Sunscreen: not a high SPF but adds a little protection for your skin.
  8. Nose bleeds: coat the nasal passage with a layer if you’re prone to nose bleeds in certain weather conditions.
  9. Allergies: CO is a solid around 76º F. Melt CO and snort/sniff it up your nose to coat sinuses and protect from pollen. Also helps kill airborne germs associated with flu and colds.
  10. Salves: add healing herbs to make a salve.

Personal Hygiene

  1. Shaving: use it as a shave cream and after shave if you need to shave on your adventure. Or grow a beard…
  2. Beard: yep, it’ll condition, tame, and sanitize any mountain man beard. Stops the itching too!
  3. Soap: use CO as a soap substitute.
  4. Foot care: nothing like a good foot massage after a day of trekking. Rubbing CO on your feet also kills harmful fungi and bacteria on the skin and toenails. Effective on athlete’s foot. Feet are likely your only means of conveyance. Take care of them.
  5. Maceration: wet feet that look like prunes are asking for blisters and can cause painful cracks after drying. Rub CO on your soles before putting on clean socks and footwear. Apply a coat to dry feet and wear socks in your bedroll for overnight moisturizing and protection for the following days trek.
  6. Teeth and bones: brush your teeth with a mix of CO and baking soda. I use CO for Oil Pulling too. Aids in absorption of calcium and magnesium for strong bones and teeth.
  7. Deodorant: CO alone is somewhat effective as a deodorant. Or you can make an aluminum-free all-natural deodorant stick ahead of time so you don’t smell like Sasquatch. Your camp mates will thank you!
  8. Bushcraft Dog: works on pets too. Apply to your dog’s skin and coat for any itchy issues.

Field Gear Maintenance

  1. Leather: cleans, conditions, and preserves leather in the field.
  2. Wood: apply a coat to ax handles, wooden spoons, and buck saws as a preservative.
  3. Metal: wipe down your cutting tools with a thin layer of CO to prevent rust.
  4. Lubricant: use to lube your crosscut/bucksaw for smooth sawing. A dab in the socket of your bearing block on a bow drill set reduces friction.
  5. Cleaner: add an abrasive like baking soda to CO to scrub sticky stuff of knives and other gear. Even works on pine sap.
  6. Fixin’ Wax: CO can be substituted for the tallow in my Fixin’ Wax recipe.
  7. Oil lamp: not a maintenance item per se, but CO can be pressed into service as fuel for slush/oil lamps.
  8. Rust remover: coat area and let it sit for an hour. Rinse with warm water.
  9. Waterproofing: seals seams in leather and canvas.
  10. Non-toxic: clean your eating knife and utensils with CO. Safe for animals and humans.

Camp Cooking

6 Life and Survival Lessons Learned from Backpacking - TheSurvivalSherpa.com

  1. Cooking oil: CO is an excellent butter substitute.
  2. Oxidation: less heat sensitive than vegetable oils so there’s less oxidation from heat. CO is more stable for stir-frying squirrel and sauteing wild edibles.
  3. Coffee: add a heaping spoonful to your campfire coffee to start your day in the woods.
  4. Hot Cocoa: I’ve dubbed cocoa/cacao the 11th C of Survivability. Adding CO to this rich beverage only cements the meal-in-a-cup on top of the list of stuff to never leave out of your kit.
  5. Flavor: my nephew, Jake, cooked a snake on our backpacking trip with unrefined CO.
  6. Energy: eat a tablespoon, with or without other food, to boost energy and endurance.
  7. Vitamin absorption: CO helps your body absorb fat soluble vitamins, minerals, and amino acids.
  8. Colon detox: shown to reduce waste and toxins from your digestive tract.
  9. Constipation: squatting in the woods, the perfect human potty position, when your system is backed up is a physical challenge. CO contains fiber and helps get stuff moving after that campfire chili encounter. No more “grrrrrrrrr” sounds coming from the latrine bushes.
  10. Diabetics: CO is associated with insulin and blood sugar control.
  11. Spread: use it as a spread on your bannock, dutch oven biscuits, or anything you’d slather butter on at home.

If you got this far, I need to add a CYA statement. I’m not giving medical advice nor am I a health care provider. This stuff is for informational purposes only and comes from my experience with coconut oil. Do your own research.

This is only a fraction of the manly uses of CO in the great outdoors. I’m sure you’ve got unique, unorthodox ways to use this magical oil. Share in the comments if you don’t mind.

Keep Doing the Stuff of Self-Reliance,

Todd

P.S. – You can also keep up with the Stuff we’re Doing on TwitterPinterestGoogle +, YouTube, Instagram, and Facebook… and over at the Doing the Stuff Network.

P.P.S – If you find value in our blog, Dirt Road Girl and I would appreciate your vote on Top Prepper Sites! You can vote daily by clicking here or on the image below. Check out all the other value-adding sites while you’re there… 

Thanks for Sharing the Stuff!

Copyright: Content on this site (unless the work of a third-party) may be shared freely in digital form, in part or whole, for non-commercial use with a link back to this site crediting the author. All links in articles must remain intact as originally posted in order to be republished. If you are interested a third-party article, please contact the author directly for republishing information.

Categories: Bushcraft, Camping, Doing the Stuff, Herbal Remedies, Natural Health, Preparedness, Real Food, Self-reliance, Survival, Wildcrafting | Tags: , , , , , , , , , | 13 Comments

Hunger Games: Find this Wild Food and You’ll Never Starve

by Todd Walker

Hunger Games: Find this Wild Food and You'll Never Starve - TheSurvivalSherpa.com

Two weekends ago I spent two days learning from a walking encyclopedia. Mark Warren operates Medicine Bow, a primitive school of Earthlore, in the north Georgia mountains near Dahlonega. Though I attended his Stalking/Tracking class, Mark’s willingness to veer onto other paths and integrate useful plants in the Eastern Woodlands only enhanced my learning experience.

One edible plant we discussed was Wapato (Sagittaria latifolia). Other common names include ~ Duck Potato, Arrowhead, Wapati, or Katniss.

I had an ‘ah ha’ moment with the common name Katniss

As a fan of The Hunger Games, I always wondered how the arrow-slinging heroine, Katniss Everdeen, received her unusual moniker. Now it makes perfect sense on two levels.

  1. Sagittaria in Latin means “arrow”. It also refers to the archer constellation Sagittarius. The obvious one, right?
  2. A lesser known botanical reason can be found in her deceased father’s words which Katniss recalls early on in the trilogy…

As long as you can find yourself, you’ll never starve.

In keeping with the Hunger Games theme of this article, we’ll use the common name Katniss when referring to this wild food.

Katniss (Sagittaria latifolia) tubers were a staple in nature’s pantry for indigenous peoples of North America. Mark told us that the Cherokee of Appalachia cultivated this wild plant in wetland habitat as a sustainable food to feed their families. Roasted duck and duck potato sound delicious!

Katniss the Plant

The day before our class I snapped a few photos of a wetland near my school with a closeup of a toxic plant which resembles katniss. Mark took our class to a wetland area near a meadow to observe a patch of katniss. After comparing both plants, one can easily distinguish between the toxic Arrow Arum (Peltandra virginica) and edible katniss (S. latifolia).

Identification: Palmate vs. Pinnate

The leaves of katniss are palmate and arrow arum are pinnate. Leaves can vary greatly in size.

  • Palmate – leaves where the nerves radiate from a central point like a curved star burst.
Hunger Games: Find this Wild Food and You'll Never Starve - TheSurvivalSherpa.com

Palmate pattern on Katniss

  •  Pinnate – leaves that have a main nerve (midrib) with other nerves branching off the full length of the midrib like a feather plume.

Pinnate pattern on Arrow Arum

A closeup of the pinnate pattern on Arrow Arum


A look at the entire Arrow Arum leaf

Arrow Arum leaf

Arrow Arum’s arrowhead-shaped leaf is often mistaken for katniss. With the side by side comparison above, it’s easy to see which is edible by the distinct difference in the leaf veins.

Arrow Arum found near Katniss

Arrow Arum in Katniss habitat

Katniss Habitat

Katniss can be found along shallow edges of ponds, streams, swamps, and bogs. Beaver habitat is another prime location for this aquatic plant.

A large beaver-manufactured wetland habitat near my school

A large beaver-manufactured wetland habitat near my school

Their range extends across North America in wetland areas except in extreme northern climates. Large colonies can be found in the shallows of lakes. Larger broadleaf arrowheads typically produce larger tubers.

Harvesting Katniss

Mike Rowe should do a Dirty Jobs episode on harvesting this aquatic food. Nothing about the process is clean. You can’t “cheat” by just pulling on the green stalk to reach the tubers. So roll up you sleeves and get ready for some mudslinging.

I trust and respect Samuel Thayer, author of The Forager’s Harvest. He’s been harvesting wild edibles since he was a kid. I tried his stomp method described on page 111.

Once you become an ‘expert’, you stop learning. There are many people with more foraging knowledge and experience than this novice forager.

But here’s the thing…

You and I will never deepen our knowledge or experience until we trade theory for ACTION. I’ve read books and articles about locating, identifying, and harvesting katniss. But this plant’s starchy tubers are more elusive than I had anticipated.

I have the locating and identification part down on katniss. Putting duck potatoes in my skillet has me stumped… for now.

I now know a few methods that do not produce desired results. Here are a few dirty lessons learned from my recent foraging foray in hot August humidity… waist deep in a Georgia mud bog.

Stomp Method

Traditionally, Cherokee women would wade barefooted into a colony of arrowhead and stomp around freeing the tubers from their muddy bed so they would float to the surface for easy pickings. Days of litter-free waterways and pristine shorelines are long gone. You may opt for an old pair of tennis shoes or waders to protect your feet from painfully locating Bubba’s broken beer bottle.

Fails, in my experience, are instructive. So are experienced foragers. I trust and respect Samuel Thayer, author of The Forager’s Harvest. Unlike me, Mr. Thayer has been Doing the Stuff of foraging wild food since his childhood. I tried his stomp method described on page 111.

Based on my personal experience, you’ll never fully appreciate this method until you’re waist deep in muck hoping you can break the Earth’s suction on your feet and return to solid land. Thayer’s harvesting accounts produced tubers consistently. All I got was muddy… and a bit smarter in the process.

Stomping in progress

Stomping in progress

Armed with hip waders and a walking stick I made my way to my friend’s property where a thick stand of katniss grows in the swampy end of their pond. The walking stick served two purposes: To move weeds in front of my feet to check for snakes; and, as a horizontal support on top of the bog surface to aid in my rescue from the jaws of waist-deep mud holes.

How hard can it be, right? Just jump into a thick clump of katniss and start stomping a man-size hole in the marsh. The embed tubers are supposed to break free from their rhizomes and float to the top of the water.

After an exhausting hour of thrashing and spinning in muck, not one tuber floated to the surface. In a long-term self-reliance situation, my haphazard expenditure of calories, with no return on investment, could be costly. This is the main reason we should trade theory for action to develop skills and techniques that actually work when it counts.

One other thought about harvesting wild food. Functional fitness should become a priority for anyone pursuing self-reliance. If modern systems fail, imagine the physical dilemma you’ll face harvesting food and performing daily tasks without an established base of fitness. Just a thought.

What went wrong?

Timing

After more research and asking online friends, my problem may stem from bad timing. That is, the tubers on our Georgia plants may not haven’t developed yet. We’re in the dog days of summer here. Katniss plants develop tubers later in the fall as a source of starch for the winter months.

More experimental foraging will take place in the same location in September and October, possibly as late as November. Once the arrowhead leaves turn brown and die back, larger tubers should be hiding in their mud beds under cold water. I image a campfire will come in handy on this adventure.

Other Methods from The Forager’s Harvest

  • Potato Hoe – Use a four-prong hoe to rake down into the mud bed to break the tubers free. From what I read, you have to rake a deep hole to reach the “tuber zone.” Thayer used the hoe while in a canoe and standing in the water with good success.
  • Hands – Locate the rhizomes and carefully trace down to the end to find the tuber. I attempted this method a few times as well.

I will not be tuber-less. I have faith that this wild food colony will give up her hidden treasure. Stay tuned for updates in my soggy saga. I will find this elusive Katniss tuber and not starve! Recipes will follow.

Keep Doing the Stuff of Self-Reliance,

Todd

P.S. – You can also keep up with the Stuff we’re Doing on TwitterPinterestGoogle +, YouTube, Instagram, and Facebook… and over at the Doing the Stuff Network.

P.P.S – If you find value in our blog, Dirt Road Girl and I would appreciate your vote on Top Prepper Sites! You can vote daily by clicking here or on the image below. Check out all the other value-adding sites while you’re there… 

Thanks for Sharing the Stuff!

Copyright: Content on this site (unless the work of a third-party) may be shared freely in digital form, in part or whole, for non-commercial use with a link back to this site crediting the author. All links in articles must remain intact as originally posted in order to be republished. If you are interested a third-party article, please contact the author directly for republishing information.

Categories: Doing the Stuff, Food Storage, Functional Fitness, Preparedness, Primal Skills, Real Food, Self-reliance, Survival Skills, Wildcrafting | Tags: , , , , , , , , , , , | 6 Comments

49 Outdoor Skills and Projects to Try When Camping

by Todd Walker

49 Outdoor Skills and Projects to Try When Camping - www.TheSurvivalSherpa.com

Planning your spring outdoor adventure?

Try these skills and projects, even if it’s in your backyard. In fact, your backyard may be the best place to start your journey to outdoor self-reliance.

Burn Stuff (Combustion)

Practice in wet conditions. If it ain’t raining, you ain’t training

Cut Stuff (Cutting Tool)


Shelter Stuff (Cover)

Avoid Stuff

Forage/Harvest Stuff

Tie Knots and Stuff

Eat Stuff

how-to-make-modern-mountain-man-mre

Jerking water buffalo

Make Outdoor Stuff

39 Self-Reliance Skills and Projects to Try When Camping | www.TheSurvivalSherpa.com

Firewood processed with the take-down bowsaw

Wilderness Self-Reliance Stuff

Iris and Dave Canterbury being gracious as usual.

Iris and Dave Canterbury being gracious as usual.

Let the fun begin! Get out and stay outdoors.

Keep Doing the Stuff of Self-Reliance,

Todd

P.S. – You can also keep up with the Stuff we’re Doing on TwitterPinterestGoogle +, YouTube and our Facebook page… and over at the Doing the Stuff Network on PinterestGoogle +, and Facebook.

P.P.S – If you find value in our blog, Dirt Road Girl and I would appreciate your vote on Top Prepper Sites! You can vote daily by clicking here or on the image below. Check out all the other value-adding sites while you’re there…

Thanks for Sharing the Stuff!

Copyright: Content on this site (unless the work of a third-party) may be shared freely in digital form, in part or whole, for non-commercial use with a link back to this site crediting the author. All links in articles must remain intact as originally posted in order to be republished. If you are interested a third-party article, please contact the author directly for republishing information.


Categories: Bushcraft, Camping, DIY Preparedness, Doing the Stuff, Self-reliance, Survival Skills, Wildcrafting | Tags: , , , , , , , | 7 Comments

Herbal Medicine Kit: Bleeding

Part 5 in our Go-to Herbal Medicine Kit series.

herbal-medicine-kit-bleeding

by Kat Yorba

Today we continue on with our series with looking at “Bleeding.”  We will discuss the herb Agrimony and Yarrow.  Make an Herbal Compress to stop Bleeding and a Tincture of Yarrow.

BLEEDING

Some people can handle the sight of blood, some can’t.  I am one of those who can’t.  But I find that being prepared…knowing ahead of time what to do and having my supplies on hand enables me to feel better about the whole issue.

 Let’s better understand what bleeding does.  Bleeding has it’s advantages.  It’s the bodies way of cleaning dire and foreign particles from a wound, and when exposed to air it forms a fibrous substance called fibrin.  This fiber creates a netting that entangles other blood cells so that they clot into a scab…your bodies natural band-aid!

So, you’re in a serious situation and bleeding needs to be stopped right away.  Certain herbs can be applied directly to the wounded area.  If this does not stop the bleeding, apply an herbal compress with pressure.  While administering herbal remedies, you should also try to slow the flow of blood by raising the injured area higher than the heart.

Agrimony, plantain and yarrow are versatile herbs that can arrest bleeding and encourage scabbing.

Keep in mind that treatments made with these herbs in the form of powders or poultices are an emergency tactic only.  Although herbs quickly arrest bleeding, they are not antiseptic enough so proper cleaning and disinfecting will also need to be done.  Use your discretion but seek medical attention when necessary!

Herbal Compress to Stop Bleeding

Click HERE to print recipe! 

 Herbal Medicine Kit   Bleeding 

Agrimony

 Herbal Medicine Kit   Bleeding

Defined

Agrimonia gryposepala: species native to North America commonly known as tall hairy agrimony was used by the Among the Iroquois people, Cherokee, The Ojibwe and other ingenious peoples for much the same purposes of the common agrimony Agrimonia eupatoria which was naturalized from europe. Hemp Agrimony, Eupatorium Cannabinum (Linn.)and the Water Agrimony Eupatorium Aquaticum mas, have somewhat similar properties but are not botanically related.

Therapeutic Uses

Agrimony’s astringency is effective against diarrhea, especially in small children, and because of its low toxicity, the herb is particularly suitable for children’s illnesses. Agrimony stops irritation of the urinary tract that may increase a child’s urge to urinate and, therefore, may be useful in the treatment of bladder leakage (cannot hold urine), bed-wetting and adult incontinence.

Agrimony is perhaps best known as a wound herb used on medieval battlefields to staunch bleeding. This same property helps to staunch heavy menstrual bleeding as well. Agrimony is most used in modern herbal practice as a mild astringent and a tonic, the tannins it contains tone the mucus membranes making it is useful for alleviating the symptoms of coughs and sore throats. The combination of being a bitter tonic as well as an astringent herb make agrimony a valuable tonic for the digestive system and a useful remedy for healing peptic ulcers. The bitter principles in the plant support the function of the liver and gallbladder. The herbal tea can be used as a skin wash; it is thought to improve minor injuries and chronic skin conditions.

Recipe

Skin Wash/Tea/Infused Liquid for Creams or Gargle :

Standard brew using 1 teaspoon of dried herb to each cup hot water. The longer you let it steep, the more tannins are extracted. Make a stronger decoction for external use in baths and skin washes Drink 2 to 3 cups per day. Used in ointment form for skin rashes, and as a gargle for sore throat.

Yarrow

 Herbal Medicine Kit   Bleeding

Description:

Yarrow was once known as “nosebleed”, it’s feathery leaves making an ideal astringent swab to encourage clotting. Yarrow skin washes and leaf poultices can staunch bleeding and help to disinfect cuts and scrapes; taken as a tea it can help slow heavy menstrual bleeding as well. Yarrow is a good herb to have on hand to treat winter colds and flu; a hot cup of yarrow tea makes you sweat and helps the body expel toxins while reducing fever. The chemical makeup of yarrow is complex, and it contains many active medicinal compounds in addition to the tannins and volatile oil azulene. These compounds are anti-inflammatory, antibacterial, and help relax blood vessels. Yarrow should be on everyone’s list of remedies since the herb makes itself useful for everything from brewing beer to a hair rinse to preventing baldness. In China, yarrow is used fresh as a poultice for healing wounds. A decoction of the whole plant is prescribed for stomach ulcers, amenorrhoea, and abscesses.

Side Effects: 

Avoid in pregnancy, can cause allergic skin reactions in sensitive people who suffer from allergies related to the Asteraceae family. Moderation is the key to safe use, the thujone content can be toxic over an extended period of time

Recipe:

Yarrow Spritzer

For a tonic that soothes the nerves and uplifts at the same time, this is a good combination for an aroma lamp or mister. Also use as a facial steam for the benefits of yarrow that is skin healing and for spruce that helps the respiratory system.

Variations: Use lime instead of orange.

3 drops-Orange

4 drops-Spruce

2 drops -Ylang-Ylang

6 drops -Yarrow

How to Use:

Lamps/Diffusers:

15 to 20 drops of a blend can be used at a time in most standard sized aroma lamps.

 Mist Spray:

As a general rule use 15-30 drops per cup (8 oz.) of liquid for mist sprays, depending on your preference and the strength of the essential oils.

Yarrow Tincture

Click HERE to print!

  Herbal Medicine Kit   Bleeding


Recap:  That concludes our look at “Bleeding”.  Today we learned a little more about the herbs; Agrimony & Yarrow.  We made a Herbal Compress to stop Bleeding and also Yarrow Tincture.

Looking ahead:  Next post we will be learning all about “Bruises”.  We will first talk about Arnica, Witch Hazel and Chamomile.  Then move on to several recipes; Bruise Compress, Tincture of Arnica & a Herbal Ice.

Reminder:  Have on hand St. John’s wort flower tops, Witch Hazel Bark, Chamomile Flowers, Lavender Flowers, Lavender Essential Oil, Distilled Water, Washcloth for Compress.

————————————–

About Kat Yorba: Hi, I’m Kat. I’m a wife, mother, friend, massage therapist, writer, gardener, and child of God. I LOVE coffee, chocolate, essential oils, good books, cats, motorcycles, guns, drag racing and living in the USA! Learning to be more self-reliant & self-sufficient in a semi-homemade, homesteading way! Connect with Kat on her blog, Simply Living SimplyFacebookTwitterPinterest, and Google+.

Categories: Doing the Stuff, Herbal Remedies, Medical, Preparedness, Self-reliance, Wildcrafting | Tags: , , , | 7 Comments

Why Being a “Tree Hugger” Builds Self-Reliance

by Todd Walker

tree-hugger-self-reliance-uses-american-sycamore

I’ve never considered myself a “tree hugger” as defined in the Merriam-Webster dictionary:

noun: someone who is regarded as foolish or annoying because of being too concerned about protecting trees, animals, and other parts of the natural world from pollution and other threats [Emphasis mine]

Yesterday I annoyed a few motorists crossing a narrow country bridge on a tree hugger outing. Not intentionally, mind you. It’s just that I needed to photograph a beautiful American Sycamore stretching its molten limbs over a muddy Georgia river. One trucker let me know how foolish I looked by blaring his air horn as I perched on the bridge railing snapping my shutter. Unaffected, I continued my craziness.

The thought of being a tree hugger, as previously defined, may not describe you, but every person on the journey to self-reliance and preparedness would benefit from hugging a tree or two.

You’re conflicted, right? Well, don’t be.

It’s our responsibility to protect, use, and conserve our natural resources. We’re stewards of this land. Our Appalachian ancestors understood the properties of trees and how to use the wood, bark, leaves, and roots to build a sustainable life. There were no box stores with stacks of dimensional lumber to build a house. If a handle shattered, they knew the best wood to use for re-hafting an ax. Tulip Poplar was abundant and used to build houses and hand-hewn log cabins. The Appalachian pioneers knew their wood!

tree-hugger-self-reliance-uses-american-sycamore

A young sycamore growing near the roadside

There are boat-loads of info on edible weeds and medicinal plants. I’ve found a lack of printed material on the medicinal/edible uses of trees. I have many of the Foxfire book series and always look to add more to my self-reliance library. Clue me in if you have more tree resource books, please. So, like any good Doer of the Stuff, I’m embarking (pun intended) on a tree education journey as part of my Doing the Stuff Skills list. Who knows, maybe you’ll be convinced to embrace your inner tree hugger.

Ready, set, hug!

The first tree to wrap your arms around is the American Sycamore (Platanus occidentalis). It can reach heights over 130 tall, over 10 feet in diameter, and grow to be 600 years old. George Washington documented in his journal in 1770 a sycamore with a diameter of 14 feet (45 feet in circumference). Trees this large usually have hollow trunks that house animals of all sorts. It’s been reported that settlers even used hollowed Sycamore trees to shelter livestock.

The rapid growth rate of this deciduous tree causes the bark to shed in molten fashion like a birch tree. Its camouflage pattern of light green and brownish gray with creamy white background splotches causes the trunk to stand out in late fall and winter when forest leaves lay on the ground. The exfoliating bark and coloration makes the sycamore one of the easiest deciduous trees in the eastern woodlands to identify in the winter.

tree-hugger-self-reliance-uses-american-sycamore

The Sycamore and Self-Reliance

The fast growing American Sycamore likes wet bottom land near streams, rivers and ponds in full sun. Their leaves are similar to maple but not as spectacular since they turn a boring brown in the fall. Beavers find the bark appetizing.

In Bushcraft 

Bushcraft refers to the art of crafting in the bush (woods) with minimal tools and lots of skill.

  • Sycamore’s fibers intertwine making it an excellent wood for spoon and bowl carving. The wood tends to warp in the drying process, so use dried, seasoned wood.
  • Not rot resistant and shouldn’t be used for longterm structures exposed to the moisture.
  • The sap offers a year-round source of hydration in warm climates.
  • The sycamore can also be tapped like a maple tree for syrup or sugar. However, it takes a lot of sap to make small batches of sycamore syrup.
  • Shade-casting crown of large trees offer shelter from the sun.
  • Large leaves (up to 10 inches across) can be used as a wrap for slow cooked food over coals for an added sweet flavor.
tree-hugger-self-reliance-uses-american-sycamore

This green leaf measured almost 9 inches across

In Woodwork 

  • Sycamore is grown commercially for pulp and rough lumber.
  • Interlocking grain makes nice accent pieces for woodworking.
  • Turns easily on a lathe for bowls.
  • Beautiful specking on gun stocks.
  • Music boxes; guitars and violins.
  • Hard to split which makes sycamore an excellent butcher’s block.
  • Quarter sawn makes this wood more stable for projects. Flat sawn tends to warp.
  • It gets one of its nicknames “Buttonwood” from it ability to create durable wooden buttons.
  • The wood is food safe and was used for food crates and barrels in the past.

In Medicine

Inner bark tee was used for a wide variety of treatments by Native Americans.

  • Colds, coughs, and lung ailments
  • Measles
  • Emetic – cause vomiting
  • Laxative
  • Astringent properties to treat skin issues and eye wash
  • Sweet sap on the inner bark used for wound dressing
  • Sap can also be used to make wine

The American Sycamore is a pioneer species. About forty years ago, we stopped cultivating a small field on wet bottom land on our family farm. Today we have a large stand of native sycamores growing wild.

tree-hugger-self-reliance-uses-american-sycamore

What was once several acres of corn we pulled by hand

Being a “tree hugger” should not carry a negative stereotype or denote a political affiliation for those of us building self-reliance skills and pursuing a more sustainable lifestyle. Embrace your love of trees and learn to be stewards of these towers of the forest!

Have you hugged a tree today?

Keep Doing the Stuff of Self-Reliance,

Todd

P.S. – You can also keep up with the Stuff we’re Doing on TwitterPinterestGoogle +, and our Facebook page… and over at the Doing the Stuff Network on PinterestGoogle +, and Facebook.

P.P.S – If you find value in our blog, Dirt Road Girl and I would appreciate your vote on Top Prepper Sites! You can vote daily by clicking here or on the image below. Check out all the other value-adding sites while you’re there…

Thanks for Sharing the Stuff!

Copyright: Content on this site (unless the work of a third-party) may be shared freely in digital form, in part or whole, for non-commercial use with a link back to this site crediting the author. All links in articles must remain intact as originally posted in order to be republished. If you are interested a third-party article, please contact the author directly for republishing information.


Categories: Bushcraft, Camping, Doing the Stuff, Homesteading, Lost Skills, Medical, Natural Health, Preparedness, Self-reliance, Wildcrafting | Tags: , , , | 21 Comments

Herbal Medicine Kit: Bites, Stings and Splinters

The end of last year we started a series by our friend and Doing the Stuff Network member Kat Yorba called Go-to Herbal Medicine Kit. With herbs and weeds growing crazy this time of the year, I thought it was time to pick it back up and keep learning about herbal remedies. Here’s part 4…

For a refresher, you can check out the previous posts below:

herbal-medicine-kit

by Kat Yorba

Today we begin a 3 part look at Bites, Stings and Splinters.  In the process we will look at many different herbs, essential oils and clays as well as make various herbal preparations.

Ready to get started?? Here we go:

Bites, Stings & Splinters…Oh MY!

OUCH!

One yellow jacket did this damage!

One yellow jacket did this damage!

Summer brings many pleasures…sunshine, long days, playing in the water and…MOSQUITOES!

If those pesky mosquitoes keep you from enjoying your summer fun…fear not, mother nature is here!  Minor bites from mosquitoes and other insects respond very quickly to a wonderfully easy to prepare herbal oil.

 Insect Bite Oil Recipe – Printable!

Click HERE to print

One more recipe for you…courtesy of Frugally Sustainable!

(This is a more advanced recipe for later use) 

Itch Relief Stick

Itch Relief Stick

Ingredients  

-1 ounce (approx. 2 tablespoons) olive oil infused with calendula flowers, chickweed, nettle leaf, lemon balm leaf, plantain leaf, and goldenseal root

-1 ounce (approx. 2 tablespoons) Shea butter

-1 ounce (approx. 2 tablespoons) cocoa butter

-1 ounce (approx 2 tablespoons) beeswax

-1 teaspoon Neem oil

-2 teaspoons essential oil blend (You can use a blend of clove, lavender, rosemary, peppermint, tea tree and/or ginger)

Method

1. Infuse your oil with the herbs.

2. In a double boiler, or small pot, over very low heat slowly melt the olive oil, butters, beeswax, and neem oil.

3. Once melted remove from heat and allow to cool slightly before adding the essential oils.

4. Pour mixture into a clean roll-up or lip balm tube and allow it to cool on the counter overnight.

Notes

-This Homemade Itch Relief Stick contains herbs that have been well-known for their strong antihistamine, analgesic, and antibacterial properties. Not only will this stick stop the itch, but it may reduce the risk for infection!

-The butters act as skin protectors to provide instant relief of itchiness and pain due to all sorts of insect bites and stings.

-This recipe makes quite a bit — approximately 4 ounces of product — so go in with a friend or two and share resources!

Let’s talk about some herbs and essential oils for a bit, to prepare us for our next posts recipe.

Echinacea

Echinacea is native to North America, with most of the research on this King of Immunity Herbs being done in Germany…and it’s early use gleaned from native healers.  Now it is the herb of choice being one of the handful of medicinal herbs that are well-known by the general public.

There are several species of Echinacea that can be used: E. angustifolia, E. purpurea, and E. pallida.  All 3 species can be used and are interchangeable, however E. angustifolia lasts longer after its been dried.

We mainly harvest the root, but it’s common to see medicine made from the aerial portions of the plant as well.  To harvest the roots and obtain the most medicinal qualities, harvest them in the fall after the plants have been growing for at least 2-3 years.  The aerial portions can be harvested in the summer not matter the age of the plant.  Remember when harvesting the aerial portions to leave enough of the

Plant for it to gather enough energy for next years growth.

Without a doubt, Echinacea is one of the most popular herbs today.  With over 300 echinacea products being sold worldwide.  Nearly 400 studies have shown that Echinacea can be used to improve the immune system in numerous ways.  These include increasing activity of three of the immune systems workhorses-T-cells, Interferon and Natural Killer Cells.  Echinacea also destroys many types of viruses and bacteria.  Echinacea even makes cells stronger and more resistant to invasion.

Also known as

Echinacea purpurea, Echinacea pallida, Echinacea angustifolia, Coneflower, Snakeroot, Purple Coneflower, and Blacksamson.

Constituents

The complex sugars of the herb are its immune stimulants. Polysaccharides and Echinaceoside.

Parts Used

The root, leaves, stems and flowers, of Echinacea purpurea, Echinacea angustifolia, or Echinacea pallida.

Typical Preparations

The above-ground parts of the plant are used to make fresh juice, infusions (warm-water teas), and tinctures. The roots are used in either cut or powdered form for capsules, fluid extracts, teas, and tinctures.

Precautions

Use with caution if you are allergic to ragweed.

*Courtesy of Mountain Rose Herbs

Lavender

Lavender was widely used in ancient Egypt for its fragrance, and it was also a favorite in the homes of Greeks and Romans.  Even its name is derived from the Latin, lavare, meaning “to wash”, because it was used in scented baths.

In Arab medicine, Lavender was used as an expectorant and antispasmodic, while European folk medicine regarded it as essential for healing wounds and as a worm remedy for children.

This fragrant plant is also famous for its wonderful aroma, which is used much in the perfume industry.  It is also widely used medicinally and is a staple of aromatherapy to promote relaxation.

Lavender has been used for centuries as a tonic to ease conditions of the nervous system.  It is a relaxant that calms nerves, relieves fatigue, depression, migraine and tension headaches, nervous exhaustion, irritability and excitement.

Also known as

Lavandula (spp- intermedia, pendunculata, officinalis and angustifolia) English lavender, Broad-leaf Lavender, Grande Lavander and True Lavender

Constituents

Essential oil containing borneol, camphor, geraniol, and linalool, also coumarins, caryophyllene, tannins, and other antioxidant compounds.

Parts Used

Flowers.

Typical Preparations

Teas, tinctures, and added to baked goods. Cosmetically it has a multitude of uses and can be included in ointments for pain and burn relief.

*Courtesy of Mountain Rose Herbs

Bentonite Clay

What is it? Bentonite, also referred to as Montmorillonite, is one of the most effective and powerful healing clays. Bentonite can be used externally as a clay poultice, mud pack or in the bath and, in skin care recipes. A good quality Bentonite should be a grey/cream color and anything bordering “pure white” is suspect. It has a very fine, velveteen feel and is odorless and non-staining. The type of bentonite offered by Mountain Rose herbs is a Sodium Bentonite.

How does it work? Bentonite is very unusual in the fact that once it becomes hydrated, the electrical and molecular components of the clay rapidly change and produce an “electrical charge”. To state it another way… “Bentonite is a swelling clay. When it becomes mixed with water it rapidly swells open like a highly porous sponge.

Where does it come from? Bentonite clay is sedimentary clay composed of weathered and aged volcanic ash. The largest and most active deposits come from Wyoming and Montana. (Mountain Rose Herbs stocks a Wyoming variety).

How is it manufactured? Bentonite is usually quarry mined from deposits that can range anywhere from 100 feet to several thousand feet. This depends on the health and vitality of the land it is processed from and how far a producer will go to find the right clay with the proper characteristics and consistency. From here it is mined from the earth and brought out into the sun to remove excess water and moisture and, to make it easier to work with. After the initial drying begins the final transformation. It gets processed (ground) with huge hydraulic crushers and it then goes through the final process of micronization, or “fine granulating”. This is usually done with the assistance of sophisticated and expensive granulators. Upon completion of this final process it gets inspected by a quality control team and is sent off for consumer use.

Recap:  Today we learned a bit about Bites and Stings, how to make an Insect Bite Oil and another wonderful recipe by Frugally Sustainable for later use!  We also learned about Echinacea, Lavender and Bentonite Clay.  Information provided is of general nature, there is much…much more out there to learn!

Looking ahead:  Next post we will be learning further about Bites and stings, learning what a Poultice is and how to make one, learning what a Tincture is and how to make one.

Reminder:  Have on hand Echinacea root and Vodka/Everclear, Lavender Essential Oil, Bentonite Clay, containers for all your remedies.

Blessings to you and yours,

Kat

———————————————

About Kat Yorba: Hi, I’m Kat. I’m a wife, mother, friend, massage therapist, writer, gardener, and child of God. I LOVE coffee, chocolate, essential oils, good books, cats, motorcycles, guns, drag racing and living in the USA! Learning to be more self-reliant & self-sufficient in a semi-homemade, homesteading way! Connect with Kat on her blog, Simply Living SimplyFacebookTwitterPinterest, and Google+.

Kat’s Printable Resources:

Herbal Medicine Kit-Bites, Stings, Splinters part 1

Link for Insect Bite Oil

Herbal Medicine Kit-Bites, Stings, Splinters part 2

Poultice Link

Link to Echinacea Tincture

Herbal Medicine Kit-Bites, Stings, Splinters part 3

Link to Ant Bite/Nettle Remedy

Link to Yellowdock Tincture

Link to Yellowdock Syrup

P.S. – You can also keep up with the Stuff we’re Doing on TwitterPinterestGoogle +, and our Facebook page… and over at the Doing the Stuff Network on PinterestGoogle +, and Facebook.

P.P.S – If you find value in our blog, Dirt Road Girl and I would appreciate your vote on Top Prepper Sites! You can vote daily by clicking here or on the image below. Check out all the other value-adding sites while you’re there…

Thanks for Sharing the Stuff!

Copyright: Content on this site (unless the work of a third-party) may be shared freely in digital form, in part or whole, for non-commercial use with a link back to this site crediting the author. All links in articles must remain intact as originally posted in order to be republished. If you are interested a third-party article, please contact the author directly for republishing information.


Categories: Herbal Remedies, Homeopathy, Natural Health, Preparedness, Self-reliance, Wildcrafting | Tags: , , | 6 Comments

Blog at WordPress.com.