Water

Wilderness Survival: 3 Core Skills to Keep Your Child Alive

by Todd Walker

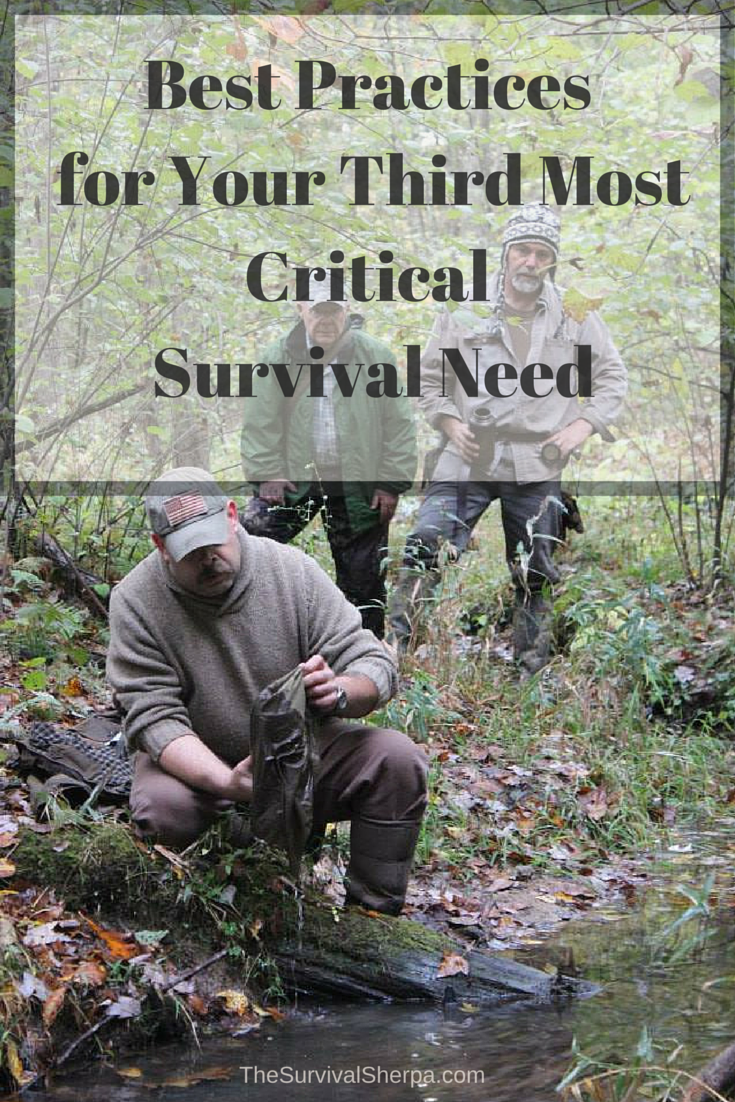
Two roads diverged in a wood… and your child is lost!

Wilderness Survival: 3 Core Skills to Keep Your Child Alive - TheSurvivalSherpa.com

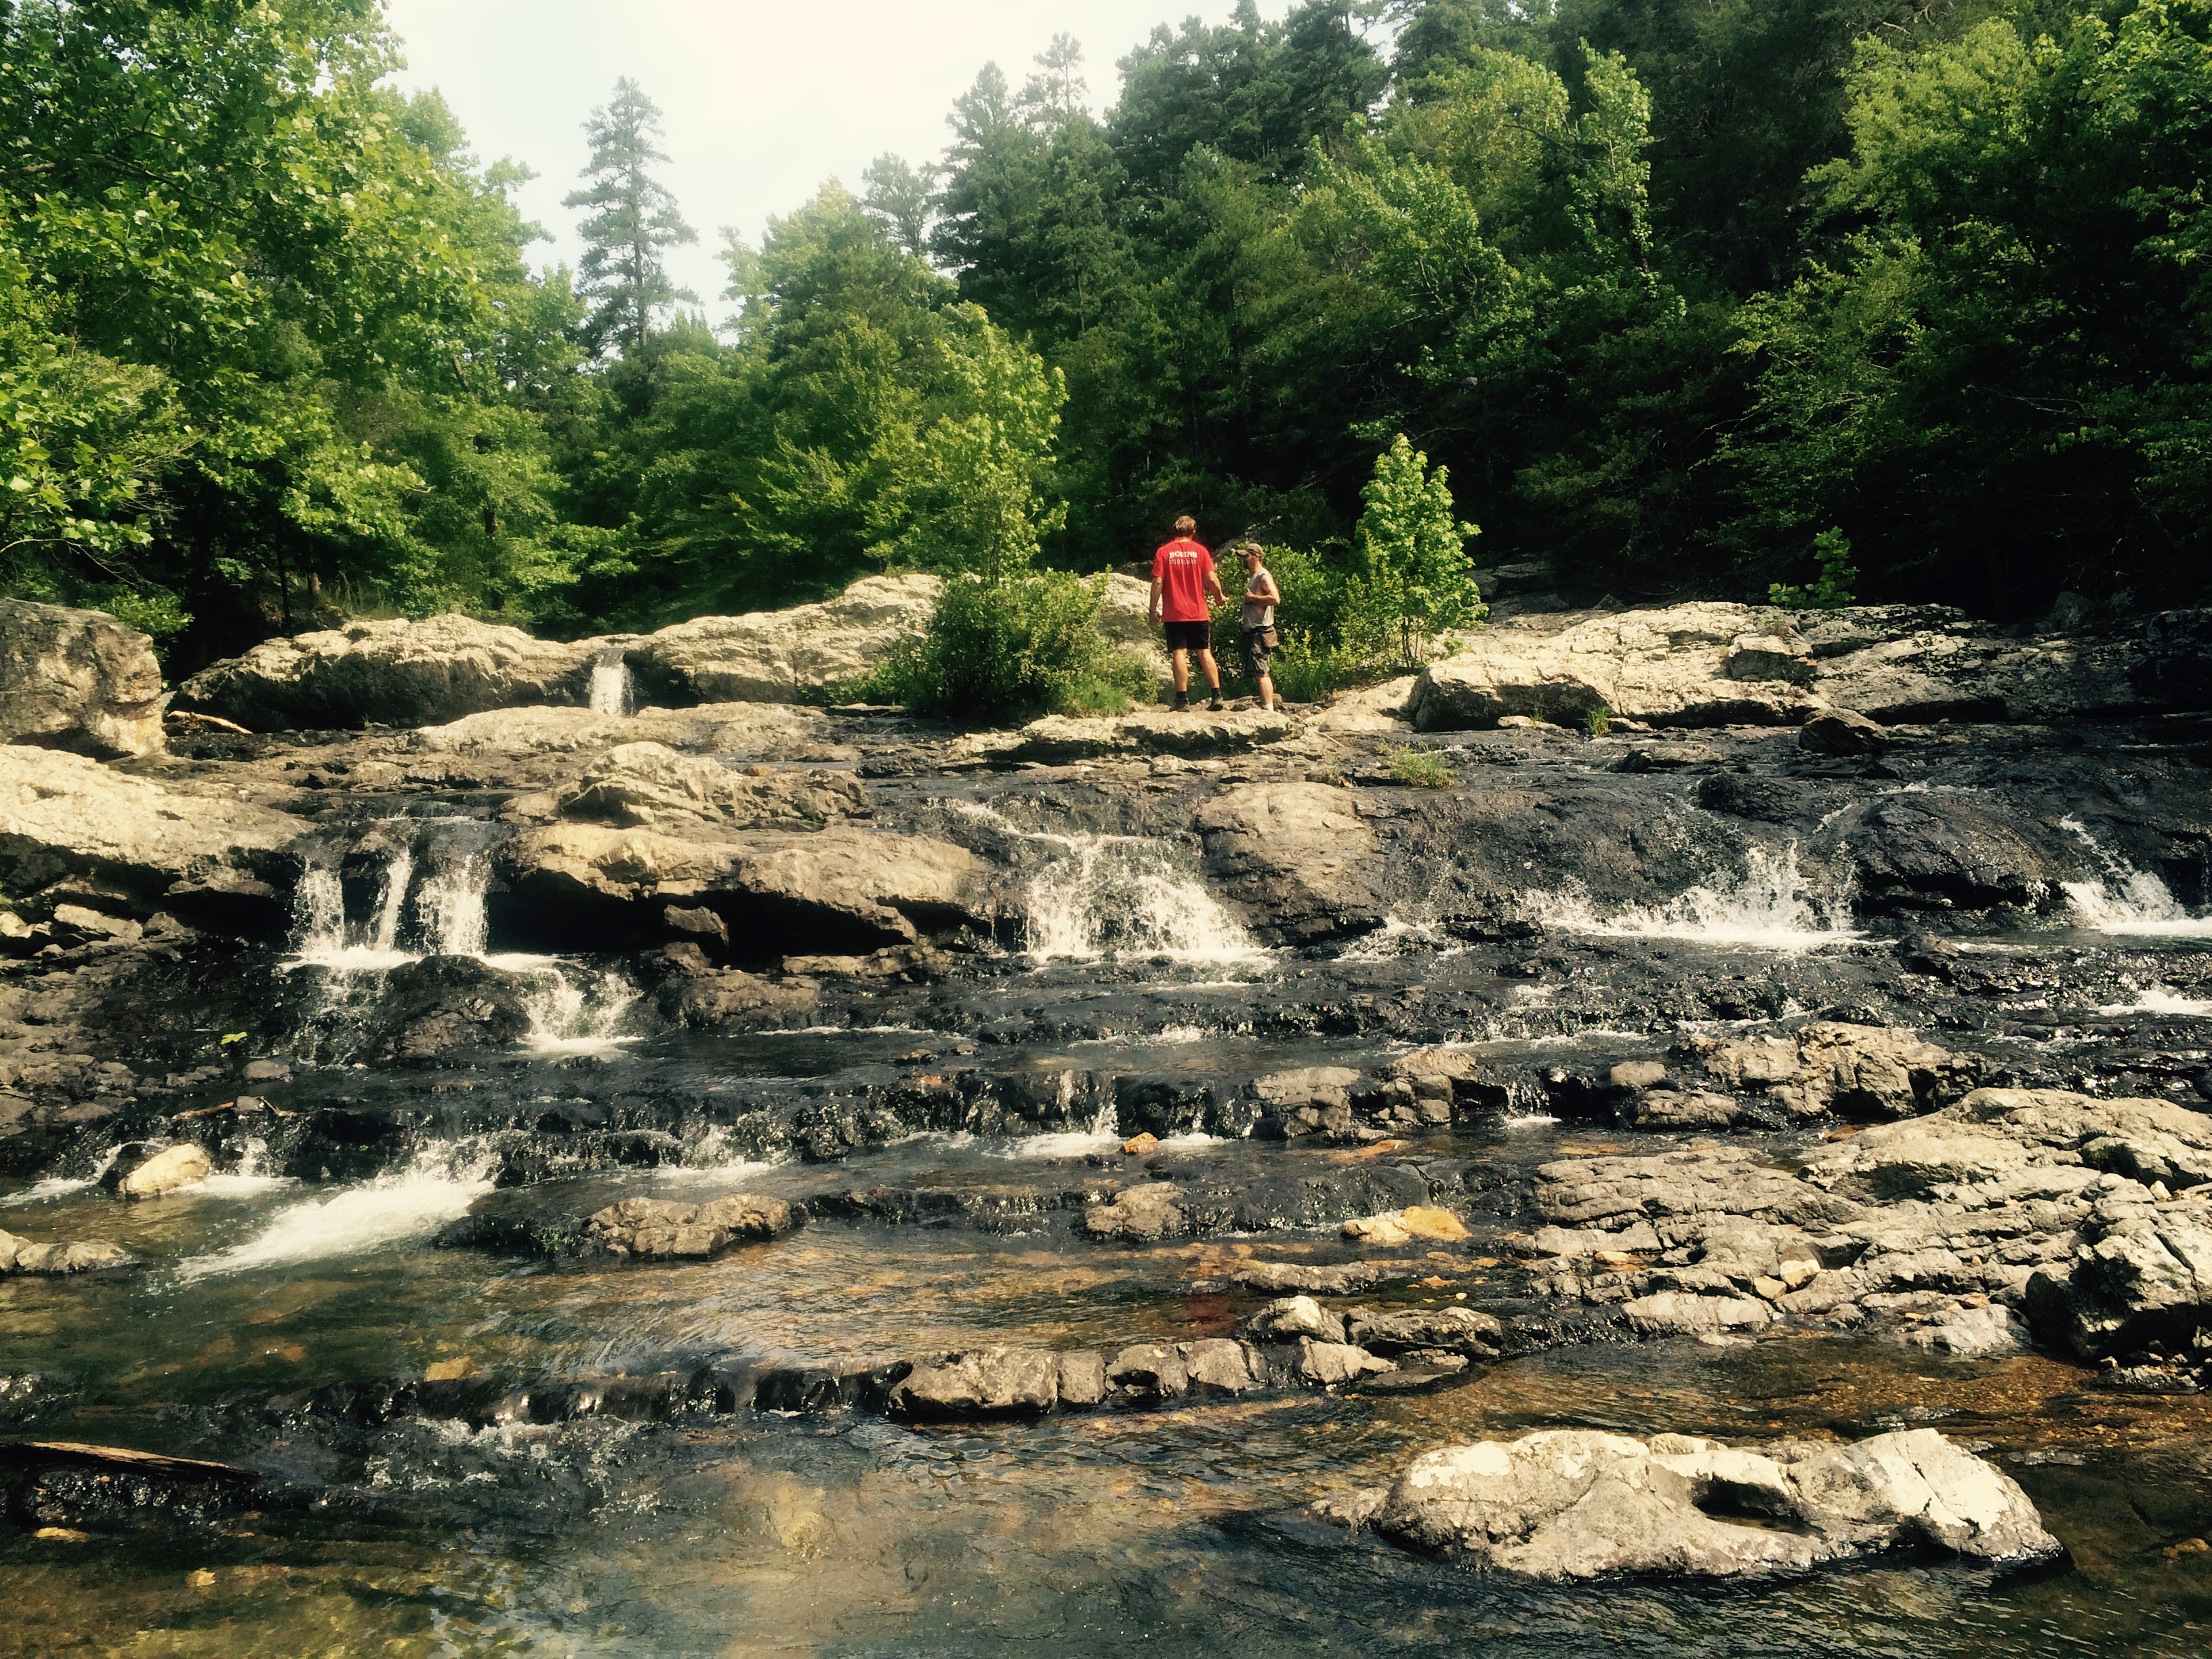
Hiking and camping season is upon us. Families are hitting the trails to enjoy nature and all its benefits. Nature is neither for you or against you. Nature is neutral. But Mother Nature can also be brutal. Any survival instructor that says otherwise is delusional.

Over the past two years, my 9 year-old grandson and I have spent time together learning survival and self-reliance skills. When he visits now, he usually asks if we can build a fire. The thermometer reading in Georgia matters not, he wants to burn stuff.

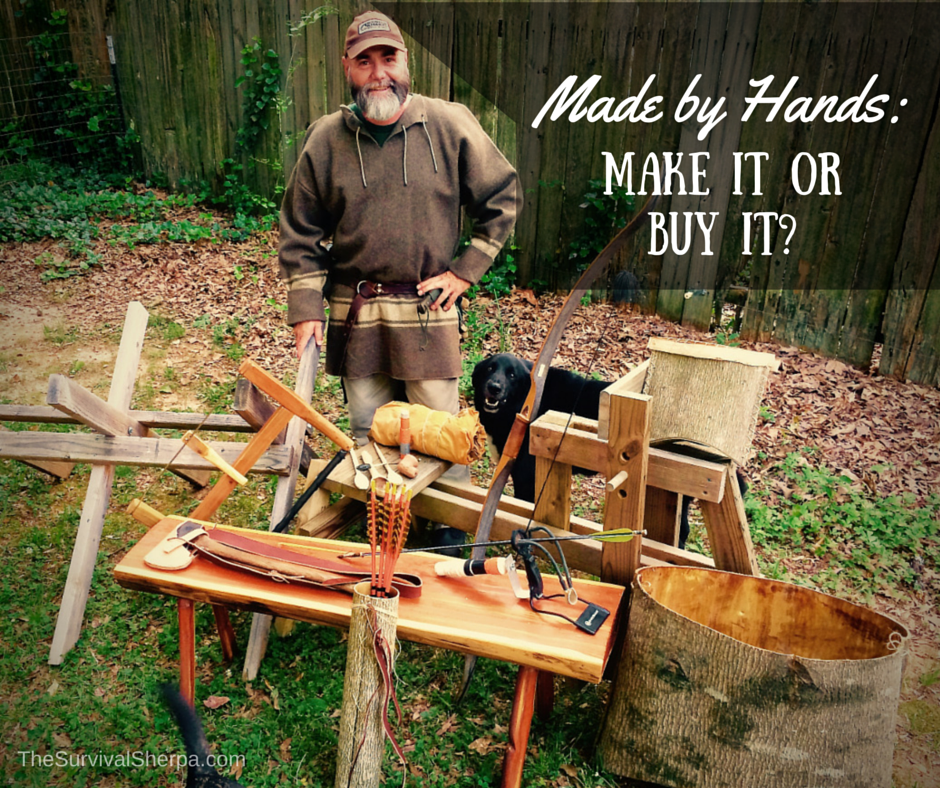
Leadership equals influence. Influencing your child to get outside is often easier achieved by you Doing the Stuff. Share your knowledge, demonstrate the skills, and let your child imitate the skills until they become proficient. If your child knows nothing else about survival, the following will keep him alive if ever lost in the backcountry.

3 Core Survival Skills

What is survival? It may be easier defined by stating what survival is not.

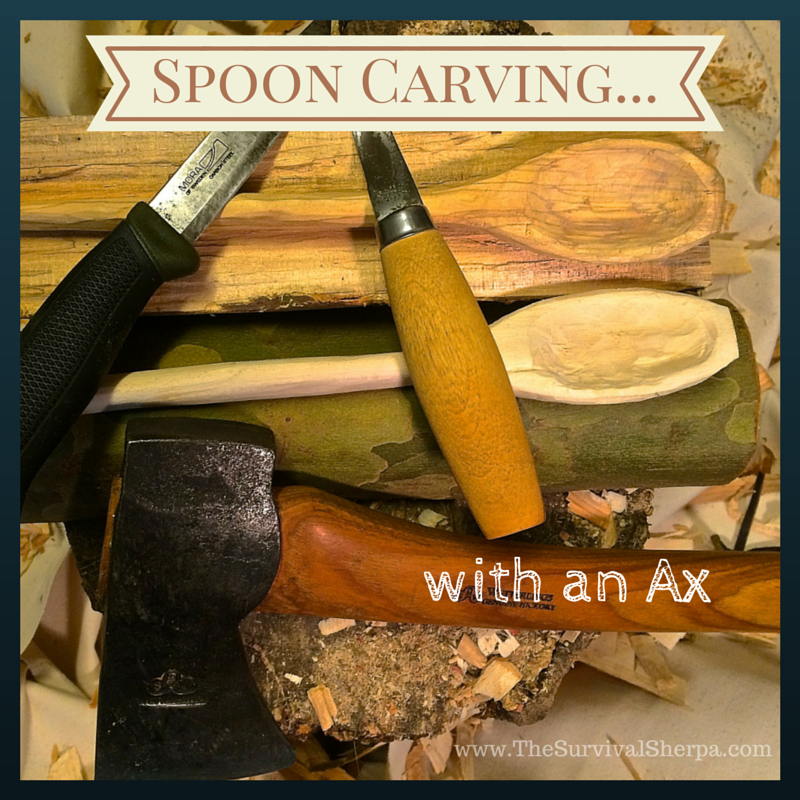
Survival isn’t wilderness living, camping, foraging, or bushcraft. Your child won’t have to carve a spoon, make a survival bow, know 21 edible plants, or build an elaborate shelter to stay alive in the unfortunate event he is ever lost in the woods. It’s highly probable that search and rescue will find him before the weekend is over.

Survival is any situation where if you don’t take corrective action, you die.

Train your child in three core survival skills…

Shelter – Hydration – Sleep until rescued.

Core Skill #1: Build a Microclimate

Wilderness Survival: 3 Core Skills to Keep Your Child Alive - TheSurvivalSherpa.com

Testing the Kochanski Super Shelter

Clothing: The most important piece of the survival puzzle is having the ability to build a microclimate for core temperature control. The first layer of shelter is the clothing your child wears. Dress appropriately for the weather and location. Cotton is a killer in cold weather survival due to its ability to hold moisture against the body. However, it can be a lifesaver in hot weather by exploiting this same property for evaporative cooling.

Tarp/Cover: Beside clothing, go out prepared to use every shelter option available in your kit. A reusable mylar space blanket is my #1 option to build an emergency microclimate. Add a clear 9 x 12 inch plastic painter’s tarp and you have a lightweight, effective cold weather microclimate called the Kochanski Super Shelter. You’ll need to teach your child to collect enough wood to build a fire in front of this shelter for it to be effective through the night.

Insulation Layer: A closed-cell foam ground pad is what I carry when backpacking or camping. This piece of gear offers a barrier from cold ground (conduction) or helps prevent heat loss from convection when laid in the bottom of my hammock. From my experience of hanging and ground camping in a sleeping bag, this insulation layer is essential to creating a microclimate.

Without a commercial ground pad, two contractor trash bags can be used as an insulation layer. Fill both bags with leaves or fluffy stuff so that, when compressed, you have a 4 to 6 inch barrier of insulation. In a pinch, the forest litter filled bags can be used as a makeshift sleeping bag. There are multiple survival uses for plastic bags. Two bags won’t add much weight but multiply your survival chances.

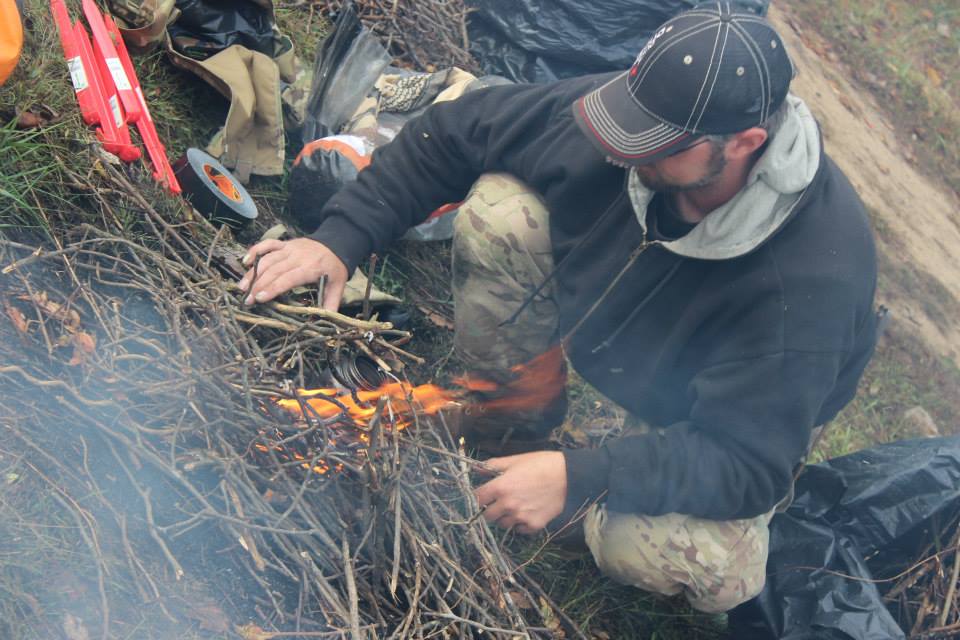
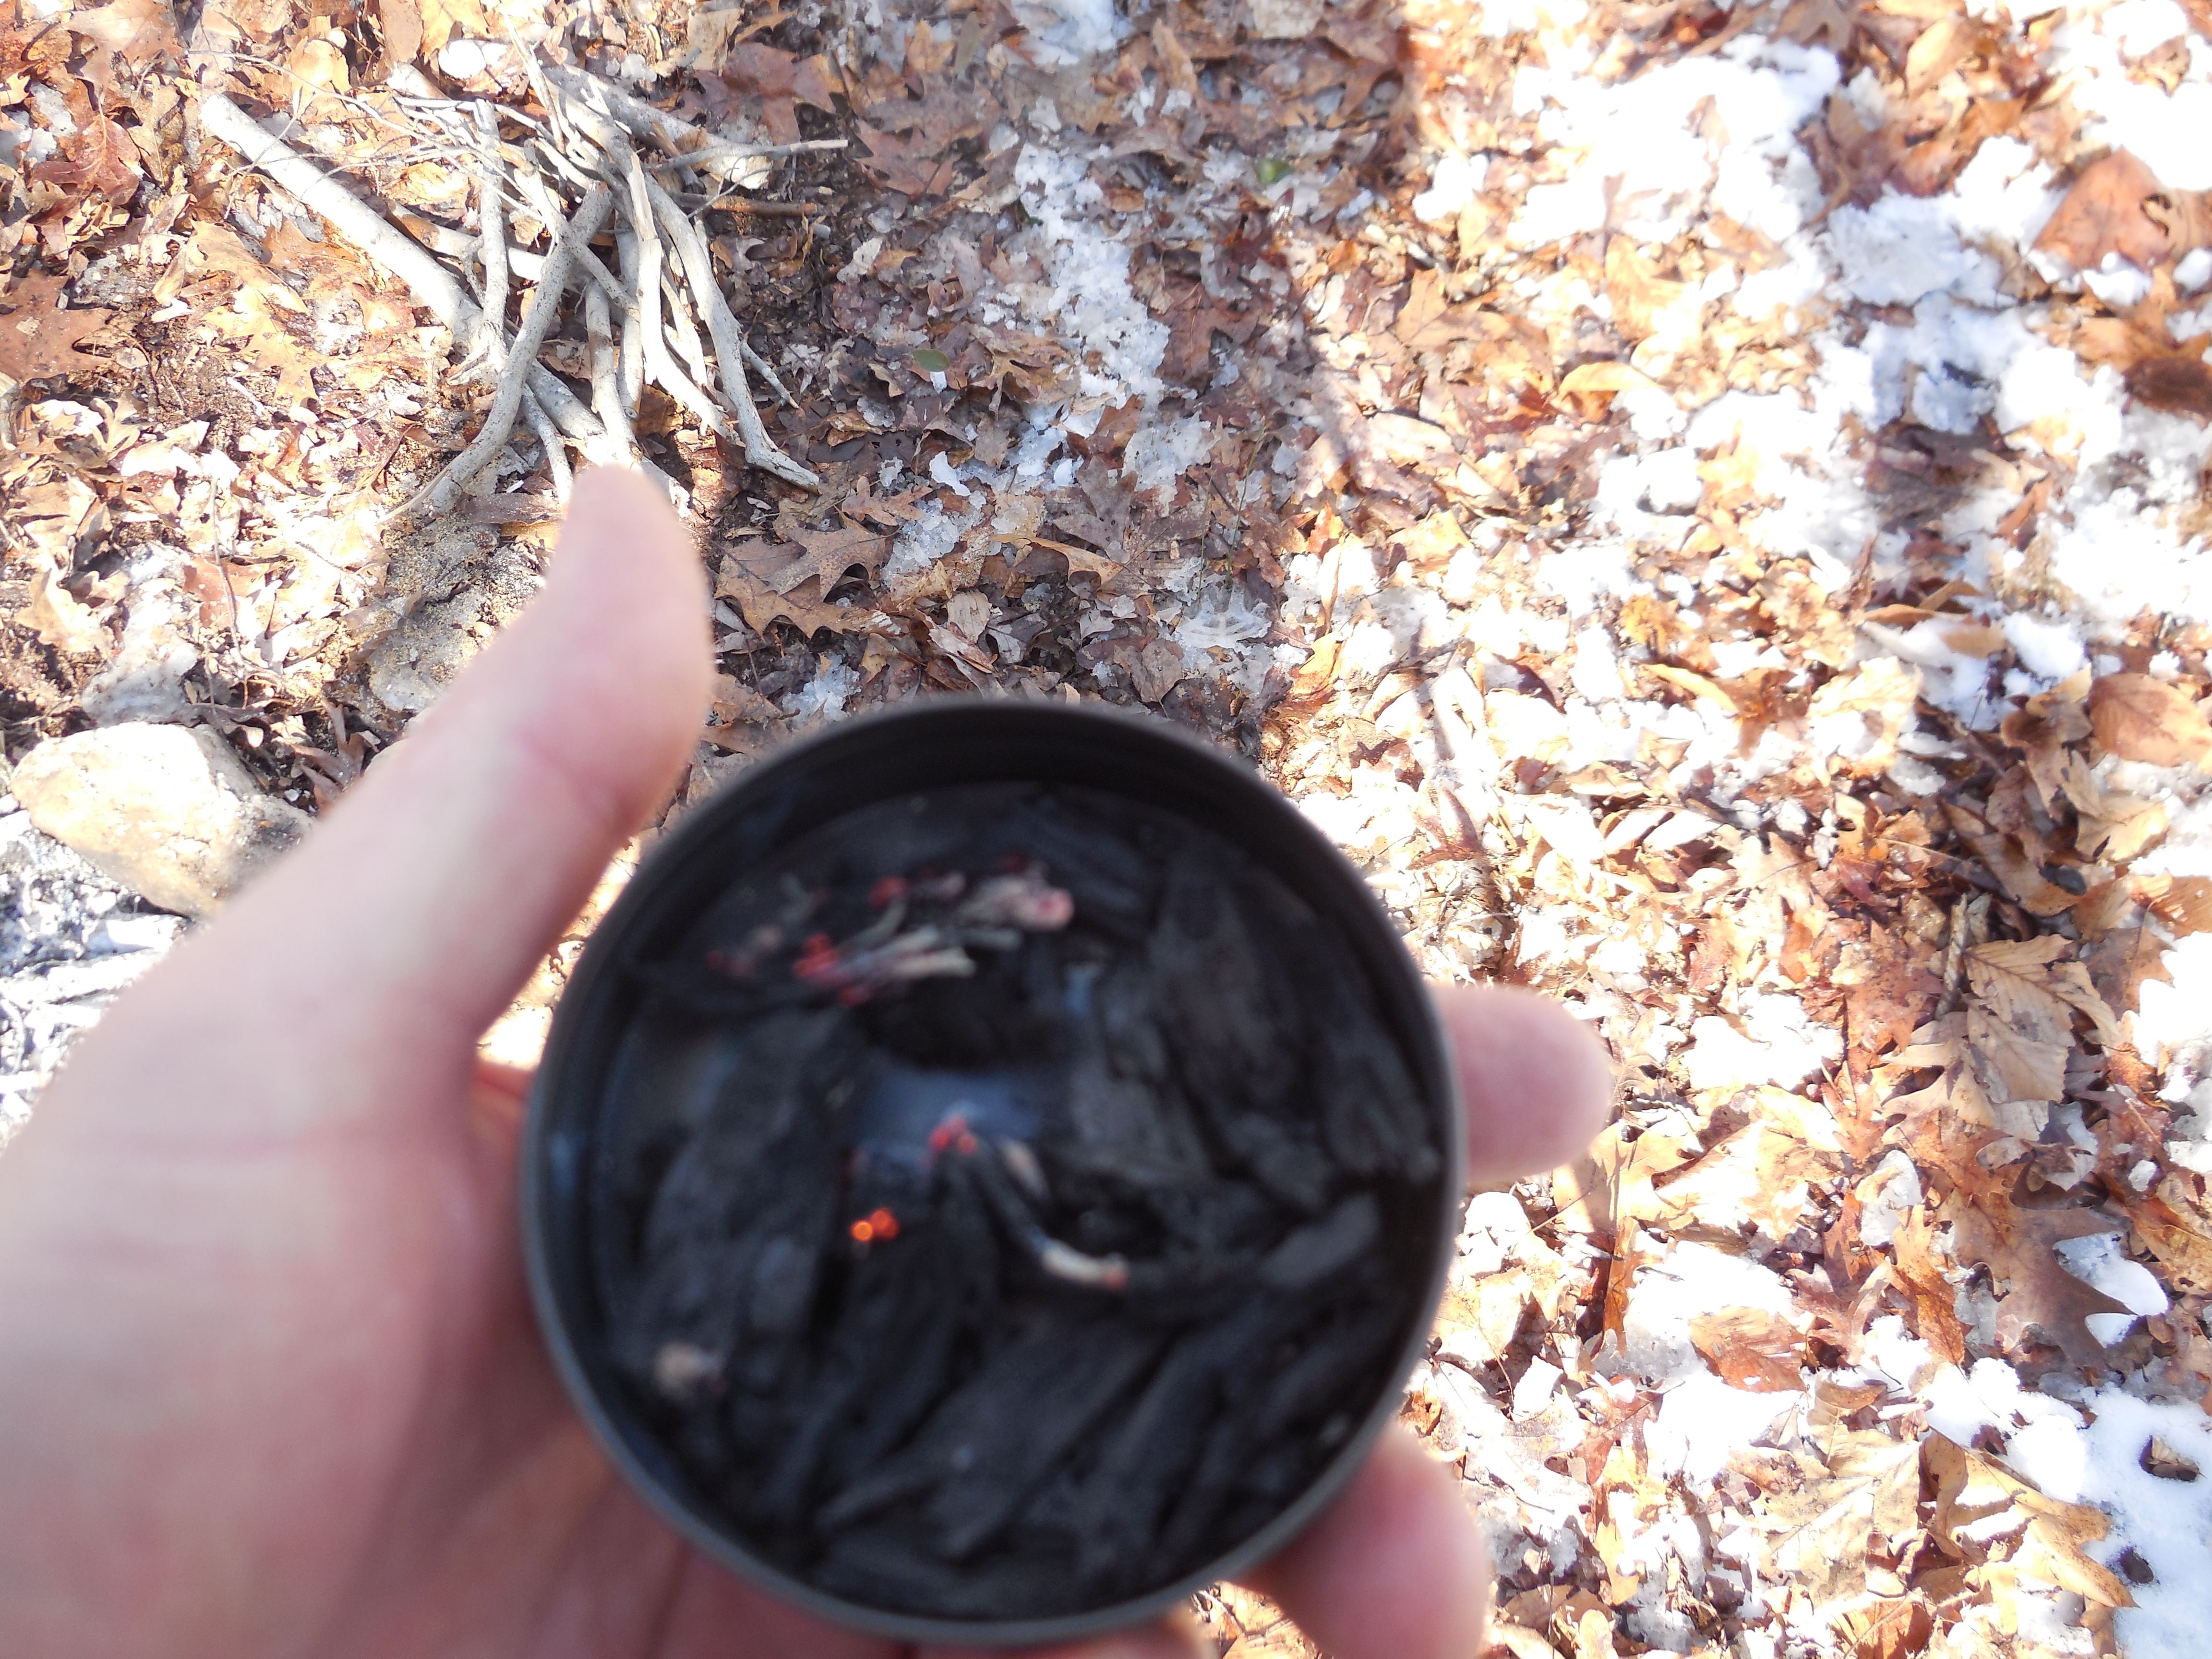
Fire: The main reason I teach fire craft to my 9 year-old grandson is to reinforce its forgiving nature as a survival tool. Yes, even with no other shelter options, fire can keep you alive. We have many articles parked on our Bombproof Fire Craft Page.

Microclimate Preps

  • Clothing
  • Reusable Emergency Space Blanket/Tarp
  • Clear Painter’s Tarp
  • Two Contractor Trash Bags

Core Skill #2: Hydration

Wilderness Survival: 3 Core Skills to Keep Your Child Alive - TheSurvivalSherpa.com

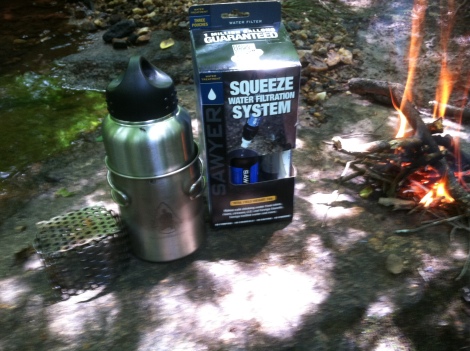
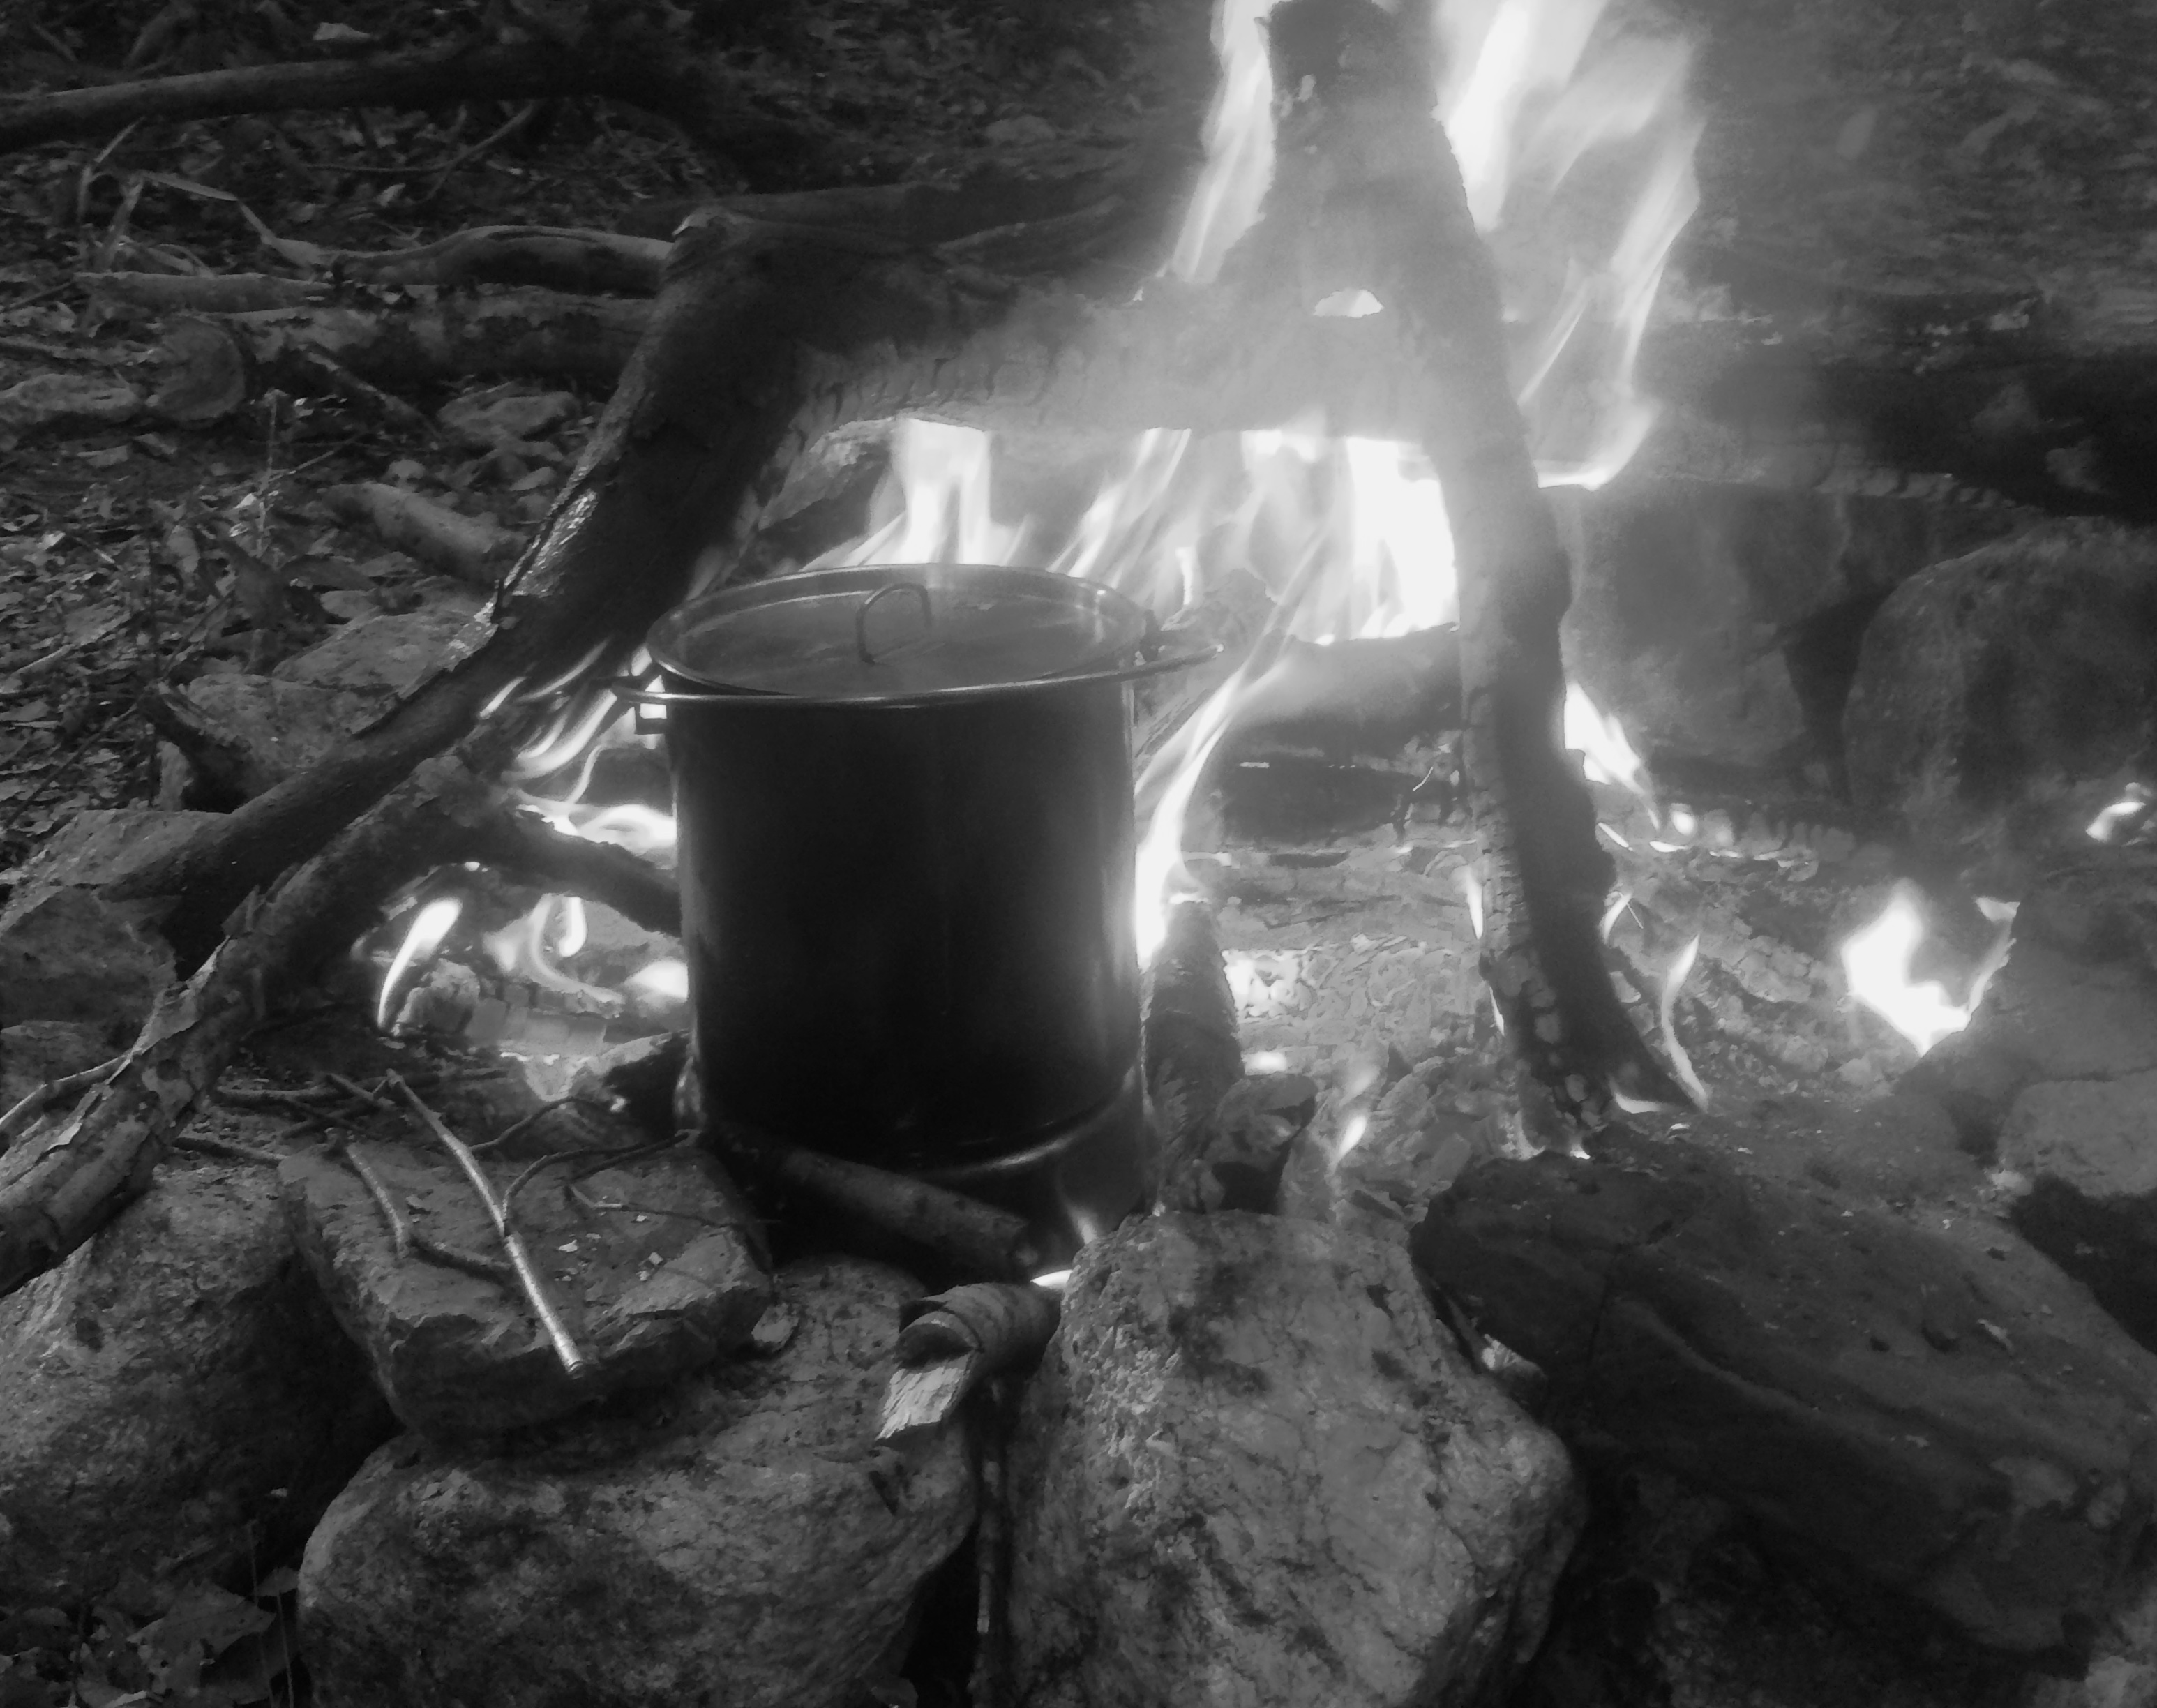
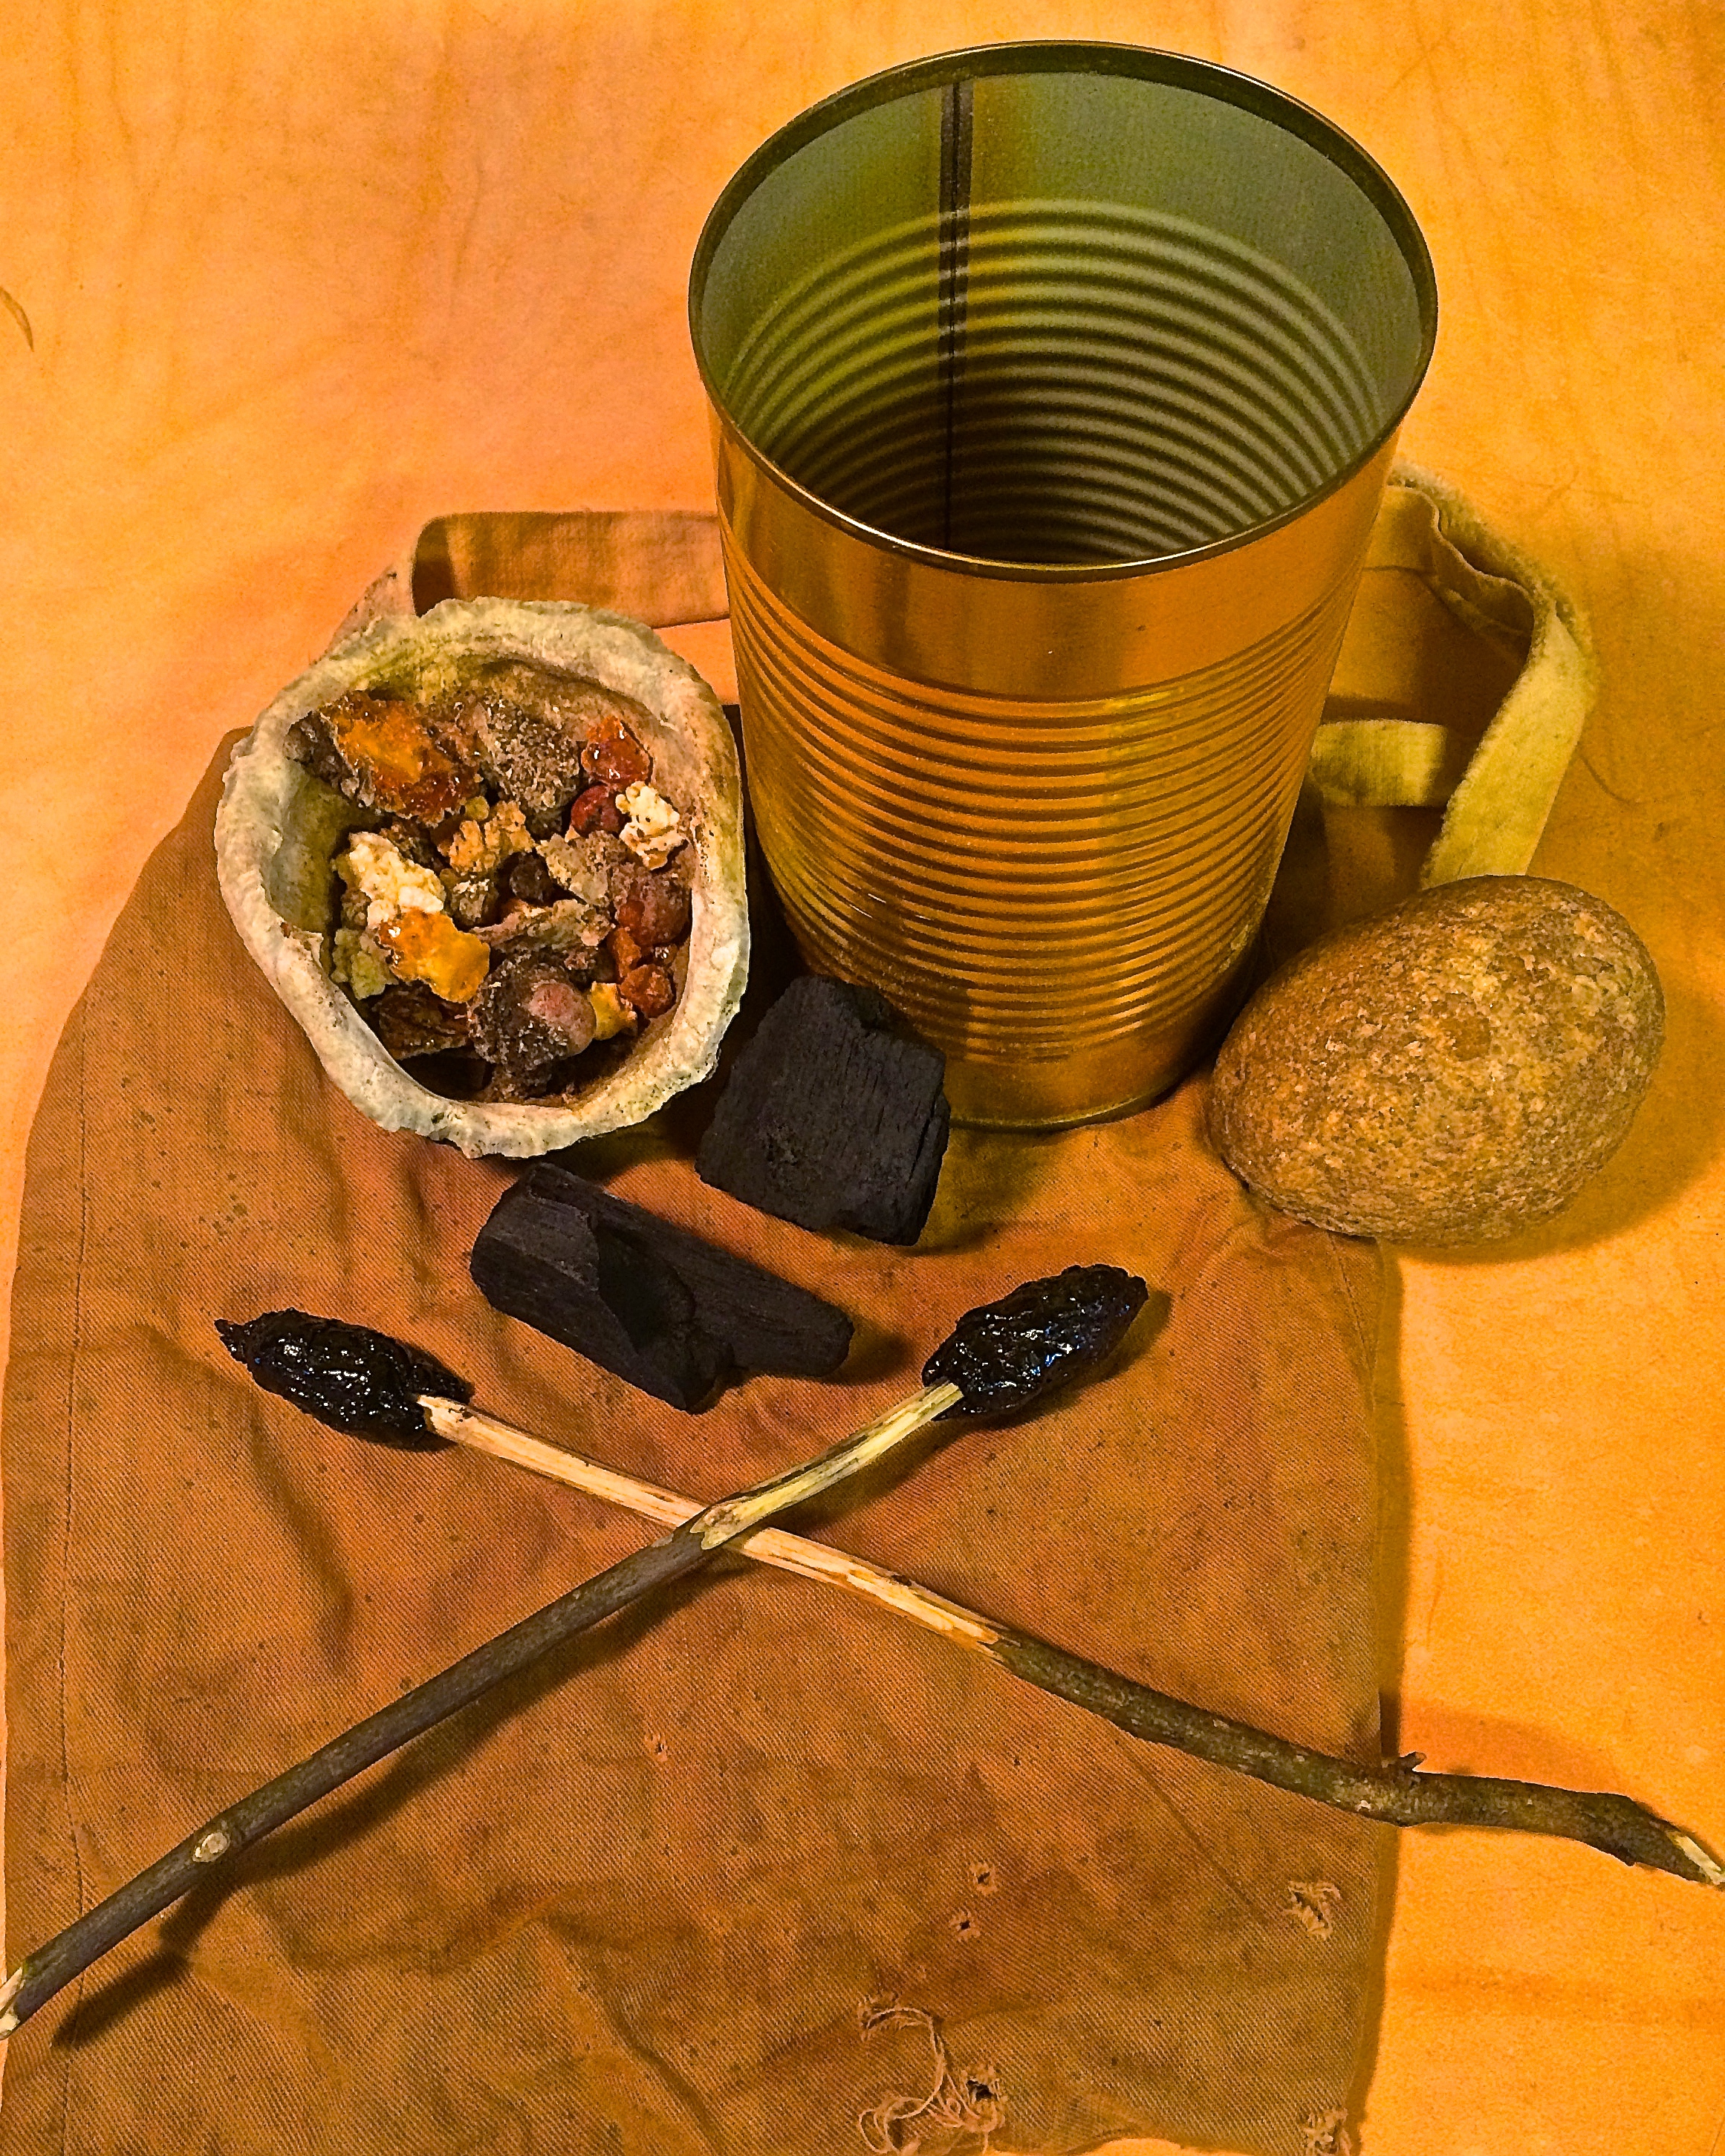
Ways to disinfect water

Find and drink enough water to cause urine to be clear. Remember, even if you don’t have a way to disinfect your water, drink it anyway. You want to die from dehydration or have the trots a week later after being rescued hydrated and logical in the wilderness?

The above statement may seem counter to “proper” survival advice. But if you’re not prepared with water treatment gear, drink the water to stay alive. Food should not be a concern for short-term survival. If you have enough calories to consume daily, eat up. Otherwise, fasting is your best choice. Physiologically, our bodies can go several weeks without food with no ill effects.

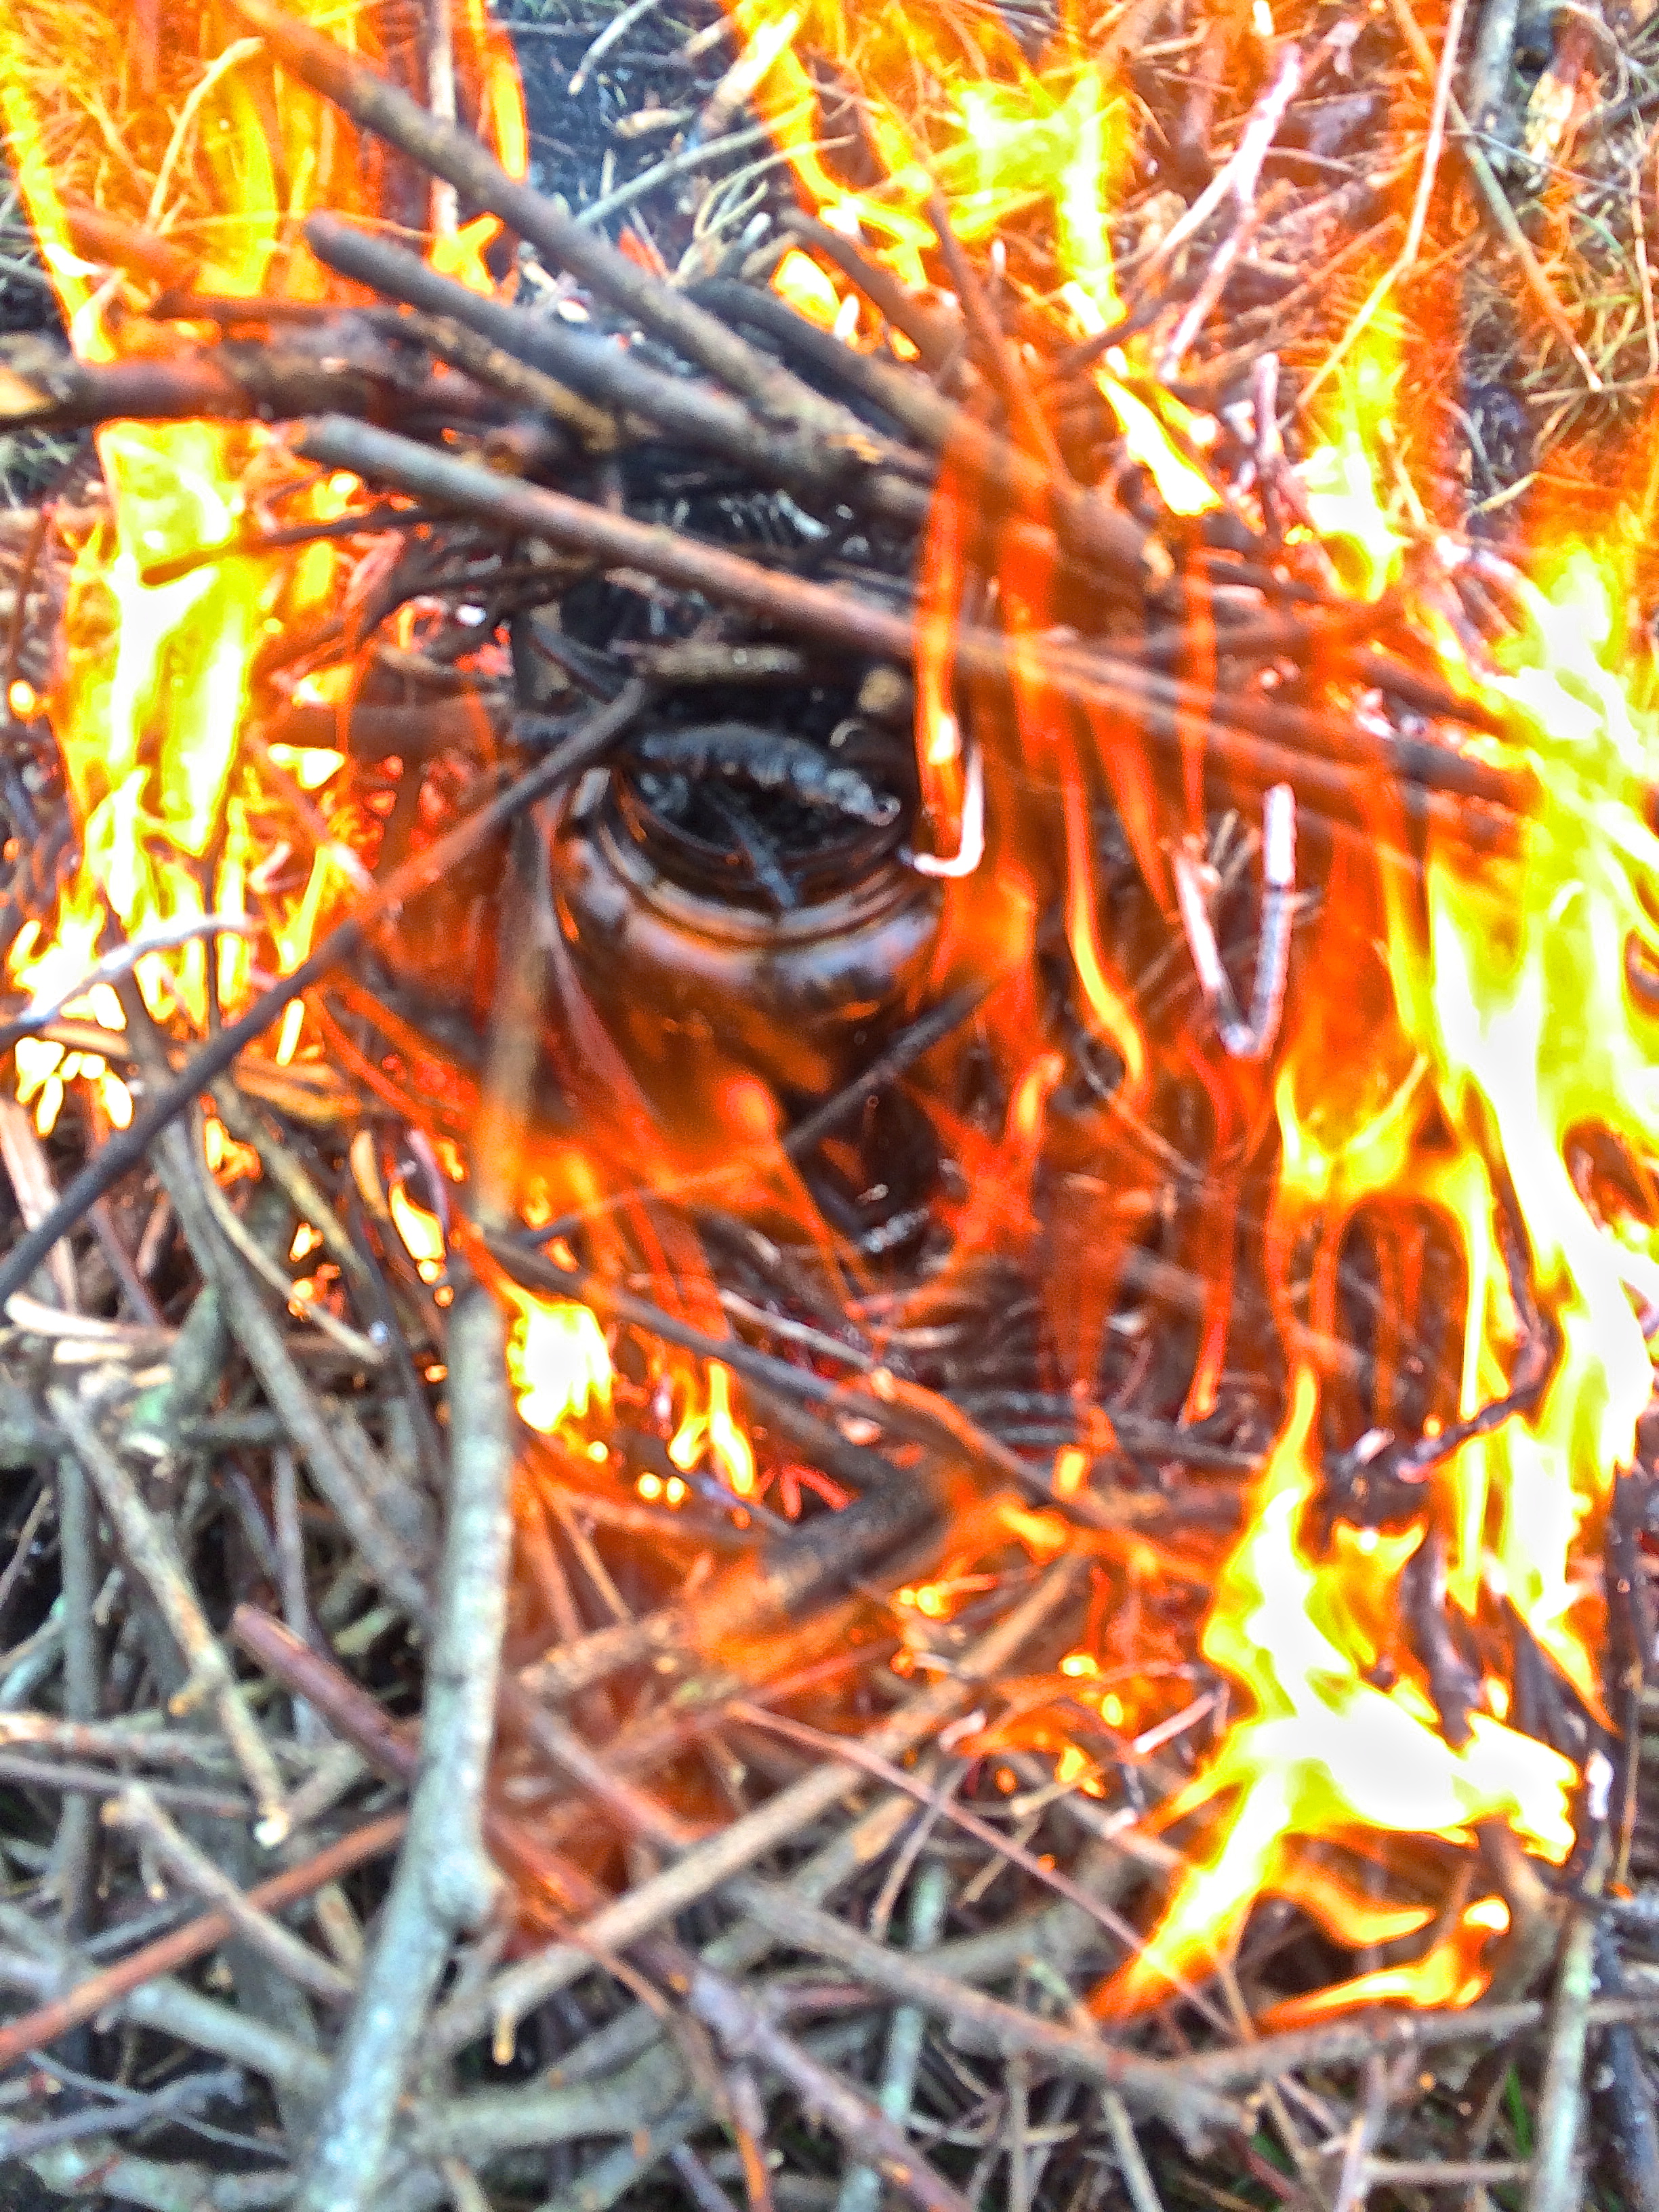
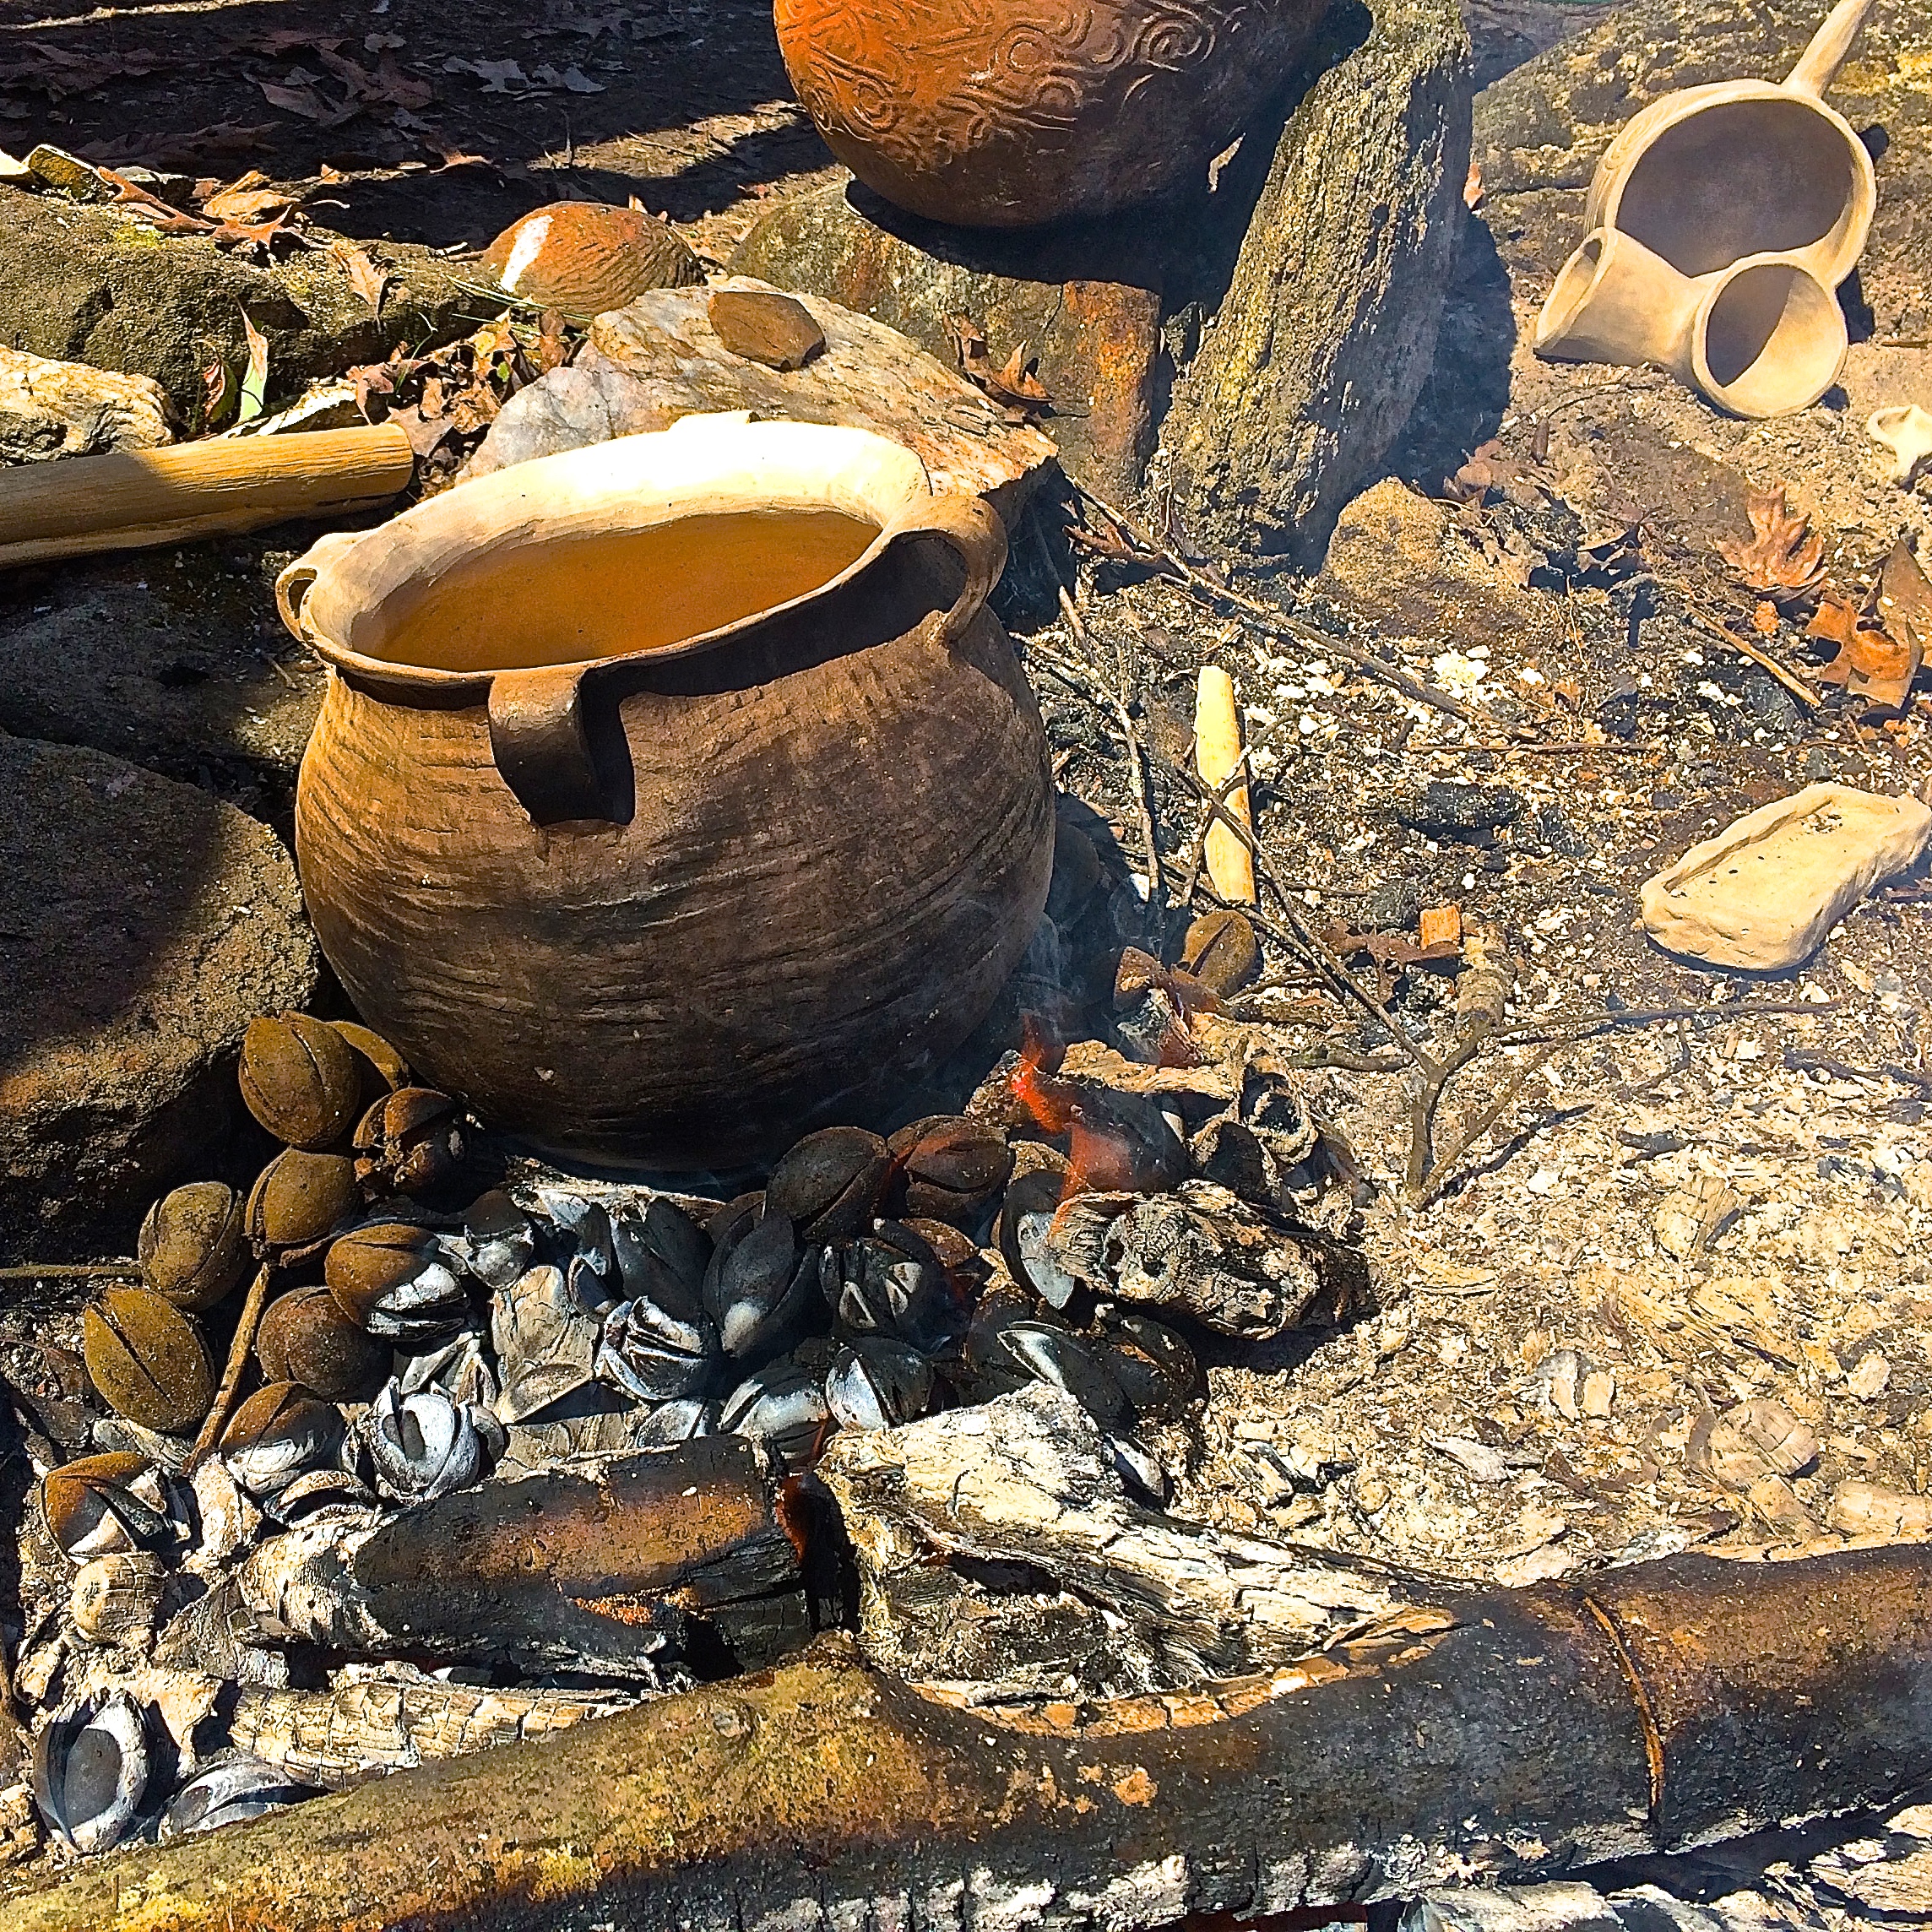
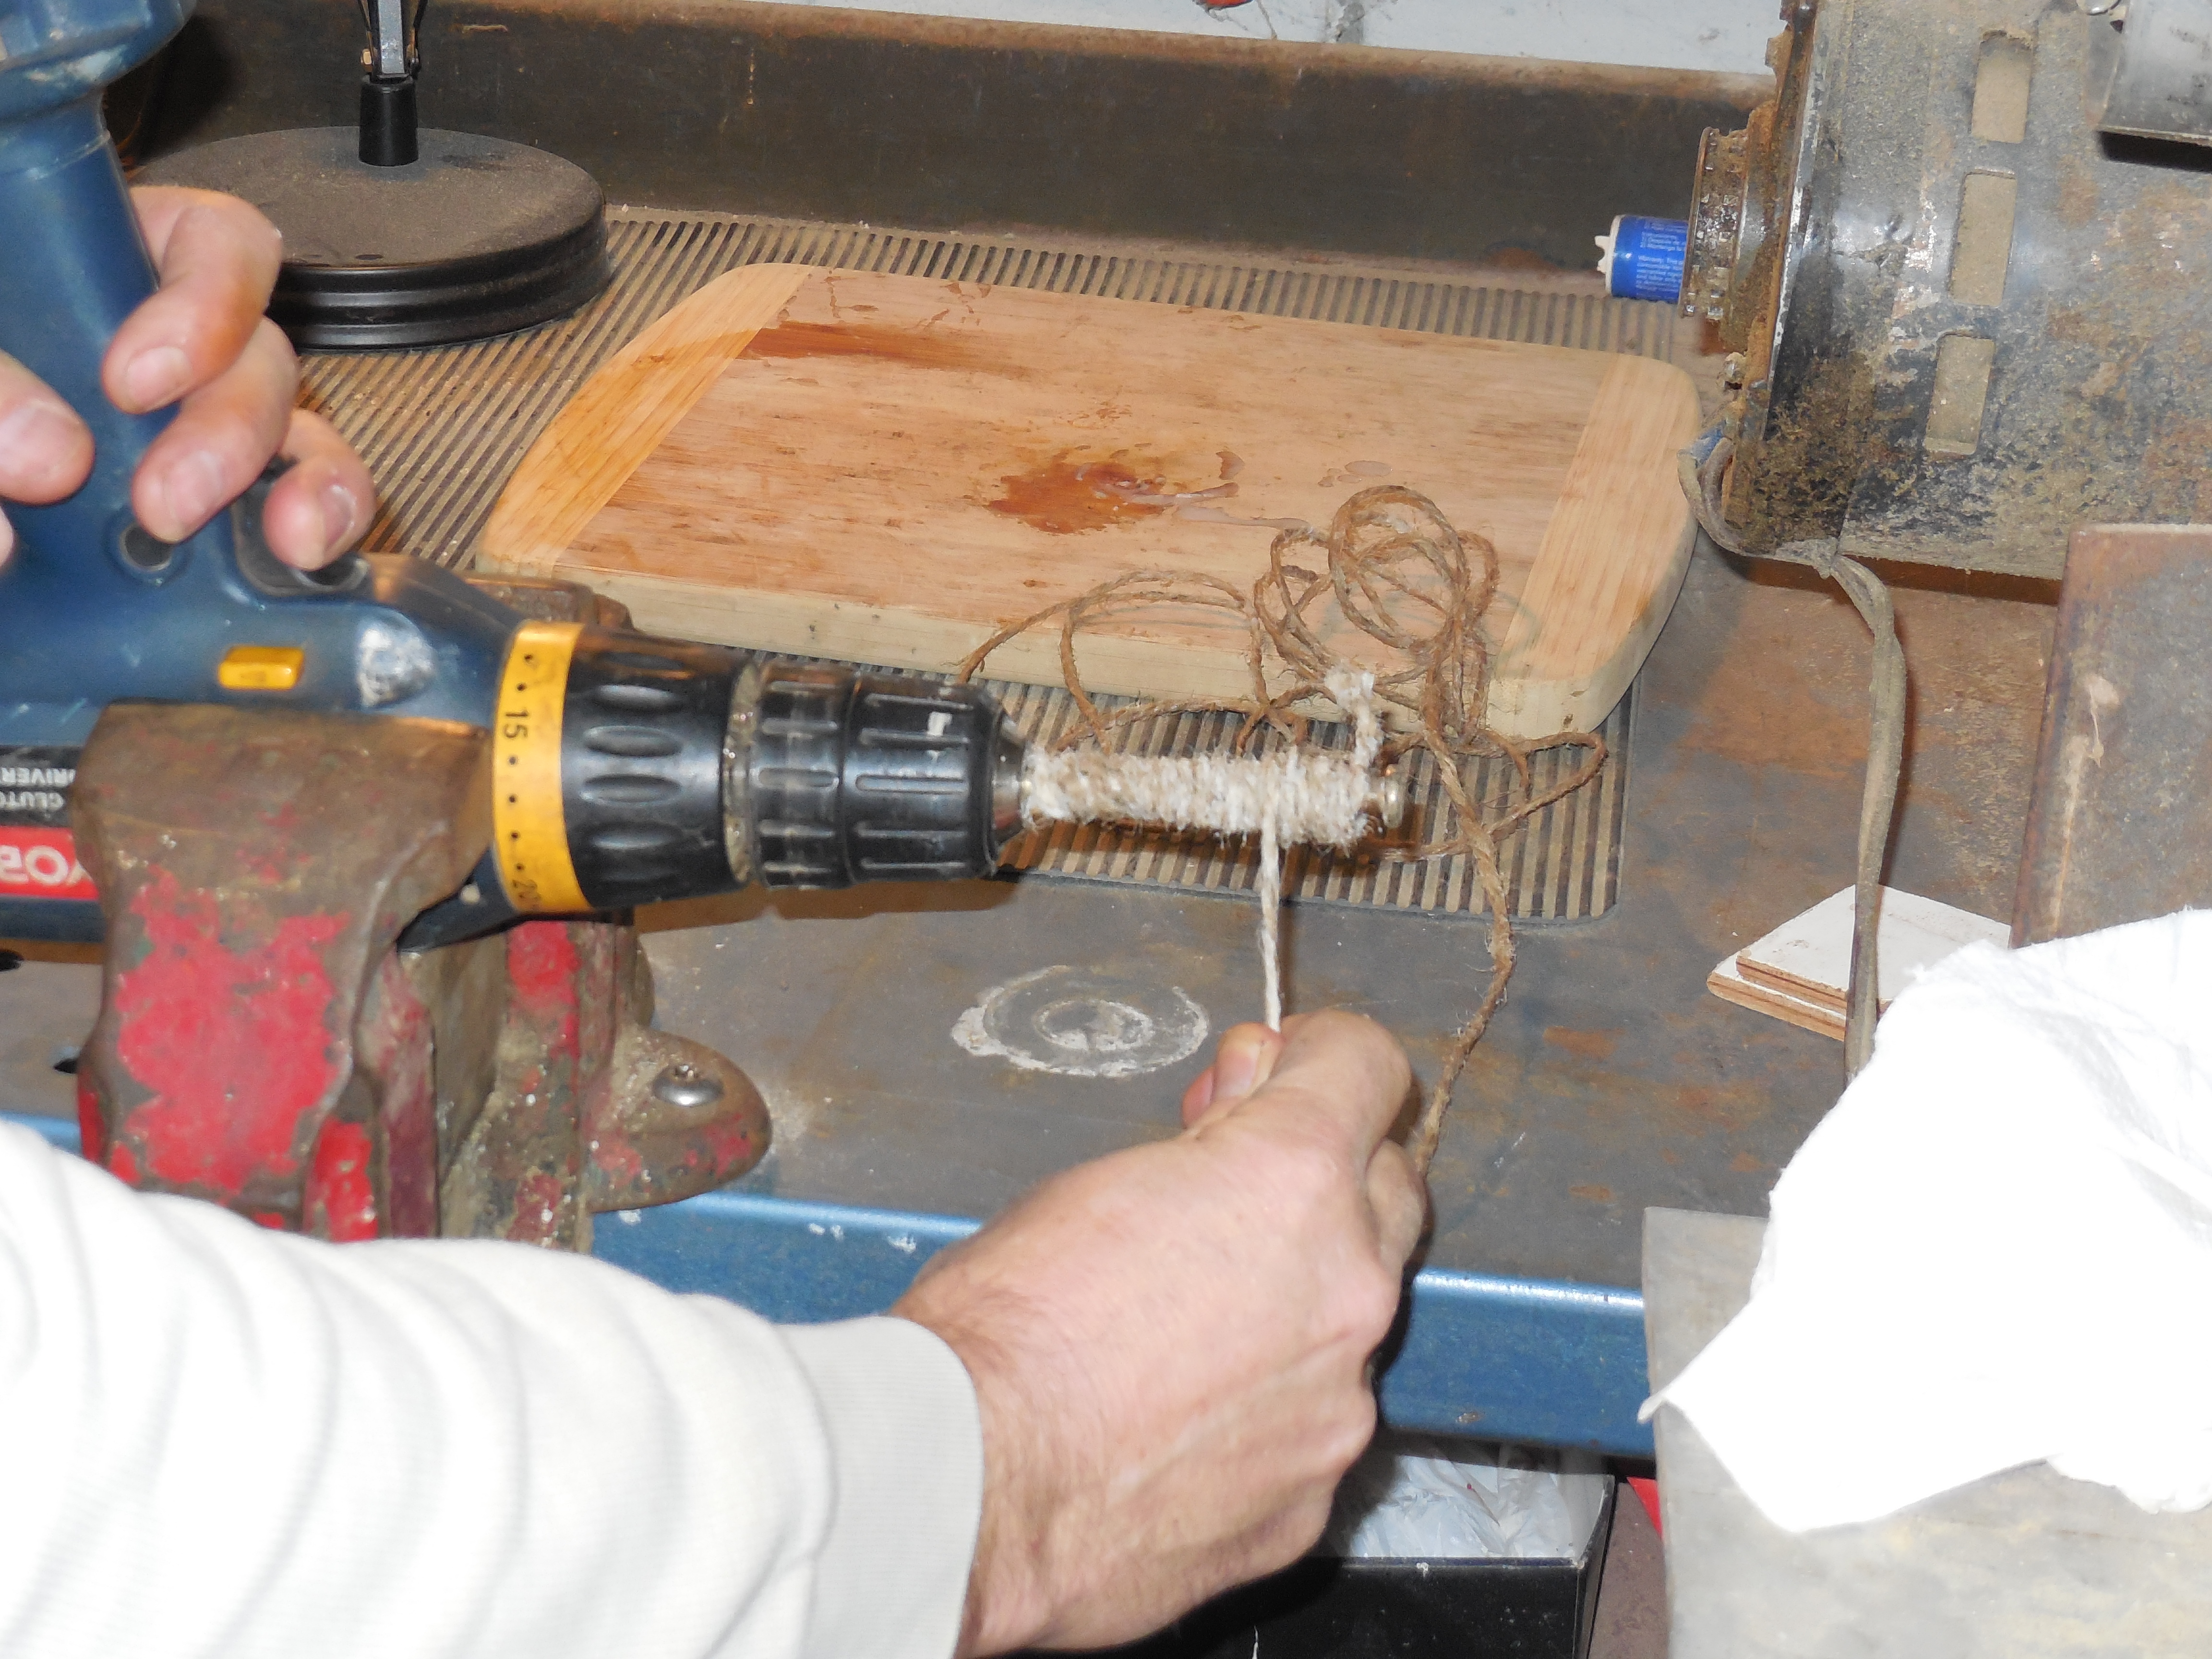
Be prepared with water disinfection equipment. My preferred method of water disinfection is boiling. You’ll need a metal container and fire. Fire plays such an important role in survival. Without a suitable metal container, use your garbage bag to boil water using the stone boil method. Practice fire craft! I also like the lightweight Sawyer Mini filters. More detailed information on water treatment can be found here.

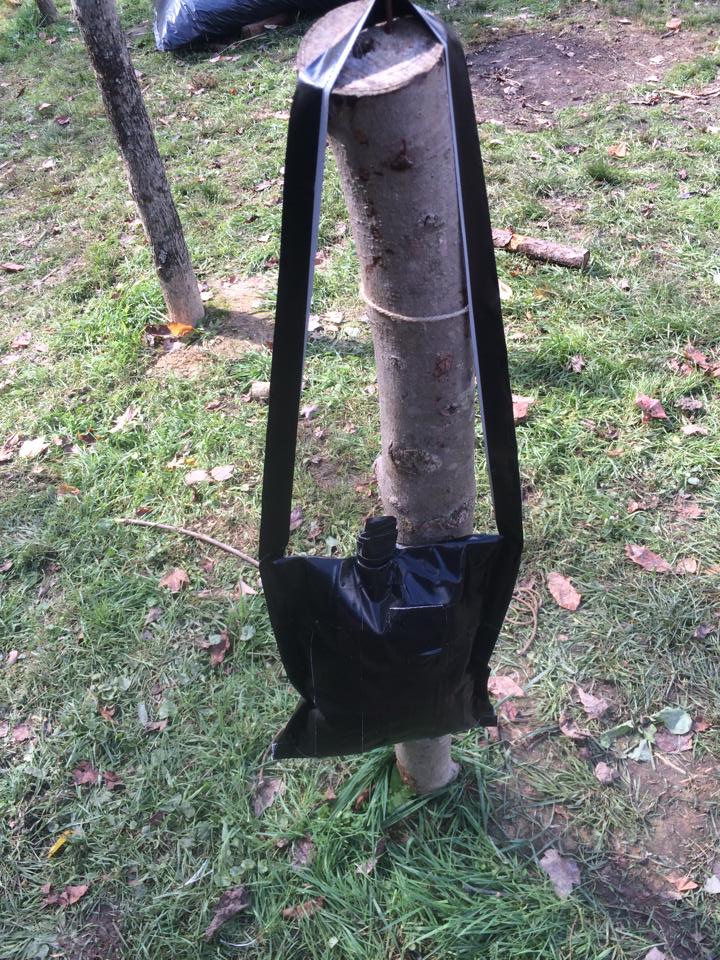
Plants and trees are also a source of water and need no filtration. Cut a wild grapevine and water will drip into a container. A clear plastic trash bag can be used to get water from leafy, low-hanging tree branches through transpiration. John McCann has a great article on using this method.

Hydration Preps

  • Metal Container
  • Water Filter
  • Water Purification Tablets
  • Trash Bag and Hot Stones
  • Transpiration Bag

Core Skill #3: Sleep

Wilderness Survival: 3 Core Skills to Keep Your Child Alive - TheSurvivalSherpa.com

Sleep is a survival tool

“The quality of a survival kit is determined by how much it can help you when you need to sleep.  If you can sleep well at night, you have it made.” ~ Mors Kochanski

When camping, I call sleep the number one skill of a good woodsman. But in a true wilderness survival situation, restorative sleep is key to staying alive. If you’re child has learned to build a proper microclimate and learned at least two methods of disinfecting drinking water, then sleeping 8 hours is his next survival skill.

Scared and alone in the wilderness, I always go back to fire. Beside being a great survival tool for shelter and water disinfection, a fire offers phycological comfort. Kind of like a nightlight in the woods. It not only keeps the boogieman at bay, but gives some peace of mind concerning predators.

Your child should sleep at opportune times. Not all eight hours have to be consecutive like we stress when home. An hour here and there adds up.

With sufficient sleep, your child will be better prepared to deal with the stress of survival. Our physiological body needs sleep for rational thought and decision-making. Sleep deprived, we make stupid mistakes. Use every available resource to make a comfortable microclimate for sleeping and shelter from the elements.

Sleep Preps

  • See Microclimate above – Core Temperature Control
  • Fire
  • Practice in the backyard with minimal gear

Your child can beat the odds of surviving by having the knowledge and practiced skills mentioned here. Spend some time rehearsing the plan before he needs the skills. As the Boy Scout’s motto states, “Be Prepared.”

Keep Doing the Stuff of Self-Reliance,

Todd

P.S. – You can also keep up with the Stuff we’re Doing on TwitterPinterestGoogle +, YouTube, Instagram, and Facebook… and over at the Doing the Stuff Network.

P.P.S – If you find value in our blog, Dirt Road Girl and I would appreciate your vote on Top Prepper Sites! You can vote daily by clicking here or on the image below. Check out all the other value-adding sites while you’re there…

Thanks for Sharing the Stuff!

Copyright: Content on this site (unless the work of a third-party) may be shared freely in digital form, in part or whole, for non-commercial use with a link back to this site crediting the author. All links in articles must remain intact as originally posted in order to be republished. If you are interested a third-party article, please contact the author directly for republishing information.

Categories: Doing the Stuff, equipment, Gear, Preparedness, Survival, Survival Skills, Water | Tags: , , , , , , | 8 Comments

Best Practices for Your Third Most Critical Survival Priority

by Todd Walker

Using the “B” word will automatically rain hell and brimstone on any online discussion. What’s the Best knife, sidearm, rifle, or water filter? Try it for kicks and giggles. Type that four-letter word in front of any piece of gear and watch the internet explode.

Best Practices for Your Third Most Critical Survival Priority - TheSurvivalSherpa.com

Photo courtesy of Iris Canterbury

When it comes to survival priorities, the same spirited debate rages.

In the Pathfinder System, Dave Canterbury ranks water as the third wilderness survival priority. Self-Aid and Shelter take the top two spots respectively. Of course, survival priorities are always dependent on the situation and shouldn’t be written in stone.

Here’s Dave’s full list…

  1. Self-aid
  2. Shelter
  3. Water
  4. Fire/heat
  5. Signaling
  6. Food
  7. Navigation

The subject of this article is the third priority – the substance which every system in the human body is dependent. A dehydrated body can not help you do all the stuff needed to keep you alive if you’re day hike turns into a week-long survival scenario.

Water is easy to find in the eastern woodlands. But it may not be fit for consumption.

That crystal clear stream you’re about to sip from may hold a rotting carcass 100 yards upstream. Also keep in mind that, yes, bears (and other critters) do crap in the woods along rivers and streams… which eventually washes into the pristine creek and into your cupped hands.

Introducing waterborne pathogens to your gut is a sure way to decrease your survivability in the wilderness. You need to assume that every water source in the backwoods contains the following invisible nasties (and more)…

  1. Giardia – A single-celled, microscopic parasite which causes a diarrheal illness called giardiasis. The parasite is passed through the feces of infected animals and humans. Symptoms include diarrhea, vomiting, nausea, bloating, gas (not your normal campfire baked-bean induced gas), weakness, and stomach cramps. Symptoms show up within 1 to 2 weeks.
  2. Cryptosporidium – Crypto, as it is commonly known, is a parasite responsible for causing the most waterborne illnesses in the U.S. according to the CDC. Symptoms of watery diarrhea, dehydration, stomach pain and cramps, fever, and vomiting begin in 2 to 10 days of infection and may last up to 30 days.
  3. Escherichia coli (E. coli) – Some E. colia bacteria are beneficial to your intestinal tract. Then there’s the pathogenic, diarrhea kind transferred through water and food contaminated from human or animal feces. Remember that bear fact? Unfortunately, s**t happens. And ignorant humans have the bears beat!
  4. Salmonella – Most folks infected by this bacteria develop diarrhea, fever, and stomach cramps within 12 to 72 hours. Not good for a 72 hour survival scenario. Oh, and it can spread to other body systems causing more long-term damage.

Bottom line… Don’t drink untreated water! … unless you have no other option in an emergency survival scenario. Dying of dehydration is worse than giardiasis after you’ve been rescued. But we’re talking camping not survival, here. Consider all backwoods water sources contaminated. Period. Even when brushing your teeth at camp, use disinfected water.

We’ve established the fact that the human body needs water to function properly. So what are the best (yeah, I used the B-word) practices to make water safe to drink?

Boiling Water

We took our youth group to a Catholic church in the early 80’s as a cross-cultural field trip. The priest met us at the door and invited us in. One of our really, really country boys asked the priest how holy water was made.

In all seriousness, the priest told us that they pour water in a pot, place it on a hot stove, and…

“boil the hell out of it.”

My Basic Class partner, Dave Williams, boiling 32 ounces of water

My Basic Class partner, Dave Williams, boiling 32 ounces of water in under 5 minutes

Boiling Times

There are lots of confusing, un-scientific info floating in the preparedness pool. So how long should you boil water to make it safe to drink?

a.) 10 minutes, b.) 5 minutes, c.) 1 minute, d.) depends on altitude

Answer: None of the above.

I’m not certain how long priests boil water before it becomes holy, but all you need to do is bring water to a boil to render the parasites, viruses, and bacteria harmless. In fact, 185º F for a few minutes will deliver the damage needed to kill the nasties. We boil in the backwoods because thermometers aren’t convenient to carry. Bubbles tell us when it’s done.

Research from the Wilderness Medical Society states that keeping water temps above 160º F for 30 minutes kills all pathogens through pasteurization. Bet you don’t carry a cooking thermometer in your pack. Even at high altitudes, once your water reaches the boiling point of 212º F,  you’re done. Boiling past zero minutes is a waste of fuel and life-giving water via evaporation.

In a perfect world, you whip out your metal container. Fill it with water and bring it to a boil. Take it off the heat immediately and allow the water to cool. Now you have potable water.

Water boiling challenge

Water boiling

What I carry is the Pathfinder Stainless Steel Cook set. The 32 ounce bottle nests inside the 25 oz. cup for easy storage in my haversack or backpack.

If you’re ever in a situation without a metal container, ask yourself this question…

What would MacGyver do?

Creative Containers

There may be resources in your pack which you’ve never considered could hold water for boiling. These items will help channel your inner MacGyver.

Dave Williams' duct tape water bottle at the Pathfinder School

Dave Williams’ duct tape water bottle at the Pathfinder School

  • Duct tape
  • Emergency space blanket
  • Trash bag
  • Backpack cover
  • Tarp
  • Rain suit or poncho
  • Dry bag
  • Hat

These pieces of kit will melt over a fire quicker than the Wicked Witch of the West from the Wizard of Oz. But the important thing is that they hold water and you can make fire… and rocks litter the ground. Now you’re ready to boil water.

Stone Boil Method

Hot rocks from your campfire will boil water. Be sure to not use river rocks in the fire. The trapped moisture inside these stones are prone to explode when heated sending hot, sharp shrapnel flying. Use dry rocks.

Below are a few fellow YouTubers I respect demonstrating the stone boil method with improvised containers.

Hats off to IHatchetJack for this one…

Master Woodsman using a trash bag to boil water with stones…

Larry Roberts using a burn and scrape wooden container…

No-Boil Methods for Clean Water

You can’t boil water without a heat source. This fact places urgency on the need to carry at least 3 different methods to start a fire. We covered my favorite methods here.

However, even without fire, potable water is available in nature.

Water from Trees

Here are 4 trees found in the eastern woodlands that can be tapped in the same manner as our northern neighbors harvest sap for maple syrup. This hydration source is available when the sap is running in early spring.

tree-hugger-self-reliance-uses-american-sycamore

A young Sycamore (Right) and River Birch (Left) growing near the roadside

Sap from the trees contains sugars and clean water that can be consumed without filtering or boiling. Collect the sap by boring a hole or notch about a 1/2 inch into the tree. Insert a 4 inch spigot made from a hollow stick or river cane as a conduit for the sap. Use a container underneath the spigot/spile to catch the runoff.

Use your Possum Mentality and collect any plastic water/soda bottles you come across. They can be used to collect sap without ever tapping the tree with a spigot. Darin from East Woodland Survival has an interesting technique I really like…

Water from Plants

Another great seasonal (spring, summer, and fall) source of clean water is found in wild grape vines. Sever the end of a large diameter vine near the ground over a container. It’ll start slowly dripping water into the container. Speed up the process by reaching as high as possible up the vine and cut a notch in the vine. The notch breaks the vacuum in the vine to increase the water output.

Don’t forget that your mouth is a container. Lay under the vine and drink directly from the plant. Be sure you can accurately identify grape vine from poison ivy and oak!

Rain Water

Rainy weather is a two-edged sword. It makes fire craft difficult but can provide needed emergency hydration.

With access to a tarp or rain gear, configure a “V” shape to collect rain and funnel it to a container.

John McCann of Survival Resources shows you how to do this in a homesteading situation easy enough. The same can be done in a survival scenario with sticks and ingenuity. His contraption collects and amazing amount of rain water!

A more primitive rain catchment technique is to harvest tree bark in half-pipe sections set up like a bicycle rim configuration with a collection device positioned at the axle. Tulip poplar, willow, and other non-resinous tree bark can be used.

Water Filters

Modern water filters are convenient and effective for removing parasites and bacteria but not viruses or chemical contaminants. I personally carried the Sawyer Mini on our recent backpacking trip on Eagle Rock Loop. It’s lightweight, easy to use, and effectively removes 99.9% of pathogens and is rated to clean 100,000 gallons of water.

sawyer squeeze water filter

DRG’s new squeeze! This is the larger Sawyer filter pictured.

Filters can be constructed from natural materials in the backcountry. My friend, Joshua Shuttlesworth, has a tutorial on building a Tripod Water Filter you should check out.

Remember to always assume wilderness water sources are contaminated. Drink without disinfecting water in the woods and you could pay a hefty price. Don’t trust what you read here or watch on YouTube videos. Get out and develop the skills needed to quench your thirst!

Keep Doing the Stuff of Self-Reliance,

Todd

P.S. – You can also keep up with the Stuff we’re Doing on TwitterPinterestGoogle +, YouTube, Instagram, and Facebook… and over at the Doing the Stuff Network.

P.P.S – If you find value in our blog, Dirt Road Girl and I would appreciate your vote on Top Prepper Sites! You can vote daily by clicking here or on the image below. Check out all the other value-adding sites while you’re there… 

Thanks for Sharing the Stuff!

Copyright: Content on this site (unless the work of a third-party) may be shared freely in digital form, in part or whole, for non-commercial use with a link back to this site crediting the author. All links in articles must remain intact as originally posted in order to be republished. If you are interested a third-party article, please contact the author directly for republishing information.


Categories: Bushcraft, Camping, Doing the Stuff, Potable Water, Preparedness, Self-reliance, Survival, Survival Skills, Water | Tags: , , , , , , , , , , , , , , , | 26 Comments

6 Life and Survival Lessons Learned from Backpacking

by Todd Walker

6 Life and Survival Lessons Learned from Backpacking - TheSurvivalSherpa.com

I flipped to “Fat Guys in the Woods” on The Weather Channel last night as DRG was reading her book. She glanced over the pages and asked…

“Is that Fat and Afraid?”

I belly laughed!

After climbing that first mountain, the name fit me.

6 Life and Survival Lessons Learned from Backpacking - TheSurvivalSherpa.com

Are we there yet?

My brother’s boys and I drove eleven hours to tackle Eagle Rock Loop in the Ouchita (pronounced wosh-i-taw) National Forest in Arkansas. Our map called the mountainous section of the loop “vigorous”. Understatement of the year! Brutal was more like it for this old man.

This wasn’t a self-imposed survival adventure. We backpacked and camped with modern gear. Here’s what I took away from our journey.

Lesson #1: Fitness Matters

The only way to train for mountains with no switchbacks is to climb mountains with no switchbacks. Baseline fitness is helpful but may not be enough.

6 Life and Survival Lessons Learned from Backpacking - TheSurvivalSherpa.com

Jake got the last laugh with his light pack

We parked at 4:30 P.M, strapped on packs and hit our first mountain 50 yards from the truck. Jake, the youngest of our trio, was point man. And perhaps the smartest. His pack weighed 15 pounds! He’d seen what heavy could do to soldiers patrolling mountains in Afghanistan. And his buddies were fresh out of boot camp and physical specimens.

IMG_9518

Car camp!?

Had I reduced my pack weight by half, I still would have struggled to climb the mountains. I won’t lie. I secretly contemplated turning back halfway up and car camping. My young, strapping hiking partners were patient with their old uncle with frequent stops for me to catch my breath and cool the burn in my gluts and thighs.

6 Life and Survival Lessons Learned from Backpacking - TheSurvivalSherpa.com

Kyle instigated this trip

If you subscribe to the popular bug-out-on-foot theory, have you tested your load out and physical abilities on the terrain you plan to walk?

Lesson #2: Water Matters

Bring more than one method to obtain potable water.

IMG_2578

Water Filters: Kyle carried a Katadyn filter which he and Jake used. I used my Sawyer Mini, which weighs 2 ounces, to fill my 2 liter bladder in my backpack. A small 16 ounce Sawyer mylar bag was my backup when I sucked the hydration bladder dry. I consumed about 4 litters per day due to the strenuous activity and summer heat.

IMG_2574

Around morning and evening campfires, I boiled water in my 64 ounce bush pot for cooking, hot cocoa, and coffee. Boiling was impractical on the move. Water filters are the way to go on rest stops.

Lesson #3: Feet Matter

When your only means of conveyance is your feet, take good care of them.

We crossed 3 mountains on our first full day of hiking. I noticed a hot spot on one of my toes going down the last mountain. Upon inspection, I had forgotten to trim my nails which turned out to be the source of the toe pain. My Swiss Army Knife scissors quickly solved the issue.

6 Life and Survival Lessons Learned from Backpacking - TheSurvivalSherpa.com

River crossings were unavoidable. At low water levels, we rock hopped. A few crossings ended in wet feet. I carried three pair of wool blend socks. One for wearing, one for drying, and one as a spare.

Cooling off with my Five Fingers

Cooling off in my Five Fingers

Also consider packing a lightweight pair of camp shoes or sandals. I wore my Five Fingers around camp and for protection while exploring the rivers. Even though I run barefoot at home, I couldn’t afford a wound to my only means of wilderness transportation.

Take time to keep your feet dry, clean, and protected. Always break in new boots or shoes well ahead of your journey.

Lesson #4: Sleep Matters

“One of the hallmarks of the veteran woodsman is the way he contrives to make himself comfortable in camp”. ~ Warren H. Miller

Follow the 4 W’s of campsite selection when choosing your spot to bed down… remember to look up. We had to fell a 5 inch dead standing oak on our last campsite. It may not have caused us problems but you never know how the wind may change. It provided ample firewood for us and to the next pilgrims who find our site.

6 Life and Survival Lessons Learned from Backpacking - TheSurvivalSherpa.com

All three of us prefer hammocks to tents. Hammocks not only offer comfortable bedding they also serve as a camp recliner by sitting perpendicularly like a swing.

You need good sleep hygiene to restore the body. Six to seven hours is about all I get at home. For some pleasant reason, I typically sleep a good 8 to 9 hours in the woods… barring abrupt disruptions from wild visitors.

I don’t worry too much about large animals. It’s the little critters that bug me… mosquitos and no-see-ums being the main culprit.

Use bug netting or insect repellent.

6 Life and Survival Lessons Learned from Backpacking - TheSurvivalSherpa.com

All Natural BugShot

I’ve just discovered a natural bug repellent called All Natural BugShot that kept the biting insects and ticks away. If you’re not crazy about applying DEET based repellents to your skin (or melting your plastic gear), check BugShot out. I shared my thoughts in a short video review on our trip. I recommend it!

Lesson #5: Bears and Bacon Matter

I was flip-flopping about whether to bring the dry cured bacon into bear country.

On this special trip with my brother’s sons, I went with bacon. One and a half pounds in fact. That amount gave us 2 thick strips each morning to get our day started. We also cooked a dozen dehydrated eggs in bacon grease over two days. We were smoothing it over the campfire kitchen!

IMG_2585

We never sighted actual bears but did walk over scat on the trails. Carry bear spray.

Here are a few bear precautions to take. I found this research site, North American Bear Center, interesting and informative in addressing commonly held myths about bear-human encounters.

A bear’s sense of smell is over 2,000 times better than humans. Knowing this, take precautions and practice good camp hygiene. Place all food and cooking utensils in a bear bag and hang it at least 10 feet off the ground and 4 feet from the nearest tree trunk.

My bear bag system contains the following:

  •  30 liter dry bag, 50 feet of paracord
  • One carabiner
  • Finger size stick off the ground

All food and cookware go inside the sealed bag and is hung 100 yards down wind from camp. I use the PCT (Pacific Coast Trail) method to hang the bag. I’ll show you this trick in a later blog.

I know this about my body but I over packed food anyway. When hot from physical exertion, I don’t eat much. We stopped for lunch breaks but never ate a meal just a few snacks of dried fruit or trail mix. And very little of that. Our largest meals were in the evening after cooling off.

Lesson #6: Family Matters

Though I’ve known Kyle and Jake since their birth, I never had the chance to connect with them as I did on this wilderness adventure. We connected by being disconnected.

IMG_2641

Kyle made slate name tags for us

We lost all communication with the outside world miles before we reached the trailhead. No phone calls, texts, social media stuff, or blog reports. And not one among us frowned.

IMG_2647

Welcome to Camp Walker!

We embraced being off-line and soaked in all nature could offer. We ate snake pan-fried in coconut oil, dined on homemade bacon, told campfire stories, laid still watching moon beams pour through leaves overhead, dried our wet bodies on rocky sandbars warmed by campfires, found the richness of life in our adventure, and confronted our fears and fatigue to discover how little it takes to make us happy.

6 Life and Survival Lessons Learned from Backpacking - TheSurvivalSherpa.com

Going primal, gig in mouth, in search of bullfrogs

That, my friends, was the most valuable lesson of all!

Get out there, and, as always…

Keep Doing the Stuff of Self-Reliance,

Todd

P.S. – You can also keep up with the Stuff we’re Doing on TwitterPinterestGoogle +, YouTube, Instagram, and Facebook… and over at the Doing the Stuff Network. P.P.S – If you find value in our blog, Dirt Road Girl and I would appreciate your vote on Top Prepper Sites! You can vote daily by clicking here or on the image below. Check out all the other value-adding sites while you’re there… 

Thanks for Sharing the Stuff!

Copyright: Content on this site (unless the work of a third-party) may be shared freely in digital form, in part or whole, for non-commercial use with a link back to this site crediting the author. All links in articles must remain intact as originally posted in order to be republished. If you are interested a third-party article, please contact the author directly for republishing information.

Categories: Bushcraft, Camping, Doing the Stuff, Potable Water, Preparedness, Self-reliance, Water | Tags: , , , , , , , , | 18 Comments

Made by Hands: Make it or Buy it?

by Todd Walker

Made by Hands: Make it or Buy it? | TheSurvivalSherpa.com

My blogging buddy, Patrick Blair (Survival at Home), is credited with the idea for this post. He recommended I share all my DiY stuff in one photo. Haha… that’s a challenge which would take a wide-angle camera lens.

Instead, I thought I’d share some of the stuff I’ve made over the years in hopes of inspiring others to make their own.

We promote skills over “shiny object survival” gear around here. But honestly, I’m a gear junkie as much as the next guy. We’re members of a tool-using species!

Man is a tool-using animal. Nowhere do you find him without tools; without tools he is nothing, with tools he is all.

~ Thomas Carlysle


There’s more to self-reliance than just buying gear and tools though…

It’s about making your own and living this philosophy… Prepare modern but practice primitive.

Could the 10 C’s of Survivability be reproduced in a 72 hour survival scenario?

Yup. However, specific skills, resources, and time are needed, which may be hard to come by. So, Buy it… but learn to make most, if not all, of these essential kit items.

  1. Cutting tools – Unless you’re a very talented craftsman or artisan, I recommend buying the best knife, ax, and saw you can afford.
  2. Combustion device – Learn to make primitive fire via friction and flint and steel. Flint or quartz can be used on the spine of your high-carbon steel cutting tool to light charred material. You carry a next fire kit, right?
  3. Cordage – Finding natural resources suitable for cordage expends calories. Making indigenous cordage is a good skill to learn though. I practice making cordage because I enjoy primitive skills. If you don’t, buy cordage for your kits.
  4. Cover – A USGI poncho or emergency space blanket doesn’t weigh much and can be found for under $20. I hammock camp with my bed sheet tarp but carry an emergency space blanket I purchased.
  5. Container – You must stay hydrated. Yes, you can make containers from the landscape but a metal container gives you anti-fragile options!
  6. Cotton – Never made it… buy this item for sure.
  7. Cargo tape – Practice making natural glues but buy and keep Gorilla Brand duct tape in your kits. If it can’t be fixed with duct tape…!
  8. Cloth sail needle – My metal repair needle is mounted on the back of my primary knife sheath with Gorilla tape. Primitive needles or awls can be made from bone, but, again, time and resources area factors.
  9. Candling device – Buy a quality head lamp that takes “AA” batteries. I carry a candle and have made fat lighter’d torches and oil lamps but a flashlight is too easy to pack.
  10. Compass – Navigation is the primary use for a compass. If that’s all your compass can do, you should consider buying another one. My multi-functional Alpine compass can also be used for combustion, signaling, self-aid, and tick removal.

Even if money isn’t tight for your family, there’s no better satisfaction than using gear made by hands… your hands!

Today is a celebration of making the stuff of self-reliance. Click the title links in the photo essay for details on how to make your own stuff.

Made by Hand

Below you’ll find DiY projects in two broad categories: Outdoor Self-Reliance and Homesteading.

Awesome photo courtesy of Connor M. Lamoureux on Instagram (adventureconwards)

Awesome photo courtesy of Connor M. Lamoureux on Instagram ~ adventureconwards

By the way, if you’re on Instagram, give us a follow at… ToddatSurvivalSherpa.

Make tag
Buy tagor


How do you know when it’s best to Make it or Buy it? Skill level, tools and equipment, space, time, and resources are determining factors on which project to tackle. The ultimate goal of making stuff is… making us more self-reliant.

What kind of person are you making?

Outdoor Self-Reliance

Wool Blanket Hunting Shirt

100% Wool Blanket = Awesome Hunting Shirt

My hunting shirt made from an Italian wool Army blanket

Oilskin Bed Sheet Tarp

homemade-oilskin-bedsheet-tarp

DiY Hands-Free Ax Sheath

How to Make a Hands-Free Ax Carrying System | www.TheSurvivalSherpa.com


Outdoor Cooking Tripod

How to Build a Bushcraft Tripod for Your Outdoor Kitchen

Prefect!

Mountain Man MRE’s (Pemmican, Parched Corn, and Dried Fruit)

how-to-make-modern-mountain-man-mre

Smoke house teepee

Fixin’ Wax

A Simple Fixin' Wax Recipe for Fixin' Stuff

Tree Bark Archery Quiver

IMG_2047

Base Camp Sawbuck

How to Build a Sturdy Sawbuck with Logs and Rope - www.TheSurvivalSherpa.com

Primitive Process Pottery

Making Containers from Primitive Process Pottery - www.TheSurvivalSherpa.com

Brian Floyd, our main instructor, made a tasty stew in one of his pots for lunch.

Wooden Spoons

Spoon Carving with an Ax | www.TheSurvivalSherpa.com

Making Containers from Primitive Process Pottery - www.TheSurvivalSherpa.com

Blowing through a section of river cane to burn the bowl of my spoon

Char Material for Your Next Fire

Blowing-My-Lid-Over-Char-Containers

Embers on charred punk wood

Waterproof Fire Starter

A-Waterproof-Tinder-Bundle-Hack-That-Guarantees-Fire

A door hinge pin chucked in my drill

Pine Pitch Glue Sticks

How to Make Primitive Hot Glue Sticks | www.TheSurvivalSherpa.com

Fat Lighter’d Torch

pine-tree-uses-self-reliance

Natural Cordage

When Primitive Skills and Prepping Have Sex | www.TheSurvivalSherpa.com

Indigenous cordage I made this weekend. Clockwise from 12:00 ~ Dogbane; Tulip Poplar; Okra, and Yucca.

Base Camp Stump Vise

Make a Stump Vise for “Smoothing It” Camp Projects | www.TheSurvivalSherpa.com


Sling Shot Bow

A DiY Survival Sling Shot with Big Game Capabilities

A DiY Survival Sling Shot with Big Game Capabilities

Duct Tape Arrow Fletching

Ducttapevanes6 - Copy


Cigar Fishing Kit

Screw cap taped

Screw cap taped

Altoids Tin Oil Lamp

30 Ultimate DiY Gifts in Santa's Survival Sleigh

DiY olive oil lamp

Survival Gig

diy-survival-gig

Used about 6 feet of cordage here

Homesteading

Compost Tumbler


30 Ultimate DiY Gifts in Santa's Survival Sleigh

DRG’s elevated compost tumbler

Rain Collection System

trading-theory-for-action

trading-theory-for-action

It’s not camo paint, but it blends in very well in the front yard.

Tomato Ladders

Todd's Tomato Ladders | www.TheSurvivalSherpa.com

Four Tomato Ladders anchored and ready with an old wooden ladder on the far left.

Pallet Fencing

Up-cycled pallets, windows, and doors.

Up-cycled pallets, windows, and doors.

Rat Trap

stairway-to-heaven-bucket-rat-trap

Paper Fire Logs

diy-firebricks-woodstove-logs-firewood

The wet fire log ready for drying

Farmhouse Table

Pipe clamps putting the squeeze on the 2x6's

Pipe clamps putting the squeeze on the 2×6’s

Foldable Sawbuck

Sawbuck: Work Smarter in the Woodpile

Sawbuck in the woodpile!

Battery Storage Rack

Attention Men: Pinterest is a Prepping Goldmine

Power at your finger tips

Self-Watering Container Gardening 

Image


Rendering Tallow

Almost ready.

Almost ready.

Homemade Sauerkraut

Get Your Gut In Shape: Down and Dirty Sauerkraut

Plumber’s Stove

How to Make a Plumber's Stove on Steroids for Cooking and Warmth | www.TheSurvivalSherpa.com

Cedar Bench

Here she sits outside my shop

Here she sits outside my shop

Plantain Salve

how-to-make-lucky-sherpa-plantain-salve

This tin fits nicely in my haversack

Being a student of self-reliance, my expertise is limited in making a lot of the gear I own. However, it’s good enough to get the job done. For instance, the bed sheet tarp has been through extensive field testing and has performed like a boss!

Then there are DiY projects I’ve tried that failed miserably. The journey to self-reliance depends on failing forward.

Your turn. What’s your favorite gear or equipment you’ve Made by Hand? Let us know in the comments.

Keep Making the Stuff of Self-Reliance,

Todd

P.S. – You can also keep up with the Stuff we’re Doing on TwitterPinterestGoogle +, YouTube, Instagram, and Facebook… and over at the Doing the Stuff Network.

P.P.S – If you find value in our blog, Dirt Road Girl and I would appreciate your vote on Top Prepper Sites! You can vote daily by clicking here or on the image below. Check out all the other value-adding sites while you’re there…

Thanks for Sharing the Stuff!

Copyright: Content on this site (unless the work of a third-party) may be shared freely in digital form, in part or whole, for non-commercial use with a link back to this site crediting the author. All links in articles must remain intact as originally posted in order to be republished. If you are interested a third-party article, please contact the author directly for republishing information.

Categories: Bushcraft, Camping, DIY Preparedness Projects, Doing the Stuff, Gear, Herbal Remedies, Homesteading, Preparedness, Self-reliance, Survival, Survival Skills, Water | Tags: , , , , , , | 11 Comments

Gnawing Solutions to Self-Reliance: 18 Beaver Habitat Resources

by Todd Walker

North America’s largest rodent may be considered a nuisance to farmers, landowners, and highway departments. From a self-reliant perspective, this fury critter offers more benefits than damage in most cases.

Gnawing Solutions to Self-Reliance- 18 Beaver Habitat Resources - www.TheSurvivalSherpa.com

Last weekend our family gathered to fulfill my brother’s request. After spreading most of his ashes in the lake behind my parents house, Kyle, my brother’s oldest son, and I took a small container of his ashes to the feeder creek where my brother and I spent many childhood hours catching crawdads and reenacting the Daniel Boone TV show.

Childhood memories were as fresh as the day our jack knives carved “CW” and “TW” in the paper-like bark of a massive Beech tree on the creeks bend. Kyle and I searched for the tree with no success.

I felt lost. Not just because my brother would never tramp these woods by my side…

The entire landscape surrounding what was once a creek full of boyhood memories and misadventures was unrecognizable. The stream which once flowed unobstructed under a thick hardwood canopy between two ridges was now a decade old beaver pond.

My eyes witnessed a complete transformation. Twenty-five yards to both sides of the creek grew a lush, green landscape of grasses, cattail, and other aquatic plants. The scenic vista stretched 100 yards with dead standing timber scatter intermittently. Our life had changed much like my beloved creek.

Self-Reliant Resources Gnawing to be Discovery in Beaver Habitat | www.TheSurvivalSherpa.com

Kyle and ‘Abby’ walking on beaver pond sediment collected over the years. The creek of my youth had split which once ran three times the size on this spot.

Inspired by Scott Jones, Georgia native and author of A View to the Past – (and a recent roadkill beaver on my drive home) – this article highlights the importance of the fury woodland engineer. For further research on the role beavers and their habitat played in pre-history, read his book.

Jones pegged it when he wrote that the beaver is…

“next to fire and human activity, one of the premier agents of landscape and habitat alteration on this continent.”

Our upland creek had morphed into new ecosystem. Presented with a smorgasbord of new resources, the beaver pond could be viewed as a gnawing problem or…

The Gnawing Self-Reliance Solution

It’s a dam good idea! Sorry, couldn’t resist that one.

Seriously though, when a beaver couple selects their home site on a free-flowing stream or creek, landowners may look despairingly upon the beaver colony and the accompanying swimming hole. However, with a view to long-term self-reliance, one should consider leaving it to the beavers.

Here’s why…

With the wetland area comes a host of new and beneficial resources for the homesteader, farmer, woodsman, foragers, primitive technologist, hunter/fisherman, wildlife, and the land itself.

Below are the top 18 resources available in your local beaver-built wetland habitat…

The Beaver (Castor canadensis) 

Beavers were once near extinction in Georgia and the United States due to over-trapping and habitat loss. A reintroduction program in the 1940’s successfully repopulated our state and nation. In fact, they’re thriving to the point in Georgia that there is no closed season on harvesting beaver.

A harvested animal can be used for

  • Meat – prepared correctly, beaver tenderloin, back straps, hams, and even the tail makes a tasty and nourishing meal.
  • Pelt – composed of long, coarse hair with wooly undercoat, beaver pelts were luxuriously warm winter hat and mittens.
  • Teeth – the chisel-sharp incisors make great primitive scrapers for wood carving tasks
  • Castor glands – used in the perfume industry but are most valuable for trappers as a universal furbearer attractant. For those interested in trapping, check out this informative article on harvesting castor glands and oil to make your own attractant.

Not crazy about the thought of eating a large rodent? No problem. A beaver colony is full of southern hospitality. Their engineering feats offer accommodations for fury, feathery, and finned appetizing meals.

Fish

In mature beaver ponds, many species of fish are available. You may not catch one as large as the one I’m tangling with below, but rest assured, you can feed yourself and family from beaver ponds.

A large grass carp

Landing a 25 pound carp

Limb hooks, fish traps, and trot lines are great for harvesting fish while you attend to other tasks of self-reliance. However, don’t discount cane poles! My brother and I pulled many a mess of fish from fishing holes with a homemade bamboo or sapling pole.

Reptiles

Venomous and non-venomous snakes are fond of wetland habitat.

Didn't get close enough to identify this one but we think it was a Black Racer (Coluber constrictor) by its behavior

Black snake resting his briar hammock

We didn’t get close enough to positively identify this one but we think it was a Black Racer (Coluber constrictor) due to its behavior. Racers like to climb and lay on vegetation. This guy/gal was using a clump of dead blackberry bushes like a drying rack.

Water moccasin

Water moccasin is a venomous snake common in and around beaver ponds in Georgia

Watch your step when scouting for resources in beaver ponds. The only venomous snakes in our area of Georgia to be concerned about are rattle snakes, cottonmouths (water moccasins), and copper heads.

Turtles and beavers go together. And, yes, turtles are edible.

This snapping turtle is next to a size 12 shoe for comparison

This Common Snapping Turtle is next to a size 12 shoe for comparison

Foraging Flora and Fauna

IMG_1616

False Nettles growing in sediment build up along the creek

River cane, Willow, Tulip Poplar, Arrowhead, Cattail, and other plants and trees that thrive in wetland habitat are available in and around beaver ponds. Always, always, correctly identify wild edibles before consuming.

Cattail

Cattail

Woodcraft and Primitive Skills

Debarked wood for tool handles, digging sticks, bow drill sets, shelter, and rabbit sticks can be found in beaver habitat. Wood removed from a dam will quickly be replaced with freshly gnawed logs. Some of my favorite walking sticks were removed from beaver ponds.

Flooded timber in our beaver pond was home to many wood peckers

Flooded timber in our beaver pond is home to many woodpeckers

Try removing bark on a log using only primitive scraping tools and you’ll have a new appreciation for beaver-chewed wood.

Beaver damage to a maple on a small pond at the property

Beaver damage to a maple on a small pond at the property

Firewood is plentiful, too. Beavers eat the bark off large diameter trunks killing the tree to open the canopy above. Standing dead, they eventually fall from wind storms or get gnawed down.

The spillway in the middle of one of the dams

The spillway in the middle of one of the dams

Exercise caution tramping through beaver dams and ponds. Watch for hazards while admiring the beauty.

Wetlands and Stored Water

The natural way to create beneficial wetlands costs no money and is built by Mother Nature’s best engineer… the beaver.  The beaver pond at the head of our lake provides critical habitat for waterfowl.

Even without the beaver pond, we have a deep water lake. However, landowners and farmers without a man-made lake or pond could benefit from a beaver-built watershed for irrigation.

  • When water tables drop during drought, water will be available in beaver ponds.
  • Dams also serve to naturally filter water and remove silt.
  • Stable water supply for wildlife, livestock, and vegetation.
  • Elevates ground water table.
  • Formation of fertile beaver meadows after being silted in.

Beaver Facts

  • Lifespan – 5 to 10 years in the wild
  • Size – 30 to 50 inches from head to end of paddle tail
  • Weight – 40 to 60 pounds fully grown; the Ice Age beaver, Castoroides, was said to have weighed 400 pounds… that’s a big beaver! (Source:A View to the Past)
  • Diet – Southeastern beavers eat tree bark: Sweetgum, Willow, Dogwood, Tulip Poplar, Pine, Cottonwood, Maple and most any tree available. They also dine on aquatic plants, roots, fruit, and tubers and stems of plants in the beaver habitat. Beavers will also venture into corn fields for meals.
  • Identification – large rodent with orange teeth, coarse outer hair with a wooly undercoat, webbed feet with claws, and a paddle tail used as a rudder, warning signal when slapped on the top of water, and a prop when standing to gnaw trees.
  • Natural Predators – Bear, bobcat, cougar, coyote, and humans
  • Shelter – Beavers build dens in lodges in the ponds they’ve created. They burrow into banks mostly in my area and not the typical beaver lodge. On deep water lakes and larger rivers, bank dens are their homes. We call these critters bank beavers.

The gnawing solutions are worth consideration by every student of self-reliance for long-term sustainability. What do you think? Benefit or nuisance?

Though I lost the Beech tree containing our initials due to flooded beaver habitat, our property has gained a valuable wetland resource. Plus, Kyle, part of the next generation of Walkers, found his initials he’d carved in a smaller Beech tree and forgotten about. I think I’ll go add “CW” and “TW” to this new family tree.

Keep Doing the Stuff of Self-Reliance,

Todd

P.S. – You can also keep up with the Stuff we’re Doing on TwitterPinterestGoogle +, YouTube and our Facebook page… and over at the Doing the Stuff Network on PinterestGoogle +, and Facebook.

P.P.S – If you find value in our blog, Dirt Road Girl and I would appreciate your vote on Top Prepper Sites! You can vote daily by clicking here or on the image below. Check out all the other value-adding sites while you’re there…

Thanks for Sharing the Stuff!

Copyright: Content on this site (unless the work of a third-party) may be shared freely in digital form, in part or whole, for non-commercial use with a link back to this site crediting the author. All links in articles must remain intact as originally posted in order to be republished. If you are interested a third-party article, please contact the author directly for republishing information.

Categories: Bushcraft, Doing the Stuff, Homesteading, Preparedness, Self-reliance, Survival, Water | Tags: , , , , , , , , , , , | 19 Comments

From Waste to Water Reservoir: Building a Rain Barrel from a Trash Can

Guest post by Garret Stembridge

Environmentally friendly rain barrels can be made from pretty much any 55 – 60 gallon container, but one of the most readily available is a basic trash can. Other options include reusing old plastic pickle barrels, soda barrels or any barrel that once carried food-grade materials in it.

From Waste to Water Reservoir: Building a Rain Barrel from a Trash Can

A simple trash can works for rain barrel water collection

By making sure the previous contents of your recycled barrel were food-grade, you can feel more secure about using the water collected in it to feed your vegetable garden or wash your dog. Barrels that contained harsh chemicals are often hard to scrub out entirely and could still contain traces of toxins.

The basic rain barrel

Regardless of what barrel type you choose, your basic rain barrel consists of four parts:

  • The barrel to hold the collected rain water
  • A screened inlet that lets in rain water but keeps out leaves, mosquitoes and small animals
  • An outlet near the bottom that can be opened and closed
  • An overflow near the top, in case your barrel reaches capacity

Equipment

DIY rain barrels can be as elaborate or simple as you want them to be. This project gives you the basic model but it can easily be added on to and expanded to fit your rain gardening needs. To build a trash can rain barrel, you’ll need:

  • A 55 – 60 gallon trash can (lid optional, but recommended)
  • Window screen (instead of purchasing new, consider cutting it out of an old screen window or door)
  • 1 garden hose, ½” diameter (standard)
  • ½” boiler drain (spigot)
  • 1, ½” conduit lock nut
  • 2, ½” flat metal washers
  • 2, ½” rubber washers
  • Grease pencil or marker
  • staple gun
  • pliers
  • utility knife
  • scissors
  • screwdriver
  • 2 – 4 old cinder blocks or gravel
  • caulking gun and silicone (optional)

Instructions

  • Creating the outlet: This part is a lot easier if you have a ½” hole-boring drill bit for an electric drill, but if you’re doing this project by hand, draw a ½” cross hatch a couple inches from the bottom of the barrel and use it to cut out a ½” diameter circle through which you can thread your boiler drain. When cutting, a little less is better than a little more. If the opening is too big, even the rubber washers can’t stop a leak. Be sure to thread a flat metal washer and then a rubber washer on the boiler drain before threading the drain through the opening.
  • At this point, if you are using silicone, coat the boiler drain threads and opening before threading the boiler drain into place.
  • Seal the boiler drain on the interior with the rubber washer first, then the flat metal washer and finally the lock nut. The rubber washers should be directly against the trash can on both sides. Use the pliers to tighten. The hose will attach to the boiler drain to direct your rainwater for use.
  • Attach the screen: Take your screen and drape it over the top of the uncovered trash can. Using the staple gun, staple the screen in place, pulling it tight as you go to keep it from sagging. Use the scissors to cut off the excess and to give it a finished look.
  • Prep the lid: Even though you don’t necessarily need a lid for your rain barrel – the screen will keep out larger debris and most insects – a lid will keep yard critters from potentially falling in and will give the finished product a cleaner look. If you’re using the lid, cut out a square opening large enough to accommodate the downpour spout on your gutter.
  • Cut an overflow: A few inches below the top of the barrel, cut a hole roughly 1″ in diameter for excess water to escape. If you want to direct the water away from the house, follow the same instructions for installing the first boiler drain except instead of a boiler drain spigot, use a ½” PVC male adapter so that you can attach a hose directly to the overflow outlet and run the hose away from your house.
  • Prep your gutter: Locate your gutter down spout and measure enough room to fit not only your rain barrel, but the barrel stand (gravel or cinder blocks – see below) and the extra length of gutter spout you’ll need to attach to the end to direct the water into the rain barrel. Cut the down spout using your utility knife and attach the gutter spout.
  • Place your rain barrel: Before putting the rain barrel under the gutter spout, prep the ground underneath either with a pile of gravel or 2 – 4 leveled cinder blocks. This will ensure that your rain barrel stays in place even in the heaviest downpour and doesn’t retain water around its base. Once in place, adjust the rain barrel so that the gutter spout flows through the lid opening and you’re done!

Rain barrel water can be used for pretty much any ‘gray water’ purpose, from watering the garden to washing the car, filling bird baths and keeping your compost pile damp.

What do you use your rain barrel water for? Where have you found suitable containers for creating rain barrels?

About the author: Garret Stembridge is a member of the Internet marketing team at Extra Space Storage, a leading provider of self storage facilities. Garret often writes about sustainable practices for the home and for businesses. Their East Tampa, Florida self storage facility has been retrofitted to reduce energy consumption, and can be found here.

Related articles

Categories: DIY Preparedness Projects, Frugal Preps, Water | Tags: , , | 4 Comments

Water: The 2nd Essential Pillar of Preparedness for SmartPreppers

by Todd Walker

Part 2 ~ Essential Pillars of Preparedness Series

Given enough time without water, you die! It’s that simple.

In our second post in the series, The Essential Pillars of Preparedness for SmartPreppers, let’s take a look at how not to die from dehydration. I thought I’d be able to cover food as well, but it’ll take up a whole post next time.

Getting started on your preparedness journey can be a daunting task. Having potable water is essential for short-term emergencies and long-term survival. At any time you find yourself in a scenario without water for an extended time (three days or so), you’re in a survival situation.

Before you go buy cases of bottled water and 55 gallon drums, think about the storage space needed for water. Also keep in mind that water weighs over 8 pounds per gallon. DRG and I don’t personally store tons of potable water. But we do have several methods to produce drinking water in an emergency. We also have access to a nearby natural water source.

Water Facts

Our bodies, depending on age, gender, and body type, are made of between 77% to 45% water. We can’t survive without water. When building this Pillar, consider your activity level, availability, nearby natural water sources, filtration equipment, storage capabilities, and climate.

Whatever recommendations you’ve read on how much H2O you need, double it. Natural disasters equal lots of manual labor, which increases your bodies need to re-hydrate. If you’ve ever pulled up soaked carpet and pad after a flood, you know the amount of labor and physical exertion involved.

The recommended one gallon per day per person does not include water for hygiene, cooking, pets, and livestock.

I’m a Container Freak

How important are containers? Whole civilizations have been built around these puppies. For thousands of years, lumps of clay on a potter’s wheel turned into bottles, jars, and jugs to store liquids.

If you’re not a potter, here are some simple options for water storage containers.

  • Used drink containers: Two liter soda containers can be cleaned and re-purposed. Since I don’t drink soda, I needed another source. I’ve got an unlimited supply of one gallon jugs from my school. The concession stand sells a sugary, frozen slushy type drink to help wash down the SAD (Standard American Diet) meals from the lunch line. The artificial flavoring comes in 4 – 1 gallon jugs per case. They are HDPE (High Density PolyEthylene) and coded with a #2 inside the recycle symbol on the bottom of the container. I collect these when they’re empty, place them into their handy shipping box, and take them home. I clean them with hot soapy water, a diluted bleach/water solution, and refill with water. They stack very well in the boxes. The boxes also block light to prevent algae growth. [Note: Warnings about reusing plastic milk and sugary drink bottles for water storage abound on the internet. Some say the sugars can’t be completely removed from the plastic which enables bacteria growth. Do your own due diligence before using these containers.]

  • Emergency water: Don’t forget that your hot water heater contains 40 gallons (depending on the size) of potable water. In an emergency, simply shut off the power source (gas shut off or electrical breaker labeled in your breaker box, right?). Even if the power is out at your house, it’s wise to take this step if you’re forced to drain your water heater. If the power is restored to your empty water heater, you’ll be replacing the heating elements on a dry water tank. Next, attach a garden hose to the bottom valve. Open the pressure relief valve on the top or side of the water heater and fill those used drink containers you’ve been hoarding.
    • Toilet tank water. A typical tank (NOT the bowl) will hold over 3 gallons of water. To keep from stirring up the sediment in the tank, scoop the water,  or disconnect the fill-line from the bottom of the tank and drain into a container. Yes, it’s potable – unless you put bowl cleaning chemical cakes in the tank. [If in doubt, don’t drink from the toilet tank.] Reconnect the fill line so you can still use the toilet to flush waste. With a bucket/container, refill the tank with non-potable water. Now you’ve still got the convenience of flushing with the handle. The ladies will appreciate the extra effort.
    • Bath Tub. Plug your tub and fill it with water if you have an early warning of possible disasters bearing down on you. This water can be used, as mentioned above, to flush toilet, personal hygiene, and even drinking. If you have to resort to drinking from the tub, you’ll want to disinfect the water by boiling and chemical treatment. Don’t want to drink from the container (tub) after all those dirty showers? Buy one of these…
    • Water BOB. For $30.00 you can add 100 gallons of potable water to you bath tub. I have no experience with water bobs. Do you?
    • Drain your pipes. In a two-story home, open the tap on the upper floor and collect the water from the pipes at the lowest faucet in your home. On single story homes, find the lowest water spigot (usually an outside garden hose bib) and follow the same advice in the previous line.
    • Kiddy pools and other outside containers can be tapped in an absolute emergency. Be sure to filter, boil and disinfect water from these sources before drinking.
    • Water from natural sources such as lakes, ponds, rivers, and creeks should be filtered, boiled, and treated before drinking. Drinking unsafe water can turn a short-term emergency into a dehydrating, diarrhea disaster – or worse.

On The Go Water

If you had to get out of dodge on foot, having lightweight water filters would come in handy. Remember, water weighs over 8 pounds per gallon. It would be crazy to try to physically carry enough water in your kit for three days on your back.

I’ve got a MSR filter for my 72 hour kit. DRG packs the Sawyer Squeeze Water Filter that weighs only 3 ounces. We both have 2 liter water bladders attached to our bags allowing us to drink while walking or hiking.

We both keep a 32 ounce metal water bottle with a metal cup in our kits. Both bottle and cup can be used to boil water if our other filters options fail or are not available. We also carry chemical treatment in our bags – iodine and purification tablets. Don’t forget to add a cotton bandana for pre-filtering debris from open water sources.

Stationary Filter

For the home, it’s wise to have a gravity fed filter like our Royal Berkey. Can’t afford the Royal Berkey? Buy the filters and make your own. Also, Prepper Helper has an article comparing popular water filtration systems if you’re in the market for one.

Yes, it takes electricity over at your city water works to treat and pump H2O to your tap. Even if you have well water, power is need to pressurize your water lines. A manual hand pump, solar-powered pump, or gravity fed cistern adds another layer of redundancy to your water preps.

If all else fails, you can always fall back on cans of dehydrated water 😉

dehydrated water

Breathing, perspiring, and urinating are a few normal bodily functions that cause fluid loss. You’re losing hydration by just taking the time to read this article. So, drink up SmartPreppers!

Keep doing the stuff,

Todd

P.S.

How are you building this essential Pillar of Preparedness? The comment section is open, as always.

Essential Pillars of Preparedness Series

Categories: Gear, Potable Water, Preparedness, Water | Tags: , , , , | 6 Comments

Sawyer Water Filter: Dirt Road Girl’s New Squeeze

by Todd Walker

A coffee shop and the Army Surplus Store were my two favorite hangouts while Dirt Road Girl was hospitalized during her battle with cancer last year. When I got a break, I’d walk a block, grab a cup of joe, cross the street, and browse cool man stuff.

Last week DRG and I visited the surplus store again. On the door was a 8 1/2 x 11 inch sign stating, “ATTENTION PREPPERS – WE HAVE SAWYER SQUEEZE WATER FILTERS IN STOCK!”

Bam!

DRG needed a portable water filter for her 72 Hour Bag. I carry a MSR water filter in my bag. But what if we had to split up. Or she had to get out of dodge own her on? She needed her own filter that was simple to use and lightweight.

I love my MSR MiniWorks EX. It’s easy to clean in the field with no tools, attaches to my MSR Dromedary Bag, and removes bacteria and protozoa including giardia and cryptosporidia. The only drawback is it’s weight – about a pound with the accessories.

Pound, smound! One pound doesn’t seem like much, but I wanted to make DRG’s bag as light and efficient as possible. Every ounce she shaves off saves energy.

We picked up a Sawyer Squeeze Water Filter. It weighs 3 ounces.

sawyer squeeze water filter

DRG’s new squeeze!

With my yellow jacket stings shrinking, I set to the woods to do some testing. The weight, box and all its contents, was hardly noticeable in my test bag. I brought along my new Pathfinder cook set. A separate review is coming on this bad boy, I promise!

For three ounces, this is what you get:

  • The filter ~ Hollow-fiber membrane with a pore size of 0.1. The MSR pore size is 0.2. Both are effective for filtering out parasites and bacteria.
  • Three mylar squeeze bags ~ 16 fl. oz.: 9 x 5 / 32 fl. oz.: 11 x 6 / 64 fl. oz.: 12 x 8 inches
  • A 60 cc syringe to back flush the filter (with clean water) to maintain proper flow as needed. You could also use this item to flush wounds in the field and other redundant uses.
Only three ounces dry.

Only three ounces dry.

Out of the Box Simplicity

There’s no breaking in this filter or big learning curve. Just fill one of the mylar bags with ‘dirty’ water from a creek or pond, screw on the filter to the bag, and start drinking. I filled the 64 oz. bag and filtered the water into my 32 oz. Pathfinder bottle in under a minute.

One hand squeezing, one hand holding the camera.

One hand squeezing, one hand holding the camera.

It’s important to wipe excess unfiltered water from the bag before transferring to your clean container. Drops of unfiltered water containing bacteria, protozoa, and cysts could cross-contaminate what you think is safe drinking water.

The filter comes with a pop-up spout found on some water bottles. This allows you to drink directly from the filter with a mylar bag of unfiltered water attached. Or you can squeeze water into a clean mylar bag or container for later use. The filter will also fit standard treads of water/soda bottles. I tried a cheapo brand water bottle and the male treads would not tighten in the filter. ‘Standard’ threads do fit.

Keep in mind that this filter, like all other filters on the market, will not remove viruses. Have a way to treat viruses via chemicals or boiling. Don’t roll the dice with water. Keep chemical treatments and fire in your kits.

Capacity

This little Sawyer is rated (guaranteed) for 1,000,000 gallons. That’s not a typo. One Million! I have no way of ever testing to see if they are right. I don’t think DRG will ever get close to that number. It would take a lot of Platypus bottles to equal a million gallons. No way we will ever squeeze that much water. It may become a family heirloom.

I’ve seen videos of the Sawyer used at home to filter water from a 5 gallon bucket. I like this guy’s gravity inline filter set up:

<iframe width=”640″ height=”360″ src=”https://www.youtube.com/embed/JoEzc-ij3sc?feature=player_detailpage&#8221; frameborder=”0″ allowfullscreen>

You can’t live long without water. Whether you’re an ultralight backpacker, prepper, or outdoor enthusiast, you’ll want to have a safe, effective way to create potable water. The Sawyer Squeeze Water Filter is a great way to do that.

Before storing your filter after use, back flush the filter with a diluted bleach water mx from the included syringe. This will help dislodge any clogs and clean up any nasties left from dirty water. Shake all the excess water you can from the filter. You can even blow through clean end to help this process.

Enjoying a cup of wild ginger tea with DRG's new squeeze!

Enjoying a cup of wild ginger tea from DRG’s new squeeze!

I would recommend this lightweight, simple-to-use water filtering system. For under $50.00, you can add one to all you kits. I’m buying one for my get home bag. I may add one as a back up to my MRS filter in my B.O.B.

Stay hydrated, my friends!

Anyone have a new squeeze and want to share tips and experiences? Please leave comments if you do.

Keep doing the stuff,

Todd

P.S.

Be a SmartPrepper and follow us here on our blog, Twitter, and Pinterest. We’d also appreciate a ‘like’, comments, and shares on our new Facebook page. Any information on this site may be shared freely, in part or whole, with a link back to this site crediting the author. Thanks for sharing the stuff!


Categories: Bushcraft, Camping, Gear, Preparedness, Self-reliance, Survival, Water | Tags: , , , | 14 Comments

Camouflaging DiY Rain Barrels for Frontyard Gardens

by Todd Walker

The resilient front yard transformation has begun in earnest at our home. Growing food – not lawns requires a certain amount of stealth. Hiding a rain barrel in plain sight was my next project on Dirt Road Girl’s honey-boo list.

I bought two food grade 55 gallon barrels months ago. One was for the DRG Compost Tumbler. I finally turned the other one into a rain barrel. The problem is that this white barrel against a red brick wall stuck out like a red fox in a chicken coop.

Camouflage was needed. Keep in mind this for our front yard not a war zone. We’ll cover that later.

Tools and material needed

The materials and a few tools for the job

The materials and a few tools for the job

Material List

  1. One 3 x 4 inch PVC reducer
  2. One 3/4 inch PVC male thread to glue adapter
  3. One 3/4 inch PVC tee with glue ends
  4. One 3/4 inch PVC 90 degree bends with glue ends
  5. One 3/4 inch PVC 90 degree bend – one end female threads – one end glue
  6. PVC cement/glue
  7. One 3/4 inch PVC cap – if you plan on adding more rain barrels at a later date as I’m planning to do
  8. One 3/4 inch PVC ball valve with glue ends
  9. Teflon and pipe dope (you could use just one of these, but I like to over do it working with water)
  10. One 3/4 inch male thread (brass) adapter with a male threaded garden hose on the other end
  11. Burlap and twine
  12. Window screen and hose clamp

Tools List

  1. Bunghole wrench – homemade from scrap lumber
  2. Jig saw
  3. Adjustable wrench or pliers
  4. Drill and bits
  5. Tin snips or metal-cutting blade a circular saw
  6. 3 feet of 3/4 inch PVC pipe – I’d recommend heavy walled schedule 40 for this application

Step 1: Remove the two-inch bunghole so you can rinse the barrel out. Some recommend a chlorox-water mix. Since my barrel contained vinegar, I just rinsed with water. Vinegar is a great alternative to bleach for cleaning anyway.

homemade bunghole tool

Homemade bunghole tool cut from a scrap 2×2. Worked great for loosening and tightening.

Step 2: Turn the barrel upside down so that the lid is on the ground. Place the 3 inch side of the 3×4 inch reducer on the barrel bottom a couple of inches from the edge of the barrel – trace the circle of the fitting on the barrel. Drill a starter hole on the inside of the circle. This allows you to insert the blade of your jig saw to make the circular cut. Tip: I had DRG hold the cutout with a pair of needle nose pliers so it didn’t fall into the barrel when the cut was finished.

Cutting the 3 inch filling hole

Cutting the 3 inch filling hole

Step 3: Flip the barrel back over. Remove the bunghole with your homemade 2×2 wrench. Being the first-born male of a master plumber and general tinkerer, I carefully clamped the bunghole in a vise and cut through the 2 inch and 3/4 inch threads with a hacks saw. This removed the extra nipple (non-threaded) portion allowing me to attach a 3/4 inch male adapter in the center of the 2 inch bunghole cap. Do Not cut through the threaded part of the bunghole cap.

Step 4: Once the cap of the 3/4 inch female center is removed, add teflon and pipe dope to the 2 inch threads of the bunghole cap and screw the cap back into the barrel hole. Tighten with your 2×2 wrench. Be careful not to over tighten and strip the treads. Now apply teflon (5 to 7 revolutions) to the 3/4 inch male adapter. Tighten hand-tight and just a half turn with a wrench.

Step 5: I built a stand for the rain barrel out of old 4x4s and half a shipping pallet. I’ve used cement blocks for rain barrel stands before this project. Whatever material you have available would work.

Once the barrel is in place on its stand, you’re ready to start cutting and putting together your drain assembly. Cut two pieces of 3/4 inch PVC pipe 5 inches long. These measurements depend on what your stand measurements are.

(Note: I made several mistakes at this point in my project. I didn’t account for the barrel sitting on a pallet and glued up my drain beforehand. Then it hit me. How am I am going to the drain through the pallet stand? I recommend you dry fit the parts – check for fit – then glue it with the barrel in place on the stand.) Below is a picture of me realizing my stupid mistake.

Don't strip the treads when tightening.

Don’t strip the treads when tightening. That would be two stupid mistakes for me.

Step 6: Assemble the drain. With the adapter tightened into the center of the bunghole cap, apply PVC glue to the female end of the adapter and the end of one of the 5 inch pieces of pipe you just cut. Mate the two together and give the pipe a 1/4 turn (do this to all your glue joints) to ensure a good seal.

Now glue a 3/4 inch elbow to the end of the other 5 inch piece of pipe. Then glue the elbow to the 5 inch drop piece attached to the bunghole cap. This should give you an inch or so of pipe sticking out (stub-out) in front of your pallet stand.

Glue the 3/4 inch PVC tee to the stub-out with the open ends running parallel to the stand. On one end (closest to my garden area) of the tee, glue a 3 inch piece of 3/4 inch pipe. Then glue the ball valve to the other end of the 3 inch piece. Cut another 3 inch piece and glue it to the open end of your ball valve.

Go ahead and attach the threaded end of the brass fitting to the female end of the last 90 degree elbow before gluing it to the open end of the pipe sticking out of the ball valve. Remember not to over-tighten.

Now glue the 3/4 inch glue end of the elbow to the end of the pipe.

Cut an 8 inch piece of pipe and glue it to the open end of the tee. Glue the cap on the end of this pipe. Your drain assembly is complete. To add more barrels, simple cut the pipe at the capped end and couple it to your next rain barrel drain assembly.

completed drain assembly

The completed drain assembly. The right side is capped and will allow me to add more rain barrels in the future.

Gutter Time

I moved the down spot on our gutter from the front corner to the side corner on the front of our house. The holly bush will help hide the barrel on the stand.

Step 7: Attach mesh screening to the 4 inch side of the reducer with a hose clamp. This will keep debris and mosquitoes out of your barrel. Place the 3 inch side of the reducer back into the hole on top of the barrel.

debris screen

I used a 10 x 10 inch piece of scrap window screen for the debris trap. Once you secure it with a hose clamp (or in my case – two smaller hose clamps joined together) trim off the excess screen under the clamp.

Step 8: With the barrel on its stand, measure the distance between the downspout and the 3 x 4 inch reducer sitting in the hole on top of the barrel. Cut a piece of gutter the proper length and secure it to the wall so that it directs rain water into the 4 inch opening at the top of the barrel. Note: Leave about two inches of space between the downspout and the top of the 4 inch reducer. This allows you room to remove the reducer to wash out collected debris periodically.

Step 9: Camouflage your barrel (optional). DRG and I picked up 3 yards of burlap from a fabric store for under $10. It’s 4 feet wide so it covered the barrel with some left over. Wrap the barrel with the burlap and tie it on with natural cordage. I tied jute twine on the bottom and top rims and two more in the middle of the barrel. Then I laced the top flaps together with more twine to insure it didn’t slide down the rain barrel.

It's not camo paint, but it blends in very well in the front yard.

It’s not camo paint, but it blends in very well in the front yard.

Now pray for rain. We just got an inch of rain last night. A 1,000 square foot roof will yield 600 gallons of water with one inch of rain. Needless to say, our barrel runneth over.

I check the pressure with the barrel being full and it will water the garden with no problem – or chlorine – or fluoride tainted city water. A water bucket is the next option if the water pressure gets too low to reach the garden.

Not only that, it’ll save us money on our water and sewer bill. Plus, it adds one more layer of resilience to our home.

Keep Doing the Stuff,

Todd

P.S. – You can also keep up with the Stuff we’re Doing on TwitterPinterestGoogle +, and our Facebook page… and over at the Doing the Stuff Network on PinterestGoogle +, and Facebook.

P.P.S – If you find value in our blog, Dirt Road Girl and I would appreciate your vote on Top Prepper Sites! You can vote daily by clicking here or on the image below. Check out all the other value-adding sites while you’re there…

Thanks for Sharing the Stuff!

Copyright: Content on this site (unless the work of a third-party) may be shared freely in digital form, in part or whole, for non-commercial use with a link back to this site crediting the author. All links in articles must remain intact as originally posted in order to be republished. If you are interested a third-party article, please contact the author directly for republishing information.

Categories: DIY Preparedness Projects, Homesteading, Resilience, Water | Tags: , , , , | 13 Comments

Resilience: Bloom Where You’re Planted

by Todd Walker


hanging bucket tomato plants, five gallon bucket planter

Bloom where you’re planted!

Ever wake up in a homeless shelter on Christmas eve?

I wasn’t a stereotypical homeless guy. I had money in my pocket and bank account. I had family and friends that I could have stayed with. How did a middle class guy with two college degrees wind up spending the holidays in an old warehouse for Christmas? Doesn’t matter. What mattered was that I had a roof over my head, food, and water – and I bounced back.

During my four months of “homeless” living, I came to appreciate the amenities most of us take for granted: Hot showers, warmth, privacy, security, protection, and a place to rest. We humans need shelter. We can’t survive without it. Since we have to have these survival basics, make them as resilient as possible.

I’ve owned many houses in my life. In fact, I use to buy, fix, and sell homes before the housing bubble burst. Just after that disaster, DRG and I decided to sell our personal residence and move to her hometown to help with her aging parents. With a contract on our home and a two weeks to get out, we decided to rent a house 5 minutes from her parents. This would be a temporary arrangement until we found a place to buy. We thought we’d be there for a month of two. This “small” window turned into three years.

Bloom where you’re planted

In our move to this small house, we had to adapt from living in a 2,500 sq. ft. house to a 1,000 sq. ft. We chose this small house because it had a 1,000 sq. ft. shop in the backyard. We stored all our extra stuff there. Besides, it was temporary. Side note: This shop became the best Man Cave ever.

About six months into our temporary living arrangement, we decided not to buy and we needed to start adding value to our little rental. Our landlord basically gave us carte blanch on improving the house. We were the best tenants he ever had. We repainted the interior walls, kitchen cabinets, and I even replaced the galvanized water lines under the house.

Our next priority was a garden. The shop took up most of our available garden space. On this small city lot, we discovered new places to grow our own food. Our main area became a raised bed (12′ x 15′) next to the back deck. We added containers of assorted veggies on the deck since it received full sun. Each year we added more resilience and value: new spots to grow food, a rainwater irrigation system, compost station, and an outdoor kitchen.

Was this our dream homestead? Not hardly. But we made the best of it. I think many people believe they have to wait for the ideal situation to become more prepared and self-reliant. Don’t get caught in that trap. Bloom where you’re planted. Like the Atlanta Rhythm Section song, we added a touch of country to our city. “It ain’t much, but it’s home.” You house and home is a key resource in building resilience.

Rural or Urban?

What should you do if you live in a less than ideal situation? Not everyone can afford to uproot and move to a piece of rural property or farmstead. Many love urban living or choose the lifestyle for jobs. The problem I see with city dwelling is dependence on the big systems: Power grid, food distribution system, municipal water supply, etc. The system is fragile to say the least. You don’t have to look far for examples of how failure in one strand of this interconnected web creates a cascade effect. Panic, havoc, and mayhem results. Then the very people dependent on the big systems scream for someone to come rescue them. Urban dwellers and even suburbanites religiously put their faith in the fragile system. One hiccup can – and often does – bring the whole system to its knees.

What’s the solution?

Go local. Become less dependent on the big system. This lessens the impact of the total fail that is coming. I touched on my plan for building community to deal with the unknown unknowns here. Our most overlooked resource may be watching TV on the sofa next door. Becoming a local producer is our goal.

DRG and I can’t wait to get back to our roots of country living. Until then, our plan is to build resilient resources for our family in the following areas:

Water

If your locale is dependent on water being piped in from hundreds of miles away by electric pumping stations, an extended power outage would cause a big die off in your big city. Water is essential for life. A plan for resilient water resources should include:

  • Rainwater collection. While it’s still ‘legal’, do your due diligence and set up a collection system.
  • Well water. If you have funds available, dig a well. You’ll be in the same boat as those dependent on electricity to pump water unless you have the ability to draw water out of the ground with alternative power. You’ve got a genset to handle the power needs of your pump. Great. Fuel will eventually run out. How about a hand pump? or gravity feed cistern? We have three deep wells on our family property. The bad part is that two of them are dependent on the electrical grid. The other well was abandoned and capped years ago. I’m doing research now to install an alternative pumping method for this abandoned well.
  • Freshwater spring. If you’re in a position to purchase property, look for land with a sustainable spring or well. Creeks, ponds, and lakes come in handy for livestock, fish, irrigation of crops, and emergency water supplies.

Food Freedom

Why is it important to know where you food comes from? We are what we eat. If you don’t want to eat the GMO fruits and vegetables from the Industrial Food Machine, what’s an individual to do. Grow your own – or at least a portion of your own food. Not only will you be eating healthier, you’re one step closer to developing self-reliance and resilience.

My long-term food storage plan only runs for six months (not recommended by the experts). I don’t store what the mainstream experts advise. Food storage is prudent but not sustainable. It runs out because we eat it – duh.

Growing our own food has been a challenge in our neighborhood. Our backyard has one tiny spot that gets about 4 to 5 hours of good sun. This past year I moved most of our garden to our full-sun front yard. I know. I run the risk of upsetting our manicured lawn neighbors. Luckily we’ve had no complaints with our foodscape near the house. Julie Bass was not as fortunate in her Michigan neighborhood.

WARNING: The Food Police are bored. What will they come up with next to make our life hell for their own amusement. (I shamelessly adapted Norseman’s fine quote from a video referring to Mother Nature’s fury: “The mountain is bored. What’s it going to do to make my life hell for its own amusement?”)

DRG and I are planning to expand into the weed infested front yard even more this year. We’ll keep some of the weeds growing for medicinal uses. We figure the beautification committee won’t mess with us if we do a gradual take over of the yard – as long it has ‘curb appeal’. It can only add value to our home since the housing bubble deflated. Wait ’til we start raising resilient backyard chickens as a science experiment for my science class.

There’s a 80 year-old man down the street that has a killer garden every year on the corner of a main intersection. He built the corner up with raised beds and packs the plants into a small garden. He sells his excess produce at his booth at our local farmers market each week. He faces the same problem we do – lack of sun in his backyard. Solution: Bloom where you’re planted.

I don’t have a plan yet for dealing with neighborly snitches. I’ll keep y’all posted on the progress and any resistance we face in our foodscaping project. Maybe I can bribe pesky snitches with fresh tomatoes.

Here’s an ambitious couple’s resilient garden. The pictures (before and after) below are an example of creative resilience over at Resilient Communities. These neighbors to our north (Canada) bloomed where they were planted 🙂

Resilience

Resilience comes from the Latin word resilio which basically means having the ability to “bounce back” from some unknown surprise.

Even if we’re paying attention, surprises happen. If we’re still breathing, we’re resilient to some degree. Our bodies are hardwired to survive. We have to do our part though. Anytime we find ourselves without the basics of survival – food, water, shelter, protection – we’ve crossed over into a survival situation.

It’s not too late. We still have time to build resources that make us more resilient. Every step you make to disconnect from the system’s ball and chain – to start connecting with your family, friends, and community – the more self-reliant, independent, and resilient you and those closest to you become.

Want to start connecting to build resilience? What’s your strategy?

Keep Doing the Stuff,

Todd

P.S. – You can also keep up with the Stuff we’re Doing on TwitterPinterestGoogle +, and our Facebook page… and over at the Doing the Stuff Network on PinterestGoogle +, and Facebook.

P.P.S – If you find value in our blog, Dirt Road Girl and I would appreciate your vote on Top Prepper Sites! You can vote daily by clicking here or on the image below. Check out all the other value-adding sites while you’re there…

Thanks for Sharing the Stuff!

Copyright: Content on this site (unless the work of a third-party) may be shared freely in digital form, in part or whole, for non-commercial use with a link back to this site crediting the author. All links in articles must remain intact as originally posted in order to be republished. If you are interested a third-party article, please contact the author directly for republishing information.

Categories: Doing the Stuff, Gardening, Gear, Preparedness, Self-reliance, Water | Tags: , , , | 10 Comments

Blog at WordPress.com.