First Aid

DiY Goldenrod Tincture Benefits

by Todd Walker

I welcome the sight of goldenrod blooming in Georgia. These tiny, golden flowers signal the end of the dog days of summer and usher in cooler weather.

Goldenrod gets a bad rap when it comes to seasonal fall allergies. The average person sees the blooming yellow stalks on roadsides and fields and automatically blame these showy goldenrod heads for their itchy eyes, runny nose, and sneezing. The most likely allergy suspect is goldenrod’s cousin – ragweed.

Goldenrod and ragweed both belong to the Asteraceae family. The good news is that goldenrod, the good cousin, can be used to treat seasonal allergies caused by the bad cousin, ragweed. Instead of blaming goldenrod, use it. Here’s a simple tincture recipe.

Harvest goldenrod in full bloom by cutting a few inches below the yellow flower head. I don’t recommend harvesting from highways/roadsides that are likely sprayed with chemicals for weed control.

I was in a hurry so I didn’t finely chop the flowers, stems, leaves for this batch. Chopping creates more surface area for contact with the alcohol used in the tincture process. We’ll see how this goes. I’m betting it’ll turn out fine.

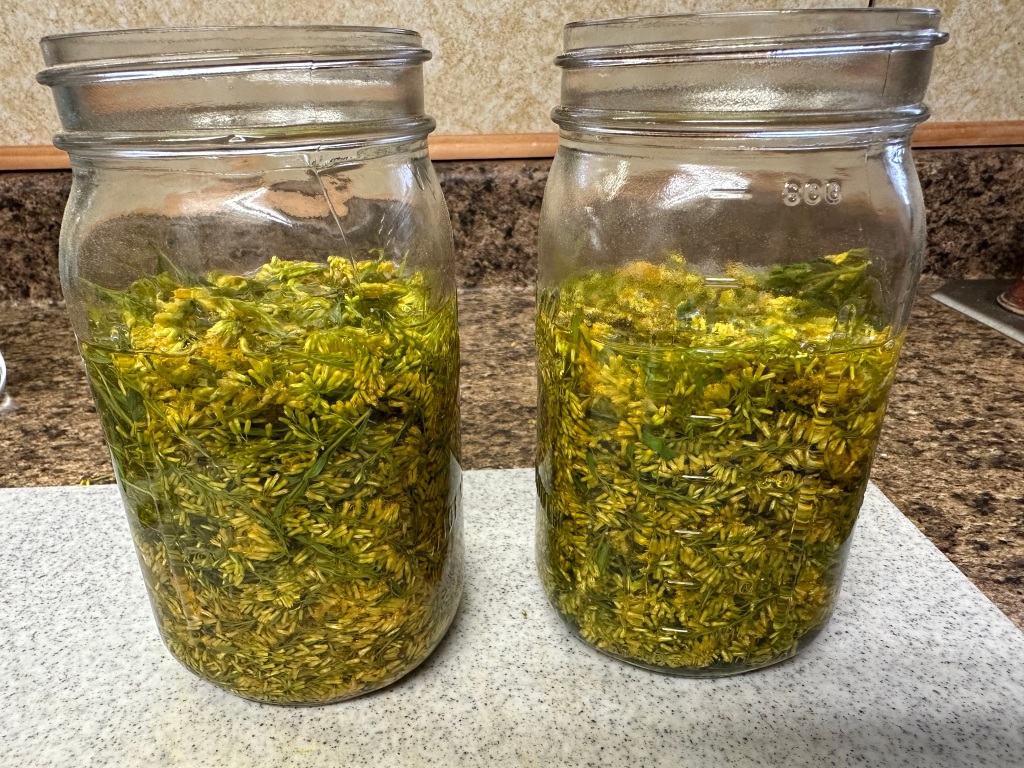
Add the chopped goldenrod to a clean glass jar. Pack it down as you fill the container about 3/4’s full of plant material.

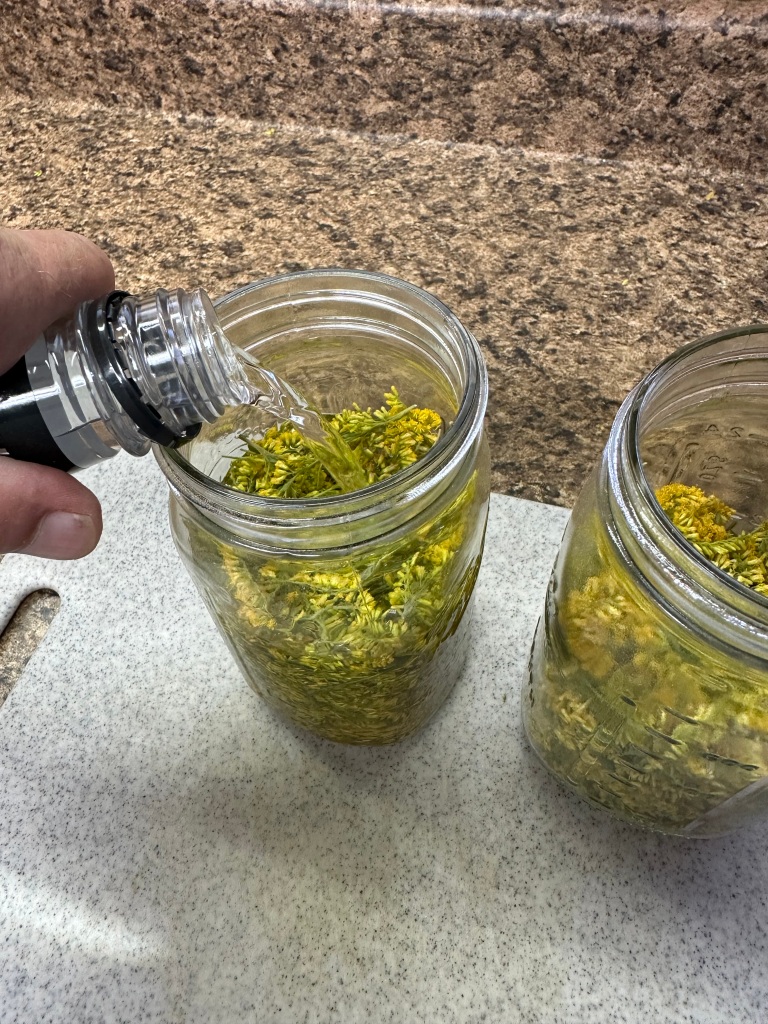
Pour enough alcohol into the jar to cover the chopped goldenrod. I used cheap vodka… because I’m cheap, and retired.

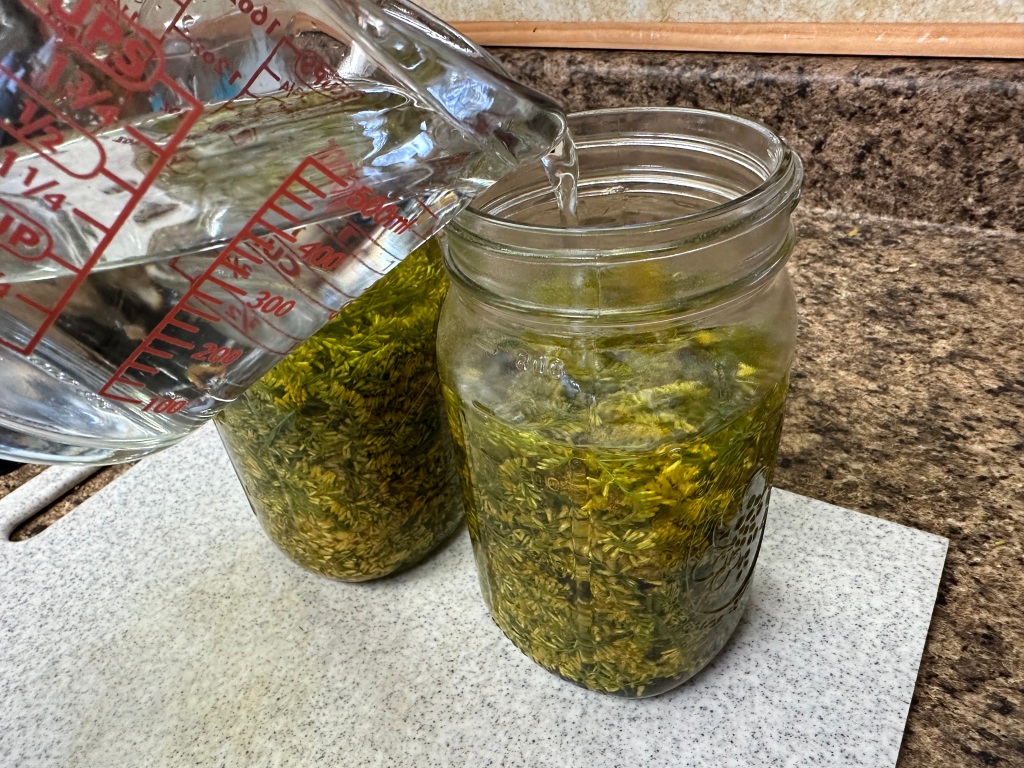
I remembered seeing someone top off the alcohol with water to fill the jar. They said some of the medicinal properties in goldenrod could only be extracted using water. I’m no expert herbalist, but I thought I’d give it a shot. I used filtered water from my Berkey water filter even though I have well water.

Seal the jar with a lid and label it with the date of production. Store it in a cool, dark cupboard. Shake the jar and contents every day or so if you remember… which I forget to do at times.

In about six weeks, the tincture can be strained and ready to use.

I mention that I’m far from a professional herbalist. I do have two friends who are highly accomplished in this field. If you’re interested in learning more from them, follow them at the links below:

Philip Winter – Twisted Vine Herbs and Anne-Marie Bilella- Forager Chick

Medicinal Use of Goldenrod

The usual disclaimer: I never give medical advice here. I’m not a doctor. Consult your physician for your health care needs. I have personally overcome health challenges using plant-based medicine. Your mileage may vary.

Goldenrod has been used for many years to help with allergy symptoms, sore throat, runny nose, itchy eyes, and colds and flu. It may also relieve toothache, sore muscles, inflammation and pain. Some claim antioxidants in the plant have anti-cancer properties.

Researching the benefits of goldenrod, I also discovered it shows promise for fighting kidney stones. This possibility alone makes me smile big! If you’ve never had a kidney stone, you won’t understand.

If you’ve personally found goldenrod to be helpful, drop us a line in the comments, please.

Keep Doing the Stuff of Self-Reliance,

~ Todd

P.S. – You can also keep up with the Stuff we’re Doing on TwitterPinterestYouTubeInstagram, and Facebook… and over at our Doing the Stuff Network.

P.P.S – If you haven’t done so already, be sure to check out the new Survival Sherpa School and smash that subscribe button at the top of the page!

Thanks for Sharing the Stuff!

Copyright © by Survival Sherpa: Content on this site (unless the work of a third-party) may be shared freely in digital form, in part or whole, for non-commercial use with a link back to this site crediting the author. All links in articles must remain intact as originally posted in order to be republished.

Categories: DIY Preparedness, First Aid, Herbal Remedies, Homeopathy | Tags: , , | Leave a comment

Off Grid Medic: Surviving Wilderness Emergencies When Definitive Care is Miles Away

by Todd Walker

Off Grid Medic: Surviving Wilderness Emergencies When Definitive Care is Miles Away ~ TheSurvivalSherpa.com

More and more people are getting back to nature to enjoy its beauty and benefits. The list of outdoor activities seems endless. With these pursuits comes risk of injury. Common injuries like scrapes, sprains, burns, bites, and blisters can turn serious in remote locations. I’ve had my share of bumps, bruises, stings, and close calls. Thankfully, none were life threatening… but could have turned sideways quickly.

Note: All injuries depicted look real but are not. If you’re queasy about blood and guts, you may want to reconsider reading the rest of this article.

A skill set I’ve neglected for years is wilderness first aid. Teaching students outdoor self-reliance skills at RISE spurred me on to train with one of the best Wilderness Emergency Care instructors available, Mark DeJong, owner of Off Grid Medic. We were also fortunate to have Michelle Pugh, an accomplished long distance hiker, author of two books of her adventures, and Off Grid Medic staff instructor teaching our class. Their style of teaching fits perfectly in my “Doing the Stuff” wheelhouse. You won’t sit and watch boring power points in a sterile environment. Courses are held where outdoor enthusiasts roam – the woods. Our class was hosted by Georgia Bushcraft, LLC.

Besides imparting real-world knowledge, Mark works his magical moulage abilities by transforming last night’s rib eye bone into a patient’s open fracture. These realistic injuries aren’t for shock value but to help students “train like you fight.” Discovering a bone protruding from the skin or an impalement in a training exercise will give you a clue as to how you’d respond in a real wilderness emergency.

Off Grid Medic: Surviving Wilderness Emergencies When Definitive Care is Miles Away ~ TheSurvivalSherpa.com

See what I mean? Some of Mark’s handiwork on “Dutch Oven” Bill.

Wilderness First Aid

Urban first responders are equipped with tools and reinforcements to get patients to definitive care within minutes typically. For wilderness rescuers, hospitals and doctors might be hours or days away. Environmental stressors, evacuation over rugged terrain, limited medical resources, and other unknown variables present unique challenges for patient care and treatment.

If you interested in professional training in wilderness emergencies, contact Off Grid Medic. Below are a few things to consider if you’re ever in the role of wilderness rescuer.

You’re Number One

You can’t rescue a victim if you step into a dangerous situation and become one yourself. Before rushing in, assess the situation, location of patient, and possible hazards; dead tree limbs overhead, steep/loose ground, freezing water, etc., etc. Take care of yourself and team before providing care.

As an example, use the Reach, Throw, Row, Go steps to protect yourself in an open water rescue.

  • Reach: Use when victim is close to shore line and can be reached with by hand, pole, paddle, etc. without having to enter the water.
  • Throw: Victim is too far away to be reached, throw a line, rope, PFD attached to rope, if the victim is conscious and able to grab the rope.
  • Row: Rescuers will use a boat/canoe/kayak if Reach and Throw isn’t an option. Get close enough to use Reach, Throw, or lift the victim into the craft.
  • Go: This is the last and least safe option for rescuers. It may be necessary due to the victim being unconscious or unable to grab a rope.

McGyver Mentality

Even if you are a medical professional, the wilderness changes the game. After your initial patient assessment, a typical first aid kit may not contain every item you’ll need in remote emergencies. Be prepared to improvise… a lot.

Off Grid Medic: Surviving Wilderness Emergencies When Definitive Care is Miles Away ~ TheSurvivalSherpa.com

Space blankets come in many styles. Buy good quality, sturdy blankets.

For a few more ideas on outside-the-box first aid items, this article of ours may help.

Besides a first aid kit, I’ll wager that you probably have the following items in your supplies. If not, consider adding them.

  • Emergency Shelter: Start with proper clothing for the rescuer, space blanket (not the cheap mylar sheets), control body temperature, body wrap for victim, shield from elements, signaling device (orange), etc.
  • Duct Tape: Wound closure (butterfly stitches), splints/wraps, slings, neck/head immobilization, fire starter, and uses too long to list here.
  • Ziplock Baggies: Exam gloves, wound irrigation, occlusive dressing for large burns, sucking chest wound taped on three sides, and more.
  • Rope/String: Splinting, litter bed, lashing a litter together, emergency shelter, etc.
  • Bandana/Cotton Material: Bandages, sling, splint padding, dressing, wet dressing, etc.
  • Metal Container: Disinfect water for hydration via boiling, cooking, warm liquids, hot/cold pack, etc.
  • Fire Kit: Emergency tinder, lighter, road flare (not joking), signaling, warm patient and rescuers, comfort, cooking (unexpected stay), water disinfection, etc.
  • Knife/Saw/Ax:  Tools to make other items for rescue (litter, fire, etc.), remove insect stinger, collecting firewood, etc.
  • Head Lamp: You’ll need your hands free to attend to a patient in dark conditions.
  • Compass: Preferable one with a mirror and magnifying lens – all kinds of uses beside navigation.

To Splint or Not to Splint

Sprains, strains, and closed fractures are not always distinguishable. Open fractures are easier to diagnose since the bone protrudes from the skin. A closed fracture may not show deformity in a limb. The rule of thumb is to splint if a limb is painful, swollen, or deformed – this applies to sprains and strains. Immobilize the limb(s) before the patient is evacuated.

Off Grid Medic: Surviving Wilderness Emergencies When Definitive Care is Miles Away ~ TheSurvivalSherpa.com

Makeshift splint by Mike and Jessica. Interesting note: I taught Mike middle school P.E. in 1985. Man, I’m old!

We learned to splint limbs with resources on hand and materials from the wilderness. Without a modern SAM Splint, you’ll have to get creative. Two sticks, cordage, and a shirt stuffed with leaves will pad and immobilize an arm or leg.

Off Grid Medic: Surviving Wilderness Emergencies When Definitive Care is Miles Away ~ TheSurvivalSherpa.com

SAM Splints are great to have in your pack.

Off Grid Medic: Surviving Wilderness Emergencies When Definitive Care is Miles Away ~ TheSurvivalSherpa.com

Mark demonstrating the B.U.F.F. splint – Big, Ugly, Fat, Fluffy – on Michelle.

Slings for an arm/shoulder/collar-bone injure have to offer support and keep the limb secured to the body. Through hands-on experimentation, my partner and I found that zipping her arm inside her light jacket created a snug fitting sling which was comfortable and warm. There’s more than one way to sling a limb.

Off Grid Medic: Surviving Wilderness Emergencies When Definitive Care is Miles Away ~ TheSurvivalSherpa.com

Another diy sling.

Transporting the Victim

Depending on location and terrain, rescue reinforcements may be far way or unable to respond in remote areas. You’re injured friend will have to be carried out. A makeshift litter can be made from poles and string.

Off Grid Medic: Surviving Wilderness Emergencies When Definitive Care is Miles Away ~ TheSurvivalSherpa.com

Happy people carrying a litter full of Casey.

Two Litter Options: 

  1. Large group of 6-8 people
  2. Small group with as few as 3 people with backpacks

Large Group: Cut two saplings about 8 feet long and sturdy enough to carry weight. Cut 5-6 sturdy cross pieces about 5 feet long. Position the two long poles parallel next to the victim. Place the cross poles under the long poles at intervals which support the head, mid back, hips, knees, and feet. Lash the poles together using square lashing or any knots to secure them in place. If time is an issue, or cordage is sparse, use a jam knot with two short pieces of bank line or paracord.

Off Grid Medic: Surviving Wilderness Emergencies When Definitive Care is Miles Away ~ TheSurvivalSherpa.com

Demonstrating square lashing and jam knot techniques.

Transfer the patient to the litter. Team members lift at the extended cross poles and walk.

Small Group: Use two saplings as above. If sturdy rope is available, wrap the rope around the poles to create a bed. The pole ends are tucked into the lower part of the shoulder straps of two backpacks. This allows two people, with proper fitted backpacks, to transport a victim.

Off Grid Medic: Surviving Wilderness Emergencies When Definitive Care is Miles Away ~ TheSurvivalSherpa.com

Two poles inserted in the backpacks straps to carry our patient on a rope litter. Obviously, they wouldn’t be facing each other if not in the class.

The culmination of our three-day, 20 hour training was a nighttime rescue. I mentioned that Off Grid Medic likes to keep it real for “train like you fight” scenarios. Mark and Michelle didn’t let up and provided excellent, realistic, hands-on training the entire weekend!

If you’re a camper, hiker, woodsman, or Scout leader, consider learning wilderness first aid. This is an entry-level course into the world of wilderness emergency care. Contact Mark for next-level courses and continuing education. I offer my highest recommendation to the Off Grid Medic team for their professionalism, knowledge, and real-world training.

Keep Doing the Stuff of Self-Reliance,

Todd

P.S. – You can also keep up with the Stuff we’re Doing on TwitterPinterestGoogle +YouTubeInstagram, and Facebook… and over at our Doing the Stuff Network.

P.P.S – If you find value in our blog, Dirt Road Girl and I would appreciate your vote on Top Prepper Sites! You can vote daily by clicking here or on the image below. Check out all the other value-adding sites while you’re there…

Thanks for Sharing the Stuff!

Copyright © by Survival Sherpa: In light of the recent theft of all my content by a pirate site, my sharing policy has changed. I do not permit the re-posting of entire articles from my site without express written consent by me. My content on this site may be shared in digital form (200 words or less) for non-commercial use with a link back (without no-follow attribute) to the original article crediting the author. All photos, drawings, and articles are copyrighted by and the property of Survival Sherpa. You are more than welcome to share our photos and articles on social media for educational purposes as long as you link back to the original article/photo with credit to the author.

Categories: Bushcraft, Camping, Doing the Stuff, First Aid, Medical, Preparedness, Self-reliance, Survival Skills | Tags: , , , | 1 Comment

16 Uses of Sticky Pine Sap for Wilderness Survival and Self-Reliance

by Todd Walker

16 Uses of Sticky Pine Sap for Wilderness Survival and Self-Reliance | TheSurvivalSherpa.com

Scavenging resources in a wilderness survival situation can turn up life-saving stuff. That’s why developing a possum mentality is vital!

Our ancestors walked our woodlands and learned to use the resources most modern outdoor enthusiast overlook. Essential woodland resources seem to be invisible to the modern eye. The stuff you’ve got packed in your woodcraft/bushcraft kit or bug out bag are consumable. You’ll eventually use up that roll of duct tape… or, more than likely, you forgot to pack it.

Not a problem. Pine trees produce a sticky substitute with superior benefits!

Learning to identify and use natural resources has gotten me out of many sticky situations in the woods. Pardon the play on words as we explore the many uses of this tacky, amber-colored pine sap I call Jewel of the Woods!

Collecting Sappy Jewels

Pine trees secrete resin as a defense to close wounds from insects or other forces. The sap provides a protective layer or sealant over the injury . The sap hardens forming an amber glob which turns dark in color over time. On fresh wounds, you’ll notice a whitish layer of sap covering the damaged area. With time, large clumps form making it easier to harvest.

Harvesting fresh resin can become a sticky situation. The fresher the glob, the more sticky and pliable. On dedicated Jewel of the Woods harvesting trips, I carry a grub knife, one I don’t mind getting covered with resin. To remove sap from my good blades in the woods, I use a bit of Everclear (190 proof) from my flask on a piece of cloth.

For hardened resin, poke a sharp object (grub knife or sharp stick) into the base of the glob and pry it loose. It’ll break off and fall into your hand or container underneath. That’s when you’ll notice the crystalized form inside which resembles a beautiful piece of amber stone.

For hard-to-reach spots high in trees, my friend Joe at Feral Woodcraft shares his clever resin harvesting tool.

Now that you’ve gathered a fair amount, what’s this sticky stuff good for?

A.) Self Aid

  • Pine sap properties include: antiseptic, astringent, anti-inflammatory, antibacterial
  • Treat wounds – apply it to cuts like you would super glue. Follow first-aid protocol for cleaning/flushing first.
  • Stop bleeding – apply a soft glob (heat if necessary) to help stop bleeding.
  • Treat skin rashes and eczema with ointments,tinctures, and salves. For tinctures, use 190 proof Everclear since resin won’t dissolve with watered down alcohols.
  • Chew softer sap straight off the tree like a gum for sore throats and colds. You could pre-make “gum” with these ingredients: bees-wax, pine sap, and honey.

B.) Glue/Epoxy – Pine Pitch

  • Turn pine resin into pitch sticks.
  • Hafting arrowheads, fletching arrows and gluing other primitive tools and weapons.
  • Waterproof boot seams, canoes, and containers.
  • Patch holes in tents and tarps.
  • Pretty much any thing you need to glue or patch in the woods, pine pitch is the product.

C.) Candling Device

  • Place globs of dried resin in a fatwood torch to extend its burn time.
  • Pitch sticks, described above, can be used as a makeshift candles.
  • Melt sap and soak a cotton bandana or rag wrapped around a stick for a torch.
  • Melted or liquid sap poured over a dried mullein stalk works as candle/torch.

backyard-bushcraft

Mullein torch

D.) Fire Craft

  • Fire is life in a wilderness survival scenario. Even on weekend camping trips, fire offers core temperature control, cooking, and hot cocoa! Resin is your secret weapon to starting and keeping a fire going in wet conditions. Anyone who’s used resin-rich fatwood in rainy conditions appreciates its important role in fire craft.

  • Resin is highly flammable. Once lit, you can dry marginal tinder and small kindling.

16 Uses of Sticky Pine Sap for Wilderness Survival and Self-Reliance | TheSurvivalSherpa.com

  • Harvest liquid sap into a container from a fresh cut in a pine tree to add to a makeshift torch. Secure the container under the exposed bark to collect the sap. Use this liquified sap as torch fuel.

Once you learn to identify this sticky life-saver, you’ll find it difficult to walk past a pine tree without scanning for this Jewel of the Woods!

Keep Doing the Stuff of Self-Reliance,

Todd

P.S. – You can also keep up with the Stuff we’re Doing on TwitterPinterestGoogle +, YouTube, Instagram, and Facebook… and over at the Doing the Stuff Network.

P.P.S – If you find value in our blog, Dirt Road Girl and I would appreciate your vote on Top Prepper Sites! You can vote daily by clicking here or on the image below. Check out all the other value-adding sites while you’re there… 

Thanks for Sharing the Stuff!

Copyright: Content on this site (unless the work of a third-party) may be shared freely in digital form, in part or whole, for non-commercial use with a link back to this site crediting the author. All links in articles must remain intact as originally posted in order to be republished. If you are interested a third-party article, please contact the author directly for republishing information.

Categories: Bushcraft, Camping, Doing the Stuff, First Aid, Preparedness, Self-reliance, Survival Skills | Tags: , , , , , | 89 Comments

Top 31 Uses for “Killer” Cotton in Core Temperature Control

by Todd Walker

Top 31 Uses of “Killer” Cotton for Core Temperature Control | www.TheSurvivalSherpa.com

Cotton got a bad rap with the advent of modern synthetic outdoor wear. I love the properties of my synthetic base layers. In cold environments, I wear synthetic wicking material against my skin. I’ve also been known to wear…. wait for it… fleece! But I’m more a fan of natural fibers like cotton and wool.

Being modern is not always better. While some situations require a blend of new and old school clothing, nothing beats wearing my favorite flannel shirt as I brew my morning coffee on an open fire at the Dam Cabin.

IMG_0824

Abby is fond of fire too

In fact, besides being comfortable, cotton can be a life-saver! Wilderness survival is all about Core Temperature Control and cotton plays a vital role.

Here are my top 31 ways Killer Cotton can be used to control your core temperature and effect your Wilderness Survival Priorities…

Priority #1: Self Aid

Self aid is your number one priority in a wilderness survival scenario. If you can’t move effectively, your chances of survival plummet. If you’re a minimalist gear junky like me, cotton material excels to meet this survival priority.

self-aid-10-piece-kit

Shemaghs make great slings.

I’m not suggesting you not carry a first aid kit. That’s completely your choice. There’s a difference in first aid kits and prescribed medications. Carry all medicines you require. But for the most common injuries you’ll encounter in a wilderness scenario, your 10 Piece Kit is your first aid kit.

  • Bandaging
  • Sling
  • Wound compress and pressure dressing
  • Cleaning
  • Padding for splints
  • Cover burns and keep moist
  • Straining medicinals in the field
  • Hot/Cold wrap
  • Tourniquet as a last resort

Priority #2: Shelter

Clothing is your first layer of cover.

  • Yes. I wear this “killer” as mid-layers in the winter! Be smart while wearing cotton by following the C.O.L.D. acronym…
  1. C – Keep cotton CLEAN
  2. O – Avoid OVERHEATING
  3. L – Wear loose LAYERS to create dead air space
  4. D – Keep cotton DRY

Priority #3: Fire

Top 31 Uses of “Killer” Cotton for Core Temperature Control | www.TheSurvivalSherpa.com

My buddy Joel making char cloth in his stainless steel water bottle. Photo credit: Iris Canterbury, The Pathfinder School

  • Char cloth for your next fire
  • Makeshift wick for tallow or other oil lamps
  • While not clothing, many folks use cotton balls/pads and Vaseline as fire starters
  • Wind screen to start a fire

Priority #4: Water/Food

Top 31 Uses of “Killer” Cotton for Core Temperature Control | www.TheSurvivalSherpa.com

Pre-filtering with a bandana into a metal container. Photo credit: Iris Canterbury, The Pathfinder School

  • Container for foraged food and other resources
  • Waxed cotton material can be used in water collection
  • Pre-filter to strain larger “floaties” while collecting water from outdoor sources. This decreases the chances of clogging commercial filters. Bandanas won’t filter out micro organisms. Boiling is the best way to kill these nasties.
  • My friend Joshua over at The 7 P’s Blog has a great tutorial on building a DiY Tripod Water Filter using… you guessed it, cotton.
  • Collect and absorb moisture from dew and plants
  • Insulator to grab hot pots off the fire
  • Use it as a tea/coffee ball

Priority #5: Signaling

Pack at least one orange bandana in your kit.

  • Orange bandanas used alert rescuers
  • Strips hanging as trail markers

Bonus Uses for Cotton

  • Toilet paper – ever tried wiping your business end with synthetic base layers?
  • Feminine hygiene
  • Personal hygiene, wash cloth, cleaning your teeth
  • Cool looking dew rag
  • Handkerchief – Yup.

Cotton can be a killer. But as you can see, it can also save your life.

Keep Doing the Stuff of Self-Reliance,

Todd

P.S. – You can also keep up with the Stuff we’re Doing on TwitterPinterestGoogle +, YouTube and our Facebook page… and over at the Doing the Stuff Network on PinterestGoogle +, and Facebook.

P.P.S – If you find value in our blog, Dirt Road Girl and I would appreciate your vote on Top Prepper Sites! You can vote daily by clicking here or on the image below. Check out all the other value-adding sites while you’re there…

Thanks for Sharing the Stuff!

Copyright: Content on this site (unless the work of a third-party) may be shared freely in digital form, in part or whole, for non-commercial use with a link back to this site crediting the author. All links in articles must remain intact as originally posted in order to be republished. If you are interested a third-party article, please contact the author directly for republishing information.

Categories: Bushcraft, Camping, Doing the Stuff, First Aid, Gear, Preparedness, Self-reliance, Survival, Survival Skills | Tags: , , , | 9 Comments

DON’T PANIC! A Layperson’s Guide to Surviving Common Wilderness First Aid Emergencies

guide-to-surviving-common-wilderness-emergencies

By Kathleen Starmer, OYOInfo.net

As a rule, I don’t take life guidance from a work of science fiction. But when it comes to The Hitchhiker’s Guide to the Galaxy, I make an exception. Whether you’re dealing with the sudden onset of a blizzard or an alien invasion, you won’t be of use to anyone if you allow yourself to be seized by the sinister tentacles of panic. Take a breath. Get all zen. Channel your inner monk. NOW you’re in the proper mindset to handle an emergency situation. Let’s proceed!

DISCLAIMER: Before we get into the meat of this article, let me say this loud and clear: I am not a medical professional. In fact, let’s all say that together, shall we? “Kathleen is not a medical professional.” The author accepts no liability for anything that happens to anyone who follows the advice in this article. The information supplied herein is strictly for informational purposes, and will hopefully serve to incite you to sign up for a Wilderness First Aid course so that you can enjoy The Great Outdoors in the safest manner possible. Glad we got that squared away.

Presenting (drum roll, please) three—count ‘em: THREE!—of the most common emergencies you’re likely to confront in a wilderness situation, as well as some suggestions on how best to handle said emergencies with only a basic level of training.

Oh, My Aching Back…or Foot…or…: Muscle Strains and Sprains

guide-to-surviving-common-wilderness-emergencies

“Hold still! I’m trying to help!”

Ah, the disappointment of a twisted ankle one day into your week-long backpacking trip! Not surprisingly, the treatment for strains and sprains in exactly the same on the trail as it is on the soccer field: Rest, Ice, Compression, and Elevation (RICE).

The “rest” part is fairly easy. If your schedule allows, take a day or two to chill out and give the injured muscle, tendon, or ligament a break. Ice can be a bit trickier. I, for one, have never hauled frozen blocks of water into the woods, but you can improvise by immersing the sore area in a cold stream for short intervals, filling a plastic bag with cold water and securing it to the injury, or even by wrapping a wet bandana around the injury and letting the breeze perform some evaporative cooling. That wet bandana can also do double-duty as a compression bandage, or you could break open the first aid kit and use an elastic wrap. Lastly, if the injury is to one of the person’s limbs, prop the offending limb on a backpack, a fallen log, or whatever handy item you can find to decrease swelling and speed recovery.

You can also offer anti-inflammatories to the patient if they wish to self-administer, and there are some fancy-schmancy taping techniques you can learn about in a Wilderness First Aid Course. Taping is especially useful if the patient needs to keep moving before they’ve fully recovered. Plus, it looks bad-ass.

“It’s Just a Flesh Wound”: Abrasions and Lacerations

guide-to-surviving-common-wilderness-emergencies

Boo boos aren’t only for the wee ones when you’re on the trail

Boo-boos just seem to be a way of life in the outdoors. In fact, lots of folks don’t consider it a successful outing if they don’t come home with at least one “war wound.” But just because skin injuries are common doesn’t mean you should get all devil-may-care about them. You can minimize the risk of complications down the line by following these simple tips.

First of all, if there is significant blood loss, staunch the flow. Just a little bit of blood is fine—in fact, it can even be good, as it will clean out the wound. Otherwise, apply pressure to the wound with a clean bandage. You can learn proper technique in any basic first aid class. Major blood loss, it goes without saying, is beyond the scope of this article.

The second thing you want to do is prevent infection. Since we’re addressing injuries in the boonies, chances are, an open wound is contaminated with nasties. You can use the alcohol wipes found in your first aid kit to clean around the wound, but it’s best not to use those wipes on broken skin because their harsh nature might actually further damage tissue. Your best bet is to irrigate the wound with clean water. Either use copious amounts of flowing, potable water, or if you’re super-prepared, use a special irrigation syringe. In the unfortunate incident of embedded debris, you can use sterilized (read: toasted in your campfire) tweezers to carefully remove it. Now, if we’re talking outright impalement, that’s a whole other issue…again, best addressed by taking a Wilderness First Aid course. Gee, you knew I was gonna say that, didn’t you?

Lastly, you want to promote wound healing. This is simply a matter of applying a proper dressing. Bonus points for elevating the injured area to decrease swelling.

You’re Giving Me a Heart Attack: Cardiac Issues

guide-to-surviving-common-wilderness-emergencies

Could be a heart attack; could be a bad cheeseburger. Play it safe and treat as a cardiac event.

You might be surprised to learn that heart attacks are among the top three causes of wilderness fatalities. It’s certainly not as “sexy” as a dramatic fall from a canyon wall, but a cardiac event has the potential to be just as deadly. So do yourself a favor: get in shape before you head out for that three-day backpacking adventure. Step away from the deep fried, gravy drenched chocolate cheesecake. Have a doctor give you the all-clear before you embark on that 14,000 ft summit hike. Do everything you can to stack the deck in your favor.

However, even the best-laid preparations can go awry, so it behooves you to know the signs of a cardiac emergency. While it’s true that less-serious conditions can cause some of these symptoms, when you’re in the wilderness, treat any patient with the following signs as though they are experiencing a heart attack until proven otherwise by a medical professional. Better safe than sorry. According to the American Heart Association (AHA), the most common symptoms of heart attack include:

  • Chest discomfort, typically in the center of the chest and lasting for several minutes. It may feel like painful pressure, squeezing, or a sense of “fullness.”
  • Discomfort in other areas of the upper body, including one or both arms, the back, neck, jaw, or even the stomach.
  • Shortness of breath that is not due to exertion, with or without chest discomfort.
  • Other signs could include breaking out in a cold sweat, nausea, vomiting, light-headedness/dizziness, or an impending sense of doom.

(Although the most common symptom of a heart attack for women is the classic chest pain shown in the movies, females are also more likely to experience the symptoms I’ve indicated in italics above.)

If you have any reason to suspect someone is your wilderness party is experiencing a cardiac emergency, sit them down, give them 325 mg of uncoated aspirin to chew for about 30 seconds and swallow, and make them comfortable. Ask if they are carrying nitroglycerin tablets. If they are, give the tablet container to them so that they can self-administer one dose. Keep them calm and quiet. If you have cell reception, call for emergency rescue by qualified professionals. If you are out of communication range, pick the fittest person in your party to hoof it back to civilization and bring help ASAP. A heart attack is serious business, and there are all sorts of special situations and qualifiers for this dilemma; your best bet is to get your Wilderness First Aid certification before your next outing so that you’ll know the proper course of action for your particular scenario.

So there you have it! A quick-n-dirty layperson’s guide for dealing with common wilderness emergencies. And I know I’ve said it 127 times already, but once again, with feeling: sign up for a Wilderness First Aid course today! Your life—or at least your comfort—may depend on it!

Author Bio:

guide-to-surviving-common-wilderness-emergencies

After over a decade of working as an academic ecologist and another 13 years at NASA, Kathleen Starmer created http://OYOinfo.net with the intent of bringing practical emergency preparedness to The Every(wo)man. She is particularly concerned with helping people who live in urban areas deal with the fallout from climate change-related disasters. You can follow Kathleen on Facebook (http://www.facebook.com/oyoinfo), Twitter (http://twitter.com/oyoinfo), Instagram (http://instagram.com/oyoinfo), and Pinterest (http://www.pinterest.com/oyoinfo). You can also amuse yourselves with her amateur video production skills on YouTube (http://www.youtube.com/channel/UCmamAXUReXQyKZOX-jf6wrQ); encouraging emails may be sent to inquiry@oyoinfo.net (mailto:inquiry@oyoinfo.net). 

—————————–

P.S. Don’t forget to register to win a $75 gift certificate from Trayer Wilderness. The giveaway ends November 3rd! Click here to enter.

Categories: Camping, First Aid, Medical, Preparedness | Tags: , , | 7 Comments

47 Creative Uses for Self-Aid in Your 10 Piece Kit

by Todd Walker

Fall is a season where many of us head out to enjoy the outdoors. Crisp air, colorful leaves, deer in rut, and clear mountain streams lure us to nature. Unfortunately, there are times when things go sideways on day hikes and canoe trips. When they do, you’ll need knowledge, skills, and resources to get home safely.

self-aid-10-piece-kit

The goal of wilderness survival is simple… to effect self-rescue or be found alive. Even “minor” injures in a 72 hour scenario can decrease your chances of meeting that goal.

Self-aid should become a top priority on your skills list. Why?

You’re likely to come in contact with sharp stuff, hot stuff, slippery stuff, and/or stinging stuff on outings. I rarely leave the woods without one of these most common wilderness injuries:

  • Cuts/Abrasions
  • Burns
  • Breaks/Strains/Sprains
  • Bites/Stings
  • Blisters

You may choose to carry a first-aid kit to treat these injuries. That is a smart option. Let me state upfront, if you require daily medication for health issues, by all means, be sure to pack enough of your meds.

Can your 10 piece kit double as a self-aid/first-aid kit? Indeed it can!

First, here are the 10 essential items that should go with you on every trip to the woods…

The 10 C’s of Survivability (10 Piece Kit)

  1. Cutting tool
  2. Combustion device
  3. Container
  4. Cover
  5. Cordage
  6. Cotton bandana
  7. Cargo tape
  8. Cloth sail needle
  9. Candling device
  10. Compass

Look beyond the obvious uses for these 10 items – shelter, fire, navigation, water, etc., etc. With a little creativity, your 10 C’s can effectively treat each of the most common injuries in a 72 hour wilderness survival scenario.

Here’s how…

(Adapted from Brian Manning’s hand-out and Jason Hunt’s class on wilderness self-aid at The Pathfinder School)

Cuts and Abrasions

  1. Cutting tool – use knife to remove debris from wounds
  2. Combustion device – sterilize tools
  3. Container – irrigate and wash wound with water
  4. Cover – (drum liner, plastic tarp) bandage and cover wounds
  5. Cordage – tourniquet as a last resort
  6. Cotton bandana – wipe/clean wound, bandages, dressings, tourniquet
  7. Cargo (duct) tape – all-purpose Band Aid, DIY butterfly Band Aid
  8. Cloth sail needle – remove debris from wound and stitch/suture in extreme cases
  9. Compass – good compasses have a magnifying lens that can be used to inspect wounds closely

self-aid-10-piece-kit

Using your knife to cut a duct tape butterfly bandage. Keep your knife outside the Triangle of Death. You don’t need another wound.

self-aid-10-piece-kit

Pull the wound together after securing one side of the bandage to the skin. The cut should be pinched together slightly. This is a temporary fix.

self-aid-10-piece-kit

Shemaghs make great slings. Get one that is 100% cotton.

Breaks, Sprains, and Strains

  1. Container – water bottle used as a hot or cold pack
  2. Cordage – splint wraps, slings (add padding)
  3. Cargo tape – immobilize limbs by taping makeshift splints in place
  4. Cotton bandana or shemagh – slings, splint wraps, padding under splints (tie smaller bandanas together for longer slings)
  5. Cover (drum liner) – water collection (cold/hot pack), splint wraps, slings

self-aid-10-piece-kit

If using a folding saw or machete as a makeshift splint, tape the cutting edge before taping it to your limb.

self-aid-10-piece-kit

Immobilizing a limb. Add padding under your splint before taping.

Burns

  1. Cutting tool – remove debris and clean burns
  2. Container – use to pour water for irrigation, stop the burning process, and cold pack
  3. Cotton bandana – cover burn loosely, retain moisture on burn
  4. Cloth sail needle – clean burns
  5. Cover (drum liner) – cover and protect burns
  6. Compass – mirror and magnifying lens used to inspect burns and hard-to-reach areas on the body

self-aid-10-piece-kit

Bites and Stings

  1. Cutting tool – knife to scrape/remove stingers and splinters
  2. Container (water bottle) – cold compress to reduce swelling, irrigation – in the case of venomous snake bites, keep location cool, immobilize, and get medical help ASAP.
  3. Cargo tape – DIY Band Aids, bandage tape, remove stinger
  4. Cloth sail needle – remove stinger or splinter
  5. Compass – mirror and magnifying lens used to locate and inspect hard to reach areas on the body (i.e. – tick removal and bites)
  6. Cotton bandana – Band Aid/bandage material, pressure dressing

self-aid-10-piece-kit

Sighting mirror on compass used to inspect embedded tick on the back of the calf in the dark. A headlamp frees both hands for the task.

self-aid-10-piece-kit

Cold water in a water bottle

Blisters

  1. Cargo tape – cover/shield developing hot spots
  2. Cloth sail needle – pop blister at base to drain
  3. Container (water bottle) – irrigate and clean area

Additional self-aid uses for the 10 piece kit

  • Your candling device (head lamp/flashlight) can be used for inspection and treatment at night with all the common injuries.
  • Metal water bottle and cup is useful for preparing infusions, decoctions, and sterilization of your knife or needle before cleaning wounds.
  • Besides using a tarp/emergency space blanket for core temperature control (CTC), these items can also serve as a stretcher, water collection device, and sling material.
  • Use your pack for immobilization and elevating injured limbs and or dealing with shock.
  • And of course, a proper fire kit affords you the ability to maintain CTC, heat natural medicinals, and heat compresses.

Your 10 piece kit should always accompany you on wilderness adventures. As you can see, these multi-purpose tools have many redundant uses. Heck, the 10 C’s of Survivability should go with you no matter where you’re headed.

Keep Doing the Stuff of Self-Reliance,

Todd

P.S. – You can also keep up with the Stuff we’re Doing on TwitterPinterestGoogle +, YouTube, Instagram, and Facebook… and over at the Doing the Stuff Network.

P.P.S – If you find value in our blog, Dirt Road Girl and I would appreciate your vote on Top Prepper Sites! You can vote daily by clicking here or on the image below. Check out all the other value-adding sites while you’re there… 

Thanks for Sharing the Stuff!

Copyright: Content on this site (unless the work of a third-party) may be shared freely in digital form, in part or whole, for non-commercial use with a link back to this site crediting the author. All links in articles must remain intact as originally posted in order to be republished. If you are interested a third-party article, please contact the author directly for republishing information.

Categories: Bushcraft, Camping, Doing the Stuff, First Aid, Medical, Self-reliance, Survival, Survival Skills | Tags: , , | 40 Comments

Top 13 Uses for Pine Trees in Woodcraft and Self-Reliance

by Todd Walker

Feel the nip in the air? Summer fades and autumn arrives to transform the forest canopy into an artist’s palate. Hunters, campers, and hikers are gearing up to enjoy the great outdoors.

Winter is on the way and many of your favorite edible and medicinal plants will fade into the landscape. But trees, they’ll stick around all four seasons. Now is the time to locate these valuable resources before their foliage covers the forest floor.

You may have a favorite season to tramp in the woods. For me, it’s Fall, Winter, Spring and Summer! Journal the location of these valuable resources. With the exception of evergreens, the only obvious identifying characteristics in the winter months will be the tree bark.

In this 5 Part Series, we’ll cover my top 5 useful trees found in the Eastern Woodlands; more specifically, in my home state of Georgia. These may be in your neck of the woods too. First up, a tree that is ease to identify year round.

pine-tree-uses-self-reliance

Pine (genus Pinus)

Let’s start with North America’s most familiar and successful conifer, pine trees. Whether you’re from the south or not, you know a pine when you see one.

There are 36 pines in North America to choose from. To narrow down the species, count the needles. The Eastern White Pine (Pinus strobus) is the only species with 5 needles in the fascicle sheath (the paper-like sheath surrounding the base of the needles). I’m just south of their natural range and haven’t had much experience with this variety. This tree is touted as the king of Vitamin C. But all pines are useful medicinally.

Self-Aid

Medicinal Properties include: antiseptic, astringent, inflammatory, antioxidant, expectoranthigh in Vitamin C for colds – flu – coughs, congestion, and even scurvy. Shikimic acid, the main ingredient in Tamiflu, is harvested from pine needles in Asia.

A.) Pine Needle Tea: Drink a cup of pine needle tea to extract the useful stuff when you feel flu-like symptoms in your body. More research can be found here.

How to Make Pine Needle Tea

Add a few pine needles to a cup of boiled water (Don’t boil the needles in the water as this will release un-tasty turpenes). Allow to steep for 3 to 5 minutes. Add natural sweetener if you like. I prefer pine needles only for a Vitamin C boost!

B.) Pine Bark Band Aid: The inner bark can be fashioned as an antiseptic Band Aid for cuts and scraps. Apply to wound and secure with duct tape, bandana, or cordage.

Inner bark Band Aid from the pine tree

Inner bark Band Aid from a pine tree

C.) Pine Sap/Resin: This sticky sap can also be used to cover wounds, blisters, and burns. Collect hardened sap from a wounded tree and heat it to make it pliable.

Mowers scared this tree on a power line. The white streaks are pine sap. Older sap is easier to collect when it forms a amber "ball" at a wound.

Mowers recently clipped this tree on a power line. The white streaks are pine sap. Older sap is easier to collect when it forms an amber “ball” at a wound.

D.) Pine Pollen: The yellow pine pollen that blankets the south in the spring is actually beneficial, not only for pine tree reproduction, but also for boosting our energy levels with small levels of testosterone.

Arthur Haines describes on his YouTube channel how pine pollen provides multiple avenues of protection against radioactive cesium. The endogenous antioxidants that are promoted by pine pollen are protective of DNA against radioactive particles.

Woodcraft Uses

E.) Bug Dope: “Nussmuk” (George Washington Sears) described his effective insect repellent in the North Woods with its main ingredient being pine resin. Once applied, a bronze protective film gave his skin weeks of protection from pesky biting insects.

Woodcraft and Camping by "Nessmuk"

F.) Firecraft: Fat lighter’d (fatwood, lighter wood, fat lighter, pine knot) is in every fire kit I own. It’s plentiful in Georgia and hard to beat as a natural fire starter/extender – especially in wet conditions.

Shavings from fatwood will ignite with a ferrro rod.

Shavings from fatwood will ignite with a ferrro rod.

G.) Pine Bark Bacon: Inner bark is edible . Check out this woodsman at Survival Topics frying pine bark like bacon!

H.) Core Temperature Control: Debris shelter roofing, pine bough bed for insulation against conductive heat lose, shelter construction,

I.) Pine Pitch Glue: Used for hafting arrowheads, fletching arrows, patching holes in tarps, seal containers, fire extender, waterproofing equipment – really, any stuff that needs adhesive.

J.) Illumination: Fat Lighter’d torches are simple to make and adds light to your camp or night-time trek.

Fatwood torch | www.TheSurvivalSherpa.com

K.) Hugelcultur: Dead wood in hugelcultur beds acts as a water retention sponge to help build food independence and self-reliance. Want to build one? One of our Doing the Stuff Network members shows you how Here.

L.) Signaling: To alert rescuers, a pre-made signal fire built with green pine boughs on top will generate enough white smoke to be seen for miles.

M.) Firewood: Burning pine on your campfire won’t produce BTU’s like hardwoods, but will keep you warm and cook your coffee. Plus, piney forests are littered with an abundance of dead limbs for fuel. The carpet of dead needles can be gathered for tinder material.

The lowly pine is listed first in our series for a reason. As you can see, its uses are many… too many to list here! Please add to the list in the comments anything I missed (I always miss something) to help us learn from each other.

Next up in the series: White Oak.

Keep Doing the Stuff of Self-Reliance,

Todd

P.S. – You can also keep up with the Stuff we’re Doing on TwitterPinterestGoogle +, YouTube, Instagram, and Facebook… and over at the Doing the Stuff Network.

P.P.S – If you find value in our blog, Dirt Road Girl and I would appreciate your vote on Top Prepper Sites! You can vote daily by clicking here or on the image below. Check out all the other value-adding sites while you’re there… 

Thanks for Sharing the Stuff!

Copyright: Content on this site (unless the work of a third-party) may be shared freely in digital form, in part or whole, for non-commercial use with a link back to this site crediting the author. All links in articles must remain intact as originally posted in order to be republished. If you are interested a third-party article, please contact the author directly for republishing information.

Categories: Bushcraft, Camping, Doing the Stuff, First Aid, Natural Health, Permaculture, Self-reliance | Tags: , , , , , , | 25 Comments

How to Make Lucky Sherpa Plantain Salve

by Todd Walker

how-to-make-lucky-sherpa-plantain-salve

When you’re Doing the Stuff of self-reliance, you’ll have the scars to prove it!

There seems to be no end to the things that attach to and attack my skin. Ticks, chiggers, cuts, burns, and poisonous plants seem to find me in the woods and backyard. My go to herb to treat these nasties that slip past my defenses is plantain. Chew a leaf of two and apply it to the area.

But what if plantain isn’t available?

Today is your lucky day!

I want to share with you an all-natural DIY ointment you can conveniently carry while practicing your Doing the Stuff skills. No need to chew the weed into a spit poultice. Just open the container, apply, and heal! I pack Lucky Sherpa Salve in all my kits now. It’s on the front row in my herbal medicine cabinet too.

There are store-bought salves available with ingredients you can’t pronounce. I like to know exactly what goes on (and in) my skin. Plus, I’m a cheap Doer of the Stuff.

Here’s how to create your own luck…

Lucky Sherpa Salve Recipe

how-to-make-lucky-sherpa-plantain-salve

  • 3/4 cup of coconut oil
  • A handful of fresh plantain leaves
  • 1 ounce of beeswax
  • 2 Tbs of local honey
  • 1 tsp of Vitamin E oil
  • 2 Tbs of Almond oil (optional)
  • 8 drops of Tea Tree essential oil (optional)
  • 8 drops of Peppermint essential oil (optional)

How to Make Your Own

This is a topical recipe for external use only.

I’ve been battling a cyst for a while now. Plantain is an effective drawing agent. However, it grew tiresome traipsing into the yard after showers looking for fresh plantain. No one is more thankful for this convenient salve than DRG!

In a hurry to treat the cyst, I whipped up a batch. Gather a large handful of plantain leaves, broad leaf or narrow leaf will both work. The narrow leaf variety is plentiful in my area.

Place the harvested weed into a blender with a 1/2 cup of virgin coconut oil. Blend until it turns into a green liquid. I added two tablespoons of almond oil to help liquefy the mixture. It should look like a dark green smoothie when properly mixed.

how-to-make-lucky-sherpa-plantain-salve

Scrape the sides to get it all!

Pour the mix into a pan and place over low heat for 30 to 45 minutes to infuse the good stuff with the oil. Stir the simmering pot occasionally.

After the concoction is infused, strain the mix through cheesecloth over a wire strainer into a clean boiler. I twisted the cheesecloth into a ball and squeezed it with tongs to extract the infused oil quickly.

how-to-make-lucky-sherpa-plantain-salve

Place the pot of strained oil back on low heat. Add one ounce of grated beeswax to the mix. Beeswax is flammable. Keep the heat low or melt the wax in a double boiler before adding it to the plantain oil. Now add two tablespoons of local honey and one teaspoon of Vitamin E oil.

how-to-make-lucky-sherpa-plantain-salve

Once the beeswax is melted, remove from heat and stir in the essential oils (optional). This step isn’t necessary. I added Tea Tree and Peppermint essential oil because of their healing properties. Tea Tree oil is also an effective insect repellent.

Test the consistency by placing a drop on a plate or wax paper and place it in the fridge for a few minutes. If it’s too thin after cooling, add more beeswax. Too thick, add oil until it’s right for you.

how-to-make-lucky-sherpa-plantain-salve

An eclectic mix of containers for my Lucky Sherpa Salve

Use your Possum Mentality and round-up several containers with lids. Pour the liquified concoction into the clean containers and allow the mix to solidify. This recipe makes about 12 ounces of salve.

Benefits of Lucky Sherpa Salve Main Ingredients

Selecting ingredients for any recipe will determine the quality of the product. Start with the best stuff nature has to offer. Here are the benefits of my ingredients.

Plantain

Plantain may be the best utility player in the world of wild weeds. Check out plantain’s healing properties here.

Coconut Oil

This natural powerhouse contains super benefits.

  • Anti-bacterial (kills bacteria that cause ulcers, throat infections, urinary tract infections, gum diseases, and other bacterial infections)
  • Anti-carcinogenic (coconut oil has antimicrobial properties so it effectively prevents the spread of cancer cells and enhances the immune system)
  • Anti-fungal (kills fungi and yeast that lead to infection)
  • Anti-inflammatory (appears to have a direct effect in suppressing inflammation and repairing tissue, and it may also contribute by inhibiting harmful intestinal microorganisms that cause chronic inflammation.)
  •  Anti-microbial/Infection Fighting (the medium-chain fatty acids and monoglycerides found in coconut oil are the same as those in human mother’s milk, and they have extraordinary antimicrobial properties. By disrupting the lipid structures of microbes, they inactivate them. About half of coconut oil consists of lauric acid. Lauric acid, its metabolite monolaurin and other fatty acids in coconut oil are known to protect against infection from bacteria, viruses, yeast, fungi and parasites. While not having any negative effect on beneficial gut bacteria, coconut oil inactivates undesirable microbes.)
  • An Antioxidant (protects against free-radical formation and damage)
  • Anti-parasitic (fights to rid the body of tapeworms, lice and other parasites)
  • Anti-protozoa (kills giardia, a common protozoan infection of the gut)
  • Anti-retroviral (kills HIV and HLTV-1)
  • Anti-viral (kills viruses that cause influenza, herpes, measles, hepatitis C, SARS, AIDS, and other viruses)
  • Infection fighting
  • Has no harmful for discomforting side effects
  • Known to improve nutrient absorption (easily digestible; makes vitamins and minerals more available to the body)
  • Nontoxic to humans and animals

Source

Honey

Local raw honey has been used for thousands of years for its anti-viral, anti-bacterial, and anti-fungal properties. Honey can be applied to burns, cuts, and scrapes for wound care. More sweet benefits can be found here.

Vitamin E

This antioxidant promotes healing of the skin and scar tissue.

  • Removes free radicals
  • Promotes blood circulation
  • Speeds cell regeneration
  • Reduces oxidation rate
  • Improves skin hydration
  • Studies on rodents show promise for vitamin E’s reduction of the risk of skin cancer caused by UV exposure.

CYA Disclaimer:

I’m not a medical professional. I’m just a regular guy busy Doing the Stuff of self-reliance with calloused hands. This information is for educational purposes only and is not meant to be advice on treating, curing, preventing, or diagnosing diseases or conditions. Do your own due diligence with our information as it may not be complete.

With the above CYA taken care of, I can report that the drawing action of the plantain has made a huge impact to reduce the soreness and size of the cyst over three days. I apply Lucky Sherpa Plantain Salve to a gauze pad and tap it to the affected area twice daily. On the second day, the nastiness is oozing out. Sorry, that’s as delicate as I know how to put it. This stuff works for me!

No-see-ems and mosquitos were out last night while I was grilling. My ankles took the brunt of their bombing raids. I rubbed a dab of the salve on and the itching stopped almost immediately.

how-to-make-lucky-sherpa-plantain-salve

This tin fits nicely in my haversack

If you want to get lucky and make your own, we’d like to hear how it turns out!

Keep Doing the Stuff of Self-Reliance,

Todd

P.S. – You can also keep up with the Stuff we’re Doing on TwitterPinterestGoogle +, and our Facebook page… and over at the Doing the Stuff Network on PinterestGoogle +, and Facebook.

P.P.S – If you find value in our blog, Dirt Road Girl and I would appreciate your vote on Top Prepper Sites! You can vote daily by clicking here or on the image below. Check out all the other value-adding sites while you’re there…

Thanks for Sharing the Stuff!

Copyright: Content on this site (unless the work of a third-party) may be shared freely in digital form, in part or whole, for non-commercial use with a link back to this site crediting the author. All links in articles must remain intact as originally posted in order to be republished. If you are interested a third-party article, please contact the author directly for republishing information.


Categories: DIY Preparedness Projects, Doing the Stuff, First Aid, Herbal Remedies, Natural Health, Self-reliance | Tags: , , , , | 22 Comments

50+ Dumpster Diva Hacks that Convert Waste to Wealth

by Todd Walker

Part of our Self-Reliant Summer series

possum mentality will lead people to think you’re cheap. In our propped up economy, I call it industrious, resourceful, and plain smart. Why buy stuff with hard-earned cash when other people’s trash is everywhere?

Over 50 Dumpster Diva Hacks to Convert Waste to Wealth

Dumpster diving is certainly NOT above the members of our Doing the Stuff Network. These resourceful folks embody the Dumpster Diva mentality. In fact, repurposing or up-cycling everyday items is an integral part of homesteading, prepping, bushcrafting, back-to-basics living, and emergency first aid.

Once you catch the Dumpster Diva bug, you’ll view dumpsters as treasure chests! I’m sure our handlers have pesky prohibitions against this uncivilized pursuit – so dumpster dive at your own risk. Ask permission from business owners before taking what you think is trash. Especially when prowling for pallets. Most businesses recycle pallets and consider taking without permission theft.

But here’s the thing…

You don’t have to actually dig in dumpsters to repurpose stuff. Up-cycle, repurpose, and re-trash are trendy terms for what our grandparents did to get through hard times. Use it up, wear it out, and then find another use for the item other than its intended purpose.

Check out the projects below and get in touch with your trashy side.

Dumpster Diving for Self-reliance

1.) Cheap to Free Stuff

That metal DVD rack collecting dust could be repurposed to feed rabbits.

Grace (DST Networker) up-cycled a 25 cent yard sale find to dispense hay in her rabbit hutch.

Grace (DST Networker) up-cycled a 25 cent yard sale find to dispense hay in her rabbit hutch.

She could have dumped several dollars at the local feed and seed but went all Dumpster Diva and made an unconventional – yet functional – rabbit feeder.

2.) Landfill Love

Michael, my brother from another mother, found an 18 foot long tent and other items he repurposed from the local landfill.

Landfill Love

I think his best up-cycling miracle performed was when his gas tank on his old Datsun pickup ruptured. He ran a gas line from a gallon gas can to his engine with the can sitting inside the hood of his truck. A fire hazard? Yes. But he had to drive to work and this was a short-term fix. Might come in handy in a bug out scenario. Redneck genius!

3.) Billboards

You didn’t hear me wrong. Large tarps are expensive but have endless uses around a homestead…

  • Protect equipment from weather
  • Wind block
  • Shade animals
  • Ground cloth
  • Roofing, etc., etc.

Here's Your Sign: Turning Trash Into Survival Treasure

A shot of my 14′ x 40′ tarp from my shop roof

I bought a 14′ by 40′ billboard for $14 a few months ago. A portion was used as a roof for my trapping shelter (personal space). A few of our readers have scored free tarps by just asking the work crew for old billboards!

4.) Pallets

With a little sweat equity, free wood for projects around your homestead, yard, handicrafts, or house can be found in wooden shipping pallets. No disassembling required for some projects. Here’s some DiY pallet projects from around the web to get your mind geared to repurpose…

I love it when people start trading theory for action! Resilient Man emailed the first steps of his journey to self-reliance and active resilience. He’s getting his hands dirty using pallets to build a chicken coop.

5.) Containers

Without becoming an obsessive compulsive hoarder, you can turn waste into wealth. The key here is to organize waste to prevent your house from becoming a death trap of trash.

The plastic five gallon bucket may be the most under appreciated prep item ever… until you need one and none are to be found. Ever tried to create your own containers from raw materials? Not an easy task! That goes double for glass.

Keep your wine bottles, mason jars, and other glass items. For an unusual use of mason jars, check out our post on Mason Jar Oil Lamps. They make Healthy Fast Food meals as well!

6.) Think Before You Toss Everyday Items

Here’s a round-up from a few of my Prepared Blogger friends who can help you take dumpster diving, repurposing, and up-cycling to new levels.

7.) First Aid/Medical

Lizzie over at Underground Medic put together Ten unconventional additions to your emergency medical kit worth checking out.

If you haven’t discovered the many survival uses for duct tape yet, The Survival Doctor (Dr. James Hubbard) wrote an entire book on how to use duct tape for medical emergencies – Duct Tape 911: The Many Amazing Medical Things You Can Do to Tape Yourself Together

The Dumpster Diva Award goes to…

One of our amazing members of the Doing the Stuff Network is now crowned Dumpster Diva! She and her husband are building a homestead house (Earthship) out of old tires!

Earthship house being built by a Doing the Stuff Networker

Dumpster Diva’s house in progress!

I hope Part 2 in the Self-Reliant Summer Series encourages you to trade theory for ACTION! We’re planning an entire summer of self-reliance articles to keep us Doing the Stuff. If you missed Part 1, you can find it here.

What’s your favorite repurposing hack for self-reliance and preparedness? Comments are always welcome…

Keep Doing the Stuff,

Todd

P.S. – You can also keep up with the Stuff we’re Doing on TwitterPinterestGoogle +, and our Facebook page… and over at the Doing the Stuff Network on PinterestGoogle +, and Facebook.

P.P.S – If you find value in our blog, Dirt Road Girl and I would appreciate your vote on Top Prepper Sites! You can vote daily by clicking here or on the image below. Check out all the other value-adding sites while you’re there…

Thanks for Sharing the Stuff!

Copyright: Content on this site (unless the work of a third-party) may be shared freely in digital form, in part or whole, for non-commercial use with a link back to this site crediting the author. All links in articles must remain intact as originally posted in order to be republished. If you are interested a third-party article, please contact the author directly for republishing information.


Categories: DIY Preparedness Projects, Doing the Stuff, First Aid, Frugal Preps, Preparedness, Self-reliance | Tags: , , , , | 11 Comments

Sherpa Tip: Equine Vet Wrap in First Aid Kits

by Todd Walker

Sherpa Tip: Equine Vet Wrap in First Aid Kits

I first discovered this flexible, self-adhesive bandage as a handle wrap for my sledge hammers 4 years ago. I needed grips for the handle to do a workout called Shovelglove. If you’ve never tried swinging a stick with a 12 pound hunk of metal on the end for 20 minutes, it will have your entire body begging for mercy!

Sherpa's Quick Survival Tip: Equine Vet Wrap

A six and 12 pound Shovelglove tool

We keep Co-Flex in our medical supplies even though we don’t own horses. On a recent tick bite to my upper buttocks – they seem to find the most inaccessible spots for attachment – I applied my usual plantain spit poultice with a band-aid 3 times daily. The problem with this is that the adhesive from the band-aid irritates my skin. And no, I don’t have a hairy butt! That’s probably too much information right there.

Sherpa Tip: Equine Vet Wrap in First Aid Kits

First Aid items in my bushcraft kit

For those with sensitive skin or you’re covered in Cro-Magnon body hair, this tape is the ticket! A non-latex version is available as well.

Tape with Benefits

Self-adhesive

Co-Flex functions like an Ace bandage without the metal clips, velcro, or safety pins. I applied plantain to the bite with a small gauze pad and secured it with two wraps around my hips. *No Pics to Document* You’ll have to take my word on this one. The bandage did roll at my waist while bending but held the pad in place for most of the day.

Lightweight/Flexible/Breathable

It performs well on body parts that don’t bend. But the flexibility allows you to wrap an elbow or wrist to hold a bandage securely. You can apply enough compression without constricting the limb.

Sweat and Water Resistant

It won’t turn loose fording a river or while sweating profusely in a sprint to escape zombies. This alone is reason enough to stock up.

Abrasion Resistant

Adds a layer of protection for wounds. It’s durable stuff!

Trading Theory for Action

FYI: If you store a roll in your first aid kit, you’ll need to find a way to prevent compression. I had a roll of camouflaged Co-Flex in my bushcraft kit that had been smashed, compacted, and abused. I needed it to wrap up my tick bite poultice. I tried to find the end to peel but it had turned into a solid lump of tape. Even slicing through to the next layer to start the roll yielded no results.

Sherpa Tip: Equine Vet Wrap in First Aid Kits

I split through the continuous mass to the cardboard core. Aha! This could be repurposed for fishing bobbers (floats), an improvised pillow for someone with a tiny head, elastic cordage, etc., etc.

Got any other ideas on using this multi-purpose kit item?

Keep Doing the Stuff,

Todd

P.S. – You can also keep up with the Stuff we’re Doing on TwitterPinterestGoogle +, and our Facebook page… and over at the Doing the Stuff Network on PinterestGoogle +, and Facebook.

Thank you for Sharing the Stuff!

P.P.S – If you find value in our blog, Dirt Road Girl and I would appreciate your vote on the Top Prepper Sites! You can vote daily by clicking here or on the image below. Check out all the other value-adding sites while you’re there…

Copyright Information: Content on this site (unless the work of a third-party) may be shared freely in digital form, in part or whole, for non-commercial use with a link back to this site crediting the author. All links in articles must remain intact as originally posted in order to be republished. If you are interested a rare third-party article, please contact the author directly for republishing information.


Categories: Doing the Stuff, First Aid, Preparedness | Tags: , , | 8 Comments

Blog at WordPress.com.